
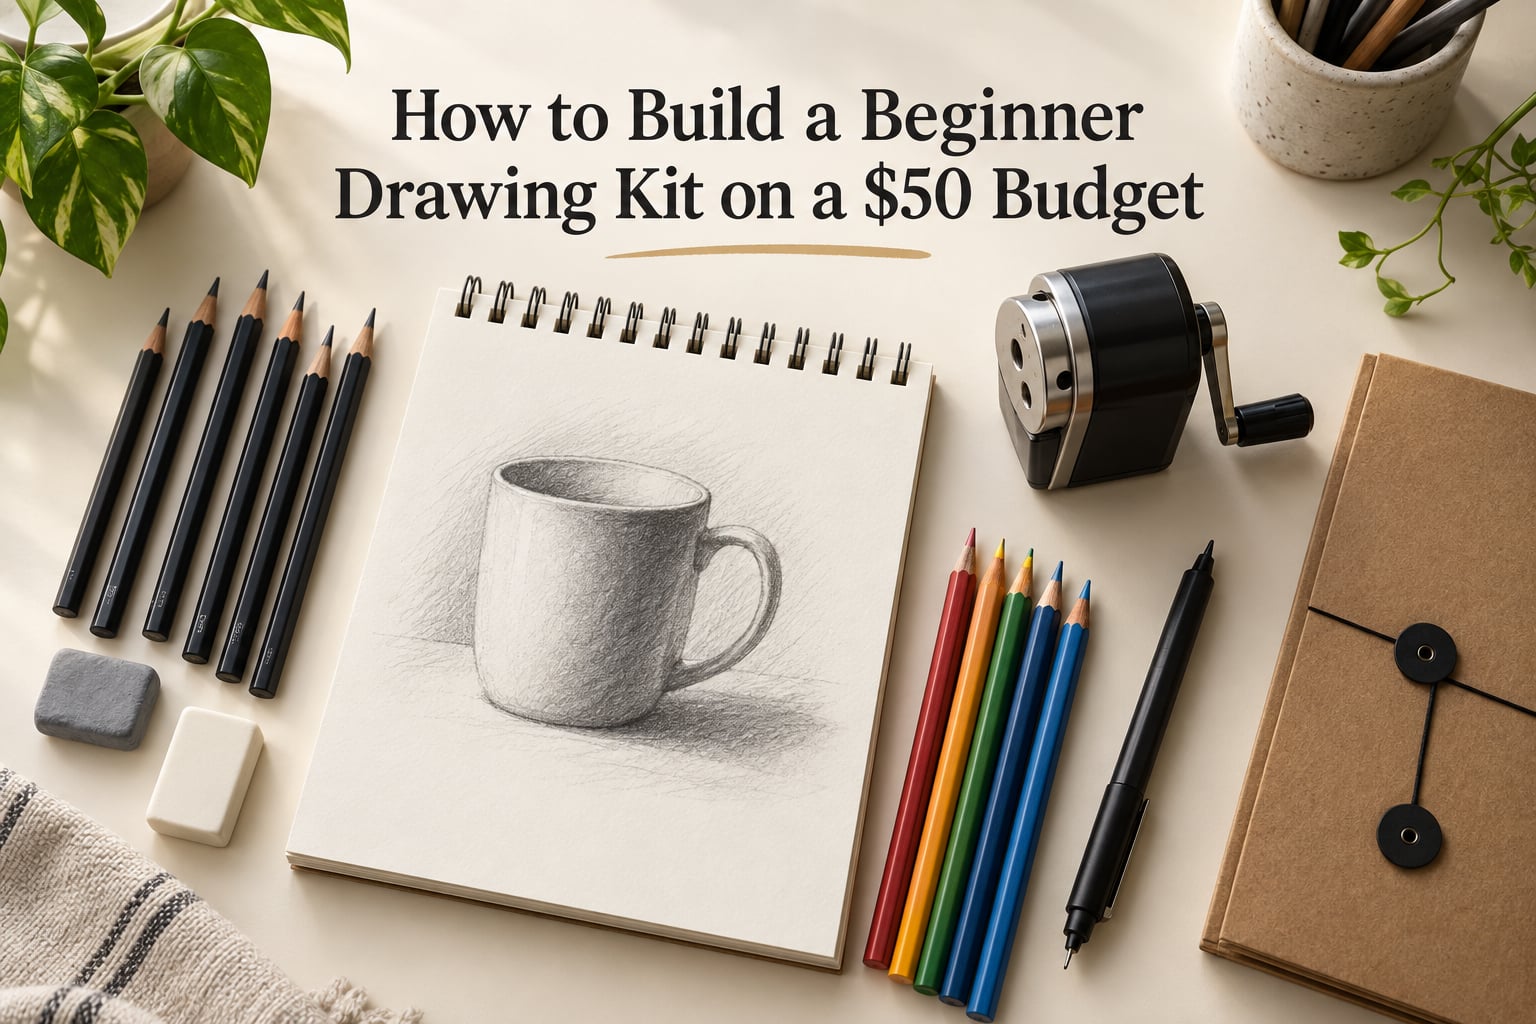
A beginner drawing kit does not need to be big, and it does not need to come in a box with a brand printed on the side. What it does need is a small set of tools that work together well enough that you can make marks, build tone, and correct mistakes without stopping to think about equipment. That is seven items, and this guide shows you how to build a beginner drawing kit on a budget that stays inside one fixed number.
Most beginners do not overspend because they want expensive things. They overspend because nobody told them what comes first, so they buy a 36-pencil set, a marker collection, and an easel in the same trip, then discover they have no decent eraser and no paper thick enough to shade on. Half the money is gone before the first page is drawn.
Because prices shift between stores, seasons, and brands, this guide does not quote fixed price tags. Instead, every item is given a share of your total budget, and the shares add up to a hundred. Apply them to whatever number you set, check the current shelf price yourself, and the arithmetic still holds. Figures were price-checked in 2026, and treat every allocation here as a starting point rather than a promise.
If you want the short version: a short pencil range, a pad of paper that does not shred, a real eraser, and one color tool will carry you roughly six months of daily practice. Everything else is optional, and some of it is optional for years.
Table of Contents
- How to Build a Beginner Drawing Kit: Seven Items That Cover Almost Everything
- How to Split a Small Fixed Budget
- Which Pencil Grades to Actually Buy
- Student-Grade vs Artist-Grade: Where Spending More Pays Off
- What to Skip Until You’re Intermediate
- Free and Household Substitutes You Already Own
- Buy in This Order Over Your First Six Months
- Where to Buy for the Least Money
- Your First Week of Practice
- Frequently Asked Questions
- What is the best drawing kit for a beginner?
- What are the basic sketching supplies needed for a beginner?
- What pencil grades should I buy as a beginner?
- What is the easiest thing to draw as a beginner?
- What should I draw on the first page of my new sketchbook?
- Are cheap art supplies usable for beginners?
- What art supplies can I skip as a beginner?
- What is the 70/30 rule in sketching?
- Final Word: Spend Slowly, Draw Daily
How to Build a Beginner Drawing Kit: Seven Items That Cover Almost Everything
Buy these seven things first, in the order listed. The order matters more than the total, because each item unlocks a specific kind of drawing and you will discover which kind you enjoy within a few weeks.
- Graphite pencils — 25% of the budget. Buy a short range of four pencils rather than a large set. Look for HB, 2B, 4B, and 6B, and skip the numbered sets for now. This is the single most important line in the kit, and it is the one most beginners get wrong.
- A sketchbook or drawing pad — 20%. Choose paper that is reasonably heavy and has some tooth. Newsprint-style pads are fine and cheap, and for graphite work they behave predictably. Avoid very thin, smooth paper that tears the moment you use a 6B on it.
- Two erasers — 10%. A white vinyl eraser for lifting graphite, plus a kneaded eraser for lifting it a little at a time. The vinyl eraser is what beginners use constantly. The kneaded one is what makes corrections look gradual instead of patchy.
- A sharpener — 5%. A small hand crank sharpener with a fine point setting. A blunt pencil is the fastest way to make a drawing look amateur, and a dull graphite grade also shades worse.
- A blending stump or smudge tool — 5%. A paper stump lets you soften shading into smooth gradients. On r/arthelp, artists recommend it specifically for a soft, airbrushed pencil look, and specifically not for beginners on the line-art path. It is cheap enough to buy and cheap enough to ignore.
- Colored pencils — 20%. One pack, twelve to twenty-four colors, and nothing more. Colored pencils are the cheapest way to add color without learning a whole new medium, and they pair naturally with graphite.
- One black fineliner plus a drawing folder — 15%. A 0.3 to 0.5 mm pen handles line work, borders, and lettering, and it is the only tool in the kit you cannot improvise with. A folder, clipboard, or large piece of cardboard keeps pages flat and gives you a surface to lean on.
Seven items, one page of text, and a working setup. On the r/ArtistLounge side of the discussion, experienced artists keep repeating the same idea from a different angle: cheap and replaceable beats delicate and premium, because a tool you are afraid of ruining is a tool you will not use.
How to Split a Small Fixed Budget
The table below is the whole plan. Each share is a percentage of your total, so the table works for any budget you set, from a holiday-gift amount to a few weeks of saved-for supplies.
| Item | What to look for | Share of budget | Why it is non-negotiable |
|---|---|---|---|
| Graphite pencils | HB, 2B, 4B, 6B, pre-sharpened is fine | 25% | Tone range is the whole game in graphite |
| Sketchbook or pad | Heavier paper with visible tooth | 20% | Thin paper shreds and frustrates beginners |
| Two erasers | White vinyl and kneaded | 10% | Correcting mistakes is how you learn |
| Sharpener | Hand crank, fine point | 5% | Cheap, and it changes every drawing |
| Blending stump | Paper stump, two sizes if possible | 5% | Turns rough shading into smooth tone |
| Colored pencils | Twelve to twenty-four colors, one pack | 20% | Lowest-effort way to add color |
| Fineliner and folder | Black pen, 0.3 to 0.5 mm, plus stiff backing | 15% | Lines, borders, and a surface you can work on |
Those shares total one hundred. If your budget is genuinely tight, hold back a small reserve rather than shaving every line. Take it from the color row, buy graphite and paper first, and add color in a few weeks when you know you are still drawing. Buying everything in one trip is the most common way beginners end up with supplies they never touch.
Which Pencil Grades to Actually Buy
Buy four grades: HB, 2B, 4B, and 6B. That is the answer, and it takes five minutes to know it is right.
The hardness scale runs from H on the hard end to B on the soft end, and the number tells you how many steps past the middle the graphite sits. HB is the middle. 2B is slightly darker and softer, 4B is noticeably so, and 6B is soft enough that a small mistake smudges into the page.
Here is what each one is for:
- HB — light, precise lines. Under-drawings, construction lines, lettering.
- 2B — your everyday pencil. Most of your sketching will happen here.
- 4B — first serious shading grade. Dark enough to read as shadow.
- 6B — deep shadow, backgrounds, soft edges, and fast blended work.
On r/NoStupidQuestions, one beginner wrote that they had been told to use 4B, 6B, then 12B, then asked the obvious follow-up: if a whole set costs the same, why not just use all of them. The honest answer is that you will not. Grades above 6B, plus the hard H grades above HB, are specialist tools. A hard pencil is for precise technical line work, and an extremely soft one produces shadows so dark that you cannot blend them smoothly on ordinary paper.
Buying the full range and using four of the pencils is how beginners inflate their cost per drawing. Four pencils that you finish in four months teach you more than thirty-six that sit in a cup.
Student-Grade vs Artist-Grade: Where Spending More Pays Off
Student-grade art supplies use less expensive materials to hit a lower price. For graphite drawing, that usually means clay binders and less careful core consistency. In some categories it barely matters at all, and in one or two categories it matters a lot.
- Pencils: student-grade is genuinely fine. The tonal difference between a cheap and an expensive graphite pencil is small enough that your technique will hide it. Spend here only if a specific pencil feels gritty or breaks constantly.
- Paper: this is where the money matters. Thicker, better-made paper holds graphite without feathering and survives repeated erasing. If your budget stretches anywhere, stretch it here.
- Colored pencils: student-grade wax is softer and less lightfast. Colors layer and blend decently, but they fade over time and smear on smooth surfaces. Fine for practice, worth upgrading if you start keeping finished work.
- Brushes: synthetic is not a compromise you need to fear. Beginners are advised on forums to prefer cheap synthetic brushes, partly because nobody wants to feel precious about a tool they may ruin by forgetting to wash.
- Erasers: cheap erasers waste money, not paper. A hard eraser that smears everything makes you think your drawing is bad when it is not. This is a good place to spend a little more.
The short verdict: pay more for paper and erasers, be relaxed about pencils, and treat color as a later upgrade.
What to Skip Until You’re Intermediate
This is the section that saves the most money, and almost no budget guide includes it. The list below is not bad quality, it is simply premature.
- Large numbered pencil sets. Twenty-four or thirty-six grades at once. You will use four.
- Premium natural-hair brush sets. Expensive, delicate, and only matter for watercolor work you may never do.
- An easel. A folder, a clipboard, or a piece of cardboard taped to a wall works fine for months of learning. You do not need to stand to draw.
- Big marker collections. Those sets exist to be displayed in stores. If you want one marker, buy one marker.
- Alcohol inks and specialty mediums. A different medium with its own rules, its own cleanup, and its own wasted-tube risk. Not a first purchase.
- Expensive art journals with heavy paper. You will be using cheap paper early on. Do not make your first drawing on a surface you are afraid to ruin.
Forum complaints about cheap supplies tend to focus on thin paper, hard pencils, skipping pens, and smudgy erasers. Every one of those problems is solved by a more careful choice within your budget, not by a bigger budget.
Free and Household Substitutes You Already Own
You can stretch the same budget further by using what is already in the house while the kit gets going.
- Printer paper and the back of old pages for warm-ups and gesture practice. This is where bad paper is fine, because bad paper is useful for fast, disposable marks.
- Cardboard, cereal boxes, and file folders make a rigid drawing surface that stops pages flexing while you shade.
- A soft cloth, cotton bud, or fingertip blends graphite nearly as well as a stump. The stump is faster and more controlled, but nothing is lost while you get one.
- A butter knife, or the edge of a folded paper, lifts highlights on finished shading. Artists have used shaped eraser alternatives for centuries.
- A household paintbrush cleaned and kept for dust, sweeping, and applying powder later. Do not share a brush you are also painting with.
- Takeout menus, magazines, and envelopes give you interesting shapes to draw, which beats geometric forms when you are starting out.
Buy in This Order Over Your First Six Months
Split your total into three purchases instead of one, and you will learn far more from each one.
- Month one: paper, four pencils, erasers, sharpener. This alone is enough to draw with for weeks.
- Month two or three: colored pencils, once you know whether you enjoy coloring your drawings or only the line work.
- Month three onward: blending stump, fineliner, and a sturdier drawing folder, added when a specific limit pushes you to them.
If you stop drawing in month two, you have lost nothing but a sketchbook. That is the real argument for buying slowly, and it is why so many experienced artists suggest a pre-vetted short list rather than a full kit.
Where to Buy for the Least Money
Budget art supplies are found in predictable places, and the savings come from how you buy rather than where.
- Dollar and variety stores carry pads, colored pencils, and basic pencils at prices no art supply shop can match. Check the pad’s paper weight before you buy, and skip anything that feels tissue-thin.
- Thrift and second-hand shops are excellent for folders, boards, and jars. Sketchbooks bought used are often half-empty, which is a feature.
- Big-box and craft chains run frequent stationery sales, and the best time is late summer, when schools order for the new year.
- Multi-packs beat singles almost every time. Compare the per-item figure, not the headline. Buying one pen usually costs several times what the same pen costs inside a pack.
One warning about buying single items in a hurry: an improvised tool from a random drawer is not a budget strategy, it is a future frustration. Buy the category properly once, then stop.
Your First Week of Practice
A kit that sits in a drawer is money wasted. This week of exercises uses nothing but the seven items above and keeps every session under twenty minutes.
- Day one: Fill a page with the easiest thing to draw as a beginner, which is a collection of simple objects, one per square. Cups, keys, folded paper, a shoe. Do not attempt anything with perspective or faces yet.
- Day two: Draw the same object ten times in small size. Repetition teaches your hand more in one session than a complicated drawing teaches in a month.
- Day three: One large value study. Pick a light source, leave the paper white, and use a 4B to build three clearly different values. Nothing else, no detail.
- Day four: Line art only. Use the fineliner on the same cup from day one, and see how the drawing changes when the line is clean instead of scratched.
- Day five: Color one finished drawing, colored pencils over the graphite. Layer lightly rather than pressing hard.
- Day six: Draw something you can see from a window, using your folder as a backrest and a folded piece of paper as a viewfinder.
- Day seven: Flip back through the week and pick the one you dislike least. That page tells you what to practice next.
Two rules of thumb come up constantly in beginner communities. The 70/30 rule suggests spending roughly seventy percent of your practice time on fundamentals and thirty percent on things you find fun. The 50% rule is a common starting target for how much of a drawing’s area is in the lightest value, which keeps shadows from swallowing the whole page.
For the first page of a brand new sketchbook specifically, do something that cannot fail. A page of simple objects in a small grid tells you how your pencil feels, how the paper takes graphite, and whether the grade range you bought is enough.
Frequently Asked Questions
What is the best drawing kit for a beginner?
The best beginner drawing kit has seven parts: a four-grade graphite range, a pad of reasonably heavy paper, a vinyl eraser and a kneaded eraser, a sharpener, a blending stump, one pack of colored pencils, and a black fineliner. Spend your budget in that order, with the largest share on pencils and paper, because those two decide whether your drawings improve.
What are the basic sketching supplies needed for a beginner?
The basic sketching supplies are paper, graphite pencils, an eraser, and a sharpener, plus a blending stump if you plan to shade. Everything else is optional at the start. You can also substitute a cloth or your fingertip for blending, and printer paper or the back of old pages for practice warm-ups.
What pencil grades should I buy as a beginner?
Buy HB, 2B, 4B, and 6B. HB handles light construction lines, 2B is your everyday sketching pencil, and 4B and 6B cover shading from mid-tone to deep shadow. Hard H grades and very soft grades above 6B are specialist tools, and buying a full numbered set means paying for pencils you will never pick up.
What is the easiest thing to draw as a beginner?
Simple everyday objects are the easiest thing to draw: a cup, a key, a folded piece of paper, a shoe, or a banana. Small, familiar, and angular shapes build observation skills without asking you to solve perspective or anatomy first. Draw each one small, several times per page, and resist adding detail until the shape is right.
What should I draw on the first page of my new sketchbook?
Draw a grid of simple objects so you can test your tools before you commit to anything. A page of small object studies tells you how your pencil feels, how the paper takes graphite, and whether your grade range gives you enough tonal separation. Nothing on that first page needs to be good, and nothing should be more than a minute each.
Are cheap art supplies usable for beginners?
Yes, with two exceptions. Spend more on paper and on erasers, since thin paper shreds and hard erasers smudge, and relax about everything else. Cheap pencils, synthetic brushes, and budget colored pencils work perfectly well for learning, and replaceable tools remove the anxiety of ruining something expensive.
What art supplies can I skip as a beginner?
Skip large numbered pencil sets, premium natural-hair brush collections, easels, big marker sets, alcohol inks, and expensive art journals. None of them block you from learning, and each one eats a large share of a small budget for a capability you will not use for months.
What is the 70/30 rule in sketching?
The 70/30 rule suggests splitting your practice time roughly seventy percent toward fundamentals such as observation, proportion, and value, and thirty percent toward work you simply enjoy. Beginners tend to invert this and only draw what is fun, which keeps them stuck. The fun work is what makes the fundamentals worth doing.
Final Word: Spend Slowly, Draw Daily
Building a beginner drawing kit on a budget comes down to three habits. Buy the small set of tools that actually work, buy them in the order that unblocks the next kind of drawing, and split the money across a few months instead of one trip.
Four pencil grades, decent paper, two erasers, a sharpener, a blending tool, one pack of color, and a black pen will carry you through the first half year. The money you do not spend on a 36-pencil set and an easel buys you six months of actual practice, and six months of practice is what turns a beginner into someone who keeps drawing.