
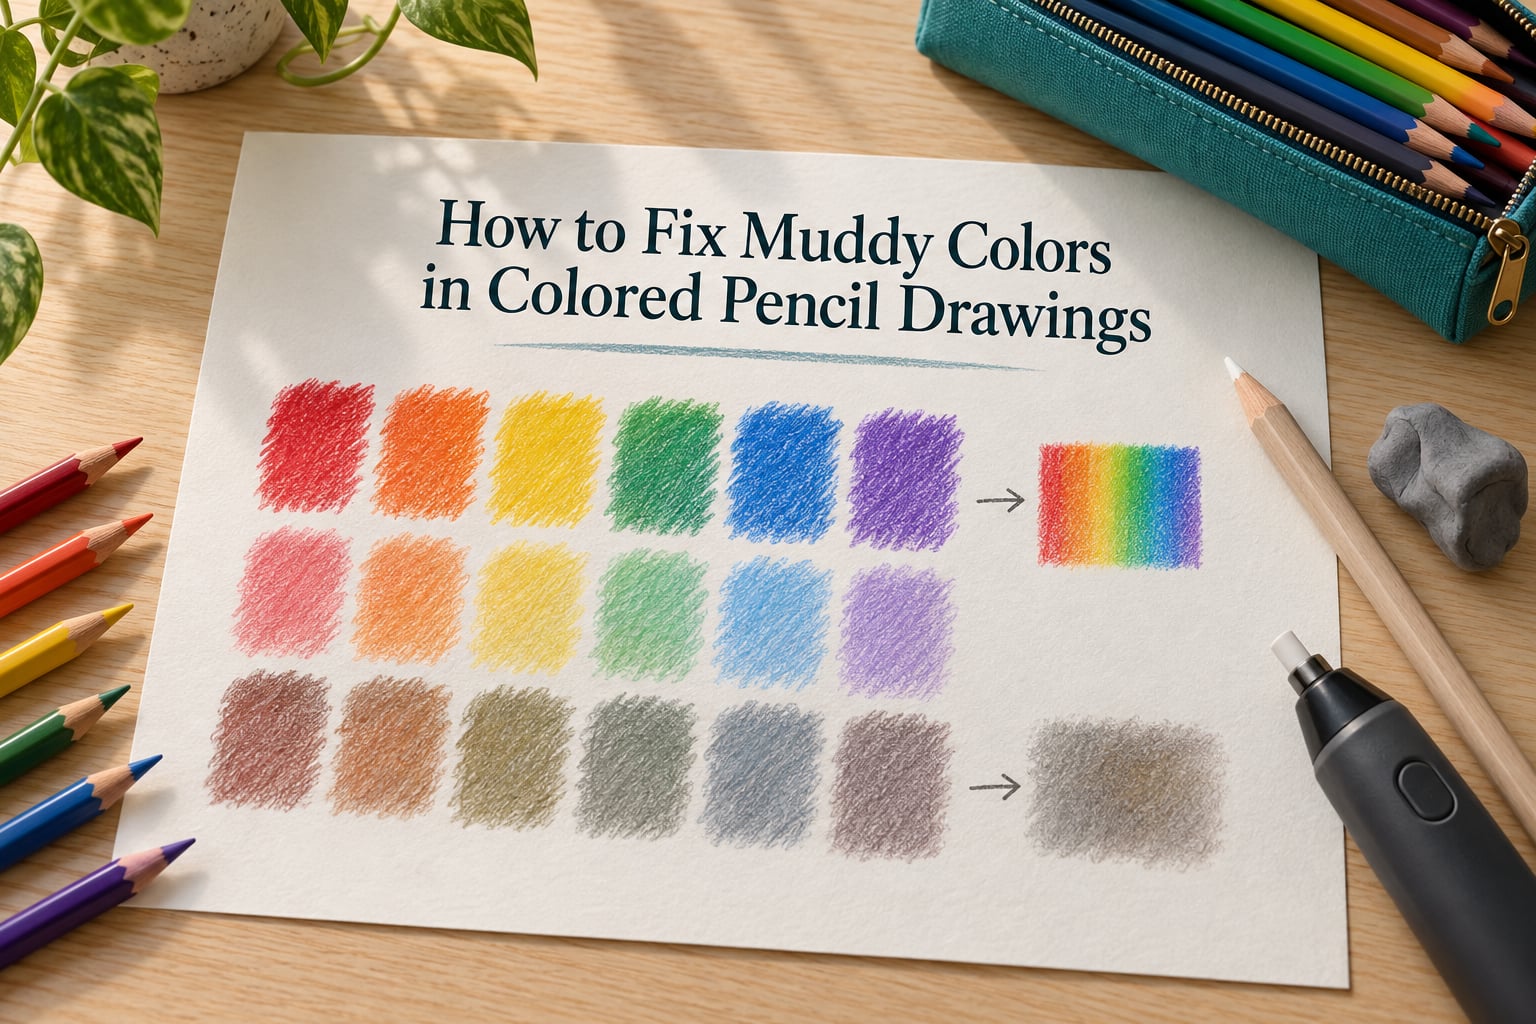
Muddy color in colored pencil is not a color problem. It is a value and pressure problem: too many hues in one area, blended too hard, until the pigments cancel each other out and the patch reads gray, brown, or flat. The fix is always the same sequence — stop adding color, thin the layers, lift what you can, and rebuild light to dark. Most areas are recoverable. Some are not, and knowing which is which saves you weeks of wasted effort.
That is the honest version of the answer. This guide walks through how to fix muddy colors in colored pencil drawings: why mud happens, how to rescue a drawing that has already turned muddy, how to troubleshoot by symptom, and how to prevent it on the next piece. It is written for beginner and intermediate artists, portrait renderers, and anyone whose skin tones have gone sullen on a piece they were happy with an hour earlier.
A note on expectations: this is a technique article, not a supply list. Nothing here depends on buying specialty gear, and a paper problem will not be solved by a better blender pencil.
What does muddy mean? Muddy color is a patch where the chroma has been destroyed — the area reads dull, gray, brown, or chalky instead of the clean hue you laid down. It happens when complementary or unrelated hues are layered together, when pressure is high enough to grind pigment into the paper tooth, or when black is used to build shadows.
Table of Contents
- What Causes Muddy Colors in Colored Pencil Work?
- Quick Fixes: The Five Fastest Corrections
- How to Fix Muddy Colors in Colored Pencil Drawings: Rescue Workflow
- Troubleshooting Muddy Color by Symptom
- Shadows Without Black: How to Mix a Believable Gray
- Which Color Pencil Is Best for Blending?
- Why Overblending Ruins Texture and How to Keep It
- Prevention: Light Pressure, Thin Layers, Limited Palette
- Solvent and Lift Techniques: What Rubbing Alcohol Actually Does
- Fixative: When to Spray and Why Timing Matters
- Why Colored Pencil Drawings Look Grainy
- Frequently Asked Questions
- How to make colors look less muddy?
- Why do my colored pencil colors look dull and gray?
- Can I fix a colored pencil drawing that is already muddy, or do I have to start over?
- How do you layer colored pencils effectively?
- Which color pencil is best for blending?
- What is the 3 color rule in art?
- How to color grey with colored pencils?
- What does rubbing alcohol do to colored pencils?
- What is the best fixative for colored pencil drawings?
- Why do my colored pencil drawings look grainy?
- How do you make colored pencil drawings look smooth?
- Conclusion: Three Habits That Keep Colors Clean
What Causes Muddy Colors in Colored Pencil Work?
Muddy color happens when you add more color to a patch that already lost its chroma, and when you press hard enough to grind pigment into the paper instead of letting layers build. The four root causes are overmixing, overblending, excess pressure, and black-based shadows.
Overmixing is the first and most common. Complementary hues sit opposite each other on the color wheel, and physically mixing them produces a neutral. A red over green does not give you a brighter red. It gives you brown.
Overblending is the second. A colorless blender pencil or a blending stump worked repeatedly over the same area grinds the waxy binder into the tooth of the paper, flattening the pigment until it looks scratched rather than layered.
Excess pressure is the third, and it is the least obvious. Colored pencil is a deposition medium, not a drawing medium. You are not rubbing color into a surface so much as laying a thin film of wax and pigment on top of a textured surface. Press hard and you flatten the tooth, and a flattened tooth cannot hold a light layer again.
Black-based shadows are the fourth. Black is the absence of light, which makes it a deadener in a medium that already mixes optically. Beginners reach for it constantly because it looks like a shadow in a textbook, and it kills the temperature information that makes a shadow read as colored.
Value, not hue, is the real problem hiding underneath
If a patch looks muddy but you cannot say why, the cause is usually value, not color. Squint at your drawing until the shapes blur, or photograph it and view it in grayscale. If the patch still reads flat and lifeless, the value structure is broken and no amount of new hue will rescue it.
Here is the diagnostic. If the muddy area sits at the same lightness as the color around it, you have a chroma problem and it is fixable with a thin warm layer. If the muddy area is darker than it should be or lighter than it should be, you have a value problem, and you need to shift the value before touching the hue at all. If it reads flat in grayscale even though the values differ, the problem is texture and pressure, not pigment.
Quick Fixes: The Five Fastest Corrections
These five corrections fix most muddy patches in under ten minutes, and they are ordered so you try the least destructive one first.
- Stop adding color to the patch. Every additional hue lowers the chroma further. Lay down one clean, thin, controlled warm color instead — burnt sienna, raw sienna, or a yellow ochre depending on the local color — and build it in light layers.
- Drop the pressure and add a new, thinner layer on top. A fresh layer of the same color at low pressure reintroduces chroma without disturbing what is underneath. This works on gray skin tones and dull skies alike.
- Lift with a kneaded eraser or an electric eraser. An electric eraser removes pigment rather than smearing it, so it lightens a muddy area without adding gray. Use the eraser before you add any new color.
- Reintroduce temperature. Muddy areas are almost always temperature-dead. Put a cool shift in a warm-lit shadow and a warm shift in a cool-lit shadow, and the patch separates from its neighbors immediately.
- Add light. A light warm layer or a cream or white pencil at low pressure over a mid-tone shifts the value upward and pulls the area out of the mud. Reserve the white of the paper for the brightest spots and do not spend it early.
How to Fix Muddy Colors in Colored Pencil Drawings: Rescue Workflow
You can fix a muddy drawing. Lift first, add color second, and never scrub — six steps cover almost every case.
- Diagnose before you touch anything. Grayscale check first. Decide whether you are dealing with a value failure, a chroma failure, or a texture failure, because the fix differs and erasing a texture problem makes it worse.
- Test your fix on a scrap sheet. Lay the same combination on a piece of the same paper at the same pressure. Two minutes here saves twenty on the artwork.
- Lift what can be lifted. An electric eraser or a kneaded eraser takes pigment off the surface without grinding the tooth further. Work gently and stop as soon as the value is where you want it.
- Glaze, do not blend. With a clean, sharp color, lay a thin transparent layer over the muddy patch at low pressure. A glaze sits on top of the mud rather than mixing into it, and it is the single most effective rescue move.
- Rebuild the value structure. Add a second thin layer where the value should be darker, and let the paper or a light layer carry the lighter areas. Two layers, two colors, no blending.
- Blend only the transitions, and only lightly. One pass with a colorless blender, then stop. A visible pencil texture in a rescue area looks far better than a smooth, dead, overworked surface.
When to accept a section instead of fixing it. Heavy burnishing is the point of no return. If the tooth has been polished flat by hard pressure, no amount of new pigment will sit on top properly, and aggressive erasing will only make the surface worse. In that case the honest move is to leave the texture, glaze a warm color over it to restore some life, and redirect your attention to the surrounding areas that are still adjustable. Starting over is almost never the right call; the drawing is rarely as far gone as it feels.
Troubleshooting Muddy Color by Symptom
Match the symptom you are seeing in the table below, read the cause, and apply the fastest fix listed. Most mud is one of the first three rows.
| Symptom | What is actually happening | Fastest fix |
|---|---|---|
| Gray or ashen skin | Complementary or unrelated hues layered too close together | Thin glaze of burnt sienna or raw sienna, light pressure, no blending |
| Brown or dull sky | Blue over yellow or orange until both neutralize | Skip the complement, lay a clean blue at low pressure |
| Chalky and pale after blending | White or cream pencil used too early, paper tooth filled | Add saturated color on top, use white only for final highlights |
| Flat color with no depth | Value range too narrow, hue used to fake shadow | Extend the value range first, hue second |
| Too dark, no room to adjust | Heavy pressure and many layers, tooth filled in | Lift with an electric eraser, glaze warm color, stop layering |
| Waxy or greasy-looking patches | Binder buildup from repeated burnishing strokes | Stop burnishing, accept texture, glaze thin color over it |
| Grainy and patchy | Paper tooth showing through thin layers, not a color problem | Add a light mid-tone layer, or change paper next time |
One warning about the chalky row. A community forum thread on drawing white on top of color describes the result as blurring and looking cloudy, and that is the exact same failure as mud. White applied early dulls everything under it, so save it for the last pass on the brightest highlights only.
Shadows Without Black: How to Mix a Believable Gray
You mix a believable gray with two colors, never with black, by pairing a hue with its complement and adjusting with white or a light value.
- Neutral gray: indigo layered over a light raw sienna, applied in two thin passes rather than one heavy one.
- Cool gray for shadow: indigo with a touch of a cool blue, kept very light so it never reads as navy.
- Warm gray for skin and wood: burnt umber with raw sienna, no black at all. This is the mix beginners most often ruin by reaching for brown too early.
- Deep, living shadow: a complementary pair plus one unexpected hue. A little purple or olive in a shadow adds richness instead of subtracting it.
The last mix is worth pausing on. Throwing several different hues under a shadow layer is a commonly reported cause of flat, muddy results, because each added hue drags the patch toward neutral. A single wildcard hue does the opposite of what a full complement set does: it gives the shadow a temperature, and temperature is what separates one shadow from the one beside it.
Use this guide to pick the shadow color for the hue in front of you.
| Color you are shading | Use in the shadow instead of black |
|---|---|
| Yellow | A violet or blue-violet, kept light |
| Blue | A warm orange or burnt sienna |
| Red | A cool green, muted |
| Green | A red or red-violet |
| Skin | Raw sienna with burnt umber, cool with indigo |
| Sky | A touch of a warm peach or orange, very diluted |
Beginners over-rely on brown in warm shadows more than any other single habit, and it is what muddies yellow transitions most often. Raw sienna with burnt umber will do nearly everything brown was doing for you, without the deadening.
Which Color Pencil Is Best for Blending?
A colorless blender pencil is best for blending colored pencil because it moves pigment without adding any, and it works best used once and lightly rather than worked repeatedly.
| Tool | Best for | Risk |
|---|---|---|
| Colorless blender pencil | Smoothing transitions between two adjacent colors | Repeated passes flatten the tooth and dull the color |
| Blending stump or tortillon | Soft, smoky edges in large areas | Picks up and drags pigment, which grays a patch fast |
| White or cream pencil | Lifting a mid-tone value gently | Chalky and permanent if used too early |
| Burnishing with the side of the pencil | Small areas where you want a smooth finish | Reversible point of no return, permanently fills the tooth |
| Kneaded eraser | Softening edges and lifting a little pigment | Can smudge if the area is heavily worked |
| Electric eraser | Removing pigment to lighten a muddy area | Easy to tear paper if the tip is dull |
| Solvent such as rubbing alcohol | Dramatic lift on wax-based pencil | Softens and spreads pigment, can make the area worse |
Beginners often ask whether a white pencil is good enough for blending. It is a legitimate tool for lightening a value, but it is not a substitute for a blender: white adds pigment, and a blender only moves what is already there.
Why Overblending Ruins Texture and How to Keep It
Overblending ruins texture because it polishes the paper tooth flat, and a flat tooth reflects light evenly so the color reads dull and scratchy instead of layered.
Textured pencil marks are not a defect. Fur, foliage, hair, and rough stone all read better with visible stroke direction, and that texture is also what gives a flat area an escape route when it needs rescuing.
The rule I work to: blend the transitions, never the middle. One pass over a seam, then back to the drawing. If a whole area has gone smooth and lifeless, adding a light layer of a slightly textured stroke across it restores more life than any amount of additional blending.
Prevention: Light Pressure, Thin Layers, Limited Palette
You layer colored pencils effectively by working light to dark, using two colors per zone, and adding each layer only after the previous one is fully established.
- Set the lightest value first. Leave the white of the paper or the toned paper color as your brightest value and never go back over it.
- Choose a local color. One color that matches the area in full light, applied at the lightest pressure your drawing needs.
- Add the undertone. A second, warmer or cooler color in thin layers, never mixed into the first one.
- Deepen with the complement. Push into the shadow with a cool or complementary color, and keep the strokes directional and light.
- Blend once, then stop. A single light pass of a blender at the transition, and the layer count is done.
The 2-3 color rule for clean mixes
The 3 color rule in art is a guideline that a mix built from three or fewer colors is easier to control, and in colored pencil the practical version is tighter: use two colors per zone, and let a third act as a unifier rather than a third mixing partner.
Bias any three-way combination toward two of the colors. A mix that is roughly two-thirds of one hue and one-third of the other stays readable, while an even three-way split drifts toward neutral and the patch goes muddy. This rule is widely used in painting and it applies exactly the same way to pencil, because the pigment physics do not change.
Toned or mid-tone paper counts as a free layer. It handles your mid-values so you spend fewer pencil layers, which is a structural way to prevent mud before it starts.
Solvent and Lift Techniques: What Rubbing Alcohol Actually Does
Rubbing alcohol dissolves the wax binder in colored pencil, which softens the pigment and lets you lift and spread it — the lift is powerful, and it also redistributes color into a haze.
Use it sparingly, on a scrap test first, with a cotton swab rather than a poured application. It is genuinely useful for lifting a stubborn dark passage or for softening a hard edge, and it is the fastest way to turn a small fixable patch into a large new problem. Never use it on a finished area you care about without testing the same combination on the same paper first.
For most muddy-color rescue work, an electric eraser is the safer tool. It removes pigment instead of moving it, and it cannot spread the mud across clean neighbors.
Fixative: When to Spray and Why Timing Matters
Spray fixative only when the drawing is finished, because fixative applied early locks your current layers in permanently, including the mud you were planning to correct.
Beginners often seal a work to make it look finished, then discover the shadows are dead and cannot be adjusted. Once pigment is sealed, layering on top of it behaves differently and the tooth no longer grips new pencil the same way.
- Complete every adjustment first, including the value structure and the highlights.
- Wait until the piece is fully done before any spray, and test the spray on scrap paper to confirm the finish you want.
- Apply light, even passes from a distance, following the can’s instructions.
- Keep in mind that fixative is a protective coat, not a color fix. It cannot brighten a muddy area, and it preserves whatever value and chroma you handed it.
Why Colored Pencil Drawings Look Grainy
Colored pencil drawings look grainy when thin layers of pigment sit on top of the peaks of the paper tooth while the valleys are still bare, and that is a texture problem rather than a muddy-color problem.
Two different failures, two different responses. If the grain disappears when you squint and the color underneath reads clean, it is texture, and the fix is a light mid-tone layer to fill the valleys. If the color still looks dull and gray when you squint, it is mud, and it needs the layering and glazing work described above.
Paper with a finer tooth holds smoother blends but shows heavy pressure more easily, which is another way of saying the surface decides how forgiving you can afford to be. A rough tooth forgives hard pressure and forgives mud. A smooth tooth forgives neither.
Frequently Asked Questions
How to make colors look less muddy?
Stop adding hues to the patch. Lay one thin, clean warm color such as burnt sienna or raw sienna over the area at light pressure, glaze it rather than blending it, and lift with an electric or kneaded eraser first. Keep each layer transparent, use no more than two colors per zone, and reserve black for accents rather than shadows.
Why do my colored pencil colors look dull and gray?
Three habits cause this: mixing complementary or too many hues, pressing hard enough to grind pigment into the paper tooth, and using black for shadows. Every extra layer of pressure dulls the color further, and each additional hue lowers the chroma. Thin layers at low pressure, two colors per zone, and complements instead of black keep colors clean.
Can I fix a colored pencil drawing that is already muddy, or do I have to start over?
Almost always fix it. Diagnose the failure with a grayscale check, lift pigment with an electric eraser, then glaze a thin transparent layer of a clean warm color on top. Deep burnishing that has polished the paper tooth flat cannot be undone, but glazing a warm color over it restores life. Starting over is rarely necessary.
How do you layer colored pencils effectively?
Work light to dark in thin transparent layers. Establish the lightest value first and protect it, add a local color, then an undertone, then push into shadow with a complement. Blend the transition once with a colorless blender and stop. Each new layer should be a decision about value, not about which color might make it look better.
Which color pencil is best for blending?
A colorless blender pencil, because it moves pigment without adding any of its own. Use it in a single light pass over transitions rather than repeated strokes, which flatten the paper tooth and gray the color. Blending stumps suit soft large areas, white or cream pencils lighten a value, and an electric eraser lifts pigment when a patch needs to be lighter.
What is the 3 color rule in art?
The 3 color rule in art is a guideline that mixes built from three colors or fewer are easier to control than mixes with many. In colored pencil the working version is two colors per zone, with any third color acting as a unifier. Bias a three-way mix toward two-thirds of one hue and one-third of the other, because an even split drifts toward neutral and goes muddy.
How to color grey with colored pencils?
Mix gray from a hue and its complement instead of using black. Neutral gray comes from indigo over light raw sienna, cool gray adds a touch of cool blue, and warm gray for skin or wood is burnt umber with raw sienna. Keep every layer light and add white only for the brightest highlights, because white used early leaves everything chalky.
What does rubbing alcohol do to colored pencils?
Rubbing alcohol dissolves the wax binder, softening the pigment so you can lift and redistribute it. That makes it a fast rescue tool for stubborn darks and it also spreads color into a haze that can muddy the surrounding area. Test on scrap paper first and apply with a cotton swab in small amounts. An electric eraser is safer for most corrections.
What is the best fixative for colored pencil drawings?
Choose a fixative that matches the finish you want, matte for a natural surface or gloss for deeper color, and follow the can directions. The timing matters more than the brand. Spray only after every adjustment is finished, because fixative locks your current layers in place, including muddy areas you were still planning to correct.
Why do my colored pencil drawings look grainy?
Grain shows when thin pigment layers sit on the peaks of the paper tooth while the valleys stay bare, which is a texture issue rather than a muddy color issue. Add a light mid-tone layer to fill the valleys, and keep pressure low so the tooth survives. If the color still reads gray when you squint, the real problem is chroma and needs glazing.
How do you make colored pencil drawings look smooth?
Build smoothness with thin light layers rather than pressure. Lay each color lightly, blend the transition once with a colorless blender, and add the next layer only after the previous one is set. Heavy pressure on a single area polishes the paper tooth flat, which is what produces the dull, scratchy look people mistake for a blending problem.
Conclusion: Three Habits That Keep Colors Clean
Learning how to fix muddy colors in colored pencil drawings comes down to three habits: two colors per zone, the lightest pressure that still registers, and light to dark with no blending until the value structure is in place. Mud is almost never a color-choice mistake. It is a pressure and layer-count habit, and that is good news, because habits change what pigments cannot.
The next time a patch goes sullen, do not add another color to it. Lift it, glaze it, and move on — the drawing is not ruined, and the 2026 version of your technique gets clearer with every layer you lay down light.