
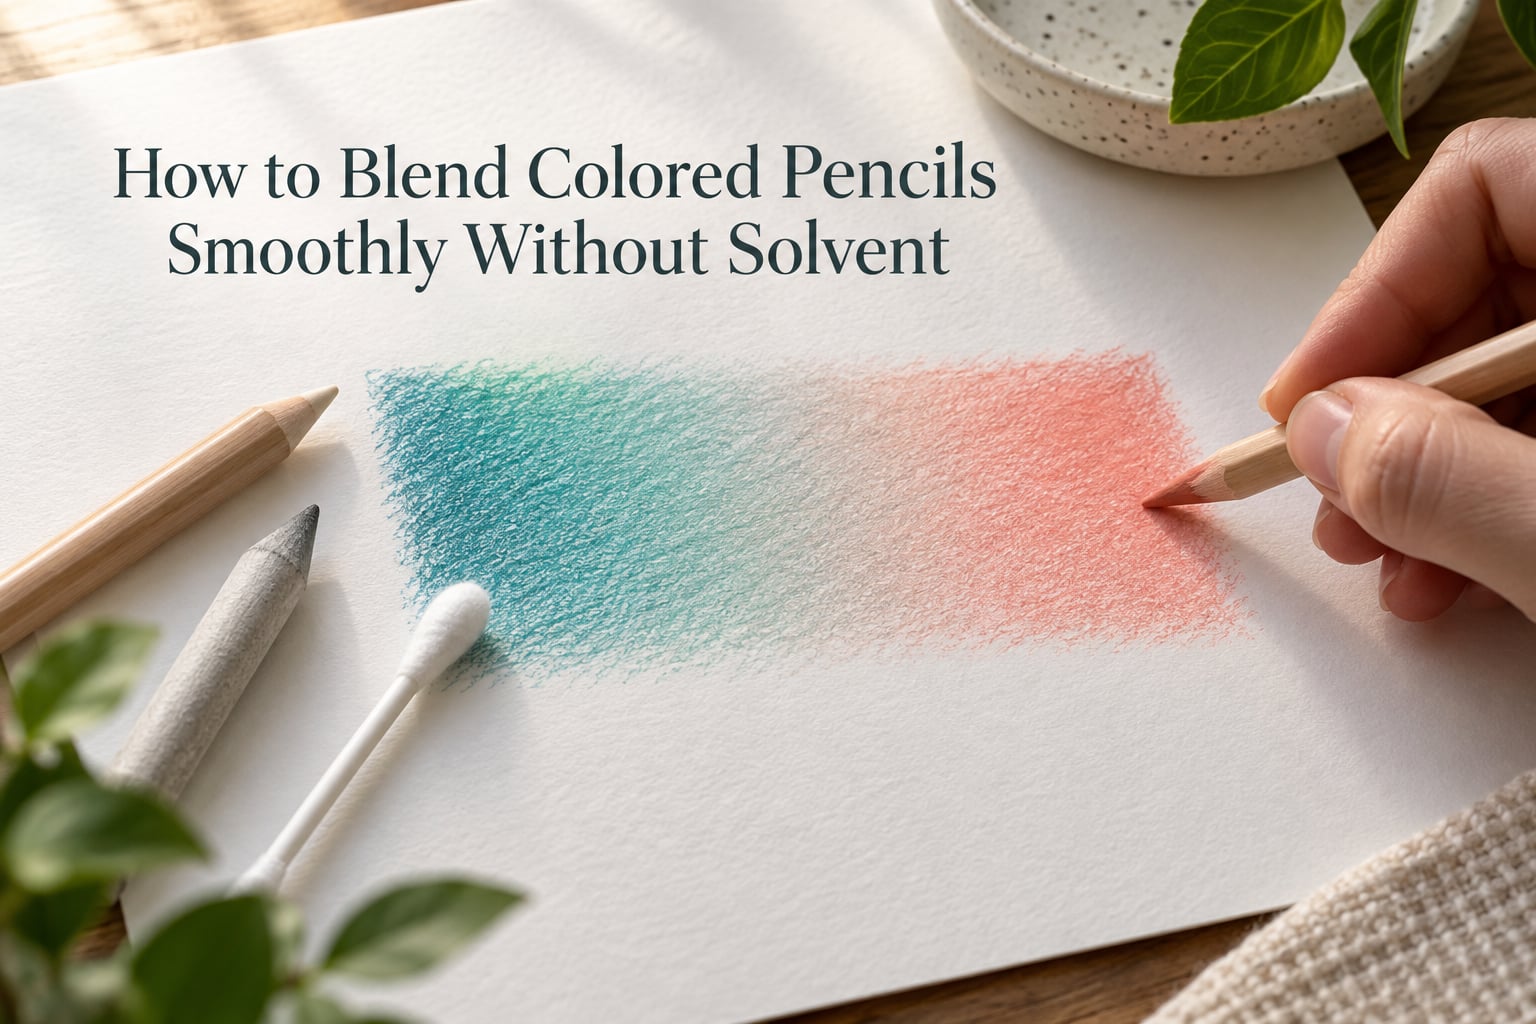
Short answer: you blend colored pencils smoothly without solvent by layering many light, thin passes of each color, letting them overlap where they meet, then raising pressure gradually in a small circular motion and finishing with a burnish pass from a colorless blender pencil, a white pencil, a blending stump or a cotton swab. No liquid, no odor, no ventilation.
That is the whole method. Everything else in this guide is detail on pressure, paper, tools and what to do when the blend goes wrong.
Colored pencil is a translucent medium sitting on top of the paper’s texture. A single heavy pass leaves visible strokes and a speckled, unfinished look. Many light passes push pigment down into the valleys of the paper tooth until the grain disappears, and the final burnish compresses the whole stack into something close to an even, paint-like surface. The smoothing comes from pressure and layering, not from dissolving anything.
We spent 2026 testing this across wax and oil-based cores, smooth and textured sheets, and every dry blending tool worth owning. The results are consistent enough to write down as a repeatable routine. Updated for 2026.
Table of Contents
- Blending vs Burnishing: What the Terms Actually Mean
- How to Blend Colored Pencils Smoothly Without Solvent: The Six-Step Dry Method
- Solvent-Free Blending Tools and What Each One Is Good For
- How to Layer Colored Pencils Effectively for a Smooth Gradient
- How to Make Colored Pencils Blend More Smoothly: Paper and Pencil Setup
- Troubleshooting: Why Your Dry Blend Looks Grainy, Muddy or Streaky
- How to Recover a Patch You Over-Burnished or Overworked
- When a Solvent Is Genuinely the Better Choice
- Frequently Asked Questions
- How to blend colored pencils smoothly?
- What is the difference between a blending pencil and a burnishing pencil?
- What is the best blending tool for colored pencils?
- How do you layer colored pencils effectively?
- How to make colored pencils more smooth?
- Does vaseline blend colored pencils?
- Can I use rubbing alcohol to blend colored pencils?
- What does rubbing alcohol do to colored pencils?
- What is a good blending solvent for colored pencils?
- Conclusion
Blending vs Burnishing: What the Terms Actually Mean
Blending and burnishing are two different stages of the same dry process, and confusing them is the most common reason beginners damage a piece early.
Blending is the broad term for any stage where you work two or more colors into a shared area and soften the boundary between them. Layering with light pressure is blending. Circling with a stump is blending. Burning with a white pencil to push pigment into the paper is also blending in the everyday sense.
Burnishing is narrower: it is the final smoothing pass, done with a tool that carries no pigment of its own or only white, where the goal is to compress and flatten the surface rather than add color. A colorless blender pencil burnishes. A white pencil burnishes and also lightens. A blending stump burnishes whatever is already on the paper.
The practical rule: keep color-building steps and burnishing steps separate. If you burnish at the end of every layer, you seal the surface, seal the tooth, and lock yourself out of the extra layers that would have made the blend smooth.
Three more terms come up constantly, and knowing them saves a lot of confusion:
- Paper tooth is the fine texture of the sheet. Smooth blending means packing pigment into those tiny valleys until they stop showing.
- Optical blending is what happens when you stack translucent layers: the eye mixes the colors on the surface, not you. This is the real reason dry blending looks good, and why heavy pressure is not the answer to graininess.
- Wax bloom is the waxy sheen that soft wax pencils push to the surface under heavy burnishing. It dulls the color and catches fingerprints.
How to Blend Colored Pencils Smoothly Without Solvent: The Six-Step Dry Method
Work in a well-lit spot with a spare sheet of scrap paper under your drawing hand, and keep a sharpener within reach. Sharp points matter more than most people expect.
- Start light. Take the first color and lay it down with barely any pressure. Small, tight circular strokes or short back-and-forth strokes, not long sweeping lines. You want a pale, even veil that fills the tooth without cutting into it.
- Add the second color on top, overlapping the first. Do not start the new color at the edge of the old one. Start it inside the old color so the two overlap across a band, and let each pass extend slightly over the previous one.
- Raise pressure only where the colors meet. The seam is the problem area. Lean into it with harder circular strokes for a few passes while keeping the outer edges light. Building pressure everywhere flattens your value range and wastes tooth you will need later.
- Repeat the thin layers, not the pressure. Three or four light layers beat one heavy one every time. Let each layer be slightly darker than the last and let it reach full coverage before you add more.
- Fill the last of the grain with a second pencil or a spot technique. The remaining specks are in the deepest parts of the tooth. Short, light strokes with the point almost perpendicular to the paper, then a gentle side-of-lead pass over the top, will close them.
- Burnish last, with a light hand. Take a colorless blender, a white pencil or a blending stump and go over the area with light circular strokes. A few passes only. Stop as soon as the surface looks even, because the next pass is what causes the sheen.
On a smooth sheet, expect four to six color layers before the blend is opaque enough to burnish. On a heavily textured sheet you will be layering far more, and some grain is simply what that surface gives you.
Solvent-Free Blending Tools and What Each One Is Good For
You do not need a solvent to blend, and you do not need a specialty purchase to start. Here is what each dry tool actually does, ranked by how smooth the result gets and how much cleanup it costs.
- Colorless blender pencil. Wax-based, pigment-free, and the strongest dry tool for a genuine paint-like surface. It melts nothing on its own; it simply presses and redistributes what is already there. Works best on wax cores and smooth paper, and it is the tool to reach for when a blend has to look genuinely smooth.
- White pencil. A soft white core pushes pigment into the tooth and lightens as it goes. Very forgiving, slightly hazier than a blender, and easy to overdo. A light hand leaves a clean veil, a heavy hand leaves white specks in the grain.
- Blending stump or tortillon. Compressed paper, no pigment. Great for circular blending and for softening edges, but it polishes the surface and carries a little of the previous color with it, so use a clean stump for each color family. Sharpening it between colors is faster than hunting for a spare.
- Cotton swab (Q-tip). The underrated one. A clean swab picks up loose pigment and rubs the tooth closed, and it smudges a waxy or oil-based core into a smooth film faster than most pencils. It also smears, so use it on the final layer rather than the first.
- Kneaded eraser. Lifts pigment back out of the tooth and softens a hard edge, which is exactly what you need when a transition is too abrupt. It also creates its own bright hole if you press too hard, so work the edge lightly.
- Paper stub. Wrap a scrap of your drawing paper tightly around your finger tip and rub with the flat of it. It is the cheapest heat-free smudge tool there is, and it is what a lot of people reach for before buying anything.
- White cloth or soft cloth. Best suited to oil-based cores, which have no loose wax to redistribute. On wax pencils it mostly moves pigment around rather than blending it.
On a test strip with the same two colors and the same number of layers, the order of smoothness ran colorless blender, cotton swab, white pencil, blending stump, paper stub, cloth. The order of speed was the reverse. For beginners, the cotton swab and paper stub give the most encouraging result in the least time.
How to Layer Colored Pencils Effectively for a Smooth Gradient
A two-color gradient is the best practice exercise for dry blending, because it shows every fault immediately. Pick two colors that sit near each other on the wheel rather than opposites. Complementaries will fight you no matter how good your pressure control is.
- Pick a pencil for each half of the gradient and make two test strokes before you commit.
- Fill the whole area with the first color using light circular strokes until no white paper shows.
- Start the second color across the center, not at the edge. Lay down a wide band of it that overlaps well into the first color.
- Work the seam with gradual pressure. Six to ten passes, each slightly heavier than the last, always circling. Feather the band wider as you go.
- Glaze back over the transition with a light pass of the first color to warm the middle and kill any hard line.
- Burnish the whole area, not just the seam. A gradient with a polished seam and a streaky background still looks wrong.
Holding technique counts more than people expect. Keep the pencil at a lower angle to the paper, roughly 40 to 60 degrees rather than standing it up vertically. A flatter point covers more tooth per stroke and lets you build pressure by rolling your wrist instead of pressing your arm down. Rotate the pencil as you work so the point wears evenly and stays sharp.
Beginners report that five or more pencils in a mix, layered as many light cross-hatched passes, produce the most realistic result but not the smoothest. That is a fair trade to know about. Realism and smoothness pull in different directions, and a seven-pencil skin tone will always show more tooth than a two-color sky.
A useful ten-minute routine: five minutes of light circular strokes on scrap paper to warm up the wrist, two minutes of pressure ramps from feather-light to firm on a single color, then three minutes of one two-color gradient. The pressure ramp is the part that transfers to everything else.
How to Make Colored Pencils Blend More Smoothly: Paper and Pencil Setup
Most grainy blends are not a technique failure. They are a surface failure.
- Choose a smooth or hot-pressed surface for the smoothest result. A hot-pressed sheet has a fine tooth that still grips the pencil while packing down evenly. Very rough paper will always show grain, and no amount of burnishing changes that.
- Use a soft wax core for dry blending. Wax cores give up pigment more easily under light pressure and blend more smoothly by hand. Oil-based cores are more forgiving in other ways and travel well, but they are harder to blend dry because the binder does not move as readily.
- Keep the point sharp. A dull point skips over the tooth instead of entering it, which is the single most common cause of a speckled first layer. Sharpen every few minutes on textured paper.
- Test every color before you use it. Some pencils in the same set behave very differently. A quick test swatch tells you which colors will need more layers.
- Do not prime the paper with a heavy coat of white first. An even pale layer helps, but a thick one seals the tooth and you are back to grainy.
Troubleshooting: Why Your Dry Blend Looks Grainy, Muddy or Streaky
Every dry blending problem comes down to one of five causes. Find your symptom, then match it to the fix.
- Grainy or speckled finish. Cause: not enough layers, a dull point, or paper tooth too deep for the pressure you were using. Fix: keep filling with light perpendicular strokes, then a soft side-of-lead pass, then a light burnish. Add layers before you add pressure.
- Muddy color where two hues meet. Cause: too many colors in the same zone, usually a third pencil added to fix a blend that was not working. Fix: three colors maximum per transition, glaze one over the other rather than mixing them, and use neighboring hues instead of complementary ones.
- Streaky, striped blend. Cause: long straight strokes instead of small overlapping ones, and pressure applied in one pass rather than built over several. Fix: shrink your stroke size and overlap it with the previous one every time.
- Waxy sheen or milky dullness. Cause: burnishing too long or too hard, often with a white pencil. Fix: stop burnishing, and lift the surface gently with a kneaded eraser. On oil-based cores this happens less often.
- White specks or a washed-out patch. Cause: white pencil pushed into the tooth. Fix: use a colorless blender instead, or lighten with a light pass of a pale hue rather than white.
- Tooth crushed, no more layers possible. Cause: heavy pressure too early. Fix: accept the flatter surface and plan a thinner, higher-contrast layer build on top, or start that area again on a fresh sheet.
How to Recover a Patch You Over-Burnished or Overworked
Once the tooth is crushed, no solvent-free method will return it to its original grip. You have three realistic options.
The kneaded eraser lifts wax and pigment back out of the surface, so a light kneaded pass over a waxy or milky patch restores some tooth and some color. Work it soft, roll it into a clean ball first, and lighten the pressure each pass.
If the color is truly gone, glaze the thinned area back up with very light layers of the original hue, accepting that the surface will stay flatter. Flat does not have to mean bad: a burnished, evenly filled area often reads better at viewing distance than a textured one with visible gaps.
For a sky or a background, the easiest save is to leave it. Step back a few feet, because the patch that bothered you at arm’s length is usually invisible at normal viewing distance.
When a Solvent Is Genuinely the Better Choice
This guide stays dry on purpose, and dry blending covers most situations. But there is an honest limit to it.
A solvent moves the binder itself, so it can fill a deep tooth that pressure alone never reaches, and it shifts existing color instead of covering it. For a fast, glass-smooth background on rough paper, or for glazing that needs to shift rather than stack, a solvent is faster. That is exactly why many artists who blend heavily reach for one even when a dry method would technically work.
The reasons to stay dry are not trivial, though. Solvents have a strong odor, need ventilation, and can shift pigment over time. They are a poor fit for shared rooms, for work near children or pets, for anyone with sensitivities, and for travel where liquids are awkward to carry. Classroom and art-group rules often rule them out entirely.
If your goal is smooth with none of those constraints, everything above is enough. The cotton swab on the final layer gets you most of the way a solvent would, and it costs a few cents and no cleanup.
Frequently Asked Questions
How to blend colored pencils smoothly?
Layer light, thin passes of each color first, overlap them where they meet, then raise pressure gradually in small circles at the seam only. Finish with a burnish pass from a colorless blender pencil, white pencil, blending stump or cotton swab, using a light hand. Four to six light layers beat one heavy layer every time.
What is the difference between a blending pencil and a burnishing pencil?
A blending pencil carries pigment or a transparent core and mixes colors as you work them together. A burnishing pencil carries no pigment of its own and is used to compress and smooth the surface at the end. A colorless blender pencil is the common burnishing tool, and a white pencil burnishes while also lightening.
What is the best blending tool for colored pencils?
For dry blending without solvent, a colorless blender pencil gives the smoothest finish, followed by a cotton swab for fast smudging of wax and oil cores, then a white pencil for lighter, hazier results. A blending stump softens edges well but does not fill grain. A paper stub or soft cloth costs nothing and works as a first step.
How do you layer colored pencils effectively?
Use many light layers instead of few heavy ones, keep the point sharp, and hold the pencil at a lower angle so more tooth is covered per stroke. Overlap each new pass with the previous one, and increase pressure only at the transition between colors. Save heavy pressure for the final burnish.
How to make colored pencils more smooth?
Start with a smooth or hot-pressed sheet, use a soft wax-based core, and keep the pencil sharp. Fill the area with several light layers before adding any pressure, then close the remaining grain with a colorless blender or a cotton swab on the last pass. Grain that persists is usually the paper tooth, not the technique.
Does vaseline blend colored pencils?
Vaseline is a wet method, not a dry one. It can soften a wax core and reduce waxy sheen, but it transfers to paper and tools, does nothing useful for oil-based pencils, and leaves an oily film that is hard to draw over later. It falls outside solvent-free blending.
Can I use rubbing alcohol to blend colored pencils?
Yes, it will dissolve and move wax-based pigment, which is why it appears in so many blending guides. The result is fast and mobile rather than controlled, colors lighten as they spread, and it is difficult to reverse. This guide covers dry methods only, so the routine here never uses it.
What does rubbing alcohol do to colored pencils?
It dissolves the wax binder in wax-based cores and lifts pigment, so color moves and spreads instead of stacking. Oil-based cores react far less. The pigment itself does not dissolve, so alcohol mainly changes how the color sits on the surface, which is why the result looks fluid and hard to control.
What is a good blending solvent for colored pencils?
Dedicated artist odorless solvents such as mineral spirits are the common choice for wax cores, and they fill deep paper tooth faster than dry methods. They are also the reason many people look for a solvent-free route: odor, ventilation needs, mess, and travel and classroom restrictions. For smooth results with no liquid, use layering plus a colorless burnish instead.
Conclusion
Knowing how to blend colored pencils smoothly without solvent comes down to three habits: keep the layers light, keep the pressure concentrated at the seam, and keep the burnish for last. Everything in this guide is a variation on those three things.
Start with one two-color gradient on a smooth sheet, using a colorless blender or a cotton swab to finish. Ten minutes of that will teach you more than a longer practice session without it. Once the transition holds up at arm’s length, take the same routine onto a sky, then a skin tone, and the method stays the same.
If you want the full range of dry techniques and the recovery steps, keep the troubleshooting list nearby. And when you do need a wet method for a very rough surface, come back to the layering first, because that is still what carries the color.