
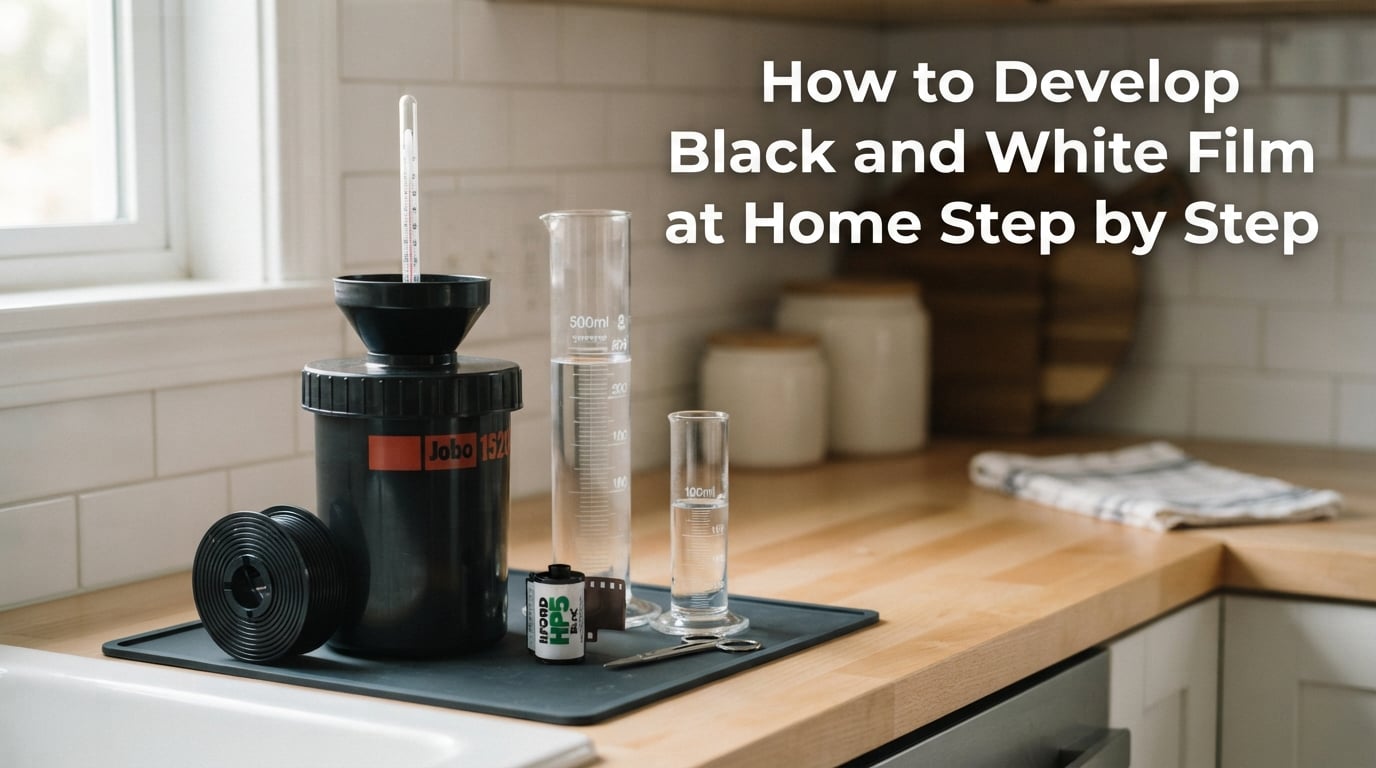
Yes, you can develop black and white film at home, in an ordinary bathroom or kitchen sink, with no darkroom and no enlarger. All you need is a light-tight tank, three liquids and a thermometer. This guide walks through how to develop black and white film at home step by step, with the exact times, volumes and temperatures written out in full so you never have to guess.
I have processed black and white film in a kitchen, a bathroom and once a laundry room in a flat with no windows. The process itself takes about forty minutes of active attention, most of it waiting. What used to intimidate people — the changing bag, the reel, the temperature — is mostly just care and repetition.
Below is the process I actually use, with a worked example using Ilford HP5+ in Kodak D-76 diluted 1:1 at 20C / 68F. Swap in your own film and developer and the steps stay identical; only the development time changes.
Table of Contents
- Can You Develop Black and White Film at Home?
- What You Need to Develop Black and White Film at Home
- The Four Chemicals You Need Explained
- Do You Need a Darkroom to Develop Film?
- How to Find Your Development Time
- How to Load Film Onto a Developing Reel in the Dark
- How to Develop Black and White Film at Home Step by Step
- Troubleshooting Your First Roll
- Safety, Storage and Disposal
- What to Do After You Develop the Film
- Frequently Asked Questions
- Can I develop black and white film at home, and if so, how?
- What chemicals do I need to develop black and white film?
- How long does it take for black and white film to develop?
- How hard is it to develop film yourself?
- How much does it cost to develop your own black and white film?
- Is it worth developing your own black and white film?
- Can I develop film photos at home?
- Is It Worth Developing Your Own Black and White Film?
Can You Develop Black and White Film at Home?
Yes. Home developing needs no darkroom. You load the film onto a reel inside a changing bag or daylight tank, then mix developer, stop bath and fixer at 20C / 68F and run a timed sequence of fill, agitate and dump cycles. The whole thing takes roughly 30 to 45 minutes and produces negatives you can scan or print the same evening.
The one genuinely tricky part is loading film onto the spiral reel in complete darkness. Everything after that is a matter of following the clock.
Developers on photography forums describe home processing as easier than they expected. The anxiety is almost always about the first ten minutes, and once you have loaded one roll successfully the fear largely disappears.
What You Need to Develop Black and White Film at Home
A usable kit fits in a shoebox. Here is what goes in it, grouped the way you will actually use it.
1. Processing kit
- A developing tank — the light-tight vessel with a lid that does not leak. Plastic tanks are cheap and work fine; stainless steel versions hold temperature better and last for decades.
- Two reels that match your format — a 35mm reel pair for 35mm, or an adjustable spiral for 120. A stainless steel reel with ball bearings is far easier to thread than a cheap plastic one.
- A funnel that fits the tank inlet, plus a stirring rod or paddle for mixing.
- Two graduated cylinders — 500ml and 100ml are the sizes that cover 600ml tank volumes and dilution mixing.
- A photographic thermometer with a readable scale, not a kitchen probe.
- A changing bag or, as an alternative, a daylight developing tank.
- A timer — a lab timer with a seconds hand or a stopwatch. Phone apps work; many people prefer the click of a mechanical timer because it cannot go to sleep mid-cycle.
- Film clips, a clip hanger, a squeegee and negative sleeves for the drying stage.
If you buy one thing, buy the tank and reel pair that you will actually use. Everything else can wait until you have shot a roll.
2. Chemistry
- Developer — D-76, HC-110 or Ilford ID-11. One bottle of concentrate lasts a long time because you dilute it.
- Stop bath — acetic acid or citric acid based.
- Fixer — Ilford or Kodak rapid fixer, or a powder fix if you prefer to mix your own.
- Wetting agent — Photo-Flo or Ilfotec. A few drops prevent dried water spots.
- Storage bottles — brown or clear plastic bottles with tight caps for the working solutions.
Never store chemistry in milk bottles, water bottles or anything else that once held food or drink. Photographic solutions in a reused food container is a genuinely dangerous habit, and the label is the only thing protecting you six months from now.
3. Drying and storage
- A dust-free place to hang film — a bathroom with the door closed works well.
- A hair dryer on cool, used for its airflow rather than its heat.
- Archival negative sleeves, cut open on one side so they slide over the film without creasing it.
- A dry box or sleeve-backed storage if you plan to keep negatives for decades.
The Four Chemicals You Need Explained
Every black and white process uses the same logic: build the image, stop the reaction, then make the result permanent. Four solutions do that job.
Developer: reduces exposed silver halide to black metallic silver
Exposing film to light creates an invisible latent image of silver halide crystals. Developer is the reducing agent that converts those exposed crystals into black metallic silver — the part of the image you will see on a print. D-76 and ID-11 give a general-purpose contrast; HC-110 is a one-shot concentrate diluted straight from the bottle and is the most forgiving option for a beginner.
Stop bath: halts development and removes residual developer
Without a stop bath, the developer keeps working while you drain the tank, and you lose control of your time. Stop bath drops the pH sharply and rinses the carried-over developer out of the emulsion. Some beginners use plain water, which works in a pinch but gives you weaker control and can leave uneven density between the moment you stop the clock and the moment the film is truly stopped.
Fixer: removes unexposed silver halide so the negative is no longer light-sensitive
Unfixed film is still light-sensitive and will darken further every time you look at it. Fixer dissolves the silver halide that was never exposed, which is what makes the highlights clear rather than milky. Fixing time depends on dilution — check the label or your data sheet, because powder fix and rapid liquid fix have very different clocks.
Wetting agent: prevents water spots during drying
Surface tension makes water bead on dry film, and each bead leaves a mineral spot. A wetting agent lowers that surface tension so the film drains evenly. A few drops in the final rinse save you from spotting a perfect roll with a soft cloth and an afternoon.
What about monobath?
A monobath develops and fixes in a single solution, which removes the stop bath and shortens the process considerably. It is a reasonable shortcut, and some people never leave it. The argument against it as a first experience is that you learn less about what each stage does, and monobath is less forgiving of temperature error than separate chemistry. Learn developer, stop and fix first, then treat monobath as an optimisation.
Do You Need a Darkroom to Develop Film?
No. You need darkness for exactly one step — loading the film onto the reel — and you get that from a changing bag, a bathroom at night with no windows, or a daylight developing tank that does the loading while you look through an opaque cap.
A changing bag is a thick light-tight pouch with a roll-top closure. You put the tank, reel, film cassette and a bottle opener inside, zip it, then reach in with both hands and feel your way through the load. It feels clumsy for the first roll and completely routine by the third.
A daylight tank is a real alternative for people who want to skip the bag entirely. The reel sits in a sealed chamber and you load the film through an opaque light-trap that screws shut. The cost is that the tank is bulkier and the chamber is easier to get wrong if you rush. Most people who own one still use a bag for 35mm, because the bag is faster.
How to Find Your Development Time
Development time is the one number you must not invent. It depends on three things: the film, the developer, and the dilution. Get any one of them wrong and the negatives will be thin or dense.
Use the Massive Dev Chart published by Digital Truth, or the data sheet that ships with your film. The chart lists times per film and developer combination, and most sheets also give a range for development temperature rather than a single number. Many manufacturers also publish a small tolerance around their recommended time, and staying inside it is far easier than chasing an exact figure.
For our worked example: Ilford HP5+, D-76 diluted 1:1, developed for 13 minutes at 20C / 68F. HP5+ is a forgiving general-purpose emulsion with wide latitude, which is why it keeps appearing as a first film. If your combination is different, take the time from the chart rather than from this page.
The full process timing table
Everything below assumes a 600ml tank, one 35mm roll, the HP5+ and D-76 1:1 example, and chemistry held at 20C / 68F.
| Stage | Solution | Volume | Time | Agitation |
|---|---|---|---|---|
| Pre-wash | Plain water | 600ml | 1 min | Continuous, then 4 inversions |
| Develop | D-76 1:1 | 600ml | 13 min | 30 sec continuous, then 5 inversions every 60 sec |
| Stop | Stop bath | 600ml | 30 sec | Continuous, then 10 inversions |
| Fix | Fixer | 600ml | Per label, typically 2-4 min | 5 inversions every 30 sec |
| Wash | Running water | Fill to lid | 10 min | Continuous flow |
| Final rinse | Water plus wetting agent | 600ml | 1-2 min | 10 inversions |
| Dry | — | — | 2-4 hours | — |
Temperature compensation: what to do when you are not at 20C
Development speeds up as temperature rises and slows as it falls, so if your solution is not at 20C / 68F you must adjust the clock. This is the most repeated beginner question in photography forums, and almost no guide answers it with actual numbers.
The common rule of thumb is roughly plus or minus 10 percent on development time per degree Celsius away from 20C. So a 13 minute development becomes about 12 minutes at 19C / 66F, and about 14.5 minutes at 21C / 70F. Push that a little further and the approximation breaks down, which is why a data sheet’s temperature table beats arithmetic.
Working practice matters more than the maths here. The bigger cause of inconsistent results is not the starting temperature but the drift during the run: a tank sitting in a warm room gains several degrees across a ten-minute development, and the last two minutes happen at a different temperature than the first. Two habits fix this. Use a water bath — a bowl of water at 20C with the bottles standing in it — so your chemistry starts and stays near target. Or develop in a small room early in the morning and in a stable space in general.
Do not try to warm chemistry on a hob or in a microwave. Dilute it with a small amount of hot water in a jug if it is too cold, and stir thoroughly before you trust the reading.
How to Load Film Onto a Developing Reel in the Dark
This is the step everyone dreads and the one that goes wrong most often. Learn the reel on a dead roll in daylight first — a roll you no longer intend to use is a free practice run.
Reel anatomy
Most plastic and stainless steel reels share three features. The entrance gate is the flared opening at one end of the spiral; the film has to catch on its edge before it will travel inward. The sprocket holes on the film edges engage small teeth or a continuous channel, which is what pulls the film along. On a ball-bearing reel, dozens of tiny stainless balls sit in channels between the two halves of the spiral and grip the sprockets as you turn the hub — this is why metal ball-bearing reels feel far smoother than flat plastic ones.
The load
- Open the film cassette with a bottle opener or cassette opener, or simply pull the tongue out if the cassette end is exposed.
- Trim or identify the leader. A short plastic leader is easy; a long paper or film leader that kinks and jams is the most common cause of a failed load.
- Feed the leader into the entrance gate, feel for the catch, and push it in about 10mm until it grips.
- Rotate the hub steadily while feeding film in a smooth arc. Never pull the film and never feed it faster than the reel takes it.
- If the film stops advancing, back it out slightly, re-align the sprockets, and continue. Forcing a jammed reel bends the perforations.
- When the film is fully wound, trim the tail so the last frame sits in the right-hand compartment of the tank.
- Place the reel in the tank, drop the funnel in, close the lid, and only then open the bag.
For 120 medium format film the same sequence applies, but the spiral has an adjustable core. You widen the spiral to about 43mm for 120, wind the film on, then squeeze the core closed to lock it. Plenty of people do not realise the core has two parts that collapse together, which is why a roll that will not fit is nearly always a core that has not been opened fully.
How to Develop Black and White Film at Home Step by Step
This is the process in order. Set your timer running and follow it linearly; the order is what stops cross-contamination between developer, stop and fixer.
Step 1: Load the film onto the reel
Do this in the changing bag, in a dark room, or in a daylight tank as described above. Tank loaded, lid closed, film inside, done.
Step 2: Mix and temper your chemistry to 20C / 68F
Mix your working solutions in the graduated cylinders, not in the tank. D-76 stock solution is diluted with water at the ratio your data sheet specifies — 1+1 for a one-to-one working solution, 1+2 for a one-to-two. Stir each cylinder thoroughly. Then stand the bottles in a water bath of 20C / 68F water for at least ten minutes and check the temperature of the solution itself, not the bath.
Step 3: Pre-wash the film
Fill the tank with plain 20C / 68F water, close it, and invert it several times. Run continuous agitation for about a minute, then do four inversions. This wets the emulsion, loosens dust and removes the anti-halation backing that would otherwise cause a milky glow around bright highlights. Drain completely.
Step 4: Develop
This is the timed step. Pour in your measured developer, start the timer as the last of it goes in, and seal the lid. Invert the tank five or six times to wet the film, then agitate continuously for the first 30 seconds. After that, do five gentle inversions every 60 seconds for the rest of the time — for the 13-minute example, that is 13 sets of five inversions.
The continuous first 30 seconds matters because the developer is strongest and most uneven at the moment of contact. Gentle inversions after that are enough to keep fresh solution moving past the emulsion and to prevent bromide drag, the streaking that appears when exhausted by-products sit in one place.
Step 5: Stop
Dump the developer, pour in stop bath, and agitate continuously for about 30 seconds followed by ten inversions. The time here is deliberately generous because stopping early is the mistake that costs you contrast and control.
Step 6: Fix
Dump the stop bath, fill with fixer, and agitate with five inversions every 30 seconds. Follow the fixing time on your product. If you want an independent check, drop a small piece of clear photographic film base into the bath; when it no longer turns milky, the fixer has done its work.
Step 7: Wash
Dump the fixer and run the tank under a steady stream of 20C / 68F water for ten minutes. A fill-agitate-dump cycle repeated several times works almost as well if your tap is unreliable. A wash filter in the outflow catches the most stubborn residue, and a final rinse with a dilute hypo-clearing solution gives archival negatives noticeably better long-term stability.
Step 8: Final rinse with wetting agent
Add a few drops of wetting agent to a fresh 600ml of water, add to the tank, and invert ten times. A minute of agitation is enough. This is the last liquid the film sees, so make it count.
Step 9: Dry, clip and sleeve
Unspool the film, attach a weighted clip at the bottom, and hang it in a clean, dust-free space. Run a hot shower for a few minutes first and dry in the bathroom while the steam settles airborne dust — it is a small trick that works surprisingly well. Use a hair dryer on cool, held about 30cm away, moving constantly, until the film is completely dry.
Pull the film taut through a film squeegee, or drag it through a clean soft cloth held taut. Squeegees are often blamed for scratches, but a clean plastic one used gently removes the bulk of the water and the surface debris that causes marks. Cut your sleeves on one side with a sharp blade, slide the film in without pressing the emulsion, and write the date, film type, developer, dilution and time on the sleeve in pencil.
Step 10: What to do next — scan, print or store
Most home developers scan first. Hold the film to a light source, start at a mid-grey setting and let the software show you the full tonal range rather than clipping the highlights. Remember that a negative is a positive in reverse: bright parts of the scene are dense and dark on the strip.
Printing means building or borrowing a darkroom, which is a separate project. Storing is the underrated option: sleeve the negatives, keep them in a dry box away from heat and humidity, and a well-fixed negative from a good process will still print decades from now.
Troubleshooting Your First Roll
Almost every disappointing first roll comes down to one of a short list of causes. Match what you see against the table below before you change anything about your process.
| Symptom | Likely cause | Fix |
|---|---|---|
| Overall grey or milky fog, low contrast | Light leak in the bag, tank or cassette, or a tank lid that does not seal | Load in a dark room to test for leaks; check the lid gasket; tape a faulty lid shut temporarily |
| Flat, thin images with weak shadow detail | Underdevelopment from a short time, or chemistry that was warmer than 20C | Confirm the time against a dev chart; use a water bath to hold temperature |
| Too dense, heavy blacks, blocked shadows | Overdevelopment from too long a time, or chemistry below 20C | Shorten the time or raise the temperature; check you are using the right dilution |
| Uneven density, streaks running along the film | Exhausted developer, insufficient agitation, or volume too low to cover the film | Agitate continuously for the first 30 seconds; never develop in less than 600ml for a 600ml tank |
| Bubbles or light patches on the film | Air trapped during the first inversion | Tap the tank on a hard surface after the first pour, then agitate continuously |
| White spots or vertical marks on dried film | Dust in the drying area, or fixer not fully washed out | Run a hot shower before drying; extend the wash; filter the wash water |
| Water spots and mineral crusts | No wetting agent in the final rinse, or film dried too quickly | Add wetting agent; dry more slowly with a cool airflow instead of a hot dryer |
| Milky highlights across the whole frame | Skipped pre-wash, leaving the anti-halation layer in place | Always pre-wash for a full minute at 20C / 68F |
| Bright yellow or orange cast | Fixer exhausted or omitted, so silver halide remains in the emulsion | Test fixer with a clear film base scrap; fix for the full time on the label |
Change one variable at a time. Adjusting time, temperature and agitation together when a roll goes wrong means you learn nothing from the next one either.
Safety, Storage and Disposal
Developer and fixer are corrosive and should never touch skin or eyes. Nitrile gloves are inexpensive and worth wearing while mixing, and the ten minutes of handling wet film is when you are most likely to get a splash.
- Store working solutions in labelled, capped, non-food containers in a cool cupboard away from light, heat, children and pets.
- Keep a spill kit on hand: a bottle of water and a roll of paper towel handle most accidental contact. Eyes get a full flush immediately, no exceptions.
- Never mix developer and fixer together outside a monobath. They react violently and release gases.
- Fixer can be reused a few times, and testing it with a scrap of clear film base is the only reliable way to know. Once it stops clearing, dispose of it.
- Do not pour spent chemistry down the drain. Fixer contains silver and both developer and fixer upset the chemistry of household wastewater systems. Many local authorities run collection days for photographic waste, and silver recovery through a fixer recycler is often worth doing if you develop regularly.
- Never combine leftover chemistry with other cleaning products. Wetting agent, stop bath and fix in one jug is the safe disposal route once you are done with it.
What to Do After You Develop the Film
Developed negatives last a long time if they are handled well. Sleeve them in a way that never touches the emulsion, keep them at stable room temperature out of direct sunlight, and avoid humid spaces like a garage or loft. Storage in sleeves backed with buffered paper is the step up for anything you want to keep for twenty years or more.
Label as you go, not later. Film type, developer, dilution, temperature, time and date on the sleeve in pencil takes thirty seconds and saves you from re-deriving your own process from memory a year later when you have forgotten which roll came from which tank.
And when you are comfortable with the basics, push and pull processing is the natural next step. Pulling a normally developed film by a stop gives you more shadow detail and finer grain; pushing it gives you the opposite. Both are just a different time in the same chart.
Frequently Asked Questions
Can I develop black and white film at home, and if so, how?
Yes. You need a light-tight developing tank, a reel, a changing bag or daylight tank, developer, stop bath, fixer, a wetting agent, a thermometer and a timer. Load the film in the dark, mix your chemistry to 20C / 68F, then run timed fill, agitate and dump cycles: pre-wash, develop, stop, fix, wash, final rinse and dry. No darkroom is required.
What chemicals do I need to develop black and white film?
Three make the process work and a fourth protects the result. Developer (D-76, HC-110 or Ilford ID-11) converts exposed silver halide into black metallic silver. Stop bath halts development and clears residual developer. Fixer removes unexposed silver halide so the negative stops being light-sensitive. A wetting agent in the final rinse prevents water spots.
How long does it take for black and white film to develop?
The active session takes about 30 to 45 minutes, most of it waiting. A typical 600ml tank run is a one-minute pre-wash, 13 minutes of development for HP5+ in D-76 1:1 at 20C / 68F, 30 seconds of stop, two to four minutes of fix, a ten-minute wash, a one-minute final rinse and two to four hours of drying.
How hard is it to develop film yourself?
Less than most people expect. The chemical stages are timed and forgiving, and the mistakes that produce bad results are almost always one of a few: wrong development time, temperature drift, or a light leak. Loading the film onto the reel in the dark is genuinely awkward the first time, and routine by the third roll.
How much does it cost to develop your own black and white film?
The ongoing cost per roll is only the chemistry you consume, typically a few pence, because you dilute a concentrate that lasts many sessions. The real cost is a one-time setup: a tank, reels, changing bag, cylinders, thermometer and an initial set of chemistry. The saving compounds because you also skip lab turnaround and get your negatives the same day.
Is it worth developing your own black and white film?
For anyone who shoots regularly, yes. You get your negatives back the same day, full control over contrast and grain, and the ability to push or pull film on demand. The main benefit for beginners is learning: understanding the process changes how you shoot, because you start to see exposure and development as related rather than mysterious.
Can I develop film photos at home?
Developing exposed negative film at home is straightforward and needs no darkroom. Printing film photos at home is a different matter: that requires enlarger, paper, a timer and total darkness, or a digital equivalent in the form of a scanner. If your goal is prints, scanning at home gets you to a printable file without building a darkroom.
Is It Worth Developing Your Own Black and White Film?
Knowing how to develop black and white film at home step by step changes how you shoot. Once you have processed a roll yourself you understand exposure, latitude and contrast as one connected process rather than three separate rules.
Start with a forgiving film, hold 20C / 68F with a water bath, and follow the chart for your developer. After three or four consistent rolls the process becomes automatic, and from there the possibilities — push, pull, medium format, your own printing — open up quickly. Updated for 2026.