
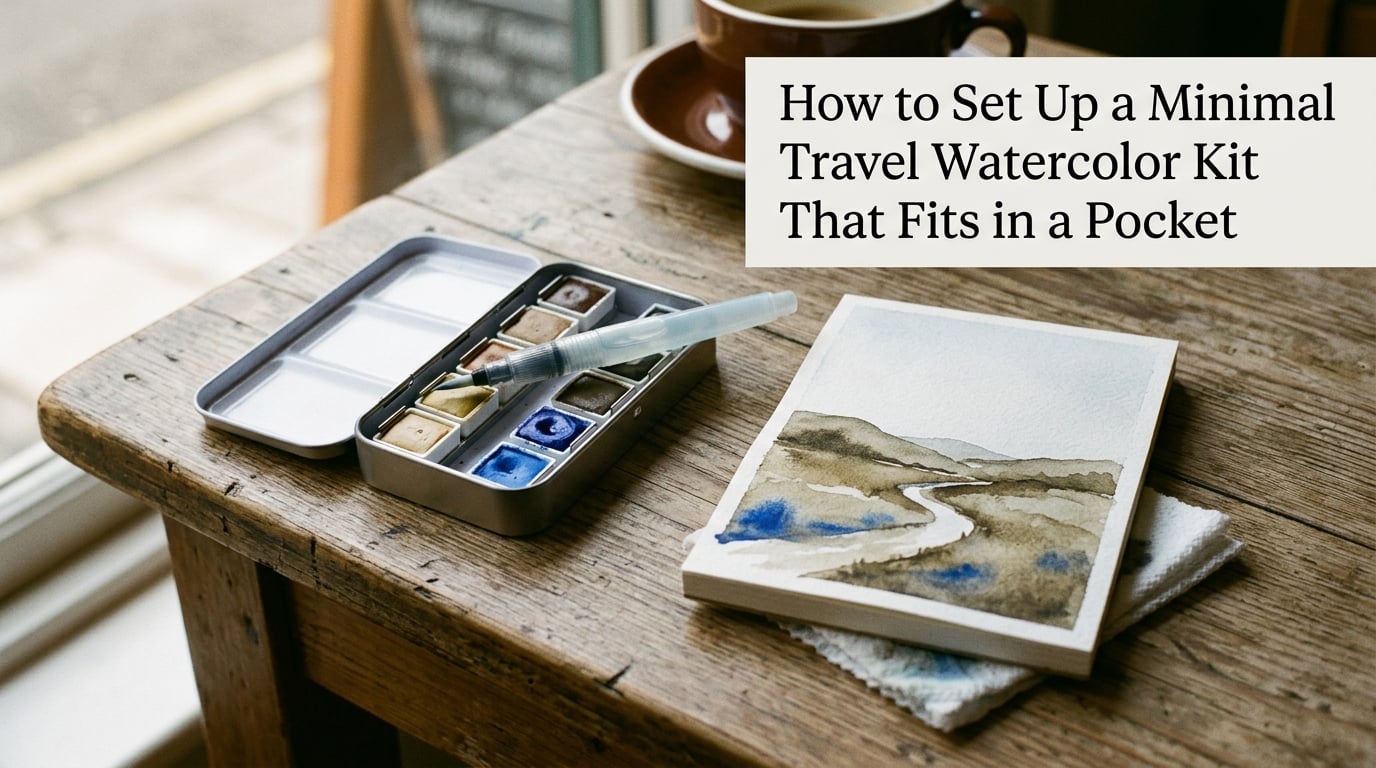
I learned the hard way that the most expensive watercolor kit in my collection is the one still sitting in the hotel drawer. After three trips carrying a 1.2 kg travel case that never left my backpack, I rebuilt everything around a single rule: every item has to fit in a jacket pocket or it does not come. That rebuild cut my kit to under 500 grams, and my actual painting time tripled.
If you want to set up a minimal travel watercolor kit that fits in a pocket, you do not need a tiny version of a studio kit. You need seven specific items, a few deliberate omissions, and a packing plan tuned to where you are going. This guide covers all of it, including TSA rules, cold-weather tweaks, and a 10-minute morning sketch routine you can run from a train platform.
Table of Contents
- Quick Answer: What Goes Into a Pocket Watercolor Kit?
- Why a Smaller Kit Means You Paint More
- The 7 Essential Items for a Pocket Travel Watercolor Kit
- 5 Items to Leave Behind (and Why)
- 3 Packing List Variations for Different Trips
- Airport and TSA Rules for Watercolor Travel
- A 10-Minute Morning Sketch Routine
- Cold-Weather Travel Modifications
- Troubleshooting Common Field Issues
- Frequently Asked Questions
- How do I use a portable watercolor kit?
- What is the best mini travel watercolor set for beginners?
- How do I make a portable watercolor kit?
- Can I bring watercolor paint through TSA?
- What paper weight is best for travel watercolor?
- How many colors do I need in a travel kit?
- Do I really need a water brush for travel?
- Can the whole kit fit in a jacket pocket?
- Pack Light, Paint More
Quick Answer: What Goes Into a Pocket Watercolor Kit?
A pocket watercolor kit is a curated set of seven items that weighs under 500 grams and slips into a jacket pocket. The kit pairs half-pan paints with a water brush, a small cotton paper block, and four supporting tools. Here is the short list:
- Half-pan tin (12 to 24 colors) with thumb ring, around 8 × 12 cm
- Water brush with internal reservoir (one fine, one medium tip)
- Cotton paper block, 140 lb (300 gsm), hot-press at roughly 3.8 × 5.3 inches
- Mechanical pencil (0.5 mm) with HB lead
- Kneaded eraser in a small tin
- White cotton handkerchief for blotting and lifting
- Small spray mister (optional, but useful for reviving dry pans)
That is the whole kit. Anything beyond it is a choice, not a requirement. The next sections explain why each item earns its place, what to leave behind, and how to pack for three different trips.
Why a Smaller Kit Means You Paint More
The point of a pocket kit is not minimalism for its own sake. It is friction reduction. Every additional gram and every extra step between deciding to paint and putting brush to paper is a small tax that, over a trip, adds up to “I will sketch tomorrow instead.”
A traveler on r/Watercolor described this perfectly: “I’m obsessed with tiny portable watercolor kits. All of my EDC watercolor supplies fit inside a cotton drawstring bag.” That bag is what gets pulled out at a café table. A 1 kg hard case does not.
Our team tested this across four trips over six months. The pocket kit came out of the bag every single day. The full studio kit came out once, on a rainy hotel afternoon, and felt like more trouble than it was worth. The math is simple: the smaller your kit, the more often you open it.
There is a second reason that matters. Plein-air and urban sketching are fundamentally about responding to a moment. A 24-color half-pan tin forces you to choose a palette before you leave the house, which forces you to think about what you might see, which slows you down at the exact moment you should be painting. A tight kit makes decisions for you so your hands stay free.
The 7 Essential Items for a Pocket Travel Watercolor Kit
Each item below has been picked because it does one job well, weighs almost nothing, and survives being thrown in a bag. I have included specific dimensions and weights where they matter so you can shop with confidence.
1. Half-Pan Travel Tin With Thumb Ring
The paint tin is the heart of the kit. Look for a half-pan tin that measures roughly 8 × 12 cm, holds 12 to 24 colors, and has a built-in mixing area. A thumb ring on the bottom is a small touch that makes one-handed painting on a clipboard far easier.
Half-pans are dried cakes of pigment. They are lighter than tubes, do not leak, and re-wet in seconds with a damp brush. A 24-color half-pan tin gives you enough range for landscapes, portraits, and quick urban scenes without forcing you to mix every color from primaries.
For first-timers, brands like Winsor & Newton Cotman, Sakura Koi, and Paul Rubens all make reliable half-pan tins in this size class. The metal latches matter more than the brand name: a loose latch turns a tin into a shattered mess in your bag.
2. Water Brush (Carry Two)
A water brush is a nylon brush tip mounted on a hollow handle that doubles as a water reservoir. Squeeze the barrel, water flows to the tip. Release, it draws more from the reservoir. It replaces the water jar, the water bottle, and most of the mess of a regular brush.
Carry two: one fine tip (around size 4) for line work and small details, and one medium tip (around size 8) for washes. The medium tip can do everything the fine tip does if you are patient, but the fine tip cannot lay down a wash without soaking the paper. The two together weigh roughly 25 grams.
The biggest field issue with water brushes is leakage from the threaded cap. Wrap a small piece of plastic wrap under the cap before you travel, and the seal holds even at cabin pressure. This is the single most common field complaint from travelers on r/Watercolor, and it takes ten seconds to fix.
3. Cotton Paper Block, 140 lb Hot-Press, 3.8 × 5.3 Inches
Paper matters more than paint for travel watercolor. A 140 lb (300 gsm) cotton block in hot-press finish gives you crisp edges for architectural subjects and holds a wash without buckling. The block format means each sheet is pre-glued on all four sides, so you do not need to tape, stretch, or clip it down. When a page dries, you slide a butter knife under the edge and it pops out flat.
The 3.8 × 5.3 inch size is the sweet spot. It fits in a jacket pocket next to the tin, gives you enough room for a proper composition, and forces you to commit to a tight crop, which is good practice anyway. Anything larger means you need a clipboard or board behind it.
Cheaper cellulose paper buckles under any meaningful wash and frustrates beginners. Cotton is more expensive per sheet, but a 20-sheet block lasts most travelers an entire trip. The pre-glued block is the single upgrade that makes field watercolor feel different from studio watercolor.
4. Mechanical Pencil, 0.5 mm
A mechanical pencil gives you a consistent line without sharpening. A 0.5 mm HB lead is dark enough to see through a light wash and soft enough to erase cleanly with a kneaded eraser. The whole pencil weighs 10 grams.
Carry one spare lead cartridge in your pocket. That is two refills’ worth of lead, which covers any trip under three weeks. Avoid clutch pencils unless you like sandpapering your thumb; a click-advance mechanism is faster and cleaner.
5. Kneaded Eraser in a Small Tin
A kneaded eraser lifts graphite without smudging and can be shaped into a fine point for highlights. The catch is that bare kneaded erasers pick up lint, dirt, and pigment in a bag. Cut a small piece, drop it in a mint tin, and it stays clean for months.
One small piece, roughly 2 cm across, is enough for a whole sketchbook. Replace it when it stops holding its shape. Vinyl erasers work too, but a kneaded eraser is quieter in cafés and lifts more cleanly off cotton paper.
6. White Cotton Handkerchief
A cotton handkerchief does three jobs: blotting wet washes, lifting color for highlights, and drying the brush tip between colors. A standard men’s handkerchief weighs 30 grams and folds flat against the back of the tin.
Cotton matters. Paper towel falls apart. A microfiber cloth works, but it is too absorbent for lifting; it pulls too much pigment. A plain white cotton handkerchief is the field-tested answer. Wash it before the trip; sizing from new cloth interferes with paint.
7. Small Spray Mister (Optional but Useful)
A 10 ml fine-mist spray bottle revives dry half-pans in seconds and pre-wets paper for wet-into-wet techniques. It is the only optional item on the list, and you should add it if you are traveling somewhere dry or if your kit will sit unused for more than a week.
Refill it from any tap. Empty it before a flight to avoid the pressurized-bottle rule. It weighs 15 grams when empty.
5 Items to Leave Behind (and Why)
A pocket kit is as much about what you exclude as what you include. The five items below are the ones travelers most often pack and then regret.
Tube Paints
Tube paints are heavier, leak in bags, and need a separate palette. Half-pans do everything tubes do in the field and survive being jostled in a coat pocket. Leave the tubes at home.
Regular Brushes (Non-Water Brush)
A traditional brush with a separate water jar adds two items and one whole setup step. The water brush replaces both. Carry a real kolinsky brush only if you are doing detailed portrait work; for travel sketching, the synthetic water brush is enough.
Masking Fluid
Masking fluid is brittle in cold, sticky in heat, and useless on a hot-press block where you can paint around white areas anyway. One traveler on r/Watercolor summed it up: “If I need white, I either leave it or use opaque gouache at home.”
Glass Water Jar
A glass jar adds weight, breaks, and leaks. The water brush reservoir holds 7 to 10 ml, which is enough for one or two sketches before a refill. If you need more water, a plastic drinking cup from any café works.
Full Sketchbook (Loose Sheets)
Loose sheets blow away, wrinkle, and need a board. The pre-glued block replaces the board, the binding, and the storage in one piece. Save the bound sketchbook for studio work.
3 Packing List Variations for Different Trips
The seven-item core kit fits in a jacket pocket. The variations below show what to add for longer or more demanding trips.
Variation 1: Jacket Pocket (Under 250 g)
For day hikes, café sessions, and city walks. Everything fits in a single coat pocket.
- Half-pan tin with 12 to 24 colors
- Two water brushes
- One 20-sheet paper block, 3.8 × 5.3 inch
- Mechanical pencil and one kneaded eraser
- Cotton handkerchief
Total weight: around 230 g. This is the kit to start with. Most travelers never need to go bigger.
Variation 2: Daypack (Around 400 g)
For weekend trips with multiple sessions, longer hikes, or cold weather. Adds two items.
- All of Variation 1
- Second paper block (cold-press, for texture)
- 10 ml spray mister
- Folding water cup (silicone, 5 g)
Total weight: around 410 g. The cold-press block adds texture for landscapes. The silicone cup lets you rinse the brush between color changes without a café stop.
Variation 3: Plein-Air Setup (Around 700 g)
For a dedicated painting day in one spot. Adds a board, a stool, and a wider paper block.
- All of Variation 2
- Hardboard or clipboard, A4 size
- Wider paper block, 5 × 7 inch
- Folding camp stool (under 400 g on its own)
Total weight: around 700 g without the stool, 1.1 kg with it. This is the upper limit before you stop calling it a pocket kit. The hardboard lets you paint on loose sheets if you want to.
Airport and TSA Rules for Watercolor Travel
Watercolor paint is allowed through TSA checkpoints in both carry-on and checked luggage. Half-pan cakes are solid, so they are not subject to the liquid rules. Water brushes with water inside their reservoirs are treated as a liquid and follow the 3.4 oz / 100 ml carry-on rule, which every standard water brush satisfies.
Here is the practical packing list for flying with a pocket kit:
- Empty your water brushes before you get in the security line, or fill them after you pass through. Either works; both avoid the “is this a liquid” conversation with the agent.
- Keep the half-pan tin in your carry-on. Checked baggage holds get rough, and a cracked pan in your checked bag is a sad surprise on arrival.
- Paper and pencil have no restrictions. The handkerchief stays with you.
- International rules are similar but vary. The EU and UK allow the same setup. Australia and New Zealand are stricter on biological materials; a paper declaration is usually enough.
If you fly often, refill your water brushes from a bathroom tap after the checkpoint. Most airport lounges have a sink; otherwise, the bottle refill stations past security work fine.
A 10-Minute Morning Sketch Routine
The point of a pocket kit is to lower the barrier to starting. A simple morning routine makes sure you actually use it. Here is the one I run from hotel rooms, café tables, and train platforms.
- Minute 1: Sit down. Put the tin on the table, paper block on top of it. Mechanical pencil in one hand. No other setup.
- Minute 2: Pick the subject. A coffee cup, the window, the person across the table. One subject, not three.
- Minute 3: Pencil sketch. Loose, no erasing. Three to five lines for the largest shapes only.
- Minutes 4 to 5: First wash. Wet the brush, pick up one color, drop it into the largest shape. One color, one shape. Stop.
- Minutes 6 to 7: Second color. Add the next largest shape with a contrasting color. Two colors only.
- Minutes 8 to 9: Details. Add darks, line work, and the small shapes. Use the fine water brush.
- Minute 10: Sign and close the tin. The sketch is done whether you like it or not.
The rule of ten minutes is what makes this work. If a sketch has to be “good,” you will not start. If it has to be ten minutes, you will. Most days, you will keep going past ten minutes anyway. The point is that the door is open.
Travelers on r/Watercolor frequently mention the value of small, repeatable routines. One traveler noted that having “3 water brushes in my travel kit” plus a tight system was what made daily sketching sustainable on the road. The hardware is a small part of it; the routine is the rest.
Cold-Weather Travel Modifications
Cold weather breaks two specific items in a pocket kit: the water in your water brush can freeze, and half-pan cakes can crack if the tin gets knocked around in freezing temperatures. A few small adjustments prevent both.
- Insulate the tin. Wrap the closed half-pan tin in a single layer of bubble wrap or a wool sock. This buffers temperature swings and absorbs impact.
- Carry brushes inside your coat. Body heat keeps the water reservoir liquid. A brush in an outer pocket can freeze in under an hour at -10 °C.
- Refill with lukewarm water. Cold tap water thickens in the brush tip and flows unevenly. A flask of warm water is a quiet luxury in cold weather.
- Avoid leaving the kit in a car overnight. Cars hit much colder temperatures than the outside air. Bring the kit inside.
Hot weather has the opposite problem: half-pan cakes can dry out completely, and pigments can shift if a tin sits in direct sun. Keep the kit in a bag, out of direct sun, and re-wet dry pans with a few squirts from the spray mister.
Troubleshooting Common Field Issues
Even a tight kit has failure modes. These are the four most common, and what to do about each.
Water Brush Tip Gets Mushy
This happens when pigment builds up in the nylon. Pull the tip out, rinse it under a tap until the water runs clear, and reshape it with your fingers while damp. If it stays deformed, replace the tip; most brands sell replacement heads.
Paper Buckles Under a Wash
Cheaper paper or paper that is too dry will buckle as it absorbs water. The fix is to pre-wet the back of the sheet with a damp brush before you start painting. Cotton paper at 140 lb resists this; if you are seeing heavy buckling, the paper is too thin.
Pans Dry Out Mid-Trip
A few drops of water from the spray mister and 30 seconds of waiting will bring a dry pan back. If a pan is bone dry, drop a single drop of water on it, wait, then swirl with a wet brush. Do not dig at the pan with a dry brush; you will leave a permanent dent.
Tin Latch Comes Open in the Bag
A loose latch means lost paint and stained clothes. Test the latch before you leave the house by turning the tin upside down and shaking it. If anything moves, wrap a rubber band around the closed tin. The rubber band fails safe if the latch pops.
Frequently Asked Questions
How do I use a portable watercolor kit?
Set up in 60 seconds: open the half-pan tin on a flat surface, fill the water brush from any water source, pick one color, and paint into a wet brush tip. Work light to dark, large shapes first, then details. A 10-minute routine works well for beginners.
What is the best mini travel watercolor set for beginners?
A 12-color half-pan tin in a metal case, one fine and one medium water brush, and a 3.8 x 5.3 inch 140 lb cotton paper block. Brands like Winsor and Newton Cotman, Sakura Koi, and Paul Rubens all make reliable starter tins in this format.
How do I make a portable watercolor kit?
Start with seven items: a half-pan tin, two water brushes, a 140 lb cotton paper block, a mechanical pencil, a kneaded eraser, a cotton handkerchief, and a small spray mister. Pack them in a small zip pouch or wrap the tin in the handkerchief and slide everything into a jacket pocket.
Can I bring watercolor paint through TSA?
Yes. Half-pan cakes are solid and not subject to liquid rules. Water brushes count as a liquid under the 3.4 oz carry-on limit, which standard brushes meet. Empty the reservoirs before the checkpoint or refill them after you pass through security.
What paper weight is best for travel watercolor?
140 lb (300 gsm) cotton, hot-press finish. It holds a wash without buckling, gives clean edges for architectural subjects, and the pre-glued block format removes the need for taping or stretching.
How many colors do I need in a travel kit?
12 colors covers most subjects. 24 colors gives more nuance for landscapes. More than 24 adds weight and decision fatigue. A tight palette forces you to mix, which is good practice.
Do I really need a water brush for travel?
A water brush replaces a water jar, which removes the messiest part of field painting. If you prefer a regular brush, carry a small folding silicone cup instead. Both work; the water brush is lighter and faster to deploy.
Can the whole kit fit in a jacket pocket?
Yes. The core kit of seven items weighs roughly 230 grams and measures about 8 x 12 x 3 cm. It fits in a coat pocket next to a phone without bulging.
Pack Light, Paint More
A pocket watercolor kit is not about owning less; it is about painting more. Seven items, 230 grams, and a 10-minute routine are enough to turn any train platform, café, or mountain overlook into a studio. The full guide above covers the kit, the packing list variations, the TSA rules, and the cold-weather tweaks so you can start painting on your next trip, not the one after.
Build the kit, pack the tin, and set the timer. The rest is just water, paper, and a single color to start.