
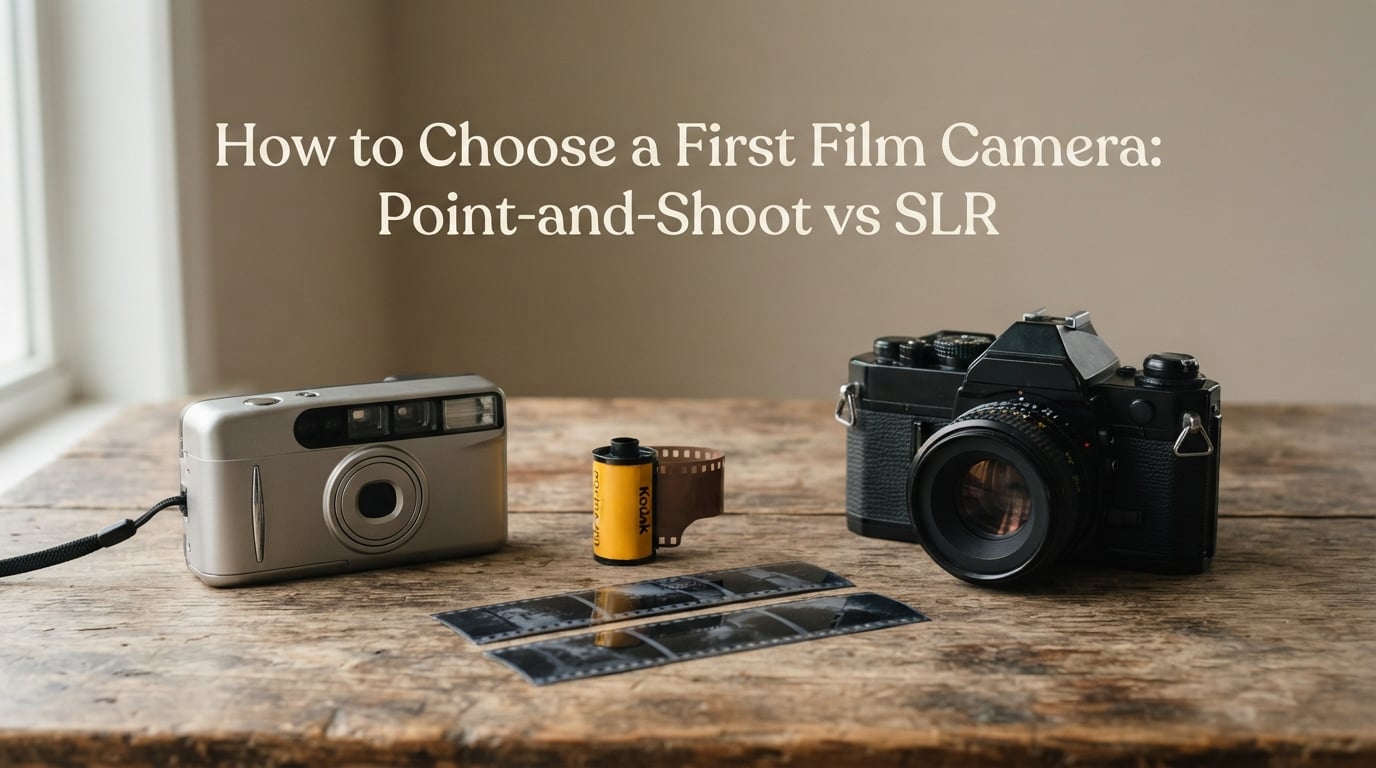
If you have been searching for your first film camera, you have almost certainly hit the same wall we did: not a shortage of options, but too many sensible ones. A straightforward 35mm point-and-shoot will make good photographs for you today. A mechanical SLR will teach you how photographs work, if you are willing to make bad ones for a month first. Both are legitimate answers, and the wrong one is the reason a lot of cameras end up on a shelf within a year.
The decision is smaller than it feels. It comes down to one question: do you want a camera that takes photos for you, or a camera that teaches you to take photos? Everything else — weight, lens, format, budget — follows from that answer.
Why bother with film now, when a phone takes a better photograph in a second? Because film slows you down, gives you one frame at a time instead of four hundred, and hands you a physical object instead of a memory card. That constraint is the entire appeal. A generation raised on instant digital results is discovering that a camera which makes you wait changes how you look before you press the shutter. The second-hand compact market has noticed that too, which is part of why ignored point-and-shoot bodies have become one of the more talked-about corners of the used film market.
We spent weeks reading the beginner forums for this one, because the confusion is visible there in a way it never is in a spec sheet. A widely-cited thread on r/AnalogCommunity for this question opens with a list of four candidate cameras and no idea which to pick. The panic is not about image quality. It is about whether the camera will be too complicated, or too automatic, and whether the owner will still be shooting in six months.
Last reviewed in 2026. The guidance below is based on what people report after living with these cameras, not on catalogue specifications, and it deliberately names no single winner — because there is not one. It is also deliberately free of product promotions: a shop that sells both types has no reason to help you decide faster.
Table of Contents
- How to choose a first film camera: point-and-shoot vs SLR
- What a point-and-shoot film camera actually is
- What an SLR film camera actually is
- Point-and-shoot vs SLR: side-by-side comparison
- Two paths: learning the craft vs just getting good photos
- Choosing a point-and-shoot film camera
- Choosing your first SLR film camera
- Where the rangefinder fits
- What to check before you buy a used film camera
- What it actually costs to shoot film
- Common first-film mistakes
- Frequently Asked Questions
- What is the best starter film camera for beginners?
- What film camera should I buy for beginners?
- What is the best point-and-shoot film camera for a beginner?
- Should I get an SLR or a point-and-shoot as my first film camera?
- What is the difference between point-and-shoot and SLR film cameras?
- What to know before buying a film camera?
- Is 200 or 400 film better for beginners?
- Why are people obsessed with digital cameras again?
- What is the 20-60-20 rule in photography?
- Conclusion: your decision in one paragraph
How to choose a first film camera: point-and-shoot vs SLR
Buy a point-and-shoot if you want film photographs with almost no learning curve and a camera you will actually carry. Buy an SLR if you want to learn aperture, shutter speed and focus yourself, and can accept a heavier body and a slower start. If you want a middle path, buy an SLR with aperture-priority and full auto, and use manual later if you get hooked. Avoid buying either until you have decided which of those two people you are.
That is the whole decision. The sections below explain what each type actually is, where each one fails, and how to inspect a used example before you commit.
What a point-and-shoot film camera actually is
A point-and-shoot film camera is a compact 35mm camera with a fixed lens that handles focus and exposure for you. You point it, press the shutter, and the camera meters the scene, chooses an aperture and a shutter speed, and advances the film. There is usually a built-in flash and a light meter, and on many models a small zoom lens.
What it is not is a lesser camera. It is a different division of labour. The camera’s job is to remove the technical decision from the moment of taking a photograph so you can concentrate on being present for it. That is a real photographic philosophy, not a compromise, and plenty of working photographers shoot primarily with fixed-lens compacts.
Here is what you are accepting when you choose one:
- Fixed lens. You cannot change the focal length beyond the built-in zoom range, and you cannot shoot wide open at f/1.8 unless that specific model was built that way. If your work needs interchangeable lenses, this ends the discussion.
- Aperture range limits. Compact zooms typically run from f/2.8 at the wide end down to f/8 or so. Background blur is therefore limited. That matters for portraits; it does not matter much for street or travel work.
- No interchangeable exposure control. Many 1990s compacts have no manual override at all, and a few have a hidden one behind a menu. If the camera cannot be forced into a specific aperture and shutter speed, you are always trusting its meter.
- Electronic dependence. Most of these cameras need batteries for exposure metering, and many will fire the shutter with the film transport dead as long as the battery is fine. A dead cell is a dead camera until you replace it.
One practical limitation worth naming comes from a first-time shooter’s account on r/AnalogCommunity. Their point-and-shoot’s zoom would not focus well on anything closer than about a metre, which made close-up work a non-starter. If you shoot small objects, food, or detail at short distances, test the minimum focusing distance before you commit.
The honest upside: the film is the same film, the negative is the same negative, and a sharp 35mm lens produces an excellent image. The gap in quality between a good compact and a good SLR frame is much smaller than the gap in how you have to behave to get it.
What an SLR film camera actually is
An SLR — a single lens reflex — is a camera where you look through the taking lens itself. Light passes through the lens, hits a reflex mirror angled at 45 degrees, is reflected upward into a pentaprism, and comes out to your eye through the viewfinder eyepiece. When you press the shutter, the mirror swings up, the shutter opens, the frame is exposed, and the mirror drops back. That movement is the mechanical clunk you hear on every shot, and it is the reason an SLR is the more complicated object to build.
You are seeing the exact frame you are about to record, which is not a small thing. On a compact with a separate optical finder, what you frame is an approximation of what you get, and the difference grows on close subjects.
What that construction buys you:
- Interchangeable lenses. Wide, normal, telephoto, close-up, whatever the subject demands. Most 35mm SLR mounts from the 1970s through the 1990s have decades of inexpensive glass available.
- Through-the-lens metering. The meter reads the light coming through the lens, so it accounts for filters and bellows factors. Exposure is measured from the film plane.
- Real exposure control. Aperture, shutter speed, and on most bodies programme, aperture-priority and shutter-priority modes. You set what matters for the shot and let the camera handle the rest.
- Serviceability. A mechanical SLR is a repairable object. Seals, shutter, mirror, light meter — each is a known part with a known specialist.
Here is what it costs you. Bodies with a prism and a mirror mechanism are heavier and taller than a compact. A 50mm f/1.8 is a real lens, which means real weight, and a body that hangs around your neck all day is a body you will stop hanging around your neck. Many neglected SLRs also need a CLA — clean, lubricate, adjust — before they are trustworthy, and that service is worth having done on any body you buy.
Focusing is manual on almost all of them, and the technique is easy to learn badly and hard to learn well. A split-image or microprism collar in the centre of the focusing screen turns slightly blurry into a distinct split or shimmering patch, which is far easier to read than “looks about right”.
Point-and-shoot vs SLR: side-by-side comparison
Here is the plain-language version. Every row is something a beginner actually has to decide about.
| Decision you are making | Point-and-shoot | SLR |
|---|---|---|
| Who sets exposure | Camera decides, on most models | You decide, or you pick a priority mode |
| Lenses | Fixed, often a modest zoom | Interchangeable, decades of used glass |
| What you see when you frame | Approximate, and sometimes nothing at all without the flash | Exactly the frame, through the taking lens |
| Size and weight | Pocketable, carried daily | Noticeably heavier, needs a strap |
| Steepest part of the curve | Framing, loading film, and shooting distance | Aperture, shutter speed and manual focus |
| What you learn | Seeing, pacing, and reading light intuitively | Exposure and optics, transferable to every camera you will ever own |
| How you can use it in low light | Generally more forgiving | Depends entirely on the lens you chose |
| Typical thing that goes wrong | Battery drained, corroded electronics, dead shutter | Dried light seals, sticky shutter, haze in the mirror box |
| Can a specialist fix it | Sometimes, and the part may no longer exist | Usually — these are simple mechanical objects |
| Cost per 36-exposure roll | Same film, same developing | Same film, same developing |
| Best suited to | Travel, street, everyday life, events, anyone who wants pictures | Anyone who wants to learn the craft and shoot deliberately |
Two rows deserve emphasis. The running cost is identical between the two types — film and developing are the same — so the camera you choose is not the thing that makes film expensive. And the repairability gap is wider than most beginners expect: an inexpensive mechanical SLR is one of the most fixable cameras you can own, while an obscure electronic compact may be unrepairable precisely because the integrated circuit is unobtainable.
Weight and size are not minor details, either. The gap between the two is the difference between a camera in your pocket and a camera on a strap, and the camera you will carry is the camera that gets used.
Two paths: learning the craft vs just getting good photos
There are two honest answers to “what is the best starter film camera for beginners”, and they are not competing so much as serving different people. Path one is learning: you want to understand why photographs come out the way they do, and you are willing to spend a month making exposures you are not proud of. Path two is shooting: you want the film look, the constraint of one frame, and the fun of it, without a technical curriculum. A point-and-shoot serves path two. An SLR serves path one.
A third path keeps coming up among experienced film shooters, and it suits a lot of beginners. Buy an SLR that has aperture-priority and full auto, and treat the manual modes as something to unlock when you are ready. One highly-upvoted position on r/AnalogCommunity puts it plainly: an aperture-priority or full auto SLR is equal to or better than a manual body on literally every aspect for a beginner, because you can always turn the dials up later but you cannot learn anything from a body that will not let you. Another thread makes the same point independently, recommending a body with programme or shutter priority because most people arriving at film have already taken photographs before.
What you genuinely learn on a point-and-shoot is worth defending, because almost every comparison on this topic treats it as a null result:
- You learn to read light. A meter-free compact forces you to watch where the light is and how strong it feels, which is the raw material of every exposure decision you will ever make.
- You learn the Sunny 16 rule. In bright sun, set the shutter to the ISO and pick f/16; in overcast light, f/11. It costs nothing to learn and it works on every camera made since.
- You learn to commit. No review screen, no reshoot. The constraint is the point, and it changes how you approach a scene.
- You learn framing and pacing. With no manual exposure override, the technique you have to develop is being there at the right moment.
What you cannot learn on a point-and-shoot: how aperture shapes depth of field, how shutter speed changes motion, and how a lens choice changes a photograph. That knowledge is not required to make good pictures, and if it does not interest you, no compact will teach it and no SLR will make you care.
Forum opinion is genuinely split on this, and the split is the useful part. One beginner who tested a Pentax Espio 60 point-and-shoot against a Canonet rangefinder found the compact far more forgiving in dim light, while the rangefinder produced soft, overexposed frames on a sunset test roll. The lesson is not that compacts are better. It is that the easier camera really is easier in practice, not just on the spec sheet — and that your first camera should be the one that keeps you shooting through week three.
Our own framing, after weighing all of this: if you are unsure, take the aperture-priority SLR with a normal prime lens. It teaches you the most and it forgives the most. Choose the point-and-shoot when your honest reason for buying film is that you want to be present for the photograph rather than studying it.
Choosing a point-and-shoot film camera
If the decision is made, look for four things in this order: a working light meter, a lens that focuses as close as you need, a manual override, and a body from a maker that still has parts. Everything else is aesthetic.
Check the manual override first. This is the single thing that can make a compact a bad first camera. Plenty of older 1990s compacts have no aperture or shutter control at all, or bury a partial one in a menu. Ask the seller, and if there is no manual mode, treat the camera as a point-and-shoot and not as a learning tool.
Test the close-focus distance. A zoom that will not focus inside a metre rules out still life, food and detail work. Many compacts are excellent far away and useless up close.
Ignore the reputation premium. Overpaying for a model that is famous on social media is a common regret in the beginner threads. A well-kept, working, unremarkable compact from a known maker will out-perform a hyped one with a tired shutter.
Representative examples, grouped by what you are getting rather than by brand prestige:
- Low-end. A basic 1990s compact from Olympus, Nikon, Minolta or Canon with a working meter. Expect manual focus and little else. The Nikon L35AF and Olympus Stylus Epic sit in this class and come up most often when people describe a first outing.
- Middle of the range. A later compact with a decent zoom and a multi-zone autofocus, such as the Olympus MJU series or an equivalent from the same makers. Better close focusing and more reliable exposure in difficult light.
- When money is not the constraint. A fixed-lens rangefinder-compact with a fast prime, such as the Olympus XA or a Canonet. Better optics and genuine manual control, with rangefinder focusing explained below.
One more route deserves a mention because almost nobody on the search results covers it: shoot half-frame. A 36-exposure roll of 35mm gives you 36 shots at full frame; the same roll in an older 35mm half-frame camera gives you 72, each one 24 by 18 millimetres. The images crop beautifully on a phone or a screen, and the cost per photograph roughly halves. It is the most practical way to find out whether you enjoy film at all before committing to the format properly.
Choosing your first SLR film camera
The SLR market is unusually kind to beginners because the whole mechanical generation is still around in large numbers and the parts still exist. Choose a body first, then a normal lens, and resist buying a kit with a bundled zoom when a normal prime is all you need.
Decide on manual versus semi-automatic, and this is the part that deserves real thought rather than folklore. A fully mechanical body like the Pentax K1000 or Canon AE-1 will outlive your interest in it, because a dead battery cannot stop it firing. An aperture-priority body gives you a learning curve that ends somewhere rather than beginning at a wall. If you are learning, pick aperture-priority. If you are buying a camera to use for decades, pick mechanical.
When choosing, favour these qualities:
- A maker with a service ecosystem. Pentax, Canon, Nikon, Minolta and Olympus all have parts, specialists and manuals. Obscure brands are not automatically bad, but they are harder to fix.
- A clear focusing screen. Split-image or microprism is a real teaching aid. Avoid bodies with a plain screen if you are learning focus.
- A body that has had a CLA. On a mechanical SLR this is close to a requirement. Dried lubricant makes the shutter slow and erratic, and the money spent on servicing before you start is money well spent on the camera itself.
- A light meter that still reads. If it does not, you can still shoot on Sunny 16 and have the negatives printed by a lab — but you lose the fastest part of the learning loop.
Representative bodies, from the simplest mechanical designs through to the later semi-automatic ones:
- Mechanical basics. Pentax K1000, Canon AE-1, Nikon FM2, Minolta X-700. Inexpensive, reliable, endlessly repairable.
- Semi-automatic middle ground. Canon AE-1 Program, Nikon FE2, Minolta X-300, and the Olympus OM-10 or OM-2, which are smaller and quieter than most SLRs of the era.
- Higher tier. Later bodies with program modes, faster autofocus on some, and better metering.
What to avoid: bodies sold as untested, anything described as “just needs new light seals” without a test roll, cracked prisms, and any camera whose shutter has not been fired. A clean body that has been sitting unused is a better bet than a working one that has been leaking battery acid for a decade.
And buy one normal lens. A 50mm f/1.8 or f/2 is the standard first lens on 35mm SLR and it fits most mounts from the 1970s through the 1990s. Everything else can wait until you know what you actually need.
Where the rangefinder fits
The rangefinder is the third option, and it ranks on related searches, so it is worth ten sentences. A rangefinder has no mirror and no prism. You frame through a separate finder, and focus by superimposing two images of your subject until they align — the rangefinder patch in the centre of the view goes from a double image to a single one when focus is correct. It is a genuinely pleasant way to focus, and it produces no mirror-shake, so it is the quietest option for street and documentary work.
Rangefinders are smaller than SLRs, quieter, and often carry glass that holds up well over the decades. Their cost is that exposure is usually manual and the meter is a match-needle rather than through-the-lens, so there is a short period during which you will produce underexposed or soft frames. As we noted above, at least one beginner’s test of a Canonet produced exactly that.
Where does a twin-lens reflex fit? As a “not yet”. A TLR shoots 120 medium format on 6 by 6, has a bright waist-level finder, and produces files of twelve frames per roll. It is a beautiful way to shoot and a costly way to learn, because a roll of 120 runs well beyond a roll of 35mm and a mistake eats a whole frame rather than a fraction of one. Same answer for 120 film generally: not your first format.
What to check before you buy a used film camera
This is the checklist that protects your money, and it applies to both types. Go through it in this order, in good light, with the seller present if possible. If a shop will not let you, that is information.
- Fire every shutter speed. On an SLR, run through the slow speeds and listen. Any hesitation, grinding, or a sound unlike a clean mechanical clunk means a service. On a compact, fire several frames and confirm the film counter and the motor behaviour.
- Test the meter against a known-good one. Point both at a mid-grey subject and compare readings. On a manual body, confirm the needle moves and swings freely rather than sticking.
- Watch a full roll advance and rewind. The sprocket must engage every frame. A camera that advances two frames and slips is a common fault worth avoiding.
- Look through the finder. The image should be bright and even across the whole frame, not dim at the edges. On an SLR, look for haze or fungus on the focusing screen and the mirror, and for a mirror that returns firmly after firing.
- Inspect the lens glass. Hold it to a window and look through at a dark background. Fog, haze or fungal strands are visible as a milky film. On a fixed-lens compact, check the taking lens the same way.
- Look at the light seals and the film door. Peeling or crumbling foam is a twenty-minute job, but only if the seller has not already let moisture into the body. Check for rust or residue in the film chamber.
- Test the flash and the batteries. Many compacts need a battery to meter at all. Carry a fresh cell and confirm the shutter fires.
- Check the body. Dents in the prism housing, a cracked eyepiece, a stiff advance lever, or corrosion around the battery compartment are all reasons to walk away or to factor the repair into your decision.
Finally, the simplest test of all: shoot one roll, get it developed, and look at it. Not a roll of a model you hope to buy. The seller. This is standard practice in the film community and it is the only check that tells you what the camera actually does rather than what it is supposed to do. Treat the first roll as a scientific exercise, not a creative one, and log the settings as you go.
When you buy new-old-stock, your risk drops dramatically. The camera has never been used and never left in a humid cupboard, so most of the checklist above becomes a formality.
What it actually costs to shoot film
The camera is the smaller part of the outlay. The recurring cost is film and processing, and it is identical whether you own a compact or an SLR.
Work it out per roll. Add what you paid for a 36-exposure roll of 35mm colour negative film to the lab’s charge for developing and printing that roll, then divide by 36. That is your cost per photograph before scanning. If you develop at home instead, the lab charge disappears and your main costs are the chemistry, the film, and the time.
Then multiply by how much you will actually shoot. A 36-exposure roll used once and forgotten costs the same as one used fully, and a lot of beginners shoot four frames and leave the rest to expire. Track it for a month and you will know your real shooting rate, which for most people is lower than they assumed.
Two levers cut this sharply. Half-frame gives you 72 exposures from the same roll, which halves the cost per photograph. And a point-and-shoot’s fixed aperture and the Sunny 16 rule mean fewer failed frames, while an SLR lets you stop down to a fast film and control depth of field, so you can choose the film that suits the shot instead of always using the most forgiving speed.
Add the one-off servicing cost. A CLA on an SLR is a service you should budget for, and new light seals on either type are a small job you can do yourself. Treat both as part of the purchase, not as a surprise later. And budget for scanning if you want to share your work online, since that is a per-roll cost too.
Common first-film mistakes
All of these are mistakes beginners describe making before they had a reason to know better. They are easy to avoid once you know they exist.
- Loading film in dim light or with the back open too long. One mishap ruins an entire roll. Load in shade, keep the back open briefly, and practise with a dead roll until the mechanism is familiar.
- Buying the wrong format. 35mm cameras take 135 film, 120 and 6 by 6 TLRs take 120. They are not interchangeable and the mistake shows up only when you try to load.
- Starting on film that punishes mistakes. Slow, fine-grained film is beautiful and unforgiving. A mid-range ISO film is easier to expose and forgive of over- and under-exposure, and it is the sensible first choice for most people.
- Paying a hype premium. It is a regret that shows up repeatedly in the beginner threads. A famous model with a tired shutter is a worse first camera than a boring one that works.
- Buying an SLR you will not carry. A camera at home is not a hobby. If you know you will not put a strap over your shoulder, buy the compact.
- Judging results before the film is developed. Focus and exposure mistakes on negatives are almost invisible until you hold prints. Judge from prints, and you will stop over-correcting.
- Skipping the service. A mechanical SLR that has not been lubricated in decades will frustrate you in ways that look like your own incompetence.
Frequently Asked Questions
What is the best starter film camera for beginners?
An SLR with aperture-priority and full auto is the most forgiving camera that still teaches you something, because the camera handles exposure until you decide you want to set it yourself. A point-and-shoot is the best starter if you want pictures rather than a curriculum. Whichever you choose, add a service or a test roll before you rely on it.
What film camera should I buy for beginners?
Buy one body and one normal prime lens rather than a kit. For an SLR, a mechanical model from Pentax, Canon, Nikon, Minolta or Olympus is inexpensive and repairable; an aperture-priority body is easier to learn on. For a point-and-shoot, look for a working light meter, a close-focus distance that suits your subject, and a manual override if you want to learn exposure.
What is the best point-and-shoot film camera for a beginner?
Look for a body with a working light meter, autofocus that holds up in dim light, and a manual exposure override. Basic 1990s compacts from Olympus, Nikon, Minolta and Canon are the usual recommendation at the low end, with the Nikon L35AF and Olympus Stylus Epic named most often. Test the minimum focusing distance before buying if you shoot anything close.
Should I get an SLR or a point-and-shoot as my first film camera?
Get an SLR if you want to learn how exposure and focus work and can accept a heavier camera and a slower first few rolls. Get a point-and-shoot if you want the film look with minimal friction and a camera small enough to carry every day. A recurring recommendation among experienced film shooters is an SLR with aperture-priority and full auto, so you can begin in automatic and turn the dials up whenever you are ready.
What is the difference between point-and-shoot and SLR film cameras?
A point-and-shoot has a fixed lens and chooses focus and exposure automatically. An SLR, or single-lens reflex, has interchangeable lenses and a mirror-and-prism system that lets you frame through the taking lens, with exposure set by you or by a priority mode. The SLR is heavier and harder to learn, but it teaches you skills that transfer to every camera.
What to know before buying a film camera?
Check that every shutter speed fires cleanly, the light meter reads, the film advance engages every frame, the viewfinder is bright and even, the lens glass is clear of haze or fungus, and the light seals are intact. Look for corrosion in the film chamber and around the battery compartment. New-old-stock removes almost all of this risk; a used body should come with a test roll.
Is 200 or 400 film better for beginners?
Neither is better, they are different tools. Faster film is more forgiving of exposure mistakes and needs less light, which suits dim interiors and moving subjects. Slower film has finer grain and more latitude in bright light, and suits sunny outdoor work. Start with a mid-range speed, learn what your camera does with it, then decide.
Why are people obsessed with digital cameras again?
Many are not. The appeal is the constraint: one frame at a time, no review screen, a physical object at the end of it, and a slower pace that makes you look before you shoot. Social media turned a lot of older compact cameras into fashion items, which is where the renewed second-hand interest comes from, though paying a premium for that reason is a regret beginners report often.
What is the 20-60-20 rule in photography?
A composition guideline, not a film technique: place the main subject roughly 20 percent in from one edge, 60 percent from the other, and let the remaining 20 percent be open space in the direction the subject is facing or moving. It is a starting point for framing, not a rule you have to follow.
Conclusion: your decision in one paragraph
Choosing your first film camera comes down to one honest question about who you want to be behind the viewfinder. If you want to be present for the photograph rather than studying it, buy a working point-and-shoot with a light meter, a close-focus distance that suits your subject, and a fresh battery in your pocket. If you want to learn how exposure and focus actually work, buy a mechanical or aperture-priority SLR from a maker with a service ecosystem, add a normal prime lens, and budget for a service before the first roll. The film and developing costs are the same either way, so decide on the camera you will actually carry, then go and shoot your test roll and find out which person you turned out to be.