
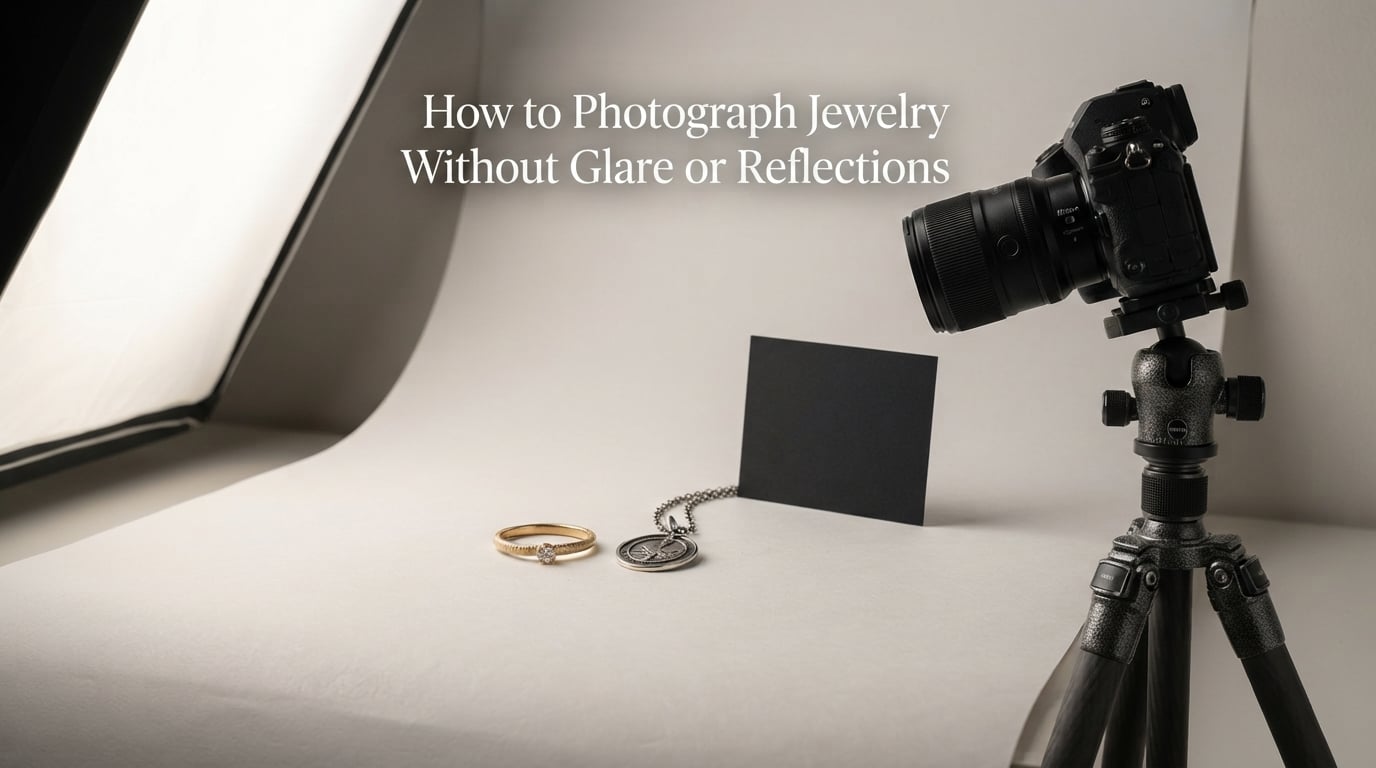
Jewelry is the most reflective material most people will ever try to photograph, and it is the category where amateur shots most often fail. Gold, silver, platinum, and polished gemstones do not scatter light the way a ceramic mug or a cotton shirt does. They send it back at the camera in sharp, mirrored hotspots that swallow the detail you actually want to show.
The good news is that glare is not a flaw in your camera or your talent. It is a physical behaviour of polished surfaces, and once you understand how it works, you can control it with a handful of specific, repeatable adjustments. This guide walks through the whole progression: why jewelry flares in the first place, what gear genuinely changes the result, how to place lights so reflections bounce away from the lens, how to use a polarizing filter properly, and how to fix what is left in editing.
I have shot product catalogs alongside our team, and the pattern is consistent across every shoot we have run. The images that look clean and sell are the ones where the lighting was set up deliberately, the surface was cleaned properly, and the settings were locked down. Consistency across a catalog matters more than any single hero shot, and glare is the fastest way to make a whole product line look untrustworthy.
By the end of this guide you will know how to photograph jewelry without glare or reflections, whether you are shooting on a phone, a mirrorless body, or a dedicated product setup.
Table of Contents
- How to Photograph Jewelry Without Glare: A Quick Start
- Why Jewelry Photographs So Much Glare
- Gear That Actually Solves Jewelry Glare
- Lighting Fundamentals: Soft, Hard, and the Angle Between Them
- The 45-Degree Rule, Step by Step
- Using a Polarizing Filter Correctly
- Building a Light Tent Setup
- Camera Settings for Jewelry Photography
- How to Focus Stack Jewelry Photos
- Product Preparation Before the Camera Comes Out
- Choosing and Removing the Background
- Lighting Setups by Jewelry Type
- Post-Processing Workflow for Jewelry
- Common Mistakes That Bring Glare Back
- Frequently Asked Questions
- What is the best way to photograph jewelry?
- How do you photograph shiny objects without glare?
- What camera settings are best for jewelry photography?
- Do I need a macro lens for jewelry photography?
- Why do my gemstones look dark in a light box?
- Does a polarizing filter remove all jewelry reflections?
- How many frames do I need for a focus stack of a ring?
- How do I get a pure white background for jewelry on Amazon?
- How do I get sparkle in jewelry photos?
- Is natural light good enough for jewelry photography?
- Conclusion
How to Photograph Jewelry Without Glare: A Quick Start
If you only have ten minutes, run through these five steps in order. Everything later in the guide is a deeper explanation of the same ideas.
- Clean the piece first. Use cotton gloves and a microfiber cloth so fingerprints never become reflections you have to retouch out.
- Use a large, diffused light source. A softbox or light tent beats a bare bulb, because a big source wraps light around the metal instead of firing a hotspot straight back.
- Move your key light to about 45 degrees off the camera axis. Reflections then travel back toward the light instead of into the lens.
- Add a circular polarizing filter and rotate it until the glare drops. A second polarizer on the light source gives you cross-polarization, the strongest glare control available.
- Shoot RAW, stop down to f/11 or f/13, keep ISO at 100 to 200, and recover highlights in editing. RAW keeps the tonal data you need to rescue a hotspot you did not fully control.
Why Jewelry Photographs So Much Glare
To photograph jewelry without glare you first need to know what glare actually is. The short answer is that a polished surface produces a specular highlight, and that highlight is what you see in your photo.
What a specular highlight is
A specular highlight is the mirror image of your light source, reflected off a smooth surface straight into the lens. On a matte object, light spreads out after it hits the surface, so no single point dominates. On polished gold or a cut gemstone, the light is reflected at one precise angle and arrives as a bright, hard-edged shape with an intensity that has no relationship to the actual colour of the metal underneath.
Angle of incidence is the angle at which light strikes the surface, and the reflected light leaves at exactly the same angle on the other side. If your light and your camera sit on the same line through the surface, the light bounces from the light, into the surface, and into the lens. That is the whole problem. Move either one and the reflection travels somewhere you are not pointing.
Fresnel effect is the reason this gets worse at the edges. At grazing angles, a surface reflects far more light than it does when you look straight at it, which is why the rim of a ring or the bevel of a bezel often glows white even when the centre looks correct.
One more effect matters for stones. A cut diamond does not just reflect light, it refracts and disperses it, splitting it into visible fire. That internal brilliance is what buyers want to see, and it is also what gets swallowed when a surface reflection sits on top of the facet pattern. Controlling glare is not about removing every highlight. It is about keeping the shaped, intentional highlights and losing the flat blown-out blobs that cover the craft.
Gear That Actually Solves Jewelry Glare
Most glare problems are solved with positioning, not equipment. Still, a short list of items earns its place in a jewelry kit because each one removes a specific failure mode.
- Diffusion material. A fabric softbox, a five-in-one reflector used as a scrim, or a sheet of white polyester between the light and the subject. This is the single highest-impact item on the list.
- Flags and negative fill. Black foam board or matte black card to kill reflections coming from the camera side.
- Circular polarizing filter. Threaded onto the lens, plus a second one that clips or tapes over the light source for cross-polarization.
- Light tent or light box. Encloses the subject in diffused light from every direction, which is the fastest fix for stubborn pieces.
- Macro lens or close-focus setup. A 90mm to 105mm focal length at 1:1 magnification gives comfortable working distance and less perspective distortion on rings and pendants.
- Solid support. A tripod, a macro rail, or a bean bag for the table. Handheld macro at f/11 will not hold focus.
- Colour reference. A grey or colour card in the first frame of the session makes white balance and skin-tone accuracy repeatable.
You do not need all of this on day one. Diffusion plus flags plus a polarizing filter solves the majority of problems, and the rest can follow as your catalog grows.
Lighting Fundamentals: Soft, Hard, and the Angle Between Them
Light has three properties you can change: quality, direction, and colour. Every glare decision follows from one of those three.
Quality: soft versus hard
A hard source is small relative to the subject. A soft source is large relative to the subject, typically several times wider. A one-metre softbox at half a metre from a ring reads as soft; a bare on-camera flash never does, no matter how far away you move it.
Wrapping light in a wide, soft source produces a gradient across the metal that shows its curve, which is what makes a photo read as three-dimensional. Hard light produces a flat white shape that hides the curve entirely.
Direction: where the light sits
- Front lighting sits near the camera axis. It is the worst possible choice for jewelry because it guarantees a reflection straight back into the lens.
- 45-degree side lighting is the workhorse. It throws reflections outward and away from the camera while still modelling the surface.
- Backlighting or rim lighting puts the light behind or above the subject, defining edges and separating dark pieces from a dark background.
- Top lighting suits chains and pendants laid flat, and it makes certain stones read darker because light enters the table from a shallow angle.
Colour: temperature and rendering
Mixing a warm window with a cool LED is the most common cause of colour that shifts from shot to shot, and inaccurate colour on a gold piece translates directly into returns. Pick one source family and stay inside it. A 5500K setting matches most daylight-balanced flashes and LEDs, and a high colour rendering index of 95 or above keeps reds and yellows from going muddy.
Natural light from a large north-facing window works well for beginners because it is big, soft, and free of flicker. Continuous LEDs give you consistent output with a constant colour temperature. Strobe gives you the power to stop down further and control exposure independently, which matters when you are photographing a diamond and a black onyx ring in the same session.
The 45-Degree Rule, Step by Step
This is the technique that solves most beginner problems, and it works because it puts the reflection somewhere you are not standing.
- Set up the camera first. Lock the tripod, frame the shot, and confirm focus before you touch the lights. Moving lights after the camera settles is fast; rebuilding a tripod alignment is not.
- Place the key light. Put it roughly 45 degrees to one side of the camera axis and slightly above the subject. Elevation around 30 to 45 degrees is a good starting point for rings and earrings.
- Add a second, softer source on the opposite side. Keep it dimmer, around half the key output, and move it further away so it fills the shadow side without creating a second mirror point on the camera axis.
- Flag the camera side. Anything reflective between the piece and the lens will bounce your own face, the tripod, and the room into the shot. Black card on both sides fixes this instantly.
- Move a white card to bounce a soft edge highlight into the shadow side if the metal goes too dark. Bounce light is softer than a second lamp and gives you more control over falloff.
- Take a test shot and look at the histogram. If you see clipped pixels where the reflection sits, the source is still aimed at the lens. Nudge the light a few degrees and repeat.
- Repeat on the other side. Pieces are rarely symmetrical, and the offending facet on a pendant may be on the side you have not tried yet.
On a r/AskPhotography thread about reflective products, the advice that came up most often was not about gear at all. It was about moving the light a few centimetres at a time and shooting a test frame each time. That is exactly the process, and it is faster than it sounds.
Using a Polarizing Filter Correctly
A circular polarizing filter is the most misunderstood tool in jewelry photography. Owners often fit one, see a small improvement, rotate it once, and conclude it does not work. In practice the filter needs to be rotated until you hit the null point.
Single polarizer on the lens
- Screw the filter onto the lens and switch to manual focus and manual exposure. Autofocus can hunt as the filter rotates.
- Take a shot, then rotate the filter by roughly 15 degrees and shoot again.
- Repeat. Within a full rotation you will hit a position where the glare from the surface drops dramatically. That is the null point.
- Lock the filter in place and stop rotating. Angle of polarization stays fixed from that point on.
A single polarizer works best when the light source is already diffused and the glare comes from a broad surface such as a table top or a stone facet. It is less effective on a small, intense specular highlight, because there is less polarized light in that tiny region to block.
Cross-polarization
Cross-polarization is the professional technique and the one most guides mention without explaining. You place a second polarizer over the light source itself.
- Fit the polarizing filter on the camera lens and find the null point as above.
- Place a second polarizer directly over the light, or tape it across the front of a softbox, diffuser sheet, or window.
- Rotate the filter on the light until the reflections in the subject reach their minimum. Because the two filters are now crossing at 90 degrees, almost all specular light is rejected before it leaves the source.
- Rotate the camera filter again to fine-tune, since moving the light filter changes the relationship between the two.
What you lose is real. A fully crossed setup removes sparkle along with glare, because brilliance and reflection are the same physical event seen from two sides. The working compromise is to use cross-polarization for the setup shot, then switch one filter for the hero frame where you want fire in the stone. Shoot both and decide later.
Cross-polarization will not help much with metal. Reflected light from metal is not strongly polarized, so the filters have little to reject. For gold and silver, angle control and diffusion do the heavy lifting.
Building a Light Tent Setup
A light tent, sometimes called a light box, is an enclosure that surrounds the subject with white translucent fabric lit from outside or within. It gives you a 360-degree soft source, which means reflections come from many small angles instead of one hot one.
Most tents are better suited to small flat items than to tall pieces. Rings, loose stones, and earrings dropped straight in. Chains and necklaces usually need the fabric opened or the tent rotated so the item can be laid flat without touching the material. Taller pieces may need a tent with a removable panel, or they can be shot against a separate diffused background and lit through the front opening only.
Stability is the problem people hit inside a tent. The camera shoots through the top opening, which puts the lens far above the subject and makes a tripod hard to position. Solutions that work: shoot through a side opening at lens height, rest the lens barrel on a foam support, or use a flat-lay setup where the camera points straight down and the tent lights from both sides.
Tents also produce flatter images, because light arrives from every direction at once. For polished pieces that is a benefit. For a diamond it is a problem, because a stone needs directional light to show its facet pattern. If your stones look dull in a tent, that is the reason, and the fix is a snoot, a small directional reflector, or a single unfiltered light outside the tent aimed through an opening.
Camera Settings for Jewelry Photography
Jewelry wants the most depth of field you can get without paying the optical penalties. Here is a baseline that works for most shots.
- Aperture: f/11 as the default, f/13 to f/16 when you need more depth. Below f/11 diffraction starts softening fine detail, and by f/16 the softening is visible on a full-frame sensor at macro magnification. That trade-off is why many shooters shoot two frames, one sharp at f/11 and one deep at f/16, and blend them.
- ISO: 100, or 200 on a camera with a strong high-ISO output. Higher ISO adds noise into smooth metal gradients, which is the one place noise is impossible to hide.
- Shutter speed: 1/125 or faster on strobe, and whatever continuous light requires. With continuous LEDs at 1/125 you will need to reach for ISO, so check the exposure before you commit.
- Focal length and magnification: 90mm to 105mm at 1:1. Longer glass gives a more flattering working distance and keeps your hands out of the reflection field.
- Focus: manual or live view magnification. Autofocus will hunt on a highly reflective subject, and phase-detect points often lock onto the brightest highlight rather than the stone.
- Stability: tripod, mirror lock-up or electronic first curtain, and a 2-second timer or a remote release. A short self-timer also absorbs the shake from pressing the shutter.
- Format: RAW. You need the highlight data to recover a hotspot that still clipped slightly.
- White balance: set it from a grey card in the first frame, then keep it fixed. Do not let auto white balance drift between shots in a catalog.
How to Focus Stack Jewelry Photos
At macro magnification, the depth of field is measured in millimetres. A ring photographed at 1:1 on a full-frame sensor can have a usable depth of field barely wider than the stone itself. Focus stacking is the standard answer, and it is easier to learn than it looks.
- Set the focus point on the front of the subject in manual focus with live view magnification.
- Set a focus bracket in the camera. Most current bodies will shoot a fixed number of frames at a fixed focus step. In the bracket menu, choose the number of frames that covers the depth of the piece.
- Compute the step by the depth you need to cover. A flat ring laid down needs a small total shift and roughly six to ten frames. An upright necklace or a watch standing up needs a much longer shift and can take thirty or more.
- Review for gaps. If a frame is out of focus, the stacked image will show a soft band. Re-shoot the sequence with a smaller focus step if you see them.
- Align and stack in software. Programs align frames automatically based on detail in the overlap regions. After stacking, apply a gentle output sharpening pass, because blending softens micro-contrast.
A motorized focus rail makes the job repeatable and reduces the risk of drift between frames. It is not required to start, but if you shoot jewelry daily, it is the upgrade that pays for itself fastest.
Product Preparation Before the Camera Comes Out
The least glamorous part of jewelry photography saves the most time in editing. Fingerprints on polished gold read as soft grey smudges, not as reflections, so they will not come out with a polarizing filter and they are tedious to clone.
- Handle pieces with clean cotton gloves, or hold them by a mounting pin rather than by the band.
- Clean with a microfiber cloth, lightly dampened if the metal allows it. Never use anything abrasive on a plated or treated finish.
- Blow off dust with a blower or a low-pressure air gun. Hold the piece by the edge while you do it.
- Check the crevices under prongs, inside links, and behind settings, where dust collects and reads as haze.
- Make sure hallmarks and engravings are clean and in focus. Showing true detail is one of the strongest trust signals in a product photo.
Choosing and Removing the Background
The background reflects too, so it is part of the glare problem. A glossy acrylic base under a ring will bounce your light source into the shot, and no amount of filter work will fully recover it.
For e-commerce listings, a pure white background is the standard and buyers read it as a sign of an honest seller. Shoot it white rather than creating white later: place the piece on white seamless or matte board, light it so the board renders as pure white with no falloff, and set your white point in editing with no clipping.
For editorial and catalogue images, a graded background reads more premium. A shallow grey-to-black gradient gives a dark metal somewhere to sit and separates the silhouette. Keep the surface matte, and keep the subject far enough off the backdrop that the background stays out of the reflection.
For removal later, shoot on a clean, evenly lit, non-reflective surface and leave a few centimetres of margin around the piece. Removing an edge from a background that is nearly the same tone as the metal is far harder than removing it from pure white.
Lighting Setups by Jewelry Type
Rings
Lay the ring slightly off-axis so the band forms a partial ellipse, which reads as three-dimensional. Use a 45-degree key, a dimmer fill on the opposite side, and a small white card to draw a bright edge along the top of the band. Keep the focus point on the stone and stack for the shank.
Chains, pendants, and necklaces
Arrange the chain in soft curves rather than a tight heap, because links touching each other create dark gaps that will not retouch cleanly. Light from above and slightly behind at about 45 degrees so the bail and the top of the pendant catch a highlight. Place a white card low to fill the underside of the chain.
Earrings
Stand them upright on a small matte support, or lay them flat if the design allows. Earrings are mostly surface, so they respond well to a large soft source and a single flag on the camera side. Watch the hook and any sharp prong edges, which catch small bright points that can be distracting at high magnification.
Watches
Watches are the hardest common case because of the glass, which reflects like a mirror and often picks up your own studio. Angle the watch slightly away from the lens axis, use a polarizing filter, and place a large dark flag so the crystal reflects black rather than the room. Dial colour should be checked against the physical piece after shooting.
Diamonds versus coloured stones
A diamond is mostly about internal reflection, so it needs directional light and dark surroundings. Cut a card and place it beside the stone so a hard source can be angled in without lighting the whole set, and let the light pass through the table at an angle that brings brilliance back toward the lens.
Coloured stones are the opposite problem, and this is where light boxes frustrate people. A soft, all-around source flattens a sapphire or an emerald until it looks almost black, because you need light entering the stone at an angle to travel back out through the table. Shoot stones with a key at 45 degrees and a lower fill from beneath or behind the stone, and use a white card underneath to push light back up through the pavilion. A light tent alone will rarely give you a bright coloured stone, and a bright white background behind the stone is the fastest way to make it wash out.
Post-Processing Workflow for Jewelry
Editing removes the imperfections that survived a good setup. It does not replace one.
- Start in RAW with the profile that matches the light you shot under, not the default profile.
- Fix white balance against the grey card frame before you touch anything else. Once contrast is applied, colour errors become much harder to judge.
- Recover highlights. Lower the whites and highlights sliders first. A hotspot that has not fully clipped can usually be brought back several stops. If it is pure white in the raw file, it is gone, and you clone or darken instead.
- Shape the falloff. A curves adjustment on a masked stone can deepen saturation without changing the metal, which is how you keep a coloured stone vivid without pushing the gold orange.
- Use frequency separation for large soft reflections. Work on the low-frequency layer with a wide soft brush, and keep the high-frequency layer for texture and edges. It lets you even out a blotchy reflection across a polished band without flattening the metal’s texture.
- Remove dust with a spot healing brush or a dedicated dust filter. Do this last, on a fully sharpened image, so you can see what the camera actually captured.
- Use the patch tool for large structural reflections such as a window frame or a strip light mirrored in a band. Set the patch to content-aware, keep the sampling patch on clean metal of similar tone, and rotate the result to align the grain.
- Output sharpen lightly at the size you will actually deliver, because sharpening exaggerates any remaining noise and any halo from the healing steps.
Leave the result looking like a photograph. Shoppers have become very good at spotting images that read as renders, and clean but believable images build more trust than heavily processed ones.
Common Mistakes That Bring Glare Back
- Using the camera flash. A built-in flash sits at the lens axis, which is the one position guaranteed to produce a reflection straight into the sensor. Turn it off and use a separate source.
- Placing the key light directly above the camera. Even a softbox overhead reflects off a curved band into the lens. Offset it.
- Leaving glossy surfaces in the frame. Acrylic bases, glass tables, and polished counter tops all act as mirrors. Matte them or remove them.
- Mixing light sources with different colour temperatures. Colour shifts shot to shot, and your catalog stops looking like one brand.
- Trusting the on-screen view of a reflective subject. Displays lie about bright highlights. Check the histogram.
- Forgetting to re-check the setup between every piece. A setup tuned for a tennis bracelet will flare on a curved cabochon. Consistency comes from repeating the checks, not from reusing the lights.
- Over-diffusing until the image looks flat. Some direction is what makes a curved surface read as curved.
- Photographing a dusty piece and planning to fix it later. Cleaning takes thirty seconds. Clone work takes thirty minutes.
Frequently Asked Questions
What is the best way to photograph jewelry?
The best method combines a large diffused light source placed about 45 degrees off the camera axis, black flags to kill reflections from the camera side, a circular polarizing filter rotated to its null point, and manual camera settings at f/11 with ISO 100 in RAW. Clean the piece with gloves before it goes on the sweep, and shoot a focus stack when the depth of the jewelry exceeds your depth of field.
How do you photograph shiny objects without glare?
Enlarge your light source so it is several times the size of the subject, move it away from the camera axis until the reflection leaves the lens, and block the camera side with matte black card. Add a circular polarizing filter and rotate it until the glare drops. For the hardest cases, place a second polarizer over the light itself and cross the two filters.
What camera settings are best for jewelry photography?
Start at f/11, ISO 100, and 1/125 second or faster on strobe, with continuous white balance around 5500K and RAW capture. Use manual focus with live view magnification, a tripod with mirror lock-up or electronic first curtain, and a self-timer or remote release. Stop down to f/13 to f/16 when you need more depth, then focus stack if the diffraction softness becomes visible.
Do I need a macro lens for jewelry photography?
You need close focus and low magnification distortion more than you need a dedicated macro lens. A kit lens can produce usable results through a close-up filter, but a 90mm to 105mm macro at 1:1 magnification gives a comfortable working distance, less perspective distortion on rings, and less chance of your hands entering the reflection.
Why do my gemstones look dark in a light box?
A light box wraps light around the subject from every direction, which flattens a cut stone. Coloured stones need light entering at an angle and travelling back out through the table, so a soft all-around source leaves them looking almost black. Shoot with a key at 45 degrees, add fill from below the stone, and place a white card underneath to push light back up through the pavilion.
Does a polarizing filter remove all jewelry reflections?
No. A filter rejects polarized reflections, which works well on glass, stone facets, and glossy surfaces. Reflections from polished metal are not strongly polarized, so gold and silver need angle control, diffusion, and flags. Cross-polarization also removes sparkle along with glare, so many shooters shoot a crossed frame for the setup and a single-filter frame for the hero shot.
How many frames do I need for a focus stack of a ring?
A flat ring needs roughly six to ten overlapping frames. A necklace hanging or a watch standing upright covers far more depth and can need thirty or more. Choose a focus step small enough that each frame overlaps the one before it, and inspect the result for soft bands before you accept the stack.
How do I get a pure white background for jewelry on Amazon?
Shoot on white seamless or matte white board, light it evenly so the board renders as pure white with no falloff, and separate the piece from the background with black flags so the light does not spill. Set the white point in editing and make sure no channel is clipping, or the background will read as grey rather than white.
How do I get sparkle in jewelry photos?
Sparkle needs directional light, not more light overall. Place a small hard source at an angle to the stone and let a dark card stand opposite it so the light has somewhere to return from. Shoot a frame with the polarizing filter off, since cross-polarization removes brilliance along with glare, and stack several of those frames for the final look.
Is natural light good enough for jewelry photography?
A large north-facing window with a sheer curtain is genuinely good for starting out, because it is big, soft, and free of flicker. Its limits are colour drift across a long session and the amount of light available, so set a fixed white balance from a grey card, shoot during consistent daylight, and be ready to add a diffused continuous light for shadow fill.
Conclusion
Glare on jewelry is not a defect to be edited away. It is a predictable reflection, and it moves out of the way the moment you change the size of your light source, the angle between that source and your lens, and the surface between them.
Start with the three changes that cost nothing: a bigger diffused source, a key light at 45 degrees, and matte black card on the camera side. Add a circular polarizing filter next and learn to find the null point. Then move on to cross-polarization, focus stacking, and the type-specific setups, and document your final arrangement so every piece in your catalog repeats it.
That last point is the one that separates a single good image from a catalog that looks professional. Once you can photograph jewelry without glare or reflections on demand, the same setup, the same white balance, and the same background will carry you through a whole product line without rethinking anything.