
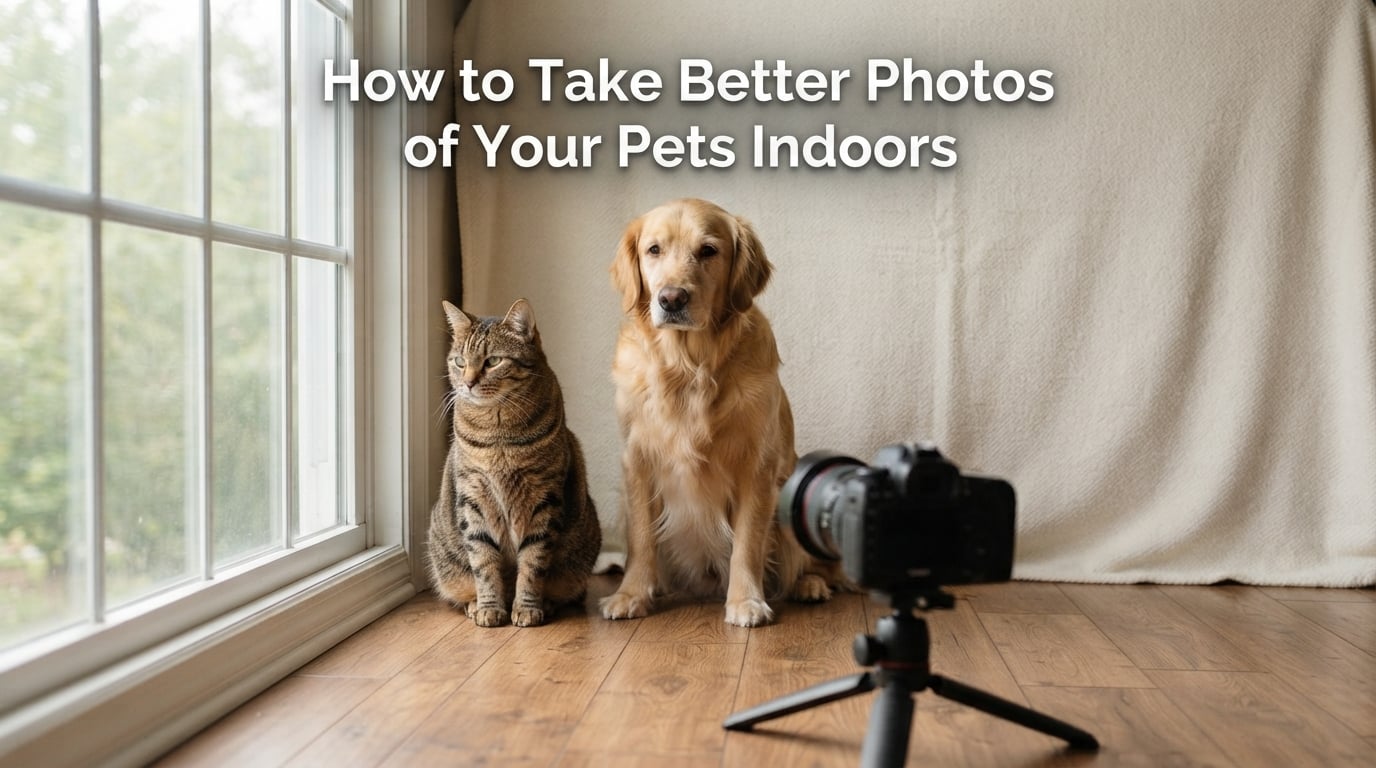
Most indoor pet photos fail for one of three reasons, and none of them is your camera. The frame is blurry because the room was dim and the shutter crawled. The lighting is flat or harsh because you used the wrong light source. The background is busy because the pet was standing where the pet always stands. Fix those three things and the same phone that produced your last disappointing set starts producing shots worth printing.
That is what this guide is for: how to take better photos of your pets indoors, without a studio, a lighting rig, or a second income. You will find the specific settings to start from, a phone path for shooters with no camera at all, a plan for rooms with no window light, and the small behavioural tricks that decide whether your pet looks at the lens for a single frame.
I shoot in my own living room, mostly with whatever is nearest, mostly of animals that have no interest in being photographed. That last part is the real constraint, and it is the part most guides skip. Every technique here has to survive a distracted dog or a cat that walks out mid-burst.
Updated for October 2026
Table of Contents
- Why Indoor Pet Photos Look Bad: Three Failure Modes
- How to Take Better Photos of Your Pets Indoors: The Core Method
- Find and Shape Window Light Indoors
- Indoor Pet Photography Settings Cheat Sheet
- Shooting Indoors at Night and in Dim Rooms
- A Phone-Only Workflow for Indoor Pet Photos
- Get Your Pet’s Attention Without Ruining the Shot
- Cats and Dogs Indoors Are Different Problems
- Backgrounds, Eye Level and Framing Inside a Real Home
- Common Mistakes in Pet Photography and How to Fix Each One
- Simple Edits That Rescue a Good Shot
- Frequently Asked Questions
- How do I stop my indoor pet photos from being blurry?
- What are the most common mistakes in pet photography?
- What is the best lighting for indoor pet photos?
- How do you avoid blurry photos of pets that will not sit still?
- Do you use flash when photographing pets indoors?
- Why are my indoor pet photos dark and grainy?
- What are some tips for photographing untrained or reluctant pets?
- What settings should I start with for a first indoor pet photo?
- How close should I get to my pet?
- Is a better camera needed for good indoor pet photos?
- Conclusion
Why Indoor Pet Photos Look Bad: Three Failure Modes
Every disappointing indoor pet photo I have taken traces back to one of the three problems below. Diagnose which one is dominating before you change anything on the camera, because the fixes are completely different.
1. Motion blur from a shutter speed that is too slow
This is the big one, and the mechanism is worth understanding because it explains everything else. Indoors, the available light is weak. A camera in automatic mode responds by opening the aperture, and then by slowing the shutter to gather more light. A slow shutter records movement for the whole length of the exposure, and your pet never stops moving. The result is a sharp-ish body with a smeared face, or a soft, ghosted image that looks like a mistake in processing rather than in settings.
Nobody can hold a pet still. The only fix is to make the camera choose a faster shutter, and the only way to make the camera choose that is to give it more light.
2. Light from the wrong direction
Shooting with the window behind the animal turns your pet into a dark shape with a bright rectangle around it. Shooting with a bare ceiling light overhead drops shadows into the eye sockets and creates shiny spots on the fur and nose. Both are fixable by repositioning, and both cost nothing.
3. A background you cannot control from the couch
Most of us photograph where the pet happens to be, which is usually in front of a bookshelf, a doorway, or a stack of mail. The animal is not the problem. The three feet of space behind the animal is the problem.
How to Take Better Photos of Your Pets Indoors: The Core Method
Run these five steps in order for every session. The order matters, because each step is cheaper than the one after it. Rearranging a couch costs nothing; adding light costs a lamp; changing settings costs a dial.
- Choose the room and window first, not the pet. Walk the house and find the space with the biggest, softest window. Shoot there, and bring the pet to it.
- Clear three feet of background. Move the pet’s usual spot, not your furniture, if the furniture is hard to move. A blanket against the wall beats a bare wall with cables in frame.
- Add light before touching the camera. Turn on every lamp in the room. Open a second window. More light is the single change that fixes the most blur.
- Set the shutter speed by hand. 1/250 second minimum for a sitting pet, 1/500 to 1/1000 second for anything moving. Set this before you raise the camera.
- Shoot bursts, then pick one frame. Hold the button for a short burst rather than taking single shots. Animals produce a usable expression three times more often than cameras do.
The patience rule is the part people resist. A session that looks like a failure in the first five minutes is normal. Your job is to make many cheap frames while the light is good, then keep two or three.
Find and Shape Window Light Indoors
The best indoor light is a window, but only if you use it correctly. Three decisions control the result: which window, where the animal stands relative to it, and whether anything diffuses it.
Which window and when
A window with the largest glass area wins, regardless of which direction it faces. North-facing windows give steady, soft light all day and are the safest choice for portraits. East and west windows deliver harder, more directional light, which can be beautiful for a nose-in-the-sun nap but produces sharp shadows at midday. Overcast days are genuinely better than clear ones: cloud cover turns a hard beam into a giant softbox outside your glass.
Within a single day, mid-morning and mid-afternoon tend to be gentler than noon. This matters less indoors than it does outside, because the glass is already softening things.
The mistake nobody names: shooting toward the window
Put the window behind the pet and you have backlighting. The camera meters for the bright outdoors, the animal drops into shadow, and you get a silhouette with glowing fur edges. It is a beautiful look when you want it and a ruined portrait when you do not.
Instead, place the pet roughly 90 degrees to the window, with the light falling across the face from one side. You get shape, texture and a catchlight in the eye. Then turn the animal the other way if you do not like how the light falls, and the plain wall behind becomes the dark side of the face. Turning the pet 90 degrees to the window is the single highest-value move in this entire guide.
Diffuse it, and fill the shadow side
Draw a sheer curtain or a thin blind to soften hard sunlight and the shadow of the window frame across your pet’s body. Harsh stripes on the fur are always a diffusion problem, not a camera problem.
For the darker side of the face, hold up a white towel, a sheet of white card, or a piece of white foam board just out of frame. It bounces light into the shadows at almost no cost. When you have no bounce material, a lampshade lit from the inside positioned several feet to one side does the same job.
Indoor Pet Photography Settings Cheat Sheet
Start from the row that matches your situation. These are starting points, not rules; the light in your room decides how far you can push. If a photo is blurry, move down a row before you change anything else.
| Situation | Shutter speed | Aperture | ISO | Support needed |
|---|---|---|---|---|
| Posed close-up by a bright window, pet sitting or lying | 1/250 s | f/2.8 to f/4 | 100 to 400 | None, hold steady |
| Pet standing or walking slowly indoors | 1/500 s | f/2.8 to f/4 | 400 to 800 | None |
| Action mid-play, running, jumping, zoomies | 1/1000 s | f/2.8 to f/5.6 | 800 to 1600 | None, shoot bursts |
| Dim living room, lamps only, pet mostly still | 1/250 s | f/1.8 to f/2.8 | 1600 to 3200 | Steady surface or tripod |
| Night or no window in the room | 1/125 s or slower | f/1.8 widest available | 3200 to 6400, accept noise | Tripod, self-timer or remote |
Shutter speed is the non-negotiable. Everything else on this list can bend. A photographer on an r/photography thread chasing blurry eyes in dog portraits found the fix was a single autofocus point held on the eye, not more light or a sharper lens. A separate thread on the same problem identified over-shallow depth of field as the cause, which is a different fault entirely, described below.
Aperture and the eyes-sharp-face-soft problem
Aperture controls two things at once: how much light gets in, and how much of the scene is sharp. A small f-number such as f/1.8 lets in plenty of light and throws the background pleasantly out of focus, but on a pet it means only a narrow slice of the face is in focus. You end up with one crisp eye and a soft second eye and a soft muzzle. A photographer with a 105mm f/1.8 lens shooting in an animal shelter ran into exactly this and posted about it on the dpreview.com forums.
The fix is to stop down. f/2.8 to f/4 keeps the separation you want while bringing both eyes and the whole face into focus. If the room goes too dark to afford it, add light rather than opening the aperture back up.
ISO and the noise tradeoff
ISO is how much the camera amplifies the signal. Raise it and you can hold a fast shutter in a dim room; leave it high and you get grain and blotchy colour in the shadows. In bright window light, 100 to 400 is clean. In a lamp-lit room, 1600 and above is a fair trade for a sharp image, and it is the better deal. A slightly noisy sharp photo is worth more than a clean blurry one every time.
Focus mode matters as much as the settings
Use single-point autofocus or animal eye detection rather than a wide tracking area, which hunts back and forth as the pet moves and lands on a nose or a shoulder. On phones, tap directly on the nearest eye and hold to lock focus and exposure, then step back slightly and shoot. Forum users photographing rescue dogs specifically ask about focus, and the answer is nearly always the same: one point, on the eye, held there.
Shooting Indoors at Night and in Dim Rooms
Night is where auto mode fails hardest, because the camera has no choice but to slow the shutter right down. The solution is to stop the camera and the pet from moving separately, and accept that the image will carry some noise.
- Put the camera on something solid. A tripod, a stack of books, a windowsill, or the floor. At slower speeds, hand-held shooting reintroduces the blur you were trying to escape.
- Use a self-timer or a remote. Two seconds is enough. A phone camera app with a remote shutter is the cheapest version of this.
- Open the aperture as far as it goes and raise ISO to whatever keeps the shutter at 1/125 second or faster.
- Turn off image stabilisation if you are on a tripod, since stabilisation can introduce its own blur at very slow speeds.
- Shoot more frames than feels reasonable and expect only a few to be sharp.
Two habits make night shots much better. Turn on every lamp and open the curtains of any room that has daylight, even if the pet stays put; a thousand lumens in the next room is free light. And if a frame comes out sharp but grainy, convert it to black and white; noise is far less distracting in monochrome, and the mood often improves with it.
A Phone-Only Workflow for Indoor Pet Photos
Most people searching for this have a phone and no intention of buying a camera. That is fine. Modern phones can do everything a camera can here, if you know which settings they are hiding. If you are still deciding whether to upgrade, the honest answer from photography communities is that the gear is rarely the fix; technique and light are.
| Situation | Phone setting | What to do |
|---|---|---|
| Pet by a window, mostly still | Standard photo mode | Tap the nearest eye, hold to lock exposure, then shoot a burst |
| Action indoors | Live Photo or burst | Hold the shutter down, accept that most frames are unusable, keep three |
| Dim or lamp-lit room | Night mode, or Pro mode with a real shutter and ISO dial | Prop the phone up; use a timer or a Bluetooth remote to fire it |
| Close-up portrait | 2x lens, never 0.5x | The 2x lens also crops to a sensor area with better detail in dim light |
Four habits separate good phone pet photos from disappointing ones. Clean the lens, because a smudged front element costs you more sharpness than any setting. Tap to focus on the eye and slide the exposure slider slightly brighter, since phone meters tend to underexpose dark fur. Stay at least a metre back on a phone and use the 2x lens, because the ultra-wide lens is closer to the animal than you think it is and its close focusing distorts the muzzle. And shoot in burst every single time.
If your phone has a Pro or Manual mode, use it for night and low light only: set the shutter to 1/125 second or faster, raise ISO until the image is bright enough, and hold everything else steady. Leave the auto modes alone for daylight shooting, where they are genuinely good.
Get Your Pet’s Attention Without Ruining the Shot
Attention techniques fail in a predictable way: the pet looks at the treat instead of the lens. The fix is geometry, not a better treat. The hand holding the treat must be closer to the animal than the camera is, so the eye travels past the lens to reach it.
- Hold the treat up and back, just above and slightly behind the lens, so the pet raises its head and the eyes come toward the camera.
- Make a sound above head level: a squeaky toy, a treat bag rustle, a whistle, a clicker. Sound pulls attention up; movement at floor level pulls it down.
- Bounce a treat, do not hand it over. Toss a piece upward and slightly behind the camera. The pet looks at the spot where the treat will land, not at your pocket.
- Enlist an assistant to hold the treat and keep the animal still. Scout’s guide to photographing pets for a pet-sitting website makes the same point, and it is still true at home.
- Shoot the moment after the reward, not during. A pet that has just been given the treat is looking at the floor; a pet that expects the next one is looking up.
For dogs, the recall word and a bouncing toy work better than a treat you can hear rattling. For cats, crinkly sounds beat squeaky ones, and many cats will hold eye contact for exactly one frame before turning away. Shoot the burst and take the frame you get.
Above all, stop shooting when it is not working. Ten quiet minutes of the pet doing nothing useful is a reset, not a waste; a frustrated photographer shakes the frame just before the good moment arrives.
Cats and Dogs Indoors Are Different Problems
Most guides treat “pet” as one subject. Indoors, cats and dogs need opposite approaches.
Dogs are generally cooperative and physically active. Recall, a bouncing ball, or a treat held at head height works quickly. Their problem indoors is motion, so budget more frames per session and expect the best expression to arrive mid-zoomies rather than while sitting politely.
Cats are independent, and forcing a pose rarely works. What works is photographing where they already choose to be: a cardboard box, a windowsill perch, a shelf above the sofa, a spot on the rug where the afternoon sun lands. The crinkly sound of a treat bag or a foil wrapper at floor level is far more effective indoors than a laser pointer, and it does not leave a cat chasing its own tail in the frame.
Cats also hold still longer than dogs once settled, which means you can afford slower shutter speeds and lower ISO. In the other direction, a cat about to bolt is the hardest subject in the house, so keep a fast shutter ready.
Backgrounds, Eye Level and Framing Inside a Real Home
You do not need an empty room. You need a patch of empty space behind your pet, and you get it by moving the animal, not by moving the house.
Three techniques that work in a real living room
- Reposition the pet. Walk the pet to the doorway, the hallway, the blank stretch of wall. This is free and it works instantly.
- Hang a blanket or sheet on a door or over a sofa back, a few feet behind where the pet will sit. It gives you a seamless background in any room and it is the standard trick for pet-sitting businesses and pet portrait studios alike.
- Move the furniture out of frame or shoot tighter. Cropping in with your feet, not in software, removes most of the clutter.
Get down to eye level
Every ranking guide on this topic says it, and they are all right. Lying flat on the floor to match your dog’s height changes the entire frame: the background drops away, the animal looks like an equal rather than a subject, and the eye catchlight appears naturally. For a cat on a perch, kneel and shoot slightly upward.
Fill the frame, then back off
Two contradictory-sounding rules, both true. Fill the frame with the face and chest for expression shots, using the 2x lens or a longer focal length rather than stepping into wide-angle distortion. For action, pull back until the whole body is in frame with room in the direction the animal is moving, so you can crop later without losing the pose.
On a phone, never use the 0.5x lens for a close pet photo. It sits so near the subject that the muzzle balloons and the eyes recede. With a dedicated camera, a short telephoto is the tool that does the opposite: from a distance, a longer lens compresses the background and produces natural-looking candid portraits without you getting in the animal’s face.
For composition, put the eyes in the upper third rather than dead centre, and give the animal space in the direction it is looking. Add light to the shadow side, or bounce a white card, or accept a silhouette only when you meant one.
Common Mistakes in Pet Photography and How to Fix Each One
These eight mistakes account for nearly every unusable indoor pet photo. Each has a direct fix.
- Letting the camera choose the shutter speed. Fix: set it manually to 1/250 second or faster.
- Shooting toward the window. Fix: turn the pet 90 degrees so the light falls across the face.
- Using direct flash. Fix: bounce it off the ceiling, or turn it off and add lamps instead.
- Focusing on the muzzle instead of the eye. Fix: use a single autofocus point on the nearest eye.
- Shooting from above. Fix: get to the pet’s eye level, even if it means lying on the floor.
- Leaving the background busy. Fix: move the pet three feet from any clutter, or hang a sheet behind them.
- Taking single shots of a moving animal. Fix: burst mode, then choose one frame.
- Over-editing in post. Fix: exposure, warmth, crop, and stop there.
One of these deserves a note: flash. A direct flash produces red-eye, a flat grey look, and a hard shadow on the wall behind the pet, and it startles many animals. If you must use flash, point it at the ceiling and widen the aperture so the light spreads; a bounced flash is closer to window light and far easier on the animal. Turning flash off and adding ambient light is better still, which is why almost every experienced photographer shoots window-lit and uses flash only as a rescue.
Simple Edits That Rescue a Good Shot
Editing is a repair step, not a rescue from bad technique. Free phone editors handle everything indoor pet photos need.
Start with exposure and lift it a quarter stop if the animal came out dark. Open the shadows to recover detail in black fur. Raise warmth, because indoor bulbs push white balance cool and most editors do not correct it enough by default; that colour cast is one of the most common indoor complaints in photography forums, and a warmer setting is a faster fix than any camera change. Then crop to the composition you wanted at the time. Nothing else is required.
Know when to stop. Heavy sharpening makes fur look crunchy and cannot recover a blurred eye. Heavy noise reduction smears detail. If the eyes are soft or the moment is gone, the edit will not bring it back, and re-shooting in better light takes ten minutes.
Frequently Asked Questions
How do I stop my indoor pet photos from being blurry?
Indoors, your camera slows the shutter to collect light, and a slow shutter records your pet moving. Add light first: move the pet to a window, turn on every lamp, open a second window. Then set the shutter speed manually to 1/250 second for a sitting pet and 1/500 to 1/1000 second for action, and shoot in burst mode.
What are the most common mistakes in pet photography?
Letting the camera choose the shutter speed, shooting toward the window so the pet goes dark, using direct flash, focusing on the muzzle instead of the eye, shooting from above, leaving a busy background, taking single shots of a moving animal, and over-editing in post. Every one of them has a simple fix.
What is the best lighting for indoor pet photos?
A large window, used sideways rather than behind the pet. Place the animal about 90 degrees to the window so the light falls across the face, and add a white card or towel on the shadow side to fill it in. Diffuse hard sunlight with a sheer curtain. More light, from more sources, beats any flash.
How do you avoid blurry photos of pets that will not sit still?
You cannot make a moving pet hold still, so stop the camera from moving instead. Raise the shutter speed to 1/500 second or faster, add light to make that speed possible, use a single autofocus point on the eye or an animal eye-detection mode, and hold the shutter down for a short burst. Then pick the one good frame out of twenty.
Do you use flash when photographing pets indoors?
Usually not. Direct flash creates red-eye, a flat grey look, a hard shadow on the wall, and it startles many animals. If you need it, bounce the flash off the ceiling and open the aperture to spread the light, or add lamps and window light instead. A bounced flash behaves much more like window light.
Why are my indoor pet photos dark and grainy?
Dim rooms force the camera to slow the shutter and raise ISO, and high ISO is what produces grain and blotchy shadow colour. Add light rather than adding ISO: more lamps, an open window, a bounce card, or a reflector. Support the camera on a tripod or a table with a self-timer, and if a sharp shot is still grainy, try converting it to black and white, where noise is far less visible.
What are some tips for photographing untrained or reluctant pets?
Never force a pose. Photograph the animal where it already chooses to be: a box, a perch, a sunny patch of rug. Hold treats above and slightly behind the lens so the eyes travel past the camera, use crinkly sounds for cats and a bouncing toy for dogs, shoot the moment after a reward rather than during it, and take a break whenever the session stalls.
What settings should I start with for a first indoor pet photo?
Switch to shutter priority or manual mode and set 1/250 second, f/2.8 to f/4, ISO 100 to 400 near a bright window. That combination keeps both eyes sharp with a blurred background. For action, raise the shutter to 1/1000 second and accept a higher ISO. On a phone, tap the nearest eye to lock focus and exposure, use the 2x lens, and shoot in burst.
How close should I get to my pet?
Close enough that the face and chest fill the frame for an expression shot, which usually means using a 2x lens or a telephoto rather than stepping into wide-angle distortion. For action, back up until the whole body fits with room in the direction the animal is moving. Get to the pet’s eye level either way, even if that means lying on the floor.
Is a better camera needed for good indoor pet photos?
Rarely. A phone with a clean lens, tap-to-focus on the eye, and burst mode produces good indoor results in window light. Upgrading helps most when you shoot at night with a long lens, since a tripod and manual controls matter more than megapixels. Fix the light, the shutter speed and the background first; gear is rarely the limiting factor.
Conclusion
Indoor pet photography is not a gear problem. It is three problems, and each has a fix you can apply in the next ten minutes: add light so the camera can keep a fast shutter, turn the pet sideways to the window instead of facing it, and give the animal three feet of clear background.
Start with the window, set 1/250 second or faster, focus on the nearest eye, and shoot bursts while the light is good. Ten frames will take you further than an afternoon of zooming in on a dim room. The rest of what you learned here, from night shooting to cat behaviour to rescuing a warm cast in editing, only matters once those four things are automatic.