
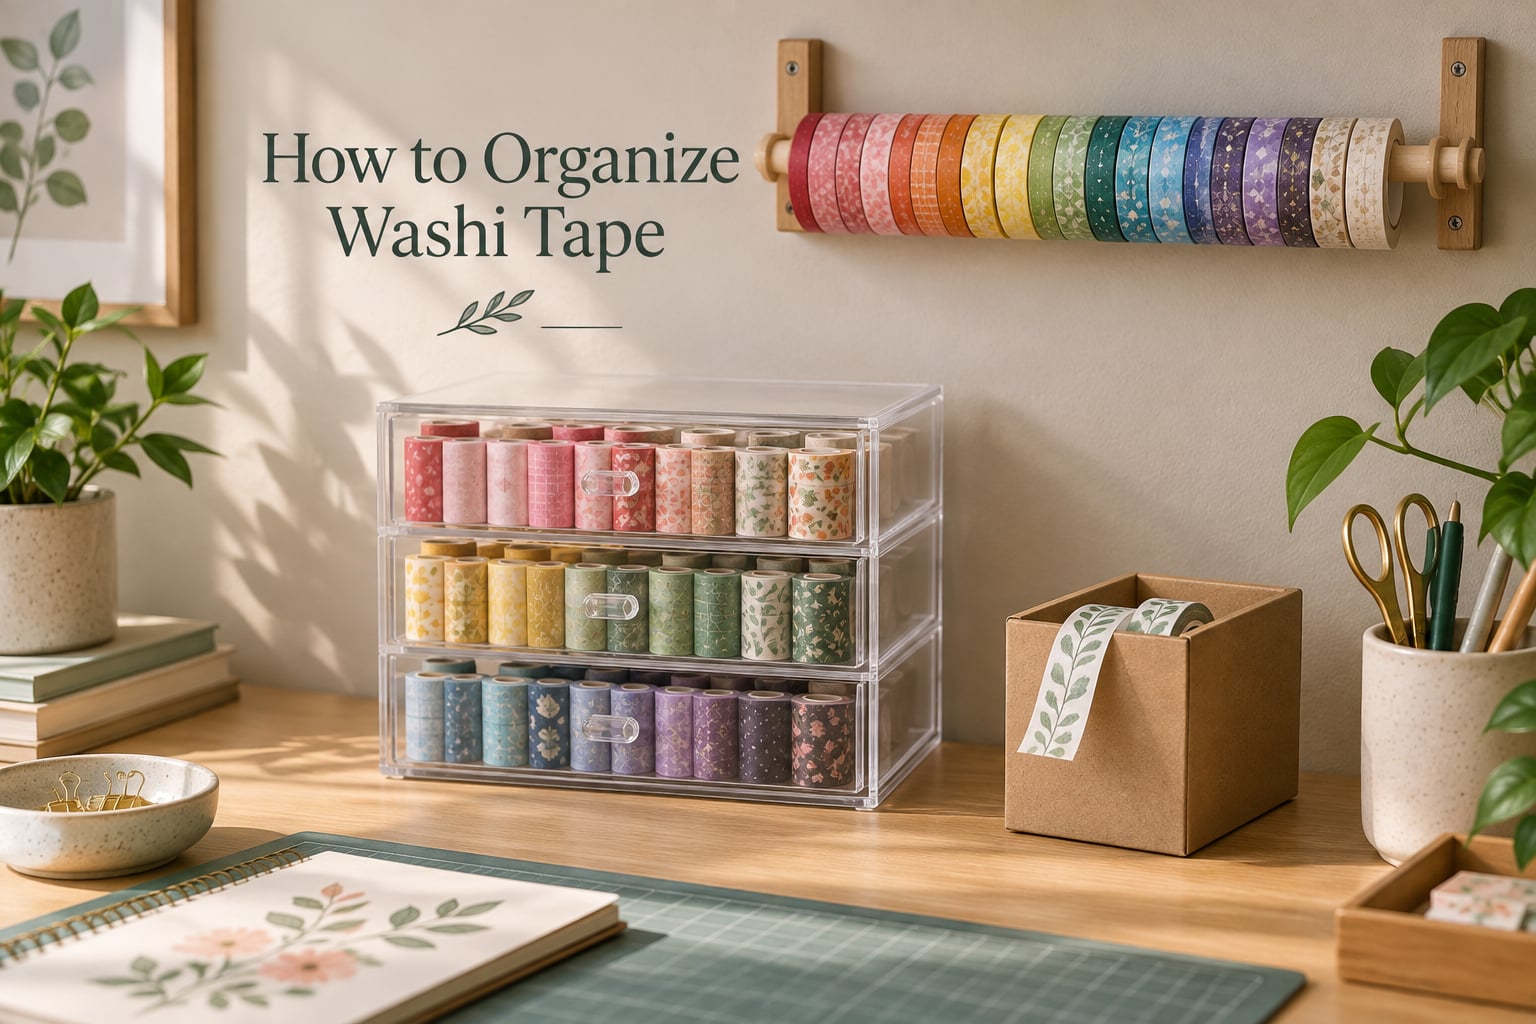
Every washi collection starts the same way. One roll becomes ten, ten becomes a full drawer, and then you are lying on the floor at midnight hunting for a specific pattern while the roll you need sits at the bottom under everything else. Anyone who has watched a planning session die because of a lost tape end knows the feeling.
Learning how to organize washi tape is not about finding a prettier container. It is about building one repeatable system that matches your collection size and the shelf space you actually have, so the tape you want is visible in under ten seconds. That matters most in a small space, where a dedicated craft shelf is a luxury and desk surface is already spoken for.
We pulled the working methods out of the craft communities that rank for this query, tested the logic of each one against real constraints like tape width, core strength and how a container behaves when you tip it, and organized them into a five-step system. Here is the whole thing, from purging the drawer to the weekly reset that keeps it standing.
Updated for 2026.
Table of Contents
- What Is the Best Way to Store Washi Tape?
- Step 1: Purge and Sort Your Collection Before You Buy Storage
- Step 2: Choose One Sorting System and Stick With It
- Step 3: Match the Storage Method to Your Collection and Space
- Storage Method Comparison Table
- Small-Space and Dorm-Safe Solutions
- How to Find a Specific Tape Fast
- Common Mistakes That Ruin a Washi Collection
- DIY Organizers From Things You Already Own
- The 5-Minute Weekly Reset
- Frequently Asked Questions
- What is the best way to store washi tape?
- How do I organize my washi tape?
- What is the best way to organize craft supplies in a small space?
- How to organize a tiny craft room?
- What are some creative ways to store tape?
- What are some quirky and funky storage ideas?
- Should washi tape be stored upright or flat?
- How do I find a specific washi tape quickly?
- Conclusion
What Is the Best Way to Store Washi Tape?
The best way to store washi tape is to purge duplicates and dead rolls, sort what remains by one consistent rule such as color, and load the survivors upright into a container that holds roughly a half inch of clearance per roll so the cores never crush. Vertical storage in a drawer unit, tote, or threaded bobbin set beats a flat pile in nearly every case.
That is the short answer. The right container depends on how many rolls you own and how much room you have, so here are the ten proven methods ranked by the situation they fit best.
- Embroidery bobbins in a thread case – best for very large collections over 150 rolls – 200-plus rolls in a shoebox-sized footprint – not portable.
- Multi-drawer clear bins – best for 50 to 120 rolls – roughly 90 rolls per three-drawer bin – stackable and easy to label.
- Dowel or rod wall display – best for collections you want to see and use daily – holds whatever fits along the rod length – takes wall space.
- Pegboard or panel hooks – best for small spaces with no shelf room – scales one roll per hook – needs a flat mounting surface.
- Repurposed box dispenser – best for a working handful of 15 to 25 rolls – about 20 rolls per box – doubles as a cutter.
- Spice rack with small drawers – best for sorted collections up to about 60 rolls – compact and completely dividable – drawers get hard to load past full.
- Clear plastic tote – best for low-effort bulk storage under 50 rolls – around 40 rolls per tote – you still dig through it.
- Cut-up retail packaging bins – best for free transparent compartments – 6 to 10 rolls per trimmed bin – nests inside a drawer.
- Pencil and hair-tie dividers – best for near-zero-cost rows – about 8 to 10 rolls per slot – fixed once the bands are on.
- Twine loop – best for travel and journaling away from home – capacity limited by twine length – fully portable.
How to choose in three lines. Count your rolls first, then measure the storage surface you can claim without stealing desk space, then pick the method that holds that count in that footprint. If you cannot name the number of rolls you own, start with the purge in Step 1 rather than buying anything.
Step 1: Purge and Sort Your Collection Before You Buy Storage
Buy the container last. The most repeated mistake in every organizing thread about washi tape is buying a beautiful system for a collection that was never sorted, then discovering in week two that a third of the rolls are duplicates of rolls already in the bin.
Pull everything out onto a bed or the floor and use three containers: keep, declutter, and unsure. Everything goes in one of them, including the piles you are sure are fine.
Declutter anything in three categories. Deduplicate: if you own two of the same pattern, keep the newer roll and the one that winds cleanly. Dead rolls: washi is rice paper with a lower-tack adhesive, so once it has dried out or been flattened it will not stick properly again. Unused patterns: if a roll has survived a full year without appearing in a project, it is decoration, not a supply.
Give the unsure pile one week. Anything still unclaimed goes to declutter. Then take a photo of the survivors spread on the bed, because that photo is your honest collection count and most people overestimate it by half.
Step 2: Choose One Sorting System and Stick With It
One system, applied consistently, beats a hybrid every time. Mixed sorting is why collections become unsearchable: you cannot predict where anything is, so you check everywhere.
Sort by color family
This is the fastest option for visual retrieval and the one technique that shows up across several top-ranking community solutions, including a twine-loop user who arranged every roll by color on a single loop. Group into neutrals, warms, cools, pastels, and metallics, then within each family arrange light to dark.
Sort by pattern or theme
Best for scrapbookers working in series, where you might need twelve coordinating florals at once. Group by subject such as botanical, geometric, newsprint, or holiday, then by width. The downside is slower retrieval when you want one specific color.
Sort by width and core size
The practical choice if you already own your storage. Standard washi runs around 15mm wide on a small core, but wider decorative rolls and thinner-core tapes exist, and mixed widths waste a lot of space. Sorting by size first tells you exactly which containers will actually work.
Sort by brand or collection
Best for preventing re-purchases. Buy a full set at once, store the set together, and the next time you see a pattern you already own you will recognize it instantly. Weak point: it does nothing for finding a color quickly.
Sort by project type
Planners, scrapbooks, card making, gift wrapping. This matches the way you actually work and it pairs well with one working tote per active project, though it duplicates rolls across groups if you are not careful.
My default recommendation is color family, with brand used as a tiebreaker inside each family. It needs no index, it degrades gracefully when you add new tape, and it makes a wall display or open tote readable at a glance.
Step 3: Match the Storage Method to Your Collection and Space
Each block below follows the same format: what it is, who it fits, how many rolls it holds, what it costs to build, how to set it up, and the one limitation that decides whether you will keep using it. Figures marked as estimates come from my own measurements rather than published sources.
1. Embroidery bobbins in a thread case
What it is: You wind each washi roll onto a plastic embroidery thread bobbin and stand the bobbins in an embroidery thread case.
Best for: Very large collections, 150 rolls and up.
Capacity: One r/washiaddict user reported 206 rolls in a thread case and said it saves a great deal of space. A standard thread case holds far fewer, so check the case against your own roll count.
Cost tier: Low spend, mostly bobbins plus one case.
Setup steps: Sort and purge your collection. Wind each roll onto a bobbin, keeping the tape end tucked flat against the previous layer. Stand bobbins in the case in your chosen color order. Group cases by color family if one case is not enough.
Watch-out: Winding takes the longest of any method here, and the whole case must stay upright, so it is not a travel option.
2. Multi-drawer clear bins
What it is: A small plastic unit with three transparent drawers, each holding rows of upright rolls.
Best for: 50 to 120 rolls and anyone who wants to see the contents without opening anything.
Capacity: A r/stationery user described three rows of about 10 rolls per drawer, which is roughly 90 rolls per unit.
Cost tier: Low to mid spend, depending on the drawer size.
Setup steps: Assign one color family per drawer. Stand rolls in rows with the loose end facing the front. Use a strip of card at the front of each drawer as a stop so rows do not tip out when you pull the drawer. Label the drawer front.
Watch-out: Once a drawer is packed, the front roll is easy to grab and the back row is not, so leave the last row for patterns you use least.
3. Dowel or rod wall display
What it is: A shelf, plank, or board with rods threaded through it, each roll slid onto a rod like a spool.
Best for: Collections you use daily and enjoy looking at.
Capacity: Limited only by rod length and your wall span. Half an inch of spacing per roll is enough if the core is not being crushed.
Cost tier: Low spend for dowels and a board, higher if you buy a finished decor shelf.
Setup steps: Drill evenly spaced holes through the board. Thread the rods through. Add a stopper or knob at each rod end so rolls cannot slide off, which is exactly the fix a r/stationery user built with wooden sticks and hot-glued knobs. Hang the board and load rolls in color order.
Watch-out: It needs clear wall space and it exposes every roll to dust and sunlight, so keep it away from a window that gets direct sun.
4. Pegboard or panel hooks
What it is: A perforated wall panel where each roll hangs on a short peg or cup hook.
Best for: Small spaces where every horizontal surface is already taken.
Capacity: One roll per hook, so capacity equals the number of hooks you can fit on the panel width.
Cost tier: Low to mid spend for a panel and hooks.
Setup steps: Mount the panel above your desk or beside your planner. Fit hooks on a consistent grid. Hang rolls by their core with the tape end facing out. Group colors in vertical columns so a full column reads as one shade family.
Watch-out: Rolls hang by the core, so a soft or thin core will deform over time. Keep light or damaged rolls on a rod instead.
5. Repurposed box dispenser
What it is: An empty plastic wrap or aluminum foil box with a tube inside and a serrated lip, so tape slides on and comes off ready to use.
Best for: A working set of 15 to 25 rolls that you want one-handed access to while crafting.
Capacity: About 20 rolls per box, roughly one row along the tube.
Cost tier: Free if you already own a box.
Setup steps: Choose a box whose lip is serrated. Slide the inner tube in. Cut rolls so the tape reaches the lip with a little overlap. Load the tube and pull the first roll over the lip so the serrated edge cuts cleanly.
Watch-out: Low capacity, so it works as a daily-use station rather than as your archive.
6. Spice rack with small drawers
What it is: A multi-drawer spice rack repurposed as a divided organizer, a trick that circulates widely as a washi storage idea.
Best for: Sorted collections up to about 60 rolls.
Capacity: Estimate 8 to 12 rolls per drawer, depending on roll diameter.
Cost tier: Low spend, and often already in the kitchen.
Setup steps: Assign one color family per drawer. Stand rolls upright rather than stacking them flat. Add a thin card strip at the front of each drawer as a roll stop. Close the drawer when you are done so the rows do not tip.
Watch-out: Loading a drawer past full makes the last rolls very hard to extract, and small drawers are not child-safe around pets.
7. Clear plastic tote
What it is: A simple clear storage tote holding upright rows of rolls, sometimes with a lid.
Best for: Budget storage for collections under 50 rolls.
Capacity: Around 40 rolls per tote, an estimate that depends heavily on tote depth.
Cost tier: Free to low spend.
Setup steps: Divide the tote into zones with strips of cardboard. Stand rolls by color family within each zone. Use a smaller tote rather than a larger one if space is the goal, which is the swap one r/ilovestationery user made for exactly that reason. Stack a second tote only if you can still see the lower one.
Watch-out: A single open tote means you still dig, so it is a holding solution rather than a retrieval solution once you pass about 40 rolls.
8. Cut-up retail packaging bins
What it is: The transparent plastic boxes that tape arrives in, trimmed into small open bins with scissors.
Best for: People who want transparent compartments with no purchase at all.
Capacity: Estimate 6 to 10 rolls per trimmed bin, and you can nest several bins in a drawer.
Cost tier: Free, paid for with packaging you were going to recycle anyway.
Setup steps: Remove labels and any sharp burrs. Cut the front panel down to a low lip. Use a heated edge or tape along the cut line so the lip is safe. Fill with upright rolls sorted by color and nest the bins inside a drawer or a larger bin.
Watch-out: Small bins hold few rolls, so this is a modular system that grows as your packaging does rather than a single big solution.
9. Pencil and hair-tie dividers
What it is: Pencils laid in a bin with hair ties or rubber bands stretched across them, creating slots that hold one row of rolls each.
Best for: Anyone who wants tidy rows at almost no cost.
Capacity: One row of roughly 8 to 10 rolls per slot, with as many slots as your bin length allows.
Cost tier: Essentially free.
Setup steps: Lay pencils parallel across the floor of the bin. Stretch a hair tie around each pair of pencil ends to lock the row in place. Stand rolls in the slots, color sorted. Add a second layer only if the slot height allows.
Watch-out: Rows are fixed once the bands are on, so adding wide decorative rolls later means rebuilding the slot.
10. Twine loop for portable use
What it is: A length of twine with a large double knot at one end and a loop at the other, with rolls loaded on and stored flat.
Best for: Journaling at a café, in a class, or on a trip, and for anyone who does not want a fussy system.
Capacity: Limited by twine length, with roughly 10 rolls per foot as an estimate for standard width.
Cost tier: Free to very low spend.
Setup steps: Cut a length of twine and knot a large double knot at one end. Tie a hanging loop at the other. Slide rolls on one at a time in color order. Keep the line flat in a box of materials so it does not stretch, and add or remove rolls to adjust the load.
Watch-out: Rolls on twine can swing and unwind if the line is hung vertically, so store it flat and roll each tail in tightly before loading it.
Storage Method Comparison Table
No ranking guide on this topic compares methods side by side, so here is one. Community figures are marked as such, and anything I measured myself is labelled an estimate. Cost tiers describe effort and materials rather than any specific amount.
| Method | Rolls Held | Approx. Footprint | Cost Tier | Portable | Build Difficulty |
|---|---|---|---|---|---|
| Embroidery bobbins in a thread case | 200-plus (community figure) | Shoebox sized | Low spend | No | Medium, slow to wind |
| Multi-drawer clear bins | About 90 per unit (community figure) | One drawer slot | Low to mid spend | Partly | None, just load it |
| Dowel or rod wall display | Set by rod length | Wall span | Low spend | No | Medium, drilling required |
| Pegboard or panel hooks | One per hook | Wall panel | Low to mid spend | No | Low |
| Box dispenser | About 20 (estimate) | One shelf space | Free | Yes | Low, under 10 minutes |
| Spice rack drawers | 8 to 12 per drawer (estimate) | Counter or shelf corner | Low spend | Partly | Low |
| Clear plastic tote | About 40 (estimate) | One shelf space | Free to low spend | Yes | None |
| Cut-up retail packaging | 6 to 10 per bin (estimate) | Nests in a drawer | Free | Yes | Low, trimming required |
| Pencil and hair-tie slots | About 10 per row (estimate) | One bin | Free | Yes | Low |
| Twine loop | About 10 per foot (estimate) | Folds flat | Free to low spend | Yes | Lowest, under 5 minutes |
Small-Space and Dorm-Safe Solutions
In a small space, the winning move is to stop using horizontal surface and start using vertical and hidden surface. The best way to organize craft supplies in a small space is to claim one vertical zone as craft storage, keep only the tape you use weekly within reach of it, and store the rest in whatever capacity container is cheapest.
Vertical spacing of about half an inch per roll is enough as long as the core is not being crushed, which means you can pack a shelf far tighter than a retail organizer suggests. The core is the cardboard inner ring, and it is the only structural part of the roll, so a squashed core is a dead roll.
How to organize a tiny craft room comes down to four surfaces most people forget. The wall above the desk takes a dowel display or a pegboard panel. The gap between the top of a door and the wall takes a shallow shelf or a rail for a box dispenser. The side of a cabinet takes adhesive hooks holding small bins. The inside of a drawer takes the working rolls, roughly a third of your collection, with everything else pushed up to a top shelf or bin.
For the smallest footprint, a 12×12 cardstock sheet makes a portable board that holds a dozen or so rolls, and a cut-up tissue box becomes a two-roll cradle that slides onto a shelf edge. Both are genuinely free and both take a few minutes.
Two rules keep small-space systems working. Put your most-used ten rolls in the daily zone and everything else in bulk storage, and never let the daily zone hold more than you can see in one glance.
How to Find a Specific Tape Fast
Retrieval speed is the part almost every washi storage idea ignores. These five habits turn a stored collection into a usable one.
Load in a fixed order. Decide a direction once, front to back and light to dark, and never deviate. A predictable position beats a clever arrangement every time.
End-mark the tail. Press a small sticker or a square of masking tape onto the loose end of each roll, or tuck the end under itself. The tape end becomes findable by touch in a second instead of by unraveling in ten.
Keep swatch index cards. Cut cardstock to tape width, wrap a short strip of each pattern around one, and file the cards in a binder sleeve or a small box beside the storage. The cards take a fraction of the space of the rolls and let you shop your collection without unpacking it.
Label the front, not the lid. A label on the front of a drawer or bin is visible when the container is closed and stacked. A label on the lid is visible only once, when you open it.
Photograph the collection. One overhead photo of each color family on your phone takes a few minutes and turns your phone into a catalog. Several collectors do this and never re-buy a pattern they already own.
Common Mistakes That Ruin a Washi Collection
Losing the tape end. A loose end inside a bin tangles with everything around it. Fix: end-mark the tail with a small sticker or a folded-under twist at load time.
Storing vertically with no support. Upright rolls in a bin that gets tipped slide out and scatter. Fix: add end knobs on rod displays, or a snug card stop at the front of every drawer and bin.
Squashing cores. Overfilling means the top rolls press down on the ones below and flatten the core. Fix: leave the half-inch clearance and keep the last row for rolls you use least.
Storing flat in a pile. A flat stack means the bottom roll is always the one you cannot reach. Fix: stand rolls upright in rows or slots, which is what every high-capacity method here does.
Buying storage before purging. You end up with a system half full and duplicates still in the mix. Fix: finish Step 1 before you spend anything on containers.
Forgetting what you own. A collection you cannot see is a collection you re-buy. Fix: swatch cards or a phone catalog, both covered above.
One more washi-specific problem deserves its own line. Because the adhesive is lower tack than standard tape, exposed rolls lose grip faster than most people expect, especially in a warm room. Decoupage medium or a coat of clear nail polish brushed over the outer wrap slows that down and is the same treatment Amy Anderson recommends for rice paper tape.
DIY Organizers From Things You Already Own
The cheapest washi tape organizers are the ones you already have. Community consensus leans hard toward repurposed materials, and the most-copied project of all is Amy’s dispenser, credited to her as the original Washi Tape Crafts tutorial.
The supply list is short: an empty plastic wrap or aluminum foil box with its tube, paintbrushes, acrylic paint, washi tape, scissors, a decoupage medium, and adhesive Velcro dots. Her build runs in six steps. Paint the box and let it dry. Apply strips of washi tape vertically or horizontally across the face and edges, then trim the ends flush. Add two coats of decoupage medium over the surface to seal it. Stick Velcro dots inside the flap so the lid holds shut. Slide the tube back into the box. Load the rolls onto the tube and pull the first tape over the serrated lip, which cuts each length as you dispense it.
The build is under ten minutes and the result doubles as decoration, because the organizer is itself covered in washi tape.
Other no-spend options worth knowing. A shoebox with cardboard cut into half-inch slots holds rows without any hardware. A tissue box with the middle removed becomes a two-roll cradle. Retail packaging from your own tape purchases trims into small transparent bins. A spice rack from the kitchen does more than a plastic bin at the same size. Bobbins from a craft drawer turn a 200-roll collection into a shoebox-sized stack. Twine and a pair of knots give you the most portable system on this list.
The 5-Minute Weekly Reset
Organizing systems fail from neglect, not from bad design. Five minutes a week keeps the whole thing standing.
Return every roll to its zone the moment you finish using it, rather than at the end of the session when you are tired. Wipe the front lip of each bin with a dry cloth so loose debris does not roll into a bin. Pull one random roll from each container and check the end is still marked. At the end of the month, pull out any roll you have not touched and confirm you still want it. If the count has drifted above your container capacity, that is the signal to move up a method in the comparison table, not to add another bin.
Frequently Asked Questions
What is the best way to store washi tape?
Store washi tape upright, sorted by color family, in a container that leaves about half an inch of clearance per roll so the cardboard core never crushes. For large collections, winding each roll onto an embroidery bobbin and standing the bobbins in a thread case holds over 200 rolls in a small footprint. Always end-mark the tape tail so the end is findable by touch.
How do I organize my washi tape?
Use a five-step system. First, purge duplicates, dried-out rolls, and patterns you never use. Second, sort what remains by one rule, with color family as the fastest default. Third, choose a storage method that matches your roll count and available space. Fourth, load rolls upright in a fixed order. Fifth, run a five-minute weekly reset so nothing drifts out of its zone.
What is the best way to organize craft supplies in a small space?
Claim vertical space instead of horizontal space, then split the collection by frequency. Put your ten most-used rolls in a wall-mounted dowel display or pegboard above your desk, and store everything else in the highest-capacity container you can fit on a top shelf. Keep about half an inch of clearance per roll so cores are not crushed, and never let the daily zone hold more than you can see at a glance.
How to organize a tiny craft room?
Use the four surfaces people forget: the wall above the desk for a rod or pegboard display, the gap above a door for a shallow shelf, the side of a cabinet for hook-mounted bins, and one drawer for your working rolls. Keep roughly a third of the collection in the daily drawer and move the rest to bulk storage. Free options like a cardstock board or a cut-up tissue box handle the overflow.
What are some creative ways to store tape?
Wind rolls onto embroidery thread bobbins and stand them in a thread case, which one collector reports holds 206 rolls. Repurpose a spice rack with small drawers, one color family per drawer. Cut up the transparent retail boxes tape arrives in and nest the pieces inside a drawer as small bins. Stand rolls upright on a dowel wall, or thread them onto a knotted length of twine that folds flat into a materials box.
What are some quirky and funky storage ideas?
A knotted twine loop is the simplest of the unconventional options: tie a large double knot at one end and a loop at the other, load rolls in color order, and store the line flat so it travels in a pencil case. For interiors, paint an empty plastic wrap box, cover it in washi tape, and add a tube and serrated lip so it dispenses and cuts at the same time.
Should washi tape be stored upright or flat?
Upright, in rows or slots, almost always. Upright storage means you can see every roll in the container, grab the front row without moving anything, and avoid the crushed cores that come from weight on a flat pile. Flat storage only makes sense in two cases: a short trip where portability matters more than visibility, or a divided bin where flat rows sit in slots and nothing presses down on them.
How do I find a specific washi tape quickly?
Load rolls in a fixed direction and order, and never deviate from it. Press a small sticker onto the loose tail of each roll so the end is findable by touch. Cut cardstock swatch cards to tape width, wrap a strip of each pattern around one, and file them in a sleeve beside the storage. Label drawer fronts rather than lids, and photograph each color family once for a phone catalog.
Conclusion
There is no single perfect washi tape organizer, and that is genuinely good news, because the right one is whichever method matches your roll count and your space. If you are learning how to organize washi tape, the single most useful action is not a container. It is the purge: pull everything out, drop duplicates, dead rolls, and patterns you never touch, and the collection you are organizing will already be half the size you thought.
Then pick one sorting rule, load upright with half an inch of clearance, mark the tape ends, and run the five-minute reset once a week. If you tell us your roll count and where you are storing, we are always interested in the systems people build in a spare closet or a dorm desk drawer.