
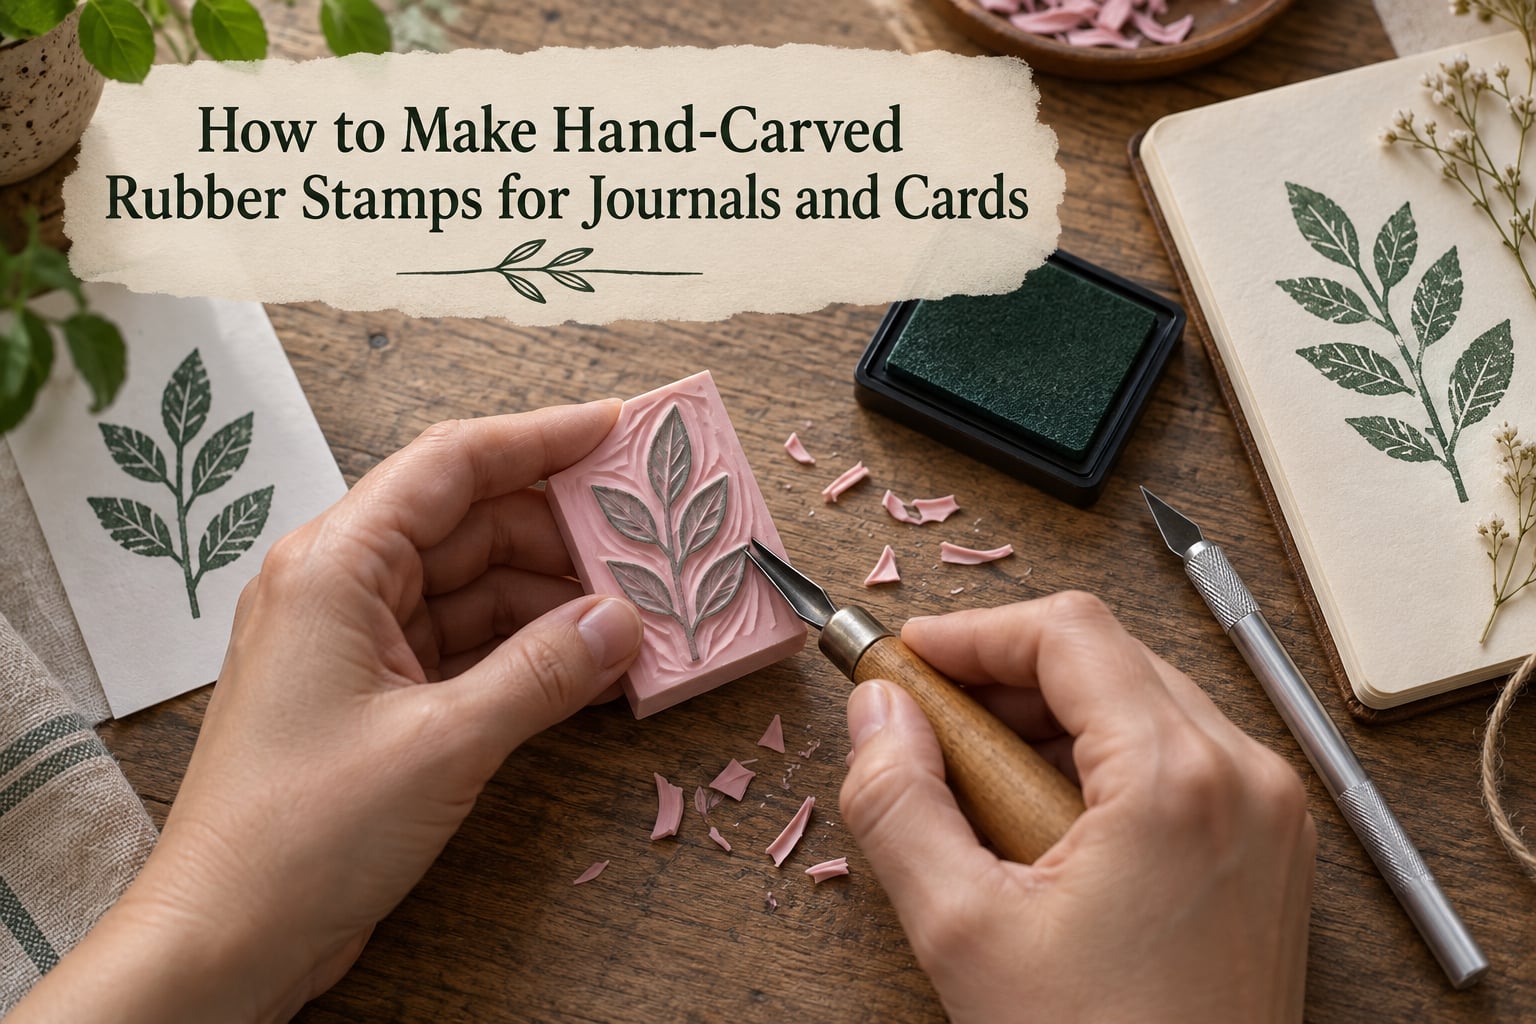
A hand-carved stamp is the one supply in a journal or card-making kit that nobody else can make for you. Draw a header that matches your handwriting, a monogram, a leafy border, a small texture field, and after twenty minutes of carving you own a printing tool that repeats perfectly every time you pick it up. That is the appeal of learning how to make hand carved rubber stamps: the craft is cheap, fast to learn, and forgiving, and the finished stamp works on any paper you already own.
I have watched people go from a paper sketch to a working stamp in a single sitting more often than I expected. One writer in r/stationery described cutting out printable decorative pieces by hand, getting tired of it, buying a beginner carving kit, and finishing a deco stamp in under twenty minutes. That is the realistic pace, and this guide walks through the whole method in the same order: choose a block, transfer a design, carve the outline, clear the negative space, then test print.
The single most common beginner regret is designing something too detailed. Fix that before you cut anything, and the rest of the process is mostly patience. Here is the full method, including the sizing rules that decide whether a design is carveable and the ink choices that decide whether a journal page stays clean.
Table of Contents
- What Is Rubber Stamp Carving?
- Supplies You’ll Need
- How to Make Hand Carved Rubber Stamps Step by Step
- Choosing Your Rubber Block and Carving Tools
- Design Rules That Make Carving Easier
- Carving Text and Logos
- Tips for Stamping in Journals and on Cards
- Common Mistakes and How to Fix Them
- Hand Carving vs. Machine Carving
- Caring for Your Finished Stamps
- 10 Simple First Stamp Designs
- Frequently Asked Questions
- What are the best tools for carving rubber stamps?
- What are some techniques for carving rubber stamps?
- Can a Cricut carve rubber stamps?
- What can I carve a stamp out of?
- How thick should lines be when carving a rubber stamp?
- How do I make sure my stamp prints the right way round?
- What type of ink is best for stamping in journals?
- How do I stop the carving tool from slipping?
- How do I fix a cut I do not like?
- How long does it take to carve a rubber stamp?
- Conclusion
What Is Rubber Stamp Carving?
Hand-carved rubber stamp making is the process of cutting a design into a sheet of soft carving rubber with a V-shaped or U-shaped gouge and a craft knife, so the raised uncut surface holds ink and prints a reversed image onto paper. It is linoleum block printing, just at a smaller scale and on a material soft enough to cut with a knife.
Two ideas carry the entire craft. The first is negative space: wherever you carve, there will be no ink, so everything you remove stays white on the print. The second is mirror image: the rubber prints backwards, so text and any asymmetric design must be drawn or flipped in reverse before you transfer it.
That is genuinely the whole technique. Everything else in this guide is about making those two ideas easier to execute cleanly.
Supplies You’ll Need
A minimal working setup is four items: a block of carving rubber, a carving tool, a pencil, and an ink pad. Most beginners end up adding a few more things, so here is the honest split between what you need on day one and what makes the work safer or faster.
Day-one essentials
- Carving block. A Speedball Speedy Carve block is the most commonly recommended beginner choice by hobbyists, and its pink rubber cuts cleanly with a craft knife. Plain pink rubber and soft pencil erasers work too.
- Carving tools. A linoleum carving set with a small V-gouge for outlines and a larger U-gouge for clearing background.
- Craft knife. An X-Acto style knife with fresh blades, for corners, straight edges, and the trim at the end.
- Pencil and transfer paper. A 2B or number 1 soft graphite pencil, plus tracing paper or graphite transfer sheets.
- Ink and paper. A basic ink pad and a stack of scrap paper for test prints.
Strongly recommended once you are past stamp one
- Self-healing cutting mat. Protects your table and gives the blade something to bite into safely.
- Bench hook or cut-resistant glove. Holds the block steady so the tool cannot skate. Tool slip is the most repeated injury concern in the carving community.
- Speedball brayer and block printing ink. Worth adding once your stamps grow past roughly 2 inches, since an ink pad will not cover a large surface evenly.
- Wooden handle blank. A small block of wood with a hole, so small stamps can be held comfortably and stamped in a consistent spot.
- Water-based marker or paint pen. Used to colour the negative space so you can see what still needs removing.
How to Make Hand Carved Rubber Stamps Step by Step
Five steps, in this order. Do not skip the test print at the end, because it is the step that tells you whether the stamp is finished or needs another pass.
Step 1 – Choose and Prep Your Block
- Pick a size that matches the design. Leave a few millimeters of blank rubber around the outside of your artwork. That border is your grip when you ink and print.
- Sand the face lightly if the rubber is slick. A light scuff with fine sandpaper gives the graphite something to bite into, which makes the transfer step far more reliable.
- Trim the block to roughly 1/4 inch thick. Thin blocks carve with less force and are easier to cut through, which is kinder to your hands and your blade.
Step 2 – Design and Transfer Your Design
- Draw the design bigger than you think you need. A stamp that is too small limits where you can use it on a page.
- Flip text and logos. Take a photo of your sketch, mirror the image, and print or redraw it reversed.
- Go dark with the pencil. Fill the lines fully rather than sketching lightly, so more graphite reaches the rubber.
- Lay the design face-down and rub the back. Tracing paper with a graphite-coated side, or a graphite transfer sheet, moves the image onto the rubber in seconds.
Warning: the image on the block will read backwards, and that is correct. A stamp that looks right on the rubber prints right on paper. If it looks correct on the rubber, it will print mirrored.
Step 3 – Carve the Outline
- Use the smallest V-gouge for the lines you want to print. The raised line you keep is the width of the blade’s V, so blade size sets your line width.
- Keep the blade at a shallow angle. Around 30 degrees to the surface, taking a thin chip rather than a deep bite.
- Rotate the block, not the knife, through curves. Twisting the blade in place is what causes slips and tears.
- Stop cuts slightly short of each intersection. Crossing cuts at a right angle is where rubber collapses and lifts.
Safety callout: carve away from your hands and your body, keep the non-cutting hand behind a bench hook or in a cut-resistant glove, work on a self-healing mat, and change direction of the stroke away from your supporting fingers. Nearly every carving injury people report is a skipped blade jumping across smooth rubber, and the fix is grip and shallow angle, not more pressure.
Step 4 – Clear the Negative Space
- Switch to the larger U-gouge. This is where most of the time goes, and it is normal for it to go slowly.
- Scoop in long, light passes. Take shallow layers rather than trying to reach the base in one cut.
- Carve deeper right next to the design. A deeper channel near the raised detail keeps ink from creeping into the low areas and printing as a halo around your image.
- Colour the background with a marker as you go. A water-based marker makes the cleared area obvious and shows you what is still standing.
- Skim any remaining rubber flat with the craft knife. It only needs to sit below the printing surface, not be perfectly level.
Step 5 – Trim, Mount, and Test Print
- Trim the outside edge with the craft knife. Leave a narrow grip border of flat rubber around the design so your fingers do not land on the printing surface.
- Test print on scrap paper, not on your journal. Three or four impressions reveal the problem fast.
- Stamp with light, even pressure. Rock the stamp down from one side rather than pressing straight down hard, which is what causes uneven inking and smudging.
- Fix stray marks by shaving, not by re-carving. A small slice removes a low bump that is catching ink, and the stamp is usable again immediately.
Choosing Your Rubber Block and Carving Tools
What you carve from decides how forgiving the material is. This table compares the four materials beginners actually use.
| Material | Entry cost | Ease of carving | Best for | Main limitation |
|---|---|---|---|---|
| Soft pencil eraser | Free, already in the house | Very easy | A first same-day project, tiny motifs | Stamp size is limited to the eraser |
| Speedball Speedy Carve block | One-time purchase | Easy | Small to medium stamps for journals and cards | Soft rubber tears if you force the blade |
| Plain pink rubber | One-time purchase | Easy | Custom sizing and layered designs | Very soft, so fine detail collapses quickly |
| Linoleum block | Moderate purchase | Harder, needs a bench hook and more force | Larger prints, art prints, texture fields | Needs a brayer and block printing ink, not an ink pad |
On tools, a linoleum carving set covers most of the work. The small V-gouge does outlines, the larger U-gouge clears background, and a U-gouge with a rounded toe makes curves far easier than a flat blade. A craft knife handles the outside trim and any corner the gouges cannot reach. A cut-resistant glove or bench hook is not a luxury, because smooth rubber is exactly the surface that makes a blade skate.
Design Rules That Make Carving Easier
These are the sizing rules that decide whether a design prints well. A stamp prints from whatever is left raised, so anything too fine to hold up as a raised island will fall out or tear during the clear step.
| Design feature | Minimum workable size | What happens if you go smaller |
|---|---|---|
| Raised line width | Roughly 1/8 inch, 2 to 3 mm | Thin lines crumble, tear, or drop out of the block |
| Smallest enclosed detail | Roughly 1/4 inch, 6 mm across | The island lifts out during background clearing |
| Text height | Roughly 3/8 inch, 9 mm, and a plain block font | Counters fill with ink and the word turns to mud |
| Gap between elements | Roughly 1/8 inch between raised areas | Adjacent areas merge into one solid shape |
| Curve radius | Rounded rather than sharp | Sharp inner corners chip and lift |
Good beginner designs share a few traits: bold geometric shapes, generous gaps, few enclosed spaces, and no more than one focal element. A five-point star, a row of leaves, a monogram, a simple frame. If your design has fifteen separate pieces, split it into fifteen stamps. Small batches of simple stamps are the norm, and one r/stationery commenter described having carved three stamps rather than attempting one ambitious piece.
Carving Text and Logos
Text is where beginners most often get a disappointing first print, and the cause is nearly always the same: the design was not mirrored before transfer. The rubber surface is the mirror, so a design that reads correctly on the block prints backwards.
- Mirror it before you transfer. Use a phone photo flipped horizontally, or flip the image in any basic editing app, then print it at the finished size.
- Use a plain block font with thick strokes. Thin serifs and fine counters fill with ink and disappear.
- Carve the letters first, then clear around them. Letters are the islands most likely to lift, and clearing around them gently is safer than routing tight corners first.
- Print the design into your journal as a test. Stamping a reference impression into a page is a real workaround people use, and it doubles as a placement guide.
- Align repeat impressions with the handle. Before mounting, stamp the blank wooden handle on scrap paper, note which face went down, and mount that face to the same side of the rubber. Every later impression then lands in the same orientation.
Tips for Stamping in Journals and on Cards
The carving matters more than the printing, but ink choice decides whether a stamp looks right in a journal kept for years. Journal paper is often thin and absorbent, which is exactly the combination that produces bleed-through and smudging.
| Ink type | Colour brightness | Permanence | Bleed risk | Best use |
|---|---|---|---|---|
| Dye-based ink pad | Bright and translucent | Fades over time | Low on card, moderate on thin paper | Quick, colourful layering in scrapbooks |
| Pigment ink pad | Muted and matte | Archival | Very low, dries matte | Journal headers, planner pages, keepsakes |
| Water-based block printing ink | Even and flat | Varies by formula | Higher on absorbent paper | Large stamps rolled out with a brayer |
- Use pigment ink for anything you want to keep. It sits on the surface, dries matte, and resists feathering on absorbent journal paper.
- Test on the actual paper first. Print one impression on a page from the same notebook before you commit a whole spread.
- Press, do not scrub. Even pressure from directly above gives a cleaner impression than rocking or dragging the stamp.
- Let it dry before the next layer. Two-color and layered stamping only works if the first impression is fully dry, otherwise the second pass lifts it.
- Plan the layout before stamping. Decide where the header, border, and small motifs sit on the spread, then stamp from the outer edge inward.
Common Mistakes and How to Fix Them
Almost every carving problem is fixable without starting over. That is the part most guides skip, and it is what keeps beginners carving past the first block.
| Problem | Why it happened | How to fix it |
|---|---|---|
| Thin lines crumble or disappear | Lines were carved narrower than the blade V | Carve a wider raised line next time; for this stamp, redraw the detail without the fine lines |
| Raised or collapsed area at a line crossing | Cuts met at a right angle | Shave the bump down with the craft knife and re-test |
| Low rubber prints a smudge ring | Background was not cleared below the printing surface | Skim the flat area with the U-gouge until it sits clearly lower than the design |
| Text prints backwards | Design was not mirrored before transfer | Flip the design, transfer again onto a fresh block |
| Small island lifted out | Detail was too small or the background was cleared too close | Leave a thin web of rubber, clear around it carefully, then widen the gap |
| Stamp prints patchy | Too much ink, or the stamp was rocked while pressing | Press straight down with light even pressure, and re-ink between every impression |
| Ink bleeds into paper fibres | Dye or water-based ink on absorbent paper | Switch to pigment ink and let each impression dry fully |
| Cut on thumb or finger | Blade jumped across slick rubber | Use a bench hook or cut-resistant glove, keep the angle shallow, and change blades often |
Hand Carving vs. Machine Carving
Can a Cricut carve rubber stamps? Only partially. A standard machine blade can cut a soft pencil eraser and, with pressure and repeated passes, thin soft rubber. It struggles with the thicker carving rubber sold for stamp making, because blade depth and pressure are the limiting factors, and it will not produce the bevelled V channels that give a hand-carved stamp its crisp printed edge. Laser cutters handle the material much better, and one r/stationery commenter noted they can laser cut their own stamps.
For anything under about 1 inch with bold shapes, a machine is fine and fast. For curved lines, bevelled edges, and small batches, hand carving gives more control and costs far less to start. Most people who own a cutting machine still carve by hand.
Caring for Your Finished Stamps
- Re-ink, then wipe. Press the stamp onto the pad, stamp twice onto scrap paper, and wipe the face with a damp cloth or a baby wipe.
- Store face-down or face-up, never stacked. A rubber stamp stored face-down on a flat surface keeps its shape; stacked stamps develop a curl and print unevenly.
- Keep the rubber out of direct sun and heat. Heat warps the block permanently.
- Oil the stamp occasionally if it starts going stiff. A drop of plain machine oil on the surface and a few impressions restores a dry pad.
- Expect the edges to round with use. That is normal wear, not damage.
10 Simple First Stamp Designs
These all clear the sizing rules above and work at a size that fits a journal spread or a card front.
- A single five-point star
- A row of three leaves
- A one-letter monogram
- A simple rectangular frame with corner blocks
- A short word in a plain block font
- A cluster of dots or a polka dot texture patch
- A single heart
- A small arrow
- A numbered tab, one to five
- A repeating scallop or wave border
Texture stamps, the kind used to add background pattern to a page rather than a focal image, are a separate category and a good second project. Once you have a handle, a background stamp is easy to position repeatedly.
Frequently Asked Questions
What are the best tools for carving rubber stamps?
A minimal set is a carving block such as a Speedball Speedy Carve block, a linoleum carving set with a small V-gouge and a larger U-gouge, a craft knife, a 2B pencil, and tracing paper or graphite transfer sheets. A cut-resistant glove or bench hook is the one safety item worth adding from day one, because smooth rubber makes a blade skate. A self-healing mat and a Speedball brayer with block printing ink become useful once your stamps grow past roughly 2 inches.
What are some techniques for carving rubber stamps?
Carve the outline with a small V-gouge at a shallow angle, taking thin chips rather than deep bites. Rotate the block instead of twisting the blade through curves, and stop each cut slightly short of a line intersection so the rubber does not collapse. Switch to a larger U-gouge to clear the negative space in long, light passes, and carve deeper right next to the design so ink cannot creep into the low areas. Colour the cleared background with a marker to see what remains, then test print on scrap paper before touching a journal page.
Can a Cricut carve rubber stamps?
Partially. A standard machine blade can cut a soft pencil eraser and, with repeated passes and firm pressure, thin soft rubber. It struggles with the thicker carving rubber sold for stamp making because blade depth and pressure are the limiting factor, and it does not create the bevelled V channels that give a hand-carved stamp its crisp edge. Laser cutters handle the material far better. For bold shapes under about 1 inch a machine is fine, while curved lines and bevelled edges are easier by hand.
What can I carve a stamp out of?
A soft pencil eraser is the one free option and is ideal for a first same-day project, though it limits the stamp size. Speedy Carve blocks and plain pink rubber are the standard beginner choices, easy to cut and available in sheets you can resize. Linoleum takes larger designs and prints with a brayer and block printing ink, but it is harder to carve and needs more force. Wood and PVC can be carved but demand significantly more pressure and sharper tools.
How thick should lines be when carving a rubber stamp?
Aim for a raised line of roughly 1/8 inch, or 2 to 3 mm. Because the printed line is as wide as the V of your blade, anything carved thinner crumbles, tears, or drops out during the background clearing. The smallest enclosed detail should be around 1/4 inch, 6 mm across, and the gap between two raised areas should be at least 1/8 inch so they do not merge into a solid block.
How do I make sure my stamp prints the right way round?
Mirror the design before you transfer it. Photograph your sketch and flip it horizontally, or flip the image in an editing app, then print or redraw it in reverse. Lay it face-down and rub the back so the image appears backwards on the block, which is correct. The rubber surface is the mirror, so anything that reads correctly on the block will print mirrored.
What type of ink is best for stamping in journals?
Pigment ink for anything you want to keep. It sits on the surface, dries matte, and resists feathering and bleed on absorbent journal paper. Dye-based ink gives brighter colour and quicker drying but fades over time. Water-based block printing ink gives flat, even coverage on large stamps rolled out with a brayer, but it bleeds more on thin paper. Test on a page from the same notebook before committing a spread.
How do I stop the carving tool from slipping?
Hold the block in a bench hook or grip it through a cut-resistant glove so your supporting fingers are never in the blade path. Keep the blade at a shallow angle and take thin chips rather than pressing hard. Cut on a self-healing mat and work on a non-slip surface, rotate the block rather than twisting the blade through curves, and change the blade often, because a dull blade is the main reason it jumps.
How do I fix a cut I do not like?
Shave it rather than starting over. A raised or collapsed area at a line crossing comes off with a light slice from the craft knife, and low background rubber that is printing a smudge ring can be skimmed flatter with the U-gouge. A small island that lifted out is the exception, since it cannot be glued back at a printable height, so redraw that design without the fine detail and carve it on a fresh block.
How long does it take to carve a rubber stamp?
A simple first stamp can be finished in under thirty minutes, including the test print. Clearing the negative space takes the longest, especially for beginners. Designs with many small enclosed areas and carved text take considerably longer, which is another reason to start with a bold shape rather than lettering.
Conclusion
Learning how to make hand carved rubber stamps comes down to two ideas and five steps. Carve away what should stay blank, transfer your design mirrored, and follow the outline, clear, test sequence in that order. Choose a bold design with lines at least 1/8 inch wide, keep the blade shallow, and hold the block in a bench hook or glove.
For your first project, take a soft pencil eraser or a small Speedy Carve block, carve a single star, and print it on scrap paper. You will have a working stamp before the session ends, and the second one is easier than the first. From there, carve a few simple shapes rather than one ambitious design, and switch to pigment ink when you are ready to stamp something you want to keep.
Updated for October 2026.