
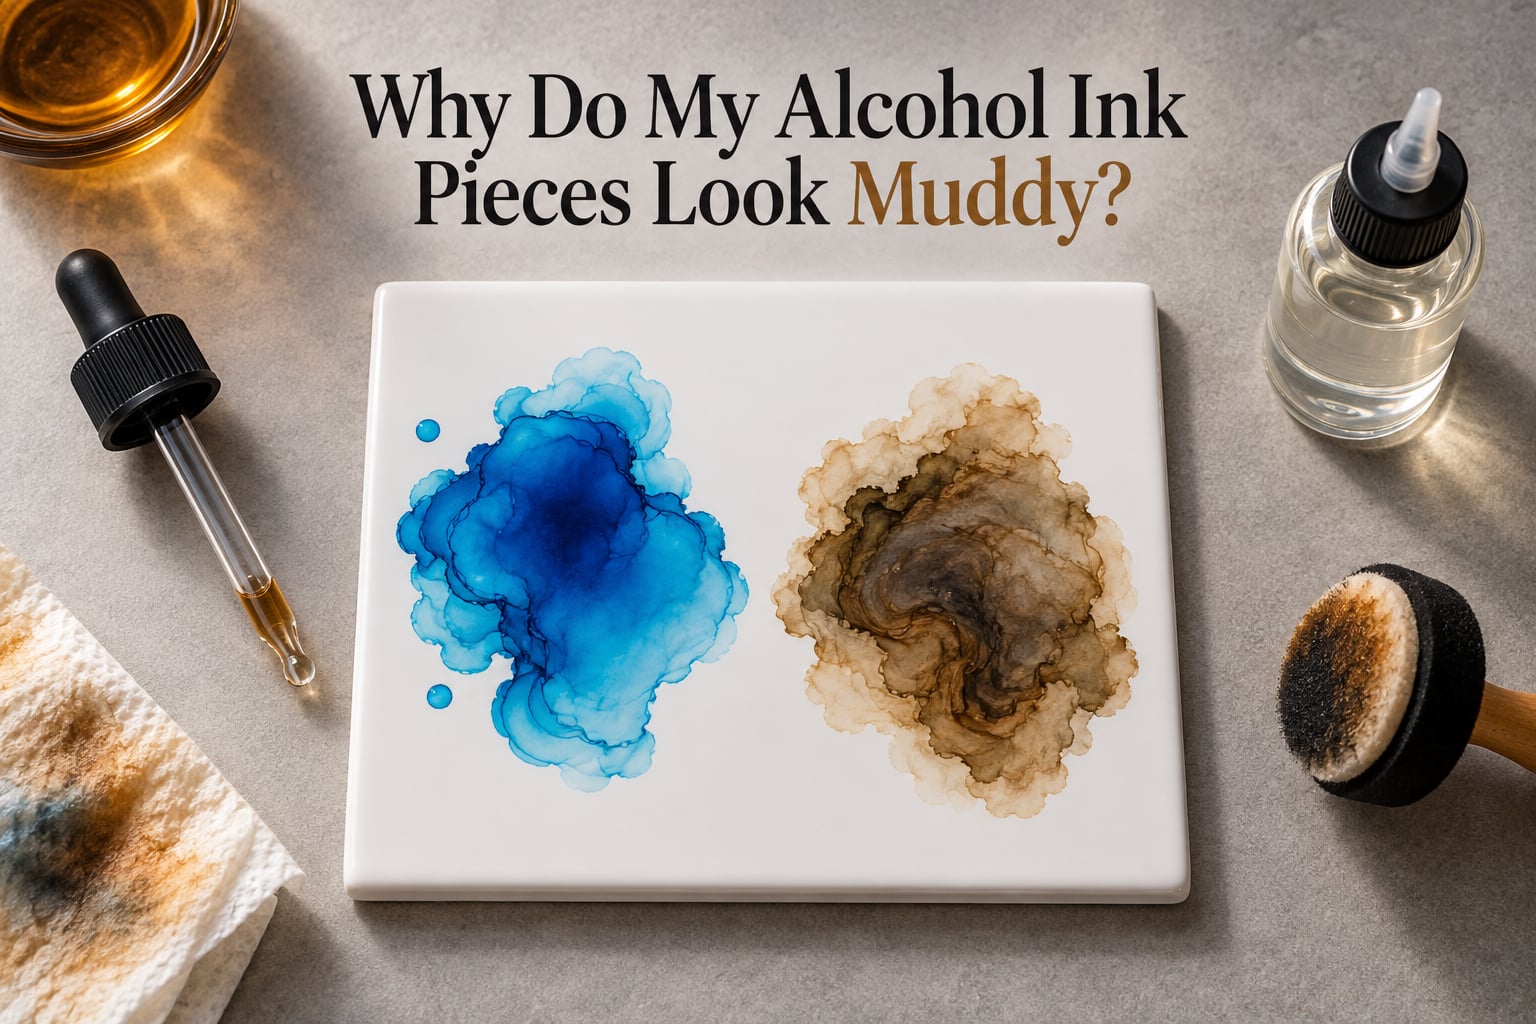
If you have ever finished a piece of alcohol ink art and wondered why do my alcohol ink pieces look muddy, the answer is almost always the same. Muddy color happens when too much pigment is physically combined in one spot instead of layered, when the ink is over-worked while wet, when a dirty tool drags old color back in, or when curing heat oxidizes the dye and shifts its hue. The color loses chroma and drifts toward brown, grey or purple.
That single sentence is the whole diagnosis, but each of those four failures has its own fix and its own telltale symptom. This guide walks through all six causes I see most often, shows you how to identify which one you hit from the finished result, and explains what to do about a piece that is already muddy.
I have watched beginners lose entire resin pours to this. The ink looks brilliant on the ceramic tile, the color reads vivid right up until the epoxy is poured, and two days later the deep blue has turned into a dull violet. Nobody tells you that is coming, so the money and the material are gone before you notice.
That delay is the real problem. Alcohol ink dries in seconds, resin cures in days, and the color shift caused by curing heat only shows up at the end of that chain. Understanding the causes before you pour prevents most wasted batches.
Table of Contents
- Why Do My Alcohol Ink Pieces Look Muddy? 6 Causes and Fixes
- Reason 1: You over-blended the ink before it dried
- Reason 2: You mixed complementary colors instead of layering them
- Reason 3: You used too many drops of ink for the pour
- Reason 4: Resin curing heat oxidized your dye-based ink
- Reason 5: Your tools, mat or water carried old color into the mix
- Reason 6: You used 70 percent isopropyl alcohol instead of 91 or 99 percent
- Diagnose Your Muddy Piece: Symptom, Cause, Fix
- How to Fix an Already Muddy Piece
- How to Prevent Muddy Colors in the First Place
- Choosing the Right Alcohol, Blending Solution and Surface
- Sealing, Ventilation and Long-Term Color Retention
- Frequently Asked Questions
- Conclusion
Why Do My Alcohol Ink Pieces Look Muddy? 6 Causes and Fixes
Six causes account for nearly every muddy alcohol ink piece. Here is the short version, one line each, followed by the full explanation of each.
- You over-blended wet ink until the pigment spread thin and flat.
- You mixed complementary colors together instead of layering them.
- You used too many drops of ink for the amount of resin or surface.
- Resin curing heat oxidized your dye-based ink and shifted the hue.
- A dirty brush, stained mat or reused rinse water carried old color into the mix.
- You used 70 percent isopropyl alcohol, whose water content dulls and streaks.
Reason 1: You over-blended the ink before it dried
Over-blending is the single most common cause, and it is the reason most beginners hear the phrase less is more. Alcohol ink is concentrated dye or pigment suspended in alcohol, and the moment it hits a surface the carrier evaporates.
Every pass of a blending solution or dropper re-wets the pigment and lets it spread a little further. Do that twenty times and the color load in that area drops until you have a thin translucent film with no saturation left. It reads as dull grey, not as a color.
On the SplitCoastStampers forum, artists note that blending solution lets you work the ink longer, but you have to keep adding more ink because the alcohol dries so fast. That is the trade-off. Working time you buy with solvent has to be paid back in pigment.
The fix is simple and unpopular: stop earlier. Give the ink two or three deliberate passes, then step back and let it dry before you judge it. Wet ink always looks duller than the same ink once it has set.
Reason 2: You mixed complementary colors instead of layering them
Complementary colors sit opposite each other on the color wheel, and mixing any two of them in equal measure produces neutral. Neutral pigment is mud. Blue and orange, purple and yellow, red and green all collapse into brown or grey when combined in one wet puddle.
Craft hobbyists have said it plainly for years: follow color theory rules so colors do not turn to mud, and build up in layers rather than mixing. The rule is not stylistic preference, it is basic pigment behavior.
Layering solves the problem because each layer dries before the next lands. A translucent blue over a dried yellow gives you green with the brightness of the blue intact. The same two colors swirled together at once give you brown with neither one left.
Keep a clean white or pale ink nearby. A thin veil of it over a dark passage lifts the value without introducing another competing hue, which is why a lot of artists treat it as their correction tool.
Reason 3: You used too many drops of ink for the pour
Alcohol ink is extremely concentrated. A single drop can tint an entire small batch, and the instinct to keep adding drops until the color looks right in the cup is what saturates the pour past the point where it can stay clear.
On r/DiceMaking, where resin and ink get mixed in bulk, the working consensus is roughly five drops or fewer per resin batch, thorough mixing of the resin, and careful ratios by volume. That number is conservative on purpose.
Too much pigment does not produce a darker version of your color. It produces a crowded one, where light no longer passes cleanly through the layer and the result goes flat and grey. On a non-resin piece, the same error shows up as an area that will not blend because the pigment is already too heavy.
Measure rather than pour freehand when you can. Add ink in stages, mix fully, look, and only then decide whether another drop is needed.
Reason 4: Resin curing heat oxidized your dye-based ink
This is the cause behind the top-ranking thread on the whole topic, titled Deep Blue alcohol ink turns into muddy purple once in resin. Commenters there consistently attribute the shift to the pigment oxidizing faster under the heat the resin generates as it cures.
Understanding it starts with the difference between two kinds of alcohol ink. Dye-based ink is transparent and reactive. It gives you those luminous, glassy transitions, and it is also the kind that reacts to heat, light and time. Pigment-based ink is opaque, sits on the surface, and is far more stable under the same conditions.
So the practical answer to will alcohol ink fade in resin is: some of it does, and it is usually the dye-based kind. Pigment-based inks hold their hue much better in a cured pour.
You cannot stop an epoxy pour from reaching its exotherm. What you can do is test before you commit, which is why the swatch routine later in this guide matters more for resin pieces than for anything else.
Reason 5: Your tools, mat or water carried old color into the mix
Cross-contamination is invisible while it happens. A felt applicator that worked through a dark passage, a dropper rinsed in cloudy water, a mat that has absorbed yesterday’s ink, and each of these pushes a trace of the previous color into your fresh mix.
Small amounts of brown or grey in a bright mix read as dullness rather than as dirt, which is why this cause gets misdiagnosed as over-blending. The result looks like the color was never bright in the first place.
Instagram practice notes from working artists make the same point about keeping a clean mixing area and using clean brushes when moving from dark passages to light highlights. Use separate applicators for light and dark work, and rinse in clean water rather than a grey puddle.
The cloudy resin question usually lands here too. A resin that cures cloudy rather than clear often picked up moisture, dust or pigment from a contaminated surface in the moments before it set.
Reason 6: You used 70 percent isopropyl alcohol instead of 91 or 99 percent
Seventy percent isopropyl alcohol is thirty percent water. That water does not evaporate as quickly as the alcohol around it, so it lingers on the surface, drags pigment into streaks, and dries last, leaving a dull film over everything you just made.
Ninety-one or ninety-nine percent isopropyl alcohol is what works for blending. The honest trade-off is control: 99 percent moves faster and is harder to slow down, while 91 percent gives you a slightly longer working window.
Long-time hobbyists on craft boards recommend higher percentage rubbing alcohol over 50 percent for exactly this reason. A glass-focused guide flags the same water-content problem when it warns that 70 percent streaks glass.
Diagnose Your Muddy Piece: Symptom, Cause, Fix
Start from what you can actually see in front of you. Each symptom points at one dominant cause, and fixing the wrong one wastes another pour.
| What you see | Most likely cause | What to do |
|---|---|---|
| Dull grey or flat, color has no depth | Over-blended, too many passes, or pigment load too high | Stop working wet ink early, build thin layers, cut drop count |
| Brown or neutral in the center of a blend | Complementary colors mixed together | Layer the two tones separately instead of swirling them |
| Vivid on tile, purple or brown after resin cures | Curing heat oxidized dye-based pigment | Test the ink in a small pour first, or switch to pigment-based ink |
| Dirty, smoky edge, an unexplained brown cast | Contaminated brush, mat or rinse water | Swap applicators, clean the surface, use fresh rinse water |
| Streaky patches that stay tacky longest | 70 percent alcohol water content | Switch to 91 or 99 percent isopropyl alcohol |
| Resin cured cloudy rather than clear | Moisture, dust or stray pigment on the surface | Clean and fully dry the substrate, work away from dust |
How to Fix an Already Muddy Piece
What you do next depends entirely on how far along the piece is. Work through the stages in order and stop when you find the one that matches your situation.
If the ink is still wet and you have not poured resin: Stop touching it. Add a small amount of clean blending solution in one spot rather than across the whole area, and let it evaporate without spreading. Then add one fresh drop of a bright complementary-compatible color on top of the dull zone. The new drop sits on top of the diluted pigment and hides it rather than trying to blend with it.
If the ink is dry but not sealed: You have more freedom here. Layer translucent bright ink over the muddy passage, keep the layers thin, and let each one dry before the next. White or a pale tint is the fastest recovery because it lifts value without adding a competing hue, though remember white is heavily saturated and will flood and muddy a small cell if you overdo it.
If resin has already been poured and is still liquid: Do not stir. Stirring spreads the pigment that is already suspended. Tilt the mould to let the heavier pigment settle to one edge, or blow gently with a straw to move the clear resin back over the dull area.
If the piece is fully cured: You cannot reverse pigment oxidation or lift cured color. Your options are a new bright layer poured on top, sanding back through the resin to reach the ink layer, or accepting the result and using it as a base for a second pour. Sanding is the only approach that restores the original art, and it needs a wet-sanding progression plus a fresh polish to come out clear.
One warning about the last option. Isopropyl alcohol will not damage cured resin, but it can haze an uncured or freshly cured surface, and acetone-based products will soften epoxy. Keep both away from any piece that is still in the first stages of cure.
How to Prevent Muddy Colors in the First Place
Prevention here is a short routine you run before every piece rather than a technique you try to remember mid-pour.
- Swatch first. Drop each color on a scrap of your actual substrate, then cover a second swatch with resin and let it cure. This is the only way to catch heat-related color shift before it costs you a full pour.
- Use fewer drops than feel necessary. Add pigment in stages and mix fully between additions. You can always add more, but you cannot take pigment back out.
- Work light to dark. Pale layers first, saturated layers last. Going dark over light gives you cleaner depth than trying to darken a finished area.
- Never touch ink that is not moving yet. Let each layer dry fully. Alcohol ink dries in seconds, so this is mostly a matter of patience between layers.
- Keep tools separated by color family. One applicator for lights, one for darks, and a rinse cup you change before it turns grey.
- Work in a ventilated space and away from dust, since both solvents and airborne particles are working against the finish.
A useful rule for judging results: if the ink is still tacky, it is not finished. Wet ink always looks duller than dry ink, and a lot of artists try to correct a color that was about to brighten on its own.
And a short list of what not to add: water, which drags pigment into streaks, acetone, which softens resin and eats cured finishes, a grey rinse cup, and a large volume of 70 percent alcohol used as a general blending fluid.
Choosing the Right Alcohol, Blending Solution and Surface
Your choice of fluid and substrate shapes how much control you have before mud becomes a problem.
| Fluid | Effect on color | Best used for |
|---|---|---|
| 70 percent isopropyl alcohol | Streaks and dulls as the water content dries last | Nothing, in practice. Avoid. |
| 91 percent isopropyl alcohol | Clean blending, slightly longer working window | General blending, careful layering |
| 99 percent isopropyl alcohol | Fastest movement, hardest to control | Quick drops, lift and clear techniques |
| Blending solution | Slows evaporation, lightens and blends, lifts color back off | Extending working time, corrections, clearing a spot |
Blending solution is the fluid most beginners are under-using, and it does three specific jobs. It lets you work an area longer without the color setting, it dilutes and lightens a mix so you can add pigment back in, and it lifts or clears color that has gone too dark. Because it slows things down, keep in mind that you will need to keep feeding the area fresh ink as you go.
On surfaces, the rule is non-porous. Porous material drinks the alcohol carrier and pulls pigment into its fibers, which spreads color unevenly and gives you a permanently dull patch no amount of blending will fix. Ceramic tile, glass, synthetic Yupo paper, glossy cardstock, acetate, metal, polymer clay and shrink plastic all work. Foam brush pads do not. A foam applicator leaves fibers in the ink, and those edges lift and blur into exactly the muddy halo people spend hours trying to correct.
Dye-based versus pigment-based matters once resin is involved. Dye-based ink gives you transparency and movement but is reactive, so expect some shift under curing heat. Pigment-based ink is opaque and more stable, at the cost of some of that glassy depth. If your work is mostly resin pours, do your swatch tests in resin rather than judging on tile.
Sealing, Ventilation and Long-Term Color Retention
Alcohol ink needs protection once it is dry. A solvent-based sealer or varnish gives you UV resistance and a wipeable surface, and applying it only after the ink is completely cured avoids re-dissolving your work. For resin pieces, the pour itself is the seal.
For color to stay where you put it, light exposure matters as much as anything you do at the table. Keep finished pieces out of direct sunlight, particularly if you used dye-based ink.
On safety, work in a ventilated room and avoid prolonged skin contact. Isopropyl alcohol dries fast and strips moisture from your hands, and the dye in the ink will stain. Nitrile gloves and open windows are the whole routine.
Frequently Asked Questions
Can alcohol inks go bad?
Yes. The alcohol carrier evaporates whether the bottle is open or closed, and once it is gone the ink is a concentrated dye or pigment with nothing to keep it dispersed. Signs of age include thickening, separation, a color that no longer matches the bottle, and a smell that has changed from clean alcohol to something sharper. A dried-out dropper tip is another common one, and a dropper that cannot deliver a full drop usually delivers an inconsistent amount instead. Store bottles tightly closed, upright, and away from heat and direct light. If your ink has thickened, a few drops of 91 percent isopropyl alcohol will often bring it back to a usable consistency.
What is the best surface for alcohol ink art?
The best surfaces are non-porous, because porous material absorbs the alcohol carrier and pulls pigment into its fibers, which spreads color unevenly and leaves a permanently dull patch. Ceramic tile, glass, synthetic Yupo paper, glossy cardstock, acetate, metal, polymer clay and shrink plastic all work well. Avoid unfinished wood, canvas, unglazed ceramic, and anything with visible texture. Foam applicator pads are also worth avoiding, because they shed fibers into the ink and leave blurred edges.
Will alcohol ink fade in resin?
Dye-based alcohol ink can, and pigment-based ink is far more stable. The heat a resin pour generates as it cures accelerates oxidation of reactive dye pigments, which is why a deep blue can read as dull violet two days after pouring. The color looked fine on the tile. Because the shift only appears once the pour has cured, swatch the ink under resin on a scrap tile before committing a full batch.
Will isopropyl alcohol ruin resin?
Isopropyl alcohol does not damage fully cured epoxy resin. It can haze a surface that is still curing or that has just been demolded, because it briefly re-dissolves the top layer as it evaporates. Keep alcohol away from resin in the first 24 hours of cure. Acetone-based products are the ones that will genuinely soften epoxy, so those stay away from a piece at every stage.
How to avoid muddy colors when painting?
Use fewer drops of ink than feels necessary and add pigment in stages rather than all at once. Layer complementary colors instead of mixing them together in one wet spot, since equal parts of two complementary colors produce neutral brown or grey. Stop working an area while the ink is still wet, because every pass spreads the pigment thinner. Keep separate applicators for light and dark work, and change your rinse water before it turns grey.
What is the best blending fluid for alcohol ink?
A dedicated alcohol blending solution is the best choice for general work because it slows evaporation enough to give you real control, and it does three jobs: it lightens a mix, it blends two tones without them neutralizing, and it lifts color back off a spot. For quick, thin work, 91 or 99 percent isopropyl alcohol works, with 99 percent moving faster and being harder to slow down. Avoid 70 percent, whose water content causes streaking and dulling.
How do I mix alcohol ink with resin?
Start with roughly five drops or fewer per resin batch, which is the working consensus on craft forums where ink and resin are mixed in bulk. Mix the resin thoroughly, add the ink, and mix again rather than pouring in a spiral. Because the pigment is so concentrated, a small number of drops goes further than most people expect. Always test on a small pour first, since curing heat shifts dye-based color and the change is only visible after cure.
Why did my resin cure cloudy?
Cloudy resin usually picked up something before it set. The usual causes are moisture or a damp surface, dust and airborne particles landing on the pour, stray pigment from a contaminated applicator or rinse cup, and humidity in the room. Make sure the substrate is clean and fully dry, work away from dust, and change your rinse water often. Cloudiness is a contamination problem, not a resin problem.
Conclusion
So if you are asking why do my alcohol ink pieces look muddy, the answer comes down to four mechanics: too much pigment in one spot, too much work while the ink is wet, contamination reaching the mix, and heat shifting the dye after the pour. Every one of them is controllable before you start.
Run one small swatch under resin on a scrap tile, use fewer drops than you think, layer instead of mixing, and change to 91 or 99 percent isopropyl alcohol. If you already have a muddy piece, match its symptom in the table above and work the rescue steps for its current stage.