
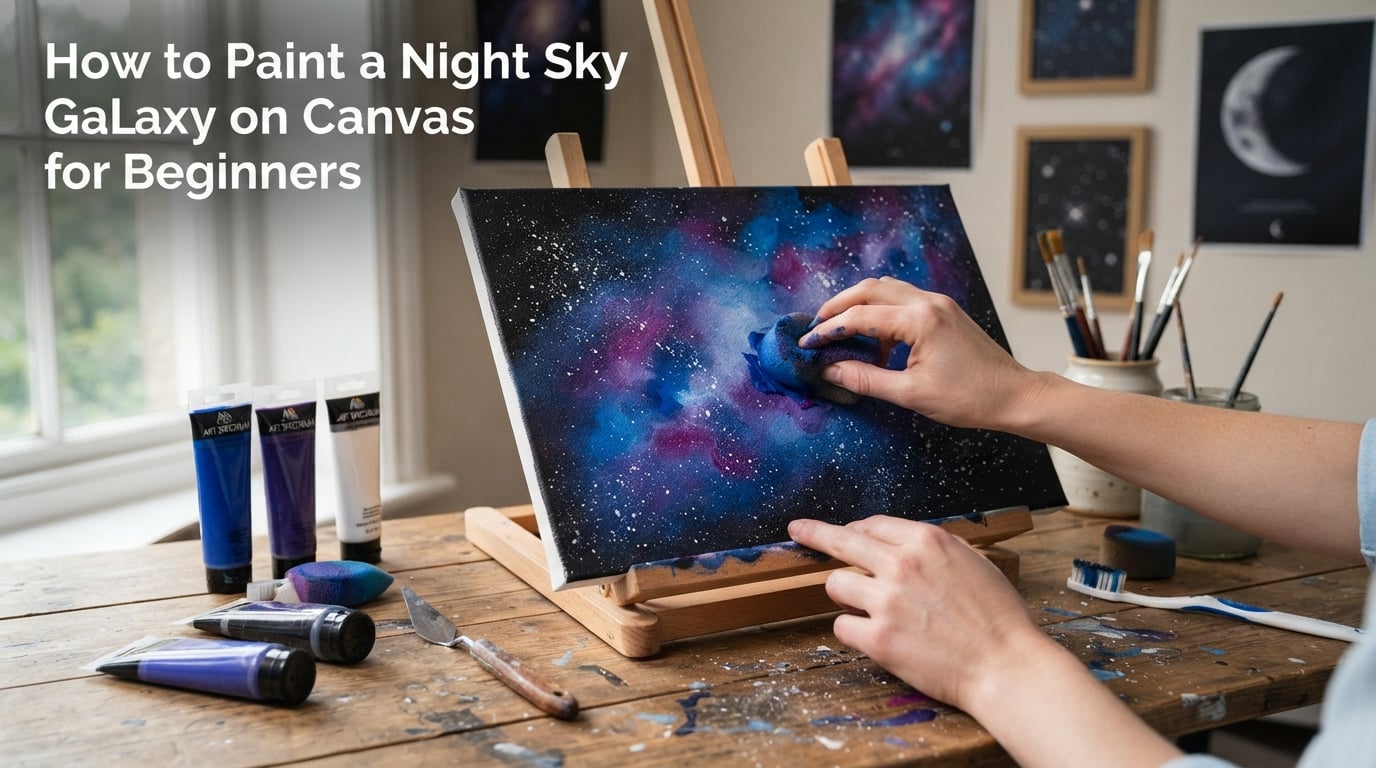
Creating your first galaxy painting feels like magic. You blend swirling colors across a canvas, flick white specks into stars, and suddenly you have your own piece of the cosmos. The best part? Learning how to paint a night sky galaxy on canvas for beginners takes just an hour and requires zero prior art experience.
This tutorial walks you through every step, from choosing your supplies to adding the final star details. You’ll learn three different star techniques, discover which colors create that authentic galaxy look, and get solutions for common beginner mistakes. By the end, you’ll have a stunning piece of space art ready to hang on your wall.
Table of Contents
- Quick Overview: 5-Minute Galaxy Painting Summary
- Materials and Supplies You’ll Need
- How to Paint a Night Sky Galaxy on Canvas for Beginners
- Star Technique Comparison: Which Method Works Best
- Common Beginner Mistakes and How to Fix Them
- Tips and Hacks for Better Galaxy Paintings
- Frequently Asked Questions
- How to paint a night sky for beginners step by step?
- How do I paint a galaxy on canvas?
- What colors do you mix to make a galaxy?
- What is the easiest way to paint a galaxy with acrylic paint?
- What colors does an artist mix to paint a night sky?
- How to paint the night sky easy step by step?
- How to do acrylic painting on canvas for beginners?
- How to color a galaxy?
- Conclusion
Quick Overview: 5-Minute Galaxy Painting Summary
Want the fast version? Here’s the entire process condensed into seven simple steps:
1. Prep your canvas – Paint it black or start with a black canvas
2. Gather colors – Ultramarine blue, indigo, cerulean, titanium white, and a pink or purple
3. Apply dark colors – Use a sponge to blend deep blues across the background
4. Add medium shades – Layer lighter blues and purples in patches
5. Highlight with light colors – Add white and pink to create nebula glow
6. Splatter stars – Flick titanium white with a toothbrush or brush
7. Adjust and finish – Add clusters, shooting stars, or a silhouette
Total time: 45-60 minutes for your first attempt. Once you get comfortable, you can complete one in 30 minutes.
Materials and Supplies You’ll Need
One reason galaxy painting works so well for beginners is the short supply list. You probably have some items already, and the rest cost under $25 at any craft store.
Canvas Options:
A stretched canvas in any size works for this project. Most beginners start with an 8×10 or 11×14 inch canvas. You can buy a pre-primed white canvas and paint it black as your first step, or purchase a black canvas for a head start. Black canvases save time but cost slightly more.
Acrylic Paint Colors:
You need just 5-6 colors to create a stunning galaxy:
– Titanium White – Essential for stars and highlights
– Ultramarine Blue – Your primary dark blue for depth
– Indigo – Adds rich purple-blue tones
– Cerulean or Cobalt Blue – Medium blue for the middle layer
– Pink or Purple – Creates the nebula glow (Flamingo Pink or Dioxazine Purple work great)
– Lamp Black – Only needed if starting with a white canvas
Student-grade acrylics work perfectly for beginners. They blend easily, dry quickly, and cost less than professional paints. Brands like Apple Barrel, FolkArt, or Arteza offer affordable sets that include all these colors.
Brushes and Tools:
You don’t need expensive brushes. A basic set with these shapes covers everything:
– Flat brush (1 inch) – For base coat and broad blending
– Round brush (small) – For detail work and larger stars
– Fan brush (optional) – Creates great texture for stars
– Sponge – Any kitchen sponge or makeup sponge works for smooth blending
– Toothbrush – The classic tool for star splatter technique
Optional Supplies:
These aren’t required but add extra flair to your finished painting:
– Glitter acrylic paint – Makes stars sparkle
– Gel medium – Slows drying time for easier blending
– Water spray bottle – Keeps paint workable longer
– Paper towels – For cleaning brushes and wiping splatter mistakes
How to Paint a Night Sky Galaxy on Canvas for Beginners
Now that you have your supplies ready, let’s walk through each step. Take your time with the early layers—the foundation determines how polished your final result looks.
Step 1: Prepare Your Canvas
Your canvas preparation sets the stage for everything that follows. If you bought a black canvas, you can skip ahead to Step 2.
For a white canvas, squeeze a generous amount of Lamp Black paint directly onto the surface. Use your flat brush to spread it evenly across the entire canvas. Work in one direction, then go over it again in the opposite direction for complete coverage.
Don’t worry if the first coat looks slightly patchy. Let it dry for 10-15 minutes, then apply a second thin coat. Two thin coats always work better than one thick coat that cracks while drying.
Why black? The dark background makes your colors pop and eliminates the need to paint black between the stars. It’s the secret to that deep, realistic space look.
Step 2: Plan Your Color Palette
Successful galaxy paintings rely on layering colors from dark to light. Think of it like building depth in a photograph. Each layer adds dimension and realism.
Dark Layer Colors:
These colors go down first and create the deepest parts of your galaxy. Ultramarine blue and indigo form the foundation. Mix a small amount of black into these if you want even darker pockets.
Medium Layer Colors:
Cerulean and cobalt blue sit in the middle of your galaxy. They bridge the gap between the deep space areas and the bright nebula clouds. These colors should cover about 40% of your canvas in patches.
Light Layer Colors:
Titanium white and your pink or purple create the nebula glow. These are your highlights. Use them sparingly in small areas to simulate gas clouds and distant stars catching light.
You don’t need to mix these colors ahead of time. Galaxy painting works best when you blend directly on the canvas.
Step 3: Apply Dark Colors for Depth
Start with your darkest colors—ultramarine blue and indigo. Squeeze small dollops of each onto your palette or a paper plate.
Dip your sponge into one color, then dab it onto the canvas in a random pattern. Don’t paint in straight lines or perfect circles. Real galaxies look chaotic and organic. Think puffy clouds, not geometric shapes.
Work quickly while the paint stays wet. Use a clean part of your sponge to blend the edges where colors meet. The goal is soft transitions with no hard lines visible.
Cover about 60% of your canvas with this dark layer. Leave some areas black—they’ll become the inky depths of space. If you have gel medium, mix a small amount into your paint. This extends the working time before the paint dries.
A common mistake here is over-applying paint. Less is more. You can always add another layer, but removing excess paint smears everything together into a muddy mess.
Step 4: Add Medium Shades
Once your dark layer feels tacky but not completely dry, start adding cerulean and cobalt blue. These medium tones create the swirling galaxy effect that makes the painting interesting.
Use the same sponge technique. Dab color onto the canvas, then blend the edges. Focus these lighter blues in different areas than your dark colors. Let some dark blue show through in places.
Imagine you’re looking at photos from the Hubble Space Telescope. Notice how galaxies have bands of different colors swirling together? Try to recreate that ribbon-like appearance with your medium shades.
Don’t cover everything. Leave about 30% of your canvas showing the dark layer or black background. The contrast between light and dark areas creates that three-dimensional galaxy look.
If your paint starts drying too fast, lightly mist the canvas with water from your spray bottle. This reactivates the acrylic just enough to continue blending.
Step 5: Apply Light Colors and Highlights
This step brings your galaxy to life. The light colors simulate nebula glow—those pink and purple gas clouds scattered throughout real galaxies.
Use titanium white and your pink or purple paint. Apply these sparingly. Think of them as accent marks rather than full coverage. A few small patches scattered across the canvas create stunning focal points.
For the white areas, dip your sponge into the paint, then pounce it onto the canvas in a tight circular motion. This creates a soft, glowing center that fades into the surrounding colors.
Pink or purple works best when applied in thin, wispy patches. Use a lighter touch with your sponge. The goal is a whisper of color that suggests a distant nebula catching light.
Blend the edges of your light patches into the surrounding colors. You want these highlights to feel integrated into the galaxy, not floating on top like separate stickers.
Here’s where beginners often go wrong: adding too much white or pink. Resist the urge. A galaxy should feel mostly dark with scattered highlights. If your painting starts looking like a rainbow, you’ve used too much light paint. Add more dark colors in those areas to balance it out.
Step 6: Add the Stars
The stars transform your colorful background into an authentic night sky. You have three main techniques to choose from, and each creates a different effect.
Technique 1: Toothbrush Splatter (Most Popular)
Load your toothbrush with titanium white paint mixed with a tiny drop of water. The consistency should resemble heavy cream—not too thick, not too watery. Hold the toothbrush about 6 inches from your canvas with the bristles facing away from you. Run your thumb across the bristles to flick paint onto the surface.
This creates hundreds of tiny stars in random patterns. Practice on a piece of paper first to get the pressure right. Too hard and you’ll get large blobs. Too soft and nothing happens.
Technique 2: Brush Flick
Load a small round brush with thinned white paint. Tap the brush handle against your finger while holding it over the canvas. The bristles release small droplets in controlled bursts.
This method gives you more control over star placement and size. It works well for adding stars to specific areas without covering the entire canvas.
Technique 3: Dotting with Round Brush
For larger, more defined stars, use a small round brush to place individual dots. Dip the brush in white paint and touch it lightly to the canvas. Each dot becomes a single star you can see clearly.
Combine all three techniques for the most realistic effect. Tiny background stars from the toothbrush, medium stars from brush flicking, and a few prominent stars from dotting.
Create clusters in some areas and leave other regions sparse. Real star fields have density variations—they’re not evenly distributed. Look at photos of the Milky Way for reference on how stars naturally cluster.
For extra sparkle, add a few stars with glitter acrylic paint after your white stars dry. The glitter catches light and adds dimension.
Step 7: Final Touches and Adjustments
Step back from your canvas and assess the overall balance. Does the galaxy look too dark in some areas? Add a touch more white or pink. Too bright in others? Dab on more dark blue or indigo.
Consider adding a shooting star. Load a small round brush with white paint and drag it across the canvas in a curved line. Add a tiny cluster of stars at one end to show where the meteor traveled.
For an advanced touch, paint a silhouette in the foreground. A simple tree shape or mountain range cut from black paint creates dramatic contrast. The silhouette anchors the composition and makes the galaxy behind it feel vast.
Sign your work in one corner with a small brush. Galaxy paintings make excellent gifts, so add your initials or full signature if you plan to share your creation.
Star Technique Comparison: Which Method Works Best
Choosing the right star technique depends on the effect you want and your comfort level. Here’s how each method compares:
Toothbrush Splatter
Best for: Beginners creating their first galaxy painting
Pros: Creates hundreds of stars quickly, natural random distribution, covers large areas fast
Cons: Less control over placement, can create large blobs if paint is too thick
Difficulty: Easy
Brush Flick
Best for: Adding stars to specific regions without full coverage
Pros: More control than toothbrush, adjustable star size, cleaner workspace
Cons: Slower process, requires practice to master the flick motion
Difficulty: Moderate
Dotting with Round Brush
Best for: Creating larger, visible stars as focal points
Pros: Complete control over size and placement, creates defined stars
Cons: Time-consuming for full coverage, less natural than splatter
Difficulty: Easy
Recommendation: Start with the toothbrush splatter for your first few galaxies. It’s the fastest method and produces the most authentic star field. Once comfortable, combine all three techniques—splatter for background stars, flicking for medium stars, and dotting for your brightest focal points.
Common Beginner Mistakes and How to Fix Them
Even experienced painters make mistakes. The difference is knowing how to recover. Here are the most common issues beginners encounter and exactly how to solve them.
Your Galaxy Looks Too Rainbow-Like
The problem: Your painting resembles a sunset or rainbow instead of deep space. This happens when you use too much light color or apply them in equal proportions.
The fix: Add more dark blues and indigo to balance the composition. Galaxy paintings should be approximately 60% dark colors, 30% medium tones, and 10% light highlights. Let the dark colors dominate.
Paint Drying Too Fast While Blending
The problem: By the time you try to blend one color into another, the edges have already dried hard. You end up with visible lines instead of smooth transitions.
The fix: Work faster in smaller sections. Mist your canvas lightly with water before applying paint. Use gel medium mixed into your acrylics to extend the drying time to 15-20 minutes instead of 5.
Uneven Star Distribution
The problem: Your stars clump in one area or spread too evenly across the canvas. Neither looks natural.
The fix: Study reference photos of real galaxies. Notice how stars cluster in bands and leave empty regions? Recreate that pattern. Add stars to specific areas, then step back and assess. Add more where it feels sparse.
Galaxy Looks Too Bright
The problem: Your painting seems washed out, more like a pastel cloud than a night sky.
The fix: Darken the background with a thin wash of diluted black or dark blue. Go over your brightest areas with indigo or ultramarine. Remember, space is mostly dark. Your highlights should feel rare and precious.
Galaxy Looks Too Dark
The problem: You can barely see the colors, and the stars disappear into the background.
The fix: Add more medium tones like cerulean and cobalt in larger patches. Increase your white and pink highlights. Make sure your stars use opaque titanium white, not a translucent white that gets lost.
Over-Blending Colors
The problem: All your colors have mixed together into a muddy gray or brown. The distinct galaxy layers disappeared.
The fix: Let each layer dry before adding the next. When blending, work the edges only—not the entire color patch. If you’ve already over-blended, let the canvas dry completely, then paint new color layers on top.
Tips and Hacks for Better Galaxy Paintings
These pro tips come from the painting community and will elevate your galaxy art from good to stunning.
Work in Layers and Let Them Dry
Rushing leads to muddy colors. Apply your dark layer, wait 10 minutes, then add your medium layer. The patience pays off in crisp, vibrant colors that don’t blend into gray.
Keep Paint Wet with a Spray Bottle
Acrylics dry fast—sometimes too fast. Keep a small spray bottle of water nearby. A light mist reactivates paint just enough to continue blending without diluting your colors.
Use Reference Photos from NASA
The Hubble Space Telescope has captured incredible galaxy images. Browse NASA’s image archive for color inspiration and to understand how real galaxies distribute light and dark areas.
Remember: Galaxy Painting Is Forgiving
This might be the most encouraging aspect of the technique. If something looks wrong, you can always add another layer. Dark colors cover mistakes. White stars hide uneven patches. Unlike realistic portraits where every stroke matters, galaxies embrace imperfection.
Practice on Small Canvases First
Before attempting a large canvas, try your technique on a 4×4 inch canvas or even a canvas panel. You’ll use less paint, finish faster, and learn the process before committing to a bigger piece.
Try Different Color Schemes
Once you master the classic blue-purple galaxy, experiment. A pink and teal combination creates a different mood. Dark red and black produces an ominous feel. The technique stays the same, but the color palette changes everything.
Frequently Asked Questions
How to paint a night sky for beginners step by step?
Start with a black canvas or paint your canvas black. Apply dark blues (ultramarine, indigo) with a sponge in random patches. Add medium blues (cerulean, cobalt) in separate areas. Highlight with white and pink for nebula effects. Finish by splattering white paint for stars using a toothbrush.
How do I paint a galaxy on canvas?
Paint your canvas black for the background. Use a sponge to blend dark blues, medium blues, and light colors in layers from dark to light. Add white stars using the toothbrush splatter technique—load white paint on a toothbrush and flick the bristles toward the canvas.
What colors do you mix to make a galaxy?
Use ultramarine blue and indigo for dark areas, cerulean or cobalt blue for medium tones, and titanium white with pink or purple for highlights. Layer these colors from dark to light, blending the edges where they meet. You don’t need to pre-mix colors—blend directly on the canvas.
What is the easiest way to paint a galaxy with acrylic paint?
The easiest method uses a sponge for color application and a toothbrush for stars. Paint your canvas black, sponge on blues and purples in patches, add white highlights, then flick white paint with a toothbrush for stars. The whole process takes under an hour with no prior experience needed.
What colors does an artist mix to paint a night sky?
A night sky palette includes titanium white for stars, ultramarine blue and indigo for deep space, cerulean blue for middle tones, and optional pink or purple for nebula effects. Black provides the darkest background. Mix these colors on the canvas rather than beforehand for natural blending.
How to paint the night sky easy step by step?
First, paint your canvas completely black and let it dry. Second, sponge dark blue colors across about 60% of the surface. Third, add medium blue patches in 30% of the remaining space. Fourth, highlight with white and pink in small areas. Fifth, splatter white paint for stars. Each step builds on the last, creating depth naturally.
How to do acrylic painting on canvas for beginners?
Start with a simple project like galaxy painting. Gather basic supplies: canvas, 5-6 acrylic colors, a sponge, brushes, and a toothbrush. Acrylics are water-based and easy to clean. They dry quickly, so work in layers. Mist with water to extend working time. Cover mistakes with new paint layers.
How to color a galaxy?
Apply colors in layers from dark to light. Start with black and dark blues, add medium blues, then finish with white and pink highlights. Blend each layer into the previous one while still wet. Leave some areas darker than others to create depth. Avoid covering the entire canvas with light colors.
Conclusion
You now have everything you need to paint your first galaxy. The process comes down to seven steps: prepare a black canvas, layer dark to light colors with a sponge, and add stars with a toothbrush splatter. That’s it.
What makes how to paint a night sky galaxy on canvas for beginners such a perfect first project is its forgiving nature. Every mistake has a solution. Too bright? Add dark paint. Too dark? Add highlights. Uneven stars? Flick more white in sparse areas. You literally cannot ruin a galaxy painting beyond repair.
Your first attempt won’t be perfect—and that’s okay. Each canvas teaches you something new about color blending, pressure control, and star distribution. By your third or fourth galaxy, you’ll develop your own style and technique preferences.
Display your finished painting where it catches natural light, or give it as a handmade gift. Either way, you’ve created something uniquely yours—a small piece of the cosmos captured on canvas.