
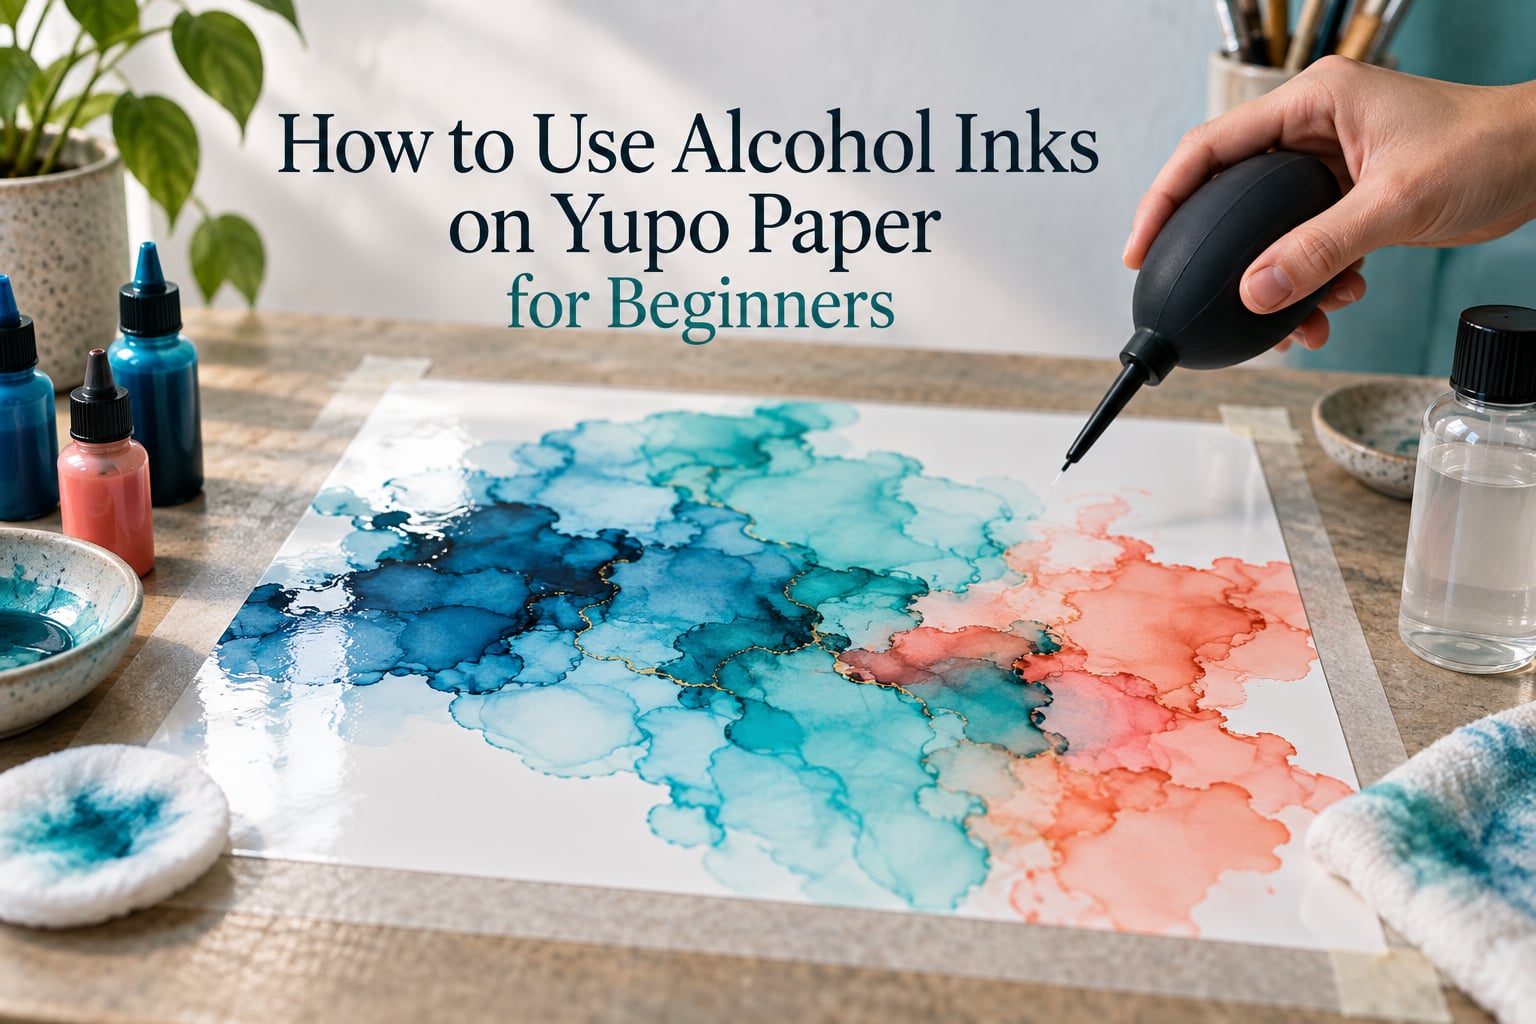
Alcohol ink on Yupo paper is the easiest way to make a genuinely good-looking abstract painting on your first afternoon with the medium. The ink is a dye-based, alcohol-based liquid that dries in seconds, and Yupo is a synthetic waterproof sheet that refuses to absorb any of it, so every drop stays exactly where you put it and every drop can still be moved. That combination is forgiving in a way most painting media are not: a mistake made ten minutes ago lifts off with a cotton pad and a drop of 99% isopropyl alcohol. This guide walks through the whole process, from the supply list to the seal, and is written for someone who has never opened a bottle of alcohol ink before. Updated for 2026.
Before we start, one reassurance that changes how bold you can be. Alcohol ink is not a permanent stain until you seal it. Artists report that it wipes out fairly easily and quickly, even on Yupo paper (Art Materials Australia), which is exactly why nervous beginners can experiment freely. Everything in this tutorial assumes you will make a mess. You will.
Table of Contents
- What Is Alcohol Ink and Why Does Yupo Paper Work?
- What You’ll Need: A Beginner Supply List
- The 5-Minute Setup Before You Drop Ink
- Step-by-Step: Your First Alcohol Ink Painting on Yupo Paper
- Step 1: Decide your palette before you uncap anything
- Step 2: Lay down your base drops
- Step 3: Add isopropyl alcohol to push the color
- Step 4: Move it while it is still wet
- Step 5: Build the second layer before the first is fully dry
- Step 6: Add the complementary accent last
- Step 7: Flatten the ink with an air tool
- Step 8: Add fine detail once everything has dried
- Step 9: Seal the finished piece
- Isopropyl Alcohol vs Blending Solution: Which One to Use and When
- Air Blower vs Hair Dryer: Which to Use and Why
- 3 Beginner Color Palettes That Always Work
- 5 Beginner-Friendly Alcohol Ink Techniques to Try Next
- Alcohol Ink Stamping on Yupo Paper and Other Application Methods
- Common Beginner Mistakes and How to Fix Them
- How to Lift a Mistake: Alcohol Ink Is Not Permanent
- Yupo Paper Alternatives
- How to Seal and Protect Your Finished Piece
- Black and Colored Yupo Paper: What Changes
- Frequently Asked Questions
- Can you use alcohol ink on Yupo paper?
- What type of paper is best for applying alcohol inks?
- What is special about Yupo paper?
- Which side of Yupo paper should I use?
- What can I use as a substitute for Yupo paper?
- What are some simple techniques for using alcohol ink?
- Isopropyl alcohol or blending solution, which should I use?
- Why does my alcohol ink look muddy?
- How can I use alcohol ink stamping techniques on Yupo paper?
- Do I need to seal alcohol ink on Yupo paper?
- Conclusion: Your Next Steps
What Is Alcohol Ink and Why Does Yupo Paper Work?
Yes, you can use alcohol ink on Yupo paper, and it is the most common pairing in the medium. Alcohol ink is a dye-based, alcohol-based ink that flash-dries almost instantly and is formulated for non-porous surfaces. Yupo paper is a synthetic, waterproof, non-porous polypropylene sheet, so the ink sits on top instead of soaking in. That is the whole trick: on regular paper the ink would stain and disappear, and on Yupo it behaves like paint sitting on a sheet of glass.
Three properties of the sheet do all the work. First, it is non-porous, so ink pools and moves rather than feathering into the fibres. Second, it is a bright white base, so translucent layers stack into saturated color instead of turning to grey. Third, it revives, meaning dried ink can be reactivated with a fresh drop of alcohol months later if you want to change your mind.
Glossary: the words you will meet in every tutorial
Alcohol ink: a dye-based ink suspended in an alcohol carrier, built for non-porous surfaces rather than paper.
Isopropyl alcohol (IPA): the plain alcohol you add to move ink. 99% concentration gives you the most control; anything with more water in it blends more slowly.
Blending solution: a slower, syrupier liquid made with glycerin. It buys you extra working time before the ink flash-dries.
Non-porous: a surface with no open pores to absorb liquid, which is the requirement for alcohol ink of any kind.
Flash-off time: the few seconds it takes for a drop to dry enough that you can no longer move it.
Muddy color: the dull grey-brown you get when too many colors are mixed together or when you over-work a drying area.
What You’ll Need: A Beginner Supply List
You can start with seven items and add tools as your hands learn what they want to do. The table below marks what is genuinely essential versus what you can borrow or buy later, so you can see the whole kit on one screen before you spend anything.
| Item | What it actually does | Essential or nice to have |
|---|---|---|
| Yupo paper, 9 x 12 inch or larger | The non-porous surface the whole medium depends on. Cut larger than you think you need. | Essential |
| Alcohol ink, 3 to 4 colors | Two blending colors plus one accent is all a first piece needs. Tim Holtz Ranger inks are the de facto standard referenced in almost every tutorial. | Essential |
| 99% isopropyl alcohol | Pushes, dilutes and lifts the ink. This is your main movement tool. | Essential |
| Blending solution or alcohol ink extender | Slows flash-off so you can blend a large area without it seizing up. | Essential |
| Needle dropper bottles or pipettes | Precise application. A squeeze bottle with a narrow tip gives you controlled lines; a pipette gives you round dots. | Essential |
| Low-tack tape or painter’s tape | Holds the sheet flat and stops it sliding or wrinkling under the air tool. | Essential |
| Nitrile gloves | Alcohol ink stains skin within minutes. Gloves are the difference between a fun afternoon and a ruined one. | Essential |
| Cotton pads or paper towels | For lifting mistakes and blotting edges. | Essential |
| Hand air blower | A directional, controllable stream that pushes ink into ribbons and petals. | Nice to have, strongly recommended |
| Foam brush | Cheap gradient washes and soft background fades. | Nice to have |
| Palette knife | Thick, textured strokes and hard-edged abstract marks. | Nice to have |
| Plastic wrap and a small cup | The cheapest texture tool in the medium. Press it on, lift it off. | Nice to have |
| UV-resistant varnish or spray seal | Stops the colors fading under daylight. Krylon Kamar varnish is the usual choice. | Essential for finished work |
One note on buying confusion that comes up constantly in craft communities. Some products labelled drawing ink or dye ink are not alcohol ink at all, and they behave completely differently. Check the label for alcohol or isopropyl alcohol in the ingredients. A buyer on a stamping forum once received a bottle labelled drawing ink and expected alcohol ink, and the mismatch made the ink unusable for the intended technique.
The 5-Minute Setup Before You Drop Ink
Do these five things before the first drop lands, and you will avoid most of the frustration beginners report. Artists across every source we looked at raise taping the sheet down as a real practical issue, not a formal instruction, because a wrinkled or sliding sheet ruins a wet piece faster than a bad color choice.
- Protect your table. Lay down a plastic sheet or a silicone baking mat and tape its edges flat. Ink will find every bare surface.
- Tape the Yupo on all four sides. Low-tack tape along each edge is enough. Leave a small unpainted border if you plan to mount it later.
- Use the glossy side. Yupo is made with one smooth face and one textured face. The textured side kills blending, makes ink bead up and gives you a dull, grainy result. If your ink is sitting in tiny beads instead of spreading, you are on the wrong side. Flip the sheet over.
- Ventilate and glove up. Work near an open window or in a ventilated room, and put on nitrile gloves before you open the bottle.
- Fill your bottles before you start. Top up the dropper bottles and put the blending solution in its own applicator. Reaching for a fresh bottle mid-project is how puddles form.
Expect the whole first piece to take about 30 to 40 minutes including dry time. A red-painting practitioner in the r/painting community combined an alcohol ink base on Yupo with black Micron pen line work afterward, which is a good way to think about your first session: the ink is a base layer, not a finished edge.
Step-by-Step: Your First Alcohol Ink Painting on Yupo Paper
This is one complete project from a blank taped sheet to a sealed piece. Follow the steps in order once, and you will have a finished abstract painting before you have a single question about the medium.
Step 1: Decide your palette before you uncap anything
Pick two colors to blend plus one complementary accent. Limit the first piece to three. Beginners reach for six or seven colors and end up with mud.
Step 2: Lay down your base drops
Work from the center outward. Place small, controlled drops rather than one large one, because a large drop runs to the paper edge before you can catch it. A common rule of thumb across tutorials is two blending colors plus one complementary applied last.
Step 3: Add isopropyl alcohol to push the color
Touch the dropper tip into the center of a drop, not its edge. Alcohol placed in the center pushes ink outward into a ring; alcohol placed at the edge dilutes and pulls inward. That single placement choice accounts for most of the difference between a beginner piece and a good one.
Step 4: Move it while it is still wet
You have seconds. Tilt the sheet slightly, blow across it, or both. If the ink has already started to set, stop pushing; forcing it creates hard, jagged edges.
Step 5: Build the second layer before the first is fully dry
While the first colors are still tacky, add your second color and repeat the push. Layering while wet is what produces smooth gradients instead of stacked, separate rings.
Step 6: Add the complementary accent last
Drop the third color in small amounts and let it react with what is underneath. The chemical reaction between complementary dye inks is where the bright, unexpected edges come from.
Step 7: Flatten the ink with an air tool
Hold a hand blower about 6 inches above the sheet and sweep it slowly across the surface. Keep the airflow moving; stopping in one spot pushes a dent into wet ink.
Step 8: Add fine detail once everything has dried
Nothing is fixed until the whole piece is dry. Use a needle dropper or a chip brush for thin lines. Never touch the sheet with a fingertip, because the alcohol on skin will lift a bloom right through the paper.
Step 9: Seal the finished piece
Wait until the ink is completely dry to the touch, then apply a UV-resistant varnish in thin, light coats from a distance, following the full sealing steps below.
If your first piece goes wrong at step 3 or 4, stop and read the lifting section further down. The whole point of this surface is that step 8 is not a punishment.
Isopropyl Alcohol vs Blending Solution: Which One to Use and When
Use 99% isopropyl alcohol for fast, thin, hard-edged movement, and use blending solution when you need more working time in a large area. They are not competing products; they are two different levers, and the choice between them is the single biggest technical decision in alcohol ink art.
| 99% isopropyl alcohol | Blending solution | |
|---|---|---|
| Spread | Runs thin and fast across the surface | Holds together and moves in thicker ribbons |
| Dry time | Flash-dries almost immediately | Slower, buys you extra seconds |
| Blend behavior | Sharp rings, petals and hard edges | Slow, smooth transitions |
| Best for | Precise control, small drops, lifting mistakes | Large fields, background washes, soft transitions |
| Watch out for | Over-wetting and pooling if you flood a spot | Less control once the ink starts moving late |
A homemade version works if you want to make your own: equal parts isopropyl alcohol and glycerin. Buy blending solution first, though, because a beginner can learn faster from a bottle that already behaves.
Knowing the two levers is more than trivia. It is the difference between an ink that feels like it is fighting you and ink that responds to the placement of a single drop.
Air Blower vs Hair Dryer: Which to Use and Why
Use a hand air blower for anything you want to control, and use a hair dryer only for a fast even dry. A hand blower gives you a narrow, directed stream you can move in one direction across the whole sheet, which is what turns round drops into ribbons and petals. A hair dryer pushes a wide, hot, uncontrollable gust that diffuses edges into soft clouds.
The heat matters too. A hot dryer on a plastic synthetic sheet and a wet ink layer is a recipe for wrinkling at the edges and a hazy result. If you use one, keep it on cool, keep it moving, and keep it 12 inches away.
One popular shortcut does not need a blower at all. Tilt the taped sheet and let gravity do the work; the ink flows downhill and you avoid both tool heat and over-airborne overspray.
3 Beginner Color Palettes That Always Work
Every reliable beginner palette follows one rule: two colors that blend well, plus one complementary accent you add last. Here are three combinations that have no muddy risk.
- Cool ocean: a blue and a teal to blend, with a coral or orange accent applied last. The orange against blue is the most reliable reaction in the medium.
- Warm sunset: a yellow and a pink blending to orange, finished with a violet or deep purple accent. Purple on orange gives hard, glowing edges.
- Monochrome plus pop: a single purple in two dilutions, with a bright yellow accent. Beginners often underestimate how much variety one hue gives you.
The mixing logic behind these is simple and worth memorizing. Yellow plus pink makes orange, blue plus yellow makes green, blue plus pink makes purple. If you stay inside those relationships you can predict the result before you drop anything.
5 Beginner-Friendly Alcohol Ink Techniques to Try Next
Once the first project dries, these five techniques are the shortest path from simple to interesting. Each one takes under five minutes on a fresh sheet.
1. Drops and fades
Place three to five drops of a single color in a loose diagonal. Add isopropyl alcohol to the edge of each drop rather than the center, so the ink pulls inward and fades instead of ringing. Work from one end so you always move into clean paper.
2. Palette knife abstract
Load a palette knife with two colors side by side and pull it across the sheet in one long stroke. You get hard, blade-shaped bands and a bright dragged edge where the colors meet. Rinse the knife between colors.
3. Foam brush gradient wash
Dip a foam brush in one color and dab an even layer across a wide area, leaving half the sheet bare. Then dab the second color into the wet edge only and let them meet. The result is a two-color fade with a soft center. Do not scrub the foam brush back over dry areas or you will pick up ink and drag it.
4. Ink drips
Fill a squeeze bottle with thinned ink and hold it a few inches above the sheet. Let drops fall, then blow across them for direction. Add a third drop mid-air for a layered effect. Practice on scrap Yupo first, because drips are the hardest thing to control and the easiest thing to love.
5. Plastic wrap mosaic
Crumple plastic wrap into a loose ball, lay it on wet ink, press gently, then lift it straight up. Each wrinkle prints a network of thin lines. A second pass with a different color on a different area gives a mosaic effect without a single extra tool.
Alcohol Ink Stamping on Yupo Paper and Other Application Methods
You can stamp on Yupo paper by inking the stamp, blotting most of the ink off on a paper towel, and pressing it onto the wet ink layer rather than onto bare paper. Pressing into wet ink pulls the color up into the stamp lines and gives a soft, broken impression that a dry press cannot. Blotting is the important step: a heavily inked stamp prints a solid blob and the texture disappears.
Three other application methods are worth knowing. A pipette gives you the round dots that the drop-and-fade technique depends on. A chip brush flicks a fine line when you drag it quickly across wet ink and stipples when you tap it. A squeeze bottle with a fine tip draws thin controlled lines for grass, hair and stems, which is how a lot of finished pieces get their detail layer.
For mixed media, a Micron pen over dried ink is the most common combination. Alcohol ink on Yupo is a base layer, and line work on top of it is normal practice, not a workaround.
Common Beginner Mistakes and How to Fix Them
Nearly every frustration beginners report comes down to one of six things. Find your symptom in the table and fix it while the ink is still wet; the same problem after drying takes ten times longer.
| Symptom | Why it happened | How to fix it |
|---|---|---|
| Ink pools in one spot and spreads to the edges | The dropper was overloaded, or you flooded the area with alcohol | Lift the excess with a cotton pad, then tilt the sheet uphill and blow from the low edge to pull the pool back |
| Colors turn muddy | Too many colors mixed together, or a complementary color added too early | Work over the mud with 99% IPA to wash it out, let it dry, then lay a single clean accent on top |
| Hard, jagged edges and harsh lines | Alcohol was added after the ink had already begun to dry | Accept it as texture, or lift it now with a pad and re-wet the surrounding area while it is still tacky |
| The sheet moved, wrinkled or slid | It was not taped down before work started | Peel it back carefully, re-tape all four edges onto a flat plastic surface, and start again |
| Ink beads up instead of spreading | You are on the textured side of the Yupo sheet | Flip the sheet. The glossy side is the ink surface |
| A dried section looks ruined after a later drop | Dried ink reactivated when fresh alcohol touched it | Blot immediately with a dry cotton pad, then blow the area dry before adding anything else |
| Ink on your hands and table | Gloves were skipped and the surface was unprotected | Wear nitrile gloves and work on a taped plastic sheet. Dried ink on a table lifts with IPA and a paper towel |
Notice how many of these fixes depend on catching the problem early. That is not an accident of the medium; it is the direct result of the ink not being permanent.
How to Lift a Mistake: Alcohol Ink Is Not Permanent
Alcohol ink can be lifted at any point before you seal, and that is the beginner safety net nobody explains clearly enough. Put a little 99% isopropyl alcohol on a clean cotton pad and press it over the mistake, then lift straight up. Do not scrub in a circle, or you spread the ink into a bigger bloom.
For a partial lift, use a dropper instead of a pad. Place one small drop of alcohol at the edge of the area you want to remove and blow the ink toward the drop. It carries the color off the sheet instead of just diluting it.
To reactivate a fully dried area, add one drop of blending solution rather than a flood of alcohol. It revives the surface slowly enough that you have control, and the dried ink lets go over several seconds. Once you seal the piece, the ink is fixed for good, so lift everything you dislike before the varnish goes on.
Yupo Paper Alternatives
If you do not have Yupo paper, any non-porous surface works: ceramic tile, glass, an acrylic sheet, or glossy photo paper. The rule is always the same. The surface must not absorb liquid, and the brighter the base, the more saturated the color.
| Surface | Best for | Watch out for |
|---|---|---|
| Ceramic tile | Practice, and permanent pieces you do not mind keeping | Grout lines catch ink; the piece is heavy to display |
| Glass or an acrylic sheet | Largest color range, easiest lifting | Sharp edges, and glare under raking light |
| Glossy photo paper | Cheapest way to test a color combination | Less bright than Yupo, and edges can curl |
| Yupo paper | The best balance of bright, clean and easy to display | Creases if you flex it while wet |
Glossy photo paper and Yupo produce visibly different results even with identical technique, which is the reason a piece does not look the way you pictured. If color is what is wrong, test the palette on scrap before you blame the technique.
How to Seal and Protect Your Finished Piece
Do you need to seal alcohol ink on Yupo paper? Yes, unless the piece is purely for practice. Unsealed dye ink fades noticeably in direct sunlight, and sealing is what stops that.
- Wait for a full dry. Every area should feel dry and slightly tack-free, including the edges. Rushing this traps solvent under the seal.
- Use a UV-resistant varnish. Krylon Kamar varnish is the common choice because it blocks ultraviolet light rather than just adding gloss.
- Apply thin, light coats. Hold the can 12 to 18 inches away and move in a slow, even sweep. Heavy coats bead and stay tacky.
- Follow the product directions on cure time between coats rather than guessing. Most need a full dry between passes and several hours before handling.
- Frame it out of direct sun. A mat and a frame with UV-filtering glass add a second layer of protection. Artists who display work rotate pieces so no single piece takes months of unbroken light.
You can skip varnish entirely if you plan to mount the piece under epoxy resin, since the resin itself is the seal. Do not apply resin and varnish to the same piece, though; the solvent in the varnish will cloud the resin.
Black and Colored Yupo Paper: What Changes
Black Yupo paper inverts the rules. On a black base, translucent inks glow, and pale colors read as light rather than as pigment, so you work with fewer colors and let the surface do more. The technique that does not change is the tape-down; black sheets show every fingerprint and wrinkle twice as clearly.
For pastel and colored Yupo, the base is somewhere in between white and black. A mid-tone sheet dulls saturated color slightly, so pick inks one step more vivid than you would on white. In all three cases the glossy side is the only side that works.
Frequently Asked Questions
Can you use alcohol ink on Yupo paper?
Yes, and it is the most common pairing in the medium. Alcohol ink is a dye-based, alcohol-based ink that flash-dries almost instantly and is formulated for non-porous surfaces. Yupo paper is a synthetic, waterproof, non-porous polypropylene sheet, so the ink sits on top instead of soaking in. That lets you push, blend, lift and layer the color.
What type of paper is best for applying alcohol inks?
The best surface for alcohol ink is any non-porous, waterproof sheet. Yupo paper is the standard choice because it is bright, holds a hard edge and revives when wet. Ceramic tile, glass, acrylic sheet and glossy photo paper all work, but they are less forgiving and less bright. Regular copy paper will absorb the ink and stain permanently.
What is special about Yupo paper?
Yupo is not really paper at all. It is a synthetic polypropylene sheet, which means it has no open fibres to absorb liquid. The ink therefore pools on the surface and stays bright and translucent instead of sinking in and going dull. It is waterproof, oil-resistant, quick-drying and re-wettable.
Which side of Yupo paper should I use?
Always use the glossy side. The reverse side is finely textured, and ink beads on it instead of spreading, so you lose blending and get a grainy result. If your drops are sitting in tiny beads rather than flowing, you are on the wrong side. Flip the sheet and start again.
What can I use as a substitute for Yupo paper?
Use ceramic tile, a glass or acrylic sheet, or glossy photo paper. The only rule is that the surface must be non-porous, meaning it cannot absorb liquid. Tile and glass give the brightest color, glossy photo paper is the cheapest way to test a palette, and all of them lift more easily than regular paper.
What are some simple techniques for using alcohol ink?
Five reliable beginner techniques are: drops and fades, where alcohol is added to the edge of each drop so the color pulls inward; palette knife abstracts, where two colors are pulled across the sheet in one stroke; a foam brush gradient wash for a soft two-color fade; ink drips from a squeeze bottle; and a plastic wrap mosaic, where crumpled wrap pressed into wet ink and lifted prints a network of lines.
Isopropyl alcohol or blending solution, which should I use?
Use 99% isopropyl alcohol for fast, thin movement and hard edges, and use blending solution when you need longer working time and soft gradients. Isopropyl alcohol flash-dries almost instantly, which gives you precise control. Blending solution is slower and holds color in thicker ribbons. Most finished pieces use both.
Why does my alcohol ink look muddy?
Mud comes from mixing too many colors in one area, or from adding a complementary color too early. Two blending colors plus one accent applied last is the reliable rule. To fix a muddy area, wash it with 99% IPA, let it dry, then lay a single clean accent color on top.
How can I use alcohol ink stamping techniques on Yupo paper?
Ink the stamp, blot most of the ink off on a paper towel, then press it into wet ink rather than onto bare paper. Pulling the color up into the stamp lines gives a soft, broken impression. Blotting is the key step, because a heavily inked stamp prints a solid blob and the texture disappears.
Do I need to seal alcohol ink on Yupo paper?
Yes, unless the piece is only practice. Unsealed dye ink fades noticeably in direct sunlight. Use a UV-resistant varnish such as Kamar varnish in thin, light coats from 12 to 18 inches away, allowing a full dry between passes. Skip varnish entirely if you are mounting the piece under epoxy resin, but never use both.
Conclusion: Your Next Steps
How to use alcohol inks on Yupo paper comes down to three levers you can control: the surface, which must be the glossy non-porous side; the liquid, which is 99% isopropyl alcohol for control or blending solution for time; and the air, which is a hand blower for direction. Nail those three and a good piece is genuinely beginner-level work.
Do one thing before you close this page. Tape down a sheet, pick three colors, and make the nine-step project above in a single sitting without lifting a single mistake. You will learn more in 30 minutes of real ink than from another hour of reading, and nothing you make on day one has to survive being framed.