
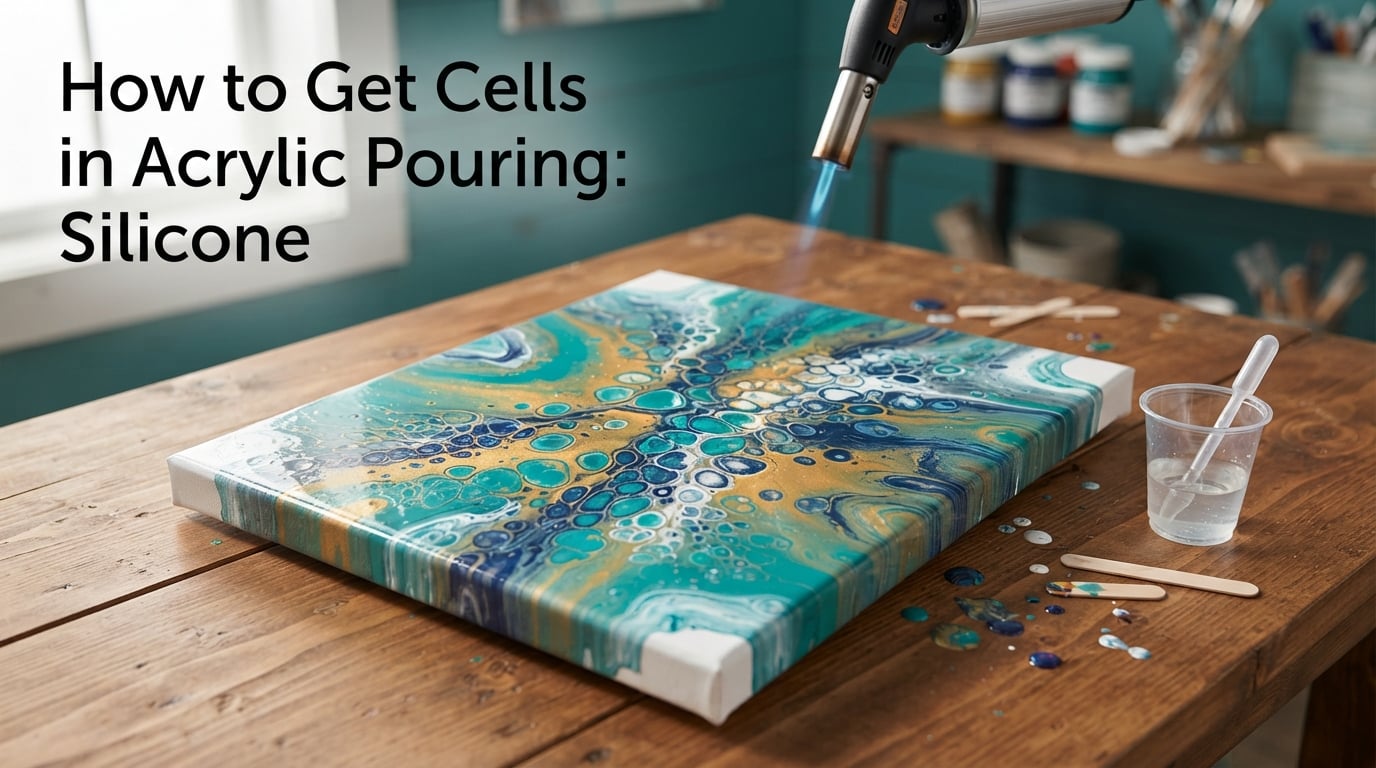
How to get cells in acrylic pouring with silicone: add 2 to 3 drops of silicone oil to each 2 oz cup of thinned acrylic paint, let it sit 10 to 15 minutes, pour with a dirty pour, flip cup, or swipe, then pass a butane torch over the surface. The silicone rises through the layers, pushes them apart, and leaves round cells behind.
Cells are the effect most fluid artists are chasing, and they are also the effect that frustrates beginners the most. Nothing ruins a pour faster than a flat, marbled surface where lace and open cells should be.
This guide covers the whole chain: why silicone makes cells at all, which silicone to use, exact mixing ratios, the three pour methods that reliably produce cells, torch and heat gun technique, how to control cell size, what to do when no cells appear, and how to seal the piece so it lasts. Updated for October 2026.
Table of Contents
- What Are Cells in Acrylic Pouring? The Science Behind Them
- Essential Materials for Silicone Cells
- Paint Mixing Ratios That Produce Cells
- How to Get Cells in Acrylic Pouring With Silicone: Three Methods
- Torch vs Heat Gun for Acrylic Pouring Cells
- Cell Size Control: Small Cells, Big Cells and Everything Between
- Can You Make Cells Without Silicone?
- Troubleshooting: Why Your Cells Aren’t Forming
- Workspace Setup and Torch Safety
- How Humidity, Temperature and Drying Time Change Your Cells
- Sealing and Protecting a Silicone Cell Painting
- Frequently Asked Questions
- How much silicone oil do I add to acrylic paint for cells?
- What causes cells in acrylic pouring?
- Why am I not getting cells even with silicone?
- Can I use treadmill lubricant instead of art silicone oil?
- Can I make cells in acrylic pouring without silicone?
- Is silicone spray the same as silicone oil for acrylic pouring?
- Why do my cells disappear when I tilt the canvas?
- What is the best cell activator for acrylic pouring?
- How do I get big cells instead of tiny ones?
- How long should I wait before sealing a silicone pour?
- Conclusion
What Are Cells in Acrylic Pouring? The Science Behind Them
Cells are round, honeycomb-like openings in the paint film where a thin silicone layer has pushed two colors apart and exposed a color underneath. Each cell has a rim, sometimes a rim of lacing, where the silicone gathered before settling.
Why silicone creates cells: density and surface tension
Silicone oil is a polymer with a different density and a much lower surface tension than acrylic paint. That mismatch is the whole mechanism. The silicone migrates upward through the paint, and where it collects it forms a film that blocks the colors from merging.
Because the silicone spreads into a thin sheet rather than dissolving, the paint above it lifts and the paint below shows through. Many colors separate at once, and each separate patch reads as a cell. Painters on r/AcrylicPouring describe the same effect as a thin film sitting between two layers of color, with each film patch pulling the layers apart around its edge.
Density explains a second thing that confuses beginners. Heavy-bodied metallic and pigment-heavy paints sit lower, so a silicone-laden cup of thin base color on top migrates into the heavy paint and gives stronger, more open cells. That is why silicone goes in the light base color far more often than in a heavy metallic.
Cells, lacing and webbing: the three patterns
Not every silicone effect is a cell. Lacing is the fine web-like network that forms where the silicone film tears rather than lifting, usually seen with metallic and pearl paints. Webbing is the trailing fringe of small cells that follows a swipe or a torch pass. Tree rings form when a dropped color spreads outward and pushes the silicone into concentric edges.
If you tell these apart, you can pick a technique on purpose. Cells come from untouched paint and heat. Lacing comes from metallic paint and a swipe. Webbing comes from a swipe or a torch pass after the surface has started to set.
Essential Materials for Silicone Cells
You need three things beyond paint: a pouring medium, a silicone source, and heat. Paint alone will not flow, and paint plus medium without silicone and heat gives you smooth marbling, not cells.
Pouring medium and paint basics
The pouring medium thins the paint and slows drying so colors have time to move. Liquitex Pouring Medium and Floetrol are the two most common. PVA glue works as a budget substitute, though it yellows over time and needs a sealing coat.
Consistency is the single biggest factor in cell formation. A paint that runs like warm honey forms cells. Paint that runs like melted ice cream sits still and cells will not spread. Thin paint also lets the silicone migrate further, which produces bigger openings.
Art-brand silicone oils
Purpose-made silicone oils for artists are the safe default. They are formulated to be pure and low in volatile content, so they do not introduce extra water into the paint. Brands that pourers name most often include Arteza and Vallejo silicone oils.
The upside is predictability. Cell size, timing and lacing behave the same way from batch to batch. If you are making pieces to sell or teaching a class, consistency matters more than cost per drop.
Treadmill lubricants as a lower-cost alternative
Over 100% silicone treadmill lubricant is the option most discussed on r/PourPainting, and it is the one that keeps coming up in answer to questions about finding affordable pure silicone. Valspar and Spot On are the two names that appear most often in those threads.
The reason it works is chemistry, not marketing. A treadmill belt is steel or urethane, so the lubricant has to be 100% silicone with no oil, no solvent and no thickener. Painters report using it at the same 2 to 3 drops per 2 oz cup and getting cells that look the same as the art-brand version.
Check the label before you buy. If it says silicone plus additives, or lists a carrier solvent, it will thin your paint and slow the cure. Pure silicone is inert and does not join the acrylic binder, which is also why it needs removing later.
Silicone spray versus silicone oil
Spray and oil are not interchangeable. Aerosol silicone spray carries a propellant and deposits an uneven, sometimes contaminated film, and it lands on your canvas as overspray rather than mixed into paint. Oil goes into the cup before the pour, where you control the dose.
Spray is occasionally used as a surface treatment for effects like bubble wrap or plastic wrap resist, but it is not the answer to how to get cells in acrylic pouring. For cells, use the oil or a pure lubricant in your mixed paint.
A homemade cell activator recipe
A cell activator is any additive that changes how the surface behaves. The simplest version is a small amount of silicone plus a touch of alcohol ink or a drop of watercolor, mixed into one light base color rather than into every cup. The alcohol thins that one cup and the ink darkens it, so the cells have contrast to open onto.
The second version is silicone plus a tiny amount of metallic or mica powder stirred into the base color. The mica lifts the pigment load, which gives the silicone something to push against and produces lacing as a bonus.
Paint Mixing Ratios That Produce Cells
Ratios decide whether cells open or whether the surface stays flat. These numbers are the ones pourers report working most often, and they are a starting point rather than a rule.
Paint to pouring medium
Start with two parts acrylic paint to one part pouring medium in each cup. For very heavy body paint, go one part paint to one part medium. For fluid or already-thinned paint, three parts paint to one part medium is enough.
How much silicone per color
The most commonly cited sweet spot is 2 to 3 drops of silicone per 2 oz cup of mixed paint. That is small, and it feels too small the first time. One drop often under-doses and gives you pinprick cells; ten drops will flood the surface with craters and leave an oily film that never cures.
Count drops, not pours. If you mix a large batch, scale to drops per cup and mix the batch in a container where you can count accurately.
Which colors get silicone
Put silicone in one color, not all of them. On r/AcrylicPouring, the most reliable report is that silicone in the base color, usually white or black, produces the best contrast cells because the opened areas read clearly against the dark.
A workable recipe is one base color with silicone, one mid-tone without, and one accent without. If you want cells everywhere, halve the dose in every cup instead of using the full amount per cup.
Let it rest before pouring
Mix the silicone in, then wait 10 to 15 minutes before you pour. That rest lets the silicone start separating from the paint. Pouring immediately after mixing often gives you a smeared film instead of open cells.
How to Get Cells in Acrylic Pouring With Silicone: Three Methods
These three methods cover most of what you see in fluid art. If you are new, run the dirty pour first because it is the easiest to control and the most forgiving of a heavy hand.
Method 1: Dirty pour
A dirty pour means alternating colors in one container, usually two at a time in separate cups, then pouring them together onto the surface.
- Prep the surface: gesso-primed canvas or MDF board, taped edges, level table covered in a sheet.
- Mix each color to the consistency you settled on, and add silicone to the base color cup only.
- Rest the mixed cups for 10 to 15 minutes.
- Pour cup A in one spot, then cup B directly on top of it, alternating until the puddle is about 2 inches wide.
- Let the puddle spread on its own for a minute before any movement. Early tilting smears cells into streaks.
- Torch or heat the surface to open the cells, then wait a few minutes and tilt one direction only.
The dirty pour gives you the widest control over where colors land, so it is the best method when you want cells in a specific area rather than across the whole surface.
Method 2: Flip cup
The flip cup is the most reliable cell method for beginners, because gravity and air pressure do the work instead of your hand. It also produces the most even cell distribution across the canvas.
- Pour every color into a single cup in thin ribbons, working from the heaviest color at the bottom to the lightest at the top.
- Add silicone at the end in one short line across the surface, roughly 5 to 6 drops for a 16 oz cup, rather than mixing it through.
- Rest 10 to 15 minutes so the silicone line sinks toward the boundary between colors.
- Place a cup or the flat bottom of a second container on the paint surface and invert it in one smooth motion.
- Let it sit 20 to 30 seconds so the paint stops running down the cup sides.
- Hold a torch or heat gun above and around the cup to pull the colors down, then lift the cup in one steady movement.
- Tilt the canvas from each corner in turn to spread the paint to the edges.
Leaving the silicone as a line on top of the layered cup rather than stirring it in is the detail that makes the difference. A line gives the silicone a clean starting boundary, so cells open as neat rings instead of a random film.
Method 3: Swipe
A swipe pulls paint across the surface with a card or a silicone tool, and it stretches whatever the paint is already doing into lacing and webbing. Swiping before cells form smears them; swiping after the surface sets gives you lacing.
- Pour the base layers and let them settle for 2 to 3 minutes.
- Open the cells with the torch first, then let the surface tighten for 2 to 4 minutes.
- Drag a clean card from the edge inward in a single pass, one swipe per area, with no back-and-forth.
- Rotate the canvas and repeat on each side, keeping the swipes parallel and light.
- Finish with a short torch pass across the swiped areas to bring back the cells you stretched.
Some artists swipe after torching specifically to turn round cells into lace, and that combination is where the most dramatic finished pieces come from.
Torch vs Heat Gun for Acrylic Pouring Cells
Heat is what makes the silicone rise. A butane torch gives more dramatic cells; a heat gun gives more control. On r/PourPainting, that is close to a consensus, and the choice comes down to how much movement you want.
How to torch a pour safely
Hold a butane torch 6 to 8 inches above the surface and move it constantly. Never park the flame in one spot, and never torch a pour that is still dripping. Use a heat-resistant surface and a stand for the torch so your hand is not the only support. Keep a window open and a fan running.
Move the torch in slow sweeps a few inches apart, covering the whole pour, then circle back over the areas that opened least. Most pourers use two or three passes. Stop as soon as cells open. Extra heat is what turns cells into craters.
How to use a heat gun
A heat gun on low, held 10 to 12 inches away, moving in the same sweeping pattern, opens cells more gently. Work in small sections rather than whole panels, because a heat gun warms unevenly and you can cook one area past the point of no return.
Keep the gun moving and never point it at the paint from a fixed distance. Low heat and patience produce the cleanest cell edges.
Torch and heat gun compared
A torch reacts faster and gives a more dramatic open cell, which suits a flip cup where you want the paint to move quickly down the sides. A heat gun is better on a dirty pour or a swipe where you want to control how much the surface opens.
If you are working with metallic and pearl paint, a heat gun is gentler on the pigments and less likely to make colors shift. If you have never torched before, practice on a scrap board first. The motion is a smooth sweeping pass, and the first attempt is usually too slow.
Cell Size Control: Small Cells, Big Cells and Everything Between
Cell size is the thing pourers most want to control and the thing almost no guide explains. It comes down to four variables, and you can move any of them.
- Bigger, more open cells: more silicone per cup, thinner paint, a longer rest before pouring, and a stronger torch pass.
- Smaller, denser cells: less silicone, slightly thicker paint, a shorter rest, and a gentler heat pass.
- Tighter, lace-like cells: mica or metallic pigment in the base color and a swipe after torching.
- Fewer, larger pockets: a puddle pour in a wide area rather than a full-canvas flip cup.
The most common mistake on this list is trying to get big cells with a big silicone dose. Painters on r/AcrylicPouring report that heavy silicone doses produce craters and oily patches instead of open cells, and that thinning the paint is what actually delivers the large openings.
Adjust one variable at a time. Change the silicone dose and heat together and you will not know which one moved the result.
Can You Make Cells Without Silicone?
Yes, but the cells will not look the same. Silicone-free methods rely on the density difference between paints rather than on a separating film.
- Metallic and mica paint: the heavy pigment load pushes the lighter paint up on its own, creating open pockets and natural lacing without any silicone.
- Alcohol ink drops: drops of alcohol ink into a wet surface push paint outward and leave bright-edged openings.
- Marble patterns: alternating high-flow and heavy-body acrylics create round separations that read as loose cells.
- Silicone spray on a surface: a light mist on the canvas before pouring gives separated edges, though the control is coarser than oil mixed into paint.
- Density layering: pouring a heavy color under a very thin color and heating it produces open pockets through pure convection.
None of these match the round, rimmed cells that silicone makes, and none of them open as predictably on a flip cup. If your goal is signature open cells, silicone is still the most reliable answer. If you need a piece that ages well, the silicone-free methods are worth knowing because silicone never bonds into the acrylic film.
Troubleshooting: Why Your Cells Aren’t Forming
Work through these in order. Most no-cell results come from the first two items, and both are quick to check before you start mixing again.
No cells at all
- The paint is too thick. This is the number one cause. Add more pouring medium a little at a time until the paint runs like warm honey.
- The silicone dose is too small. Confirm you counted drops rather than shaking the bottle. Move to 3 drops per 2 oz cup.
- You poured too soon after mixing. Wait the full 10 to 15 minutes.
- You did not apply heat. Silicone needs heat to migrate. One torch or heat gun pass, minimum.
- Your silicone is not pure. A contaminated lubricant thins the paint and the cells never form. Check for a 100% silicone label.
- All colors got the same silicone dose. Same density everywhere means no cell can open. Put silicone in one color only.
Cells that vanish when you tilt the canvas
Cells disappear when they have not set. The silicone film needs time to cool and firm before gravity works against it. Wait 3 to 5 minutes after torching, then tilt in one direction only and stop at the first sign of movement in the paint.
Tilting too early is also the most common mistake listed in beginner pouring forums. If the colors run freely and the colors merge, the pour was moved before it set. Start over rather than trying to rescue it.
Craters, fish eyes and an oily film
Craters come from too much silicone and too much heat. Reduce the dose to 2 drops and shorten the torch pass. A film that never cures is usually silicone that pooled on the surface, which means you torched too long in one area or the paint was too thin to hold it.
Fish eyes in a resin topcoat are a different problem. Silicone left on the surface repels resin, so the finish beads up. Clean the dried surface before you pour resin, and skip the resin topcoat if a fully cured varnish is enough for your piece.
Cracking and crazing after drying
- Too much silicone. The film thickens over the paint and creates tension as the acrylic shrinks. Cut the dose.
- Too thin a paint film. Thicker mixes dry as one film. Add more paint to the mix.
- Humidity. Pourers report cracking problems with silicone in humid rooms. See the section below.
- Uneven thickness. Tilt the board to level the paint at the edges, or the paint at the rim dries thinner and cracks first.
- No seal coat. A varnish or resin layer slows the rate at which the surface responds to air and moisture.
Common mistakes worth naming outright
- Pouring on an unprimed surface, which lets the paint soak in and separate unevenly.
- Using a plastic cup that is not paint-compatible and lets the silicone film the walls.
- Adding silicone to metallic paint in a heavy dose, which gives pinholes instead of lace.
- Testing the paint by dabbing it back into the cup, which introduces air bubbles you then torch across the surface.
- Leaving the room too cold, so the paint sets before the colors can move.
Workspace Setup and Torch Safety
Work flat, level and covered. A level surface matters more than any other workspace factor, because a tilted table pulls the paint to one edge and drags the cells with it.
For a butane torch, ventilation is the first safety item. Use a torch stand, keep the flame moving, keep paper and solvents away from the pour, and never torch where paint is still running off the edges. Nobody should be in the room when you light it if the room is small.
Keep silicone bottles capped when you are not pouring from them, and wipe the nozzle before it touches a cup rim. Oil on the outside of a cup will transfer to your canvas in a ring.
How Humidity, Temperature and Drying Time Change Your Cells
Cells are a physical reaction to heat and time, so the room changes the outcome. In high humidity, silicone pours are reported to crack more, because the surface skins over at a different rate than the paint underneath cures.
Lower humidity and warmer air both speed the cure. In a cool room, give the paint longer before torching or the silicone will not have migrated. A rough rule from pourers is that a room around 70 degrees Fahrenheit gives you a workable window, and anything colder needs extra time on the surface.
Drying and curing are two different things. A silicone pour is touch-dry in hours but fully cured in 24 to 48 hours depending on thickness and room temperature. Sealing before the cure finishes traps the silicone film and is the usual cause of a later crack or an oily sheen under varnish.
If you are in a humid climate, thin the pour less, use fewer silicone drops, and give the piece extra drying time in a ventilated room before you seal.
Sealing and Protecting a Silicone Cell Painting
Silicone does not join the acrylic binder. It sits on the surface, so the sealing step is about covering it properly rather than integrating it.
Cleaning silicone off the surface
Let the piece cure fully first. Then wipe the surface gently with a barely damp cloth, taking the silicone film off the top without scrubbing into the cells. For a heavier film, a drop of isopropyl alcohol on a soft cloth works, and you want to test a corner first because alcohol can lift paint on a cured surface.
For large pieces, the more common approach is not to remove the film at all and to seal directly over it with a full-coat varnish. What you should never do is scrape the silicone, because a palette knife will lift the cell rims and destroy the pattern you spent the pour creating.
Varnish, resin and UV protection
- Wait 24 to 48 hours after the pour for a full cure, longer in humid conditions.
- Clean the silicone surface as above if you plan to use resin, which repels silicone and fish-eyes badly.
- Apply a clear varnish in thin coats, following the can directions, and let each coat dry.
- Use a UV protective varnish if the piece will hang in direct sun, since acrylic pigments are not fully lightfast.
- Use epoxy resin for a glassy, durable finish on furniture and table tops, and clean the surface first.
Varnish is the safer route for wall art and for anything you might move. Resin gives the harder, more reflective finish that people want on a coffee table, and it needs a silicone-free surface to bond properly.
Frequently Asked Questions
How much silicone oil do I add to acrylic paint for cells?
The most commonly cited amount is 2 to 3 drops of silicone oil per 2 oz cup of mixed paint. For a 16 oz flip cup, that works out to roughly 5 to 6 drops added in a single line across the surface rather than stirred in. Let the mix rest 10 to 15 minutes before pouring, and never exceed about 10 drops per 2 oz cup, because too much silicone produces craters and a film that never cures.
What causes cells in acrylic pouring?
Cells form because silicone oil has a different density and much lower surface tension than acrylic paint. The silicone rises through the paint layers, collects into a thin film, and pushes the layers apart, exposing the color underneath as round openings. Heat speeds this up by lowering the paint’s viscosity so the silicone can migrate faster.
Why am I not getting cells even with silicone?
Paint that is too thick is the most common cause. The paint needs to run like warm honey, which usually means two parts paint to one part pouring medium. Other causes include too few silicone drops, pouring before the mix has rested 10 to 15 minutes, skipping the heat pass, using an impure lubricant that thins the paint, or putting the same silicone dose in every color so no cell can open against a contrast color.
Can I use treadmill lubricant instead of art silicone oil?
Yes. Pourers on r/PourPainting regularly use 100% silicone treadmill lubricant from brands such as Valspar and Spot On at 2 to 3 drops per 2 oz cup, and report cells that look the same as art-brand silicone. Check that the label says 100% silicone with no additives or carrier solvents, because additives thin the paint and slow the cure.
Can I make cells in acrylic pouring without silicone?
Yes, though the effect is different. Heavy metallic and mica paints create open pockets and lacing from pigment density alone, alcohol ink drops push paint outward into bright-edged openings, and alternating heavy-body and high-flow paints create loose round separations. None of these match the rimmed cells silicone produces, and they are less predictable on a flip cup.
Is silicone spray the same as silicone oil for acrylic pouring?
No. Aerosol silicone spray carries a propellant, deposits an uneven film, and lands on the surface as overspray rather than mixing into the paint where you control the dose. For cells, use silicone oil or a 100% silicone lubricant mixed into the paint. Silicone spray is only used occasionally as a surface treatment for resist effects.
Why do my cells disappear when I tilt the canvas?
Cells disappear when the silicone film has not set yet and gravity works against it. Wait 3 to 5 minutes after torching, then tilt in one direction only and stop as soon as the paint starts to move. Tilted too early, the colors run and merge, and that pour usually cannot be rescued.
What is the best cell activator for acrylic pouring?
The best activator is a small amount of pure silicone oil mixed into one light base color, with a contrast color underneath it. For more effect, add a drop of alcohol ink or a small amount of mica powder to that same cup. The mica raises the pigment load and produces lacing as a bonus, which is why metallic and pearl paints lace so well.
How do I get big cells instead of tiny ones?
Thin the paint more rather than adding more silicone. A 3 parts paint to 1 part pouring medium mix, 3 drops of silicone per 2 oz cup, a full 10 to 15 minute rest, and a slightly stronger torch pass all open up larger cells. Pourers report that a heavy silicone dose gives craters and oily patches instead of open cells.
How long should I wait before sealing a silicone pour?
Wait for a full cure, which is 24 to 48 hours depending on how thick the pour is and how warm and humid the room is. A silicone pour feels touch-dry within hours but keeps shrinking underneath. Sealing before the cure finishes can trap the silicone film, which shows up later as a crack or an oily sheen under the varnish.
Conclusion
Learning how to get cells in acrylic pouring with silicone comes down to four repeatable moves: thin paint to honey consistency, add 2 to 3 drops of pure silicone to one base color, rest the mix 10 to 15 minutes, then apply moving heat before you tilt anything.
Change one variable at a time when a pour misses, and use the troubleshooting list in that order. Most flat pours are a thickness problem, and most craters are a dose or heat problem. Both are quick to correct on the next attempt.