
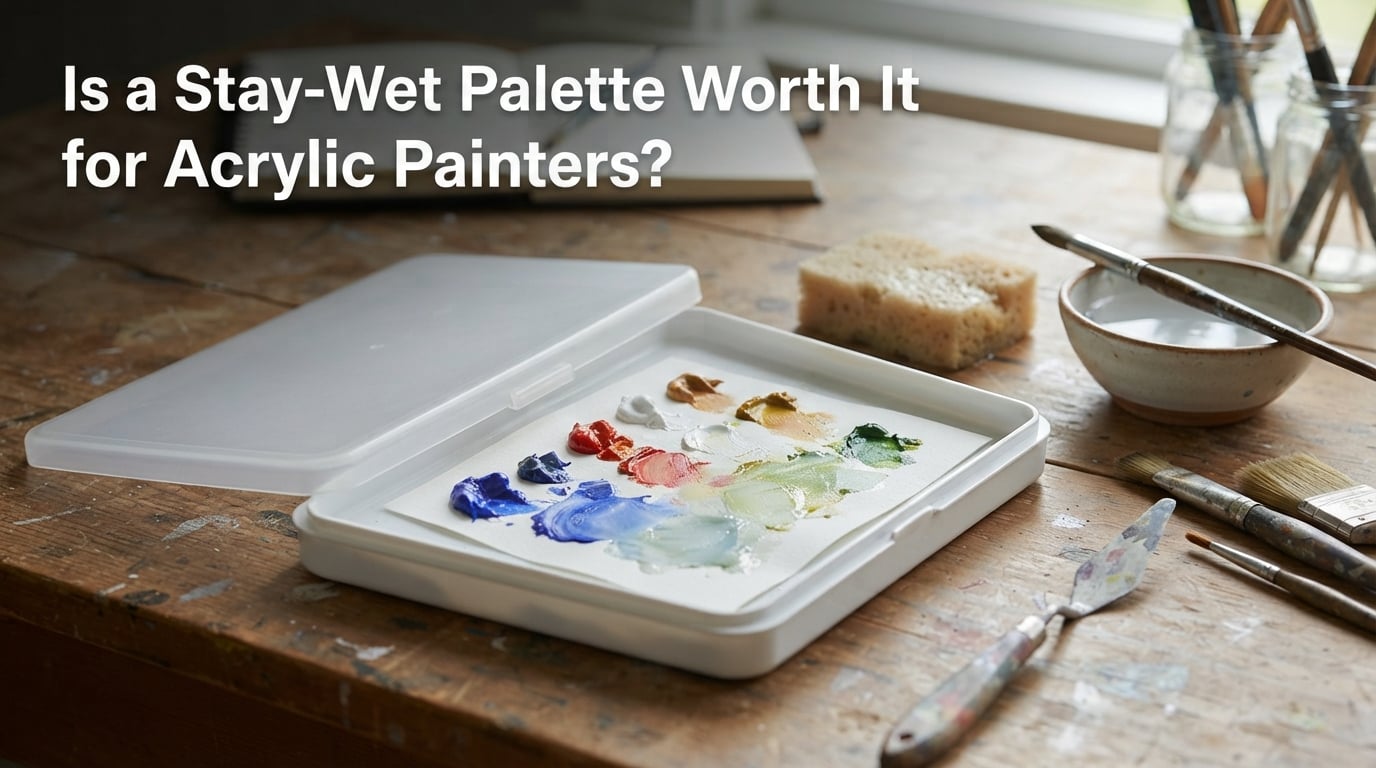
Yes, a stay-wet palette is absolutely worth it for most acrylic painters. This simple tool keeps your paint workable for days instead of minutes, dramatically reducing waste and extending your blending time. If you’ve ever watched helplessly as perfectly mixed colors dried into unusable blobs on your palette, the stay-wet palette is the solution you’ve been waiting for.
Acrylic paint dries fast—sometimes within 10 to 20 minutes on a regular palette. This rapid drying time creates constant pressure to work quickly, wastes expensive paint, and makes smooth color transitions difficult. A stay-wet palette solves all these problems by maintaining consistent moisture around your paint through a simple but clever system of sponges and semi-permeable paper.
In this guide, I’ll explain exactly how a stay-wet palette works, who benefits most, and whether it’s worth it for your specific painting style. You’ll learn how to set one up, maintain it properly, and troubleshoot common issues. By the end, you’ll have all the information you need to decide if a stay-wet palette is worth it for you.
Table of Contents
- What Is a Stay-Wet Palette & How It Works
- Benefits for Acrylic Painters
- Cost-Benefit Analysis: Paint Waste Savings
- How to Use a Stay-Wet Palette: Step-by-Step Setup Guide
- DIY vs Commercial Wet Palettes: Comparison Table
- Use-Case Scenarios: Who Benefits Most
- Maintenance & Mold Prevention
- Troubleshooting Guide
- Frequently Asked Questions
- What type of palette is best for acrylic painting?
- What is the best stay-wet palette for acrylic paint?
- What kind of palette is best for painting with acrylic paint?
- Can you do wet on wet painting with acrylic paint?
- How to use a stay wet palette?
- Are stay wet palettes worth it?
- Do you need to water down paints on a wet palette?
- What are the benefits of using a wet palette?
- Conclusion
What Is a Stay-Wet Palette & How It Works
A stay-wet palette is a sealed container system that keeps acrylic paint moist and workable for extended periods. It consists of three main components: a waterproof tray, a sponge or foam reservoir, and a semi-permeable paper that sits on top of the sponge. When properly assembled, this system creates a humid environment that prevents your paint from drying out.
The magic happens through capillary action. Water from the soaked sponge travels upward through the porous paper, creating a consistently moist surface without actually soaking your paint. Think of it like a self-watering system for your paint—the paper stays damp enough to maintain humidity but not so wet that it dilutes your colors.
Here’s the science in simple terms: acrylic paint dries through evaporation. When water evaporates from the paint, the acrylic polymer binder hardens and your paint becomes permanent. A stay-wet palette slows this process dramatically by keeping the air around your paint humid. The semi-permeable paper acts as a membrane that allows moisture transfer without letting water pool directly on your paint.
Many painters worry that a wet palette will make their paint too thin or watery. This is a common misconception. When set up correctly, the water stays below the paper in the sponge reservoir. Your paint sits on top of the paper, separated from direct contact with standing water. The system maintains humidity in the air space between the paper and the lid, not in the paint itself.
Benefits for Acrylic Painters
The benefits of using a stay-wet palette extend far beyond simply keeping paint wet longer. For most acrylic painters, this tool fundamentally changes how they work and what they can accomplish. Let me break down the key advantages.
Paint Waste Prevention
Every acrylic painter has experienced the frustration of mixing the perfect color, only to have it dry before finishing the area. With a regular palette, that mixed color becomes a dried, unusable blob that you end up scraping off and throwing away. Over time, this wasted paint adds up significantly—both in materials and money.
A stay-wet palette eliminates most of this waste. Colors you mix today stay usable tomorrow, or even days later. Painters consistently report using significantly less paint overall once they switch to a wet palette. For anyone who works with artist-grade acrylics, the savings can be substantial over a year of painting.
Extended Blending Time
Acrylic paint’s fast drying time makes wet-on-wet blending challenging. You often have only a few minutes to blend colors smoothly before the paint starts to set. This time pressure can make blending feel rushed and stressful, particularly for beginners still developing their technique.
With a stay-wet palette, your mixed colors remain workable for hours or even days. You can blend at your own pace, step back to evaluate your work, and make adjustments without racing against the clock. This extended working time enables the kind of smooth gradients and soft transitions that many painters assumed were only possible with oils.
Color Consistency Across Sessions
One of the biggest challenges for painters working on multi-session projects is color matching. You mix a custom color on Monday, but by Tuesday that color is gone—dried on your palette and impossible to recreate exactly. This leads to visible color shifts between painting sessions.
A stay-wet palette preserves your mixed colors between sessions. That perfect gray you mixed on Monday? It’s still there on Wednesday, ready to use. This consistency is invaluable for miniature painters, portrait artists, and anyone working on detailed pieces that span multiple sittings.
Stress Reduction
Painting should be enjoyable, not a race against drying paint. Without a wet palette, you constantly feel pressure to work faster, use paint before it dries, and remix colors that have already skinned over. This urgency can steal the joy from painting.
A stay-wet palette removes this time pressure entirely. You can pause to answer the phone, take a break for lunch, or step back to study your work. Your paint will still be there, still workable, still ready when you are. Many painters describe the experience as “freeing” or say they “can’t imagine going back.”
Enables Advanced Techniques
Some painting techniques are nearly impossible with regular acrylic palettes. Wet blending—where you blend two colors directly on your painting surface—requires extended working time. Glazing techniques need paint that stays fluid and translucent over time. Color gradients across large areas demand the ability to work slowly and make adjustments.
A stay-wet palette makes these techniques accessible. You can explore methods that were previously impractical with fast-drying acrylics. Many painters discover new techniques and styles once they’re no longer constrained by rapid drying times.
Cost-Benefit Analysis: Paint Waste Savings
Let’s look at the numbers. For many painters, a stay-wet palette pays for itself through paint savings alone. Consider how much acrylic paint you typically waste. If you paint regularly, chances are you’re throwing away dried paint every session—sometimes significant amounts.
Here’s a realistic calculation. A typical hobbyist painter might waste the equivalent of one 2-ounce tube of paint per month on dried palette scrapings. With artist-grade acrylics costing anywhere from moderate to premium prices per tube, that annual waste adds up. A quality stay-wet palette costs far less than a year’s worth of wasted paint.
Professional painters report even more dramatic savings. Those who paint daily or work on large-scale projects can waste substantial amounts of paint without a wet palette. Many professionals consider a stay-wet palette essential equipment precisely because it reduces their material costs over time.
Compare this to the alternative: adding retarder medium to slow drying time. Retarder helps, but you need to add it to every paint mixture, and the cost accumulates over time. A stay-wet palette is a one-time purchase that provides continuous benefit without ongoing consumable costs beyond occasional replacement paper.
Even DIY wet palettes made from household containers provide the core benefit at minimal cost. If you’re budget-conscious, you can start with a homemade version and upgrade to a commercial palette later. The paint savings begin immediately, regardless of which route you choose.
How to Use a Stay-Wet Palette: Step-by-Step Setup Guide
Setting up a stay-wet palette correctly makes the difference between success and frustration. The process is straightforward, but getting the details right matters. Follow these steps for reliable results.
Step 1: Soak the Sponge
Place your sponge in water and let it absorb moisture thoroughly. Most sponges need a few minutes to become fully saturated. Squeeze gently to remove excess water—the sponge should be damp throughout but not dripping or waterlogged.
Step 2: Place Sponge in Container
Lay the damp sponge flat in the bottom of your container. It should fit snugly without bunching or gaps. If your sponge is larger than your container, trim it to size with scissors. A proper fit ensures even moisture distribution across the palette surface.
Step 3: Prepare the Paper
Wet your palette paper or baking paper under running water or by dipping it in a bowl. Lay it gently on top of the sponge. The paper should be moist but not soaking wet—excess water can seep through and dilute your paint.
Step 4: Smooth Out Air Bubbles
Run your hand across the paper to press out any air bubbles trapped between the paper and sponge. Air bubbles create dry spots where your paint will dry prematurely. The paper should lie flat and make full contact with the sponge below.
Step 5: Test the Surface
Before adding paint, touch the paper surface with your fingertip. It should feel cool and slightly damp, similar to a barely moist towel. If water pools visibly on the surface, blot gently with a paper towel. If the paper feels dry, lift it and rewet the sponge below.
Step 6: Apply Your Paint
Place small amounts of paint on the paper surface. Space your colors apart to prevent them from running together. Start with small amounts—you can always add more paint, but removing excess from a wet palette is messy.
Step 7: Close the Lid
When you’re not actively painting, close the container lid to maintain humidity. Most painters leave the lid slightly cracked during active painting sessions for air circulation, then seal it completely between sessions.
DIY vs Commercial Wet Palettes: Comparison Table
One of the most common questions painters ask is whether to build their own wet palette or buy a commercial version. Both approaches have merit, and the right choice depends on your needs, budget, and how seriously you paint.
DIY Wet Palettes
Making your own wet palette at home costs almost nothing if you have the right household items. You need three things: a shallow plastic container with a lid (food storage containers work well), a sponge or layer of paper towels, and baking paper or parchment paper as the painting surface.
DIY palettes work surprisingly well for the core function of keeping paint moist. Many painters use them successfully for years. The main limitations involve seal quality, paper consistency, and maintenance. Homemade palettes may not seal as tightly as commercial versions, leading to faster evaporation. Paper quality varies between brands of baking paper, affecting how well moisture transfers to your paint.
Commercial Wet Palettes
Commercial palettes like the Masterson Sta-Wet, Vallejo Pro Painter Palette, and Army Painter Wet Palette offer several advantages over homemade versions. They’re designed specifically for painting, with features that improve the experience.
Quality seals keep moisture in more effectively than most food containers. Dedicated palette paper is manufactured for consistent moisture transfer and durability. Some commercial sponges include anti-mold treatments. Replacement parts are available when components wear out.
Commercial palettes also tend to be more portable and professional-looking, which matters for painters who travel or teach classes. The standardized paper size makes replacement straightforward—you always know exactly what to buy.
Which Should You Choose?
Start with a DIY version if you’re new to wet palettes or unsure whether you’ll use one regularly. You can build one in minutes with items already in your kitchen. This lets you test the concept without any investment.
Upgrade to a commercial palette if you paint frequently and appreciate quality tools. The improved seal, consistent paper, and thoughtful design features make painting more pleasant. For miniature painters and professionals who use their palette daily, a commercial version is worth the cost.
Use-Case Scenarios: Who Benefits Most
Different types of painters have different needs. Understanding how a stay-wet palette serves various painting styles helps you evaluate whether it’s worth it for your specific situation.
Miniature Painters
For miniature and model painters, a stay-wet palette is nearly essential. These painters work on small-scale projects that require precise color matching over multiple sessions. A custom color mixed for a squad of models needs to stay consistent across days of work.
Miniature painting also involves extensive wet blending and glazing techniques that benefit from extended working time. The small paint quantities used in miniature painting dry quickly on regular palettes, leading to frequent remixing. A wet palette eliminates this frustration.
Canvas Artists
Canvas painters working in acrylics gain the ability to blend more smoothly and work more slowly. Without the pressure of rapid drying, you can achieve the kind of soft gradients and subtle color transitions typically associated with oil painting.
Artists painting realism or portraits particularly benefit. These styles require extensive color mixing and adjustment that’s difficult when paint dries in minutes. A wet palette gives you time to get your colors exactly right.
Paint-by-Numbers Enthusiasts
Even casual painters using paint-by-numbers kits can benefit from a wet palette. These kits often provide just enough paint for the project—if that paint dries before you finish, matching the color becomes difficult.
A simple DIY wet palette keeps your kit paints fresh throughout the project. This is especially valuable for larger paint-by-numbers that take weeks to complete.
Beginners Learning Acrylics
Beginners face a steep learning curve with acrylics. The paint dries faster than you can react, colors shift as they dry, and mistakes feel permanent. This rapid timeline adds stress to an already challenging learning process.
A stay-wet palette removes this time pressure. New painters can experiment, make mistakes, and learn at their own pace. The extended working time makes acrylics more forgiving and less intimidating.
Professional Artists
For professional artists, time is money, and wasted paint is lost profit. A stay-wet palette improves workflow efficiency by eliminating the constant need to remix dried colors. Painters can focus on their art rather than fighting their materials.
Many professionals consider a wet palette standard studio equipment. It’s one of those tools that, once you start using it, you wonder how you ever managed without it.
Maintenance & Mold Prevention
A stay-wet palette requires some maintenance to perform well and stay clean. Without proper care, the damp environment can become a breeding ground for mold and bacteria. Fortunately, maintaining your palette is simple once you establish good habits.
Daily Maintenance
After each painting session, check your palette for any dried paint edges or debris. Remove any solid paint pieces with a palette knife or paper towel. If you notice the sponge drying out, add a small amount of water to rehydrate it—don’t oversaturate.
Close the lid completely when you’re done painting. An airtight seal keeps moisture in and contaminants out. If your lid doesn’t seal tightly, consider adding a clamp or weight to maintain pressure.
Weekly Deep Cleaning
Once a week (or whenever you notice buildup), empty your palette and clean all components. Remove the paper and discard it or set it aside if it’s still usable. Rinse the sponge thoroughly with clean water, squeezing it several times to flush out any accumulated paint or bacteria.
Wash the container with mild soap and warm water. Rinse thoroughly to remove all soap residue, which can affect paint consistency. Let everything air dry completely before reassembling, or pat dry with a clean towel if you’re in a hurry.
Mold Prevention Strategies
Mold is the most common problem with wet palettes, but it’s entirely preventable with the right approach. The key is understanding that mold needs organic material, moisture, and warmth to grow. You can disrupt this environment in several ways.
First, use distilled or filtered water instead of tap water. Tap water contains minerals and sometimes organic material that can encourage mold growth. Distilled water is purer and less hospitable to mold.
Second, let your palette dry out occasionally. If you paint regularly, consider emptying and drying your palette once a week. Even a 24-hour dry period disrupts mold growth. Many painters make this part of their weekly studio cleanup routine.
Third, store your palette in the refrigerator between sessions if you won’t be painting for several days. The cold temperature slows mold growth significantly. Just remove your paint before refrigerating, or keep only the sponge and paper inside.
Fourth, some painters add a small amount of vinegar to the water used for soaking the sponge. Vinegar creates an acidic environment that inhibits mold without affecting your paint. Use a ratio of about one tablespoon of vinegar per cup of water.
Paper Replacement Frequency
Replace your palette paper whenever it shows signs of wear, staining, or mold. For most painters using commercial palette paper, this means replacing every one to three weeks depending on use. Baking paper in DIY palettes may need more frequent replacement due to its thinner construction.
Watch for these signs that paper needs replacing: visible mold spots (even tiny ones), paper that tears or punctures easily, paper that no longer lies flat, or paper that has absorbed so much pigment it’s stained throughout.
Troubleshooting Guide
Even with proper setup, you may encounter issues with your wet palette. Here are the most common problems and their solutions.
Paint Too Watery
If your paint becomes thin and watery on the palette, too much moisture is transferring through the paper. This usually happens when the sponge is oversaturated with water or when the paper itself is too wet.
To fix this, remove your paint temporarily and blot the paper surface gently with a paper towel or cloth. Check the sponge—if it’s dripping wet, squeeze out excess moisture before replacing the paper. In the future, use less water when initially soaking your sponge.
Some painters prefer a slightly drier setup from the start. It’s easier to add water later than to remove it. If you’re consistently struggling with watery paint, try starting with a sponge that’s only damp rather than fully soaked.
Mold Growth
Black, green, or white spots on your sponge or paper indicate mold. This is unsightly but fixable—and preventable with better habits going forward.
Remove and discard any moldy paper immediately. Clean the container thoroughly with hot water and mild soap, then sanitize with a diluted bleach solution or vinegar. Rinse extremely well. Replace the sponge entirely if mold has penetrated it—sponges are porous and difficult to fully sanitize.
Going forward, implement the mold prevention strategies discussed earlier: use distilled water, let the palette dry between uses, refrigerate during long breaks, and consider adding vinegar to your soaking water.
Paper Tearing or Not Lying Flat
Paper that tears easily or won’t lie flat usually indicates a quality issue or improper preparation. Thin or low-quality paper can’t withstand regular use with palette knives and brushes.
Try a different brand of baking paper if using a DIY palette. Some brands are thicker and more durable than others. For commercial palettes, use the manufacturer’s recommended replacement paper rather than substitutes.
Proper paper preparation also matters. Wet the paper thoroughly before placing it on the sponge, then smooth out all wrinkles and air bubbles. Paper that starts with folds or wrinkles will continue to have problems.
Paint Drying Too Fast Anyway
If your paint still dries quickly despite using a wet palette, something is wrong with your setup or sealing. Check that your container lid closes completely and creates an airtight seal. Gaps in the seal allow moisture to escape.
Also verify that your sponge is adequately moist. A bone-dry sponge can’t transfer moisture to the paper. The sponge should feel damp throughout, not just on the surface.
In very dry climates or heated indoor spaces during winter, evaporation happens faster. You may need to add water to your sponge more frequently or use a container with a better seal.
Paint Separating from Paper
If paint pools into droplets or refuses to stick to the paper surface, your paper might be too smooth or coated with something that repels water. This sometimes happens with certain brands of baking paper or wax paper.
Try different paper until you find one that holds paint properly. The paper should have a slightly textured surface that allows paint to adhere. Many painters recommend testing several brands of baking paper to find the one that works best.
Frequently Asked Questions
What type of palette is best for acrylic painting?
A stay-wet palette is best for most acrylic painters because it extends working time from minutes to days. Regular palettes allow paint to dry quickly, leading to waste and limited blending time. For painters who mix custom colors or work on multi-session projects, a stay-wet palette provides the best results.
What is the best stay-wet palette for acrylic paint?
The Masterson Sta-Wet Palette is widely considered the best all-around option for acrylic painters. It offers excellent seal quality, comes with proper palette paper, and includes an anti-mold sponge. The Vallejo Pro Painter Palette and Army Painter Wet Palette are also popular choices, particularly for miniature painters.
What kind of palette is best for painting with acrylic paint?
A palette that maintains humidity around your paint is best for acrylics. This includes stay-wet palettes, which use a sponge and semi-permeable paper system. Without humidity control, acrylic paint dries in 10-20 minutes, limiting your working time and wasting paint.
Can you do wet on wet painting with acrylic paint?
Yes, you can do wet-on-wet painting with acrylics using a stay-wet palette. The extended working time allows you to blend colors directly on your painting surface, similar to oil painting techniques. Without a wet palette, acrylics dry too fast for most wet-on-wet applications.
How to use a stay wet palette?
To use a stay-wet palette, soak a sponge in water and place it in a sealed container. Lay damp semi-permeable paper over the sponge, smoothing out air bubbles. Apply your acrylic paint to the paper surface. Close the lid when not actively painting to maintain humidity and keep paint workable for days.
Are stay wet palettes worth it?
Yes, stay-wet palettes are worth it for most acrylic painters. They dramatically extend working time, reduce paint waste, and enable advanced blending techniques. Many painters report the palette pays for itself through paint savings within months of regular use.
Do you need to water down paints on a wet palette?
No, you should not need to water down paints on a properly set up wet palette. The palette maintains humidity around your paint without directly watering it. If your paint becomes watery, your setup has too much moisture in the sponge or paper. Blot the surface and use less water next time.
What are the benefits of using a wet palette?
The main benefits of a wet palette are: extended working time (hours or days instead of minutes), reduced paint waste and cost savings, color consistency across painting sessions, stress-free painting without racing against drying time, and the ability to use advanced blending techniques previously difficult with acrylics.
Conclusion
For most acrylic painters, a stay-wet palette is absolutely worth it. This simple tool transforms the painting experience by extending working time from minutes to days, dramatically reducing paint waste, and enabling techniques that were previously impractical with fast-drying acrylics.
The benefits are clear: less wasted paint means real cost savings over time. Extended blending time allows for smoother transitions and more detailed work. Color consistency across sessions eliminates the frustration of trying to match yesterday’s custom mix. Perhaps most importantly, a wet palette removes the constant time pressure that makes acrylic painting feel rushed and stressful.
If you’re still unsure whether a stay-wet palette is worth it for your acrylic painting practice, start with a DIY version. A plastic container, sponge, and baking paper cost almost nothing and let you experience the benefits firsthand. Once you understand how much easier painting becomes with extended working time, you’ll likely want to upgrade to a quality commercial palette.
For miniature painters, professionals, and anyone working on detailed multi-session projects, a stay-wet palette isn’t just worth it—it’s essential equipment. The consensus among experienced acrylic painters is clear: this is one of the most useful tools you can add to your studio.