
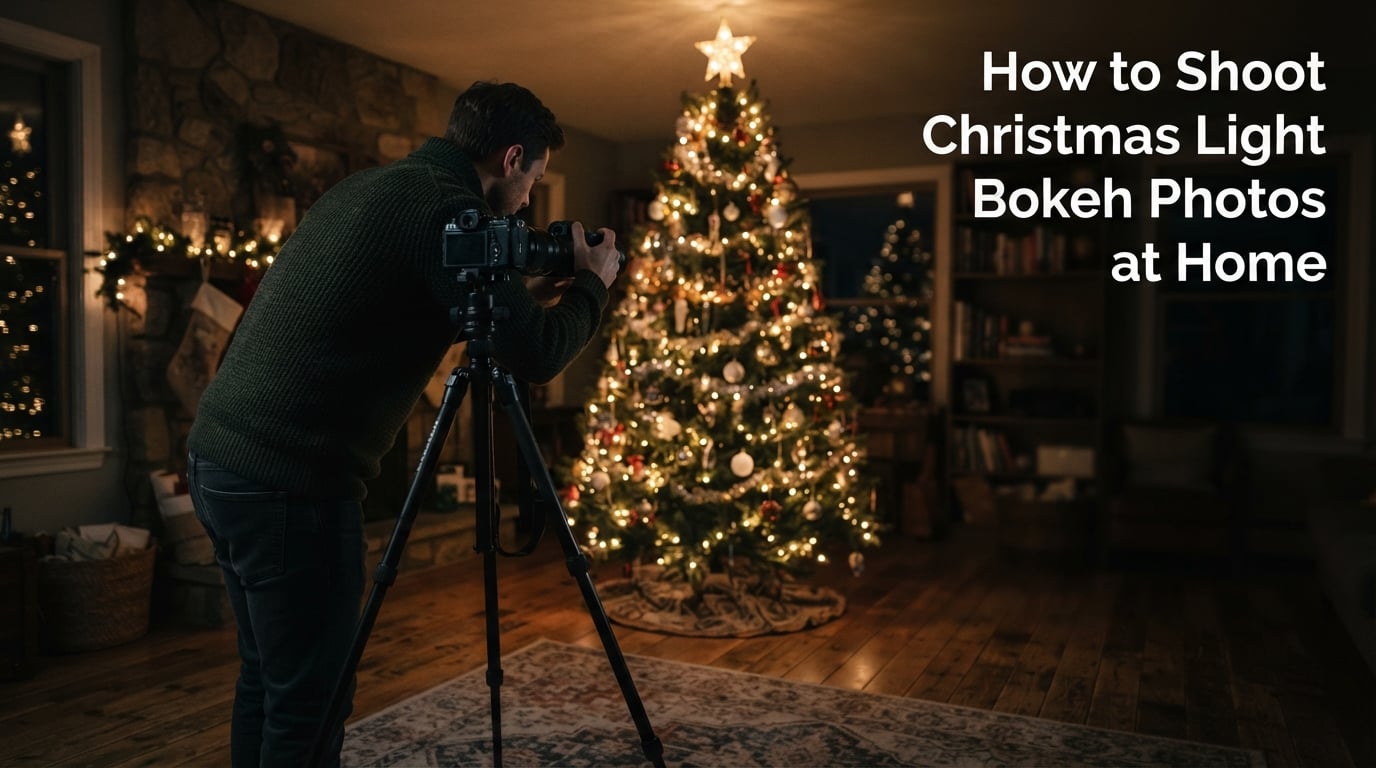
Every December the same thing happens: you point your camera at a string of Christmas lights, press the shutter, and get back a mess of tiny hard dots instead of the soft glowing orbs you saw online. Nothing is wrong with your camera. Bokeh is a deliberate choice, and once you understand the three variables behind it, the shots become repeatable in a single living room.
This guide covers how to shoot Christmas light bokeh photos at home, from the first darkening of the room to the final edit. We break it into six steps, a settings table you can copy for a DSLR, a mirrorless body, a kit zoom, or a phone, and a troubleshooting table for the four failures that come up every time: blown-out bulbs, a frame that is too dark, focus that will not lock, and lights so small they read as mush.
You do not need studio lighting, a second camera, or expensive glass. A tree in a dim room, a window with lights strung across it, or a single string draped over a railing gives you every ingredient the effect needs. Updated for 2026, and written for readers who have never used manual mode.
Table of Contents
- What Is Christmas Light Bokeh?
- What You Need Before You Start
- How to Shoot Christmas Light Bokeh in 6 Steps
- Why the Camera Gets Christmas Lights Wrong
- Camera Settings Cheat Sheet
- How to Get Rounder, Bigger Bokeh Balls
- Photographing a Subject in Front of the Lights
- How to Shoot Christmas Light Bokeh on a Phone
- Blue Hour vs Full Dark: When to Shoot
- Creative Bokeh Ideas at Home
- Why Your Bokeh Balls Look Like Hexagons, Hearts, or Cat’s Eyes
- Bokeh Balls vs Starbursts
- What to Do If Your Lens Is Too Slow
- Editing Christmas Light Bokeh
- Troubleshooting: Symptom, Cause, Fix
- Common Mistakes to Avoid
- Safety and Setup Notes for Indoor String Lights
- Frequently Asked Questions
- What f stop is best for bokeh?
- What are the best iPhone camera settings for taking pictures of Christmas lights?
- How do I get very large bokeh while keeping a nearby subject in focus?
- How to take better bokeh photos?
- How do I avoid bokeh effect?
- Is bokeh overrated?
- How do I photograph a Christmas tree without starburst spikes around the lights?
- How do you do the viral Christmas photos?
- Conclusion
What Is Christmas Light Bokeh?
Christmas light bokeh is a night photography technique where you focus your lens on something other than the lights, so string lights, tree lights, or fairy lights are rendered as soft, out-of-focus glowing circles instead of sharp points. You get the look by shooting wide open, putting distance between your subject and the lights, and exposing for the dark rather than for the bulbs.
A few terms make the rest of this guide easier to follow:
- Bokeh – the word comes from the Japanese for blur. It describes the out-of-focus areas of an image, and in this context, the soft discs the lights become.
- Aperture – the number inside f/1.8 or f/5.6. A smaller number means a wider opening, more light, and a shallower depth of field.
- Depth of field – the slice of the scene that is actually sharp. At f/1.8 that slice can be a few centimetres deep.
- Subject-to-light distance – the gap between whatever you focused on and the lights behind it. This is the single biggest control you have, and it is the one most beginners never think about.
- Point light – a small, bright, isolated source. A single bulb is a point light, and point lights are exactly what the camera’s meter struggles to read.
What You Need Before You Start
The honest list is short. A camera with a manual or semi-manual exposure mode, a light source made of many small bulbs, a dark room, and something to rest the camera on are the whole kit. Everything else is a refinement.
Camera. Any interchangeable lens camera works, as does most recent smartphones. The mode dial matters more than the megapixel count, because you need Aperture Priority or Manual to hold the aperture wide while the shutter stretches.
A stable support. A tripod is ideal, but a stack of books, a sturdy chair back, or a table edge with a folded towel works. At the shutter speeds this technique needs, hand-holding produces a soft frame that is easy to mistake for a focus problem.
A dark room. This is the step everyone skips. Kill the ceiling light, close the blinds, and turn off the TV. Residual room light fills the frame with grey and the colors wash out. If you shoot at night, block the streetlight coming through the window with a sheet.
Room to move. You want at least two to three metres between your subject and the lights. In a small flat, that means putting the lights at one end of the room and shooting from the other, or moving the subject close to the camera and letting the lights hang behind them.
A fast lens helps enormously but is not a requirement. There is a full section later for kit zoom users on how to make f/5.6 produce usable bokeh by changing your distance instead of your glass.
How to Shoot Christmas Light Bokeh in 6 Steps
Step 1 – Set up and darken the room
Turn off every light source except the string lights. Push the tree or the light strand toward a corner or the far end of the room, then shoot from the opposite side. Fewer stray lights means darker corners, and darker corners are what make the glowing balls read as balls rather than as a wash.
Step 2 – Choose the widest aperture your lens has
Set the aperture as low a number as it goes. If the lens bottoms out at f/1.8, shoot f/1.8. If it stops at f/4, shoot f/4 and rely on distance for the rest. Aperture is the first lever controlling how large the out-of-focus discs become.
Step 3 – Create subject-to-light distance
Put your subject near the camera and the lights well behind it. A person standing two metres from the lens with lights three metres further back gives dramatically bigger bokeh than a person standing a metre from the lights. This is the second lever, and usually the stronger one.
Step 4 – Pick your focus strategy
For a person, plant the focus point on the eye or the shoulder and let the rest soften. For pure abstract light photos, focus on something a short distance in front of the lights, such as a corner of the room, then reframe. Switch to single-point autofocus or manual focus so the camera does not hunt.
Step 5 – Expose for the lights
Shoot in Manual if you have it. Start around 1/125s, ISO 1600, f/1.8 and check the histogram, keeping the brightest bulbs just under the clipping point. If the frame is too dark, raise ISO before you lengthen the shutter. If the lights are pure white blobs, drop exposure by a third of a stop.
Step 6 – Review and refine
Zoom in on the playback at 100 percent and check two things: whether the subject’s eyes are sharp, and whether the bokeh balls are distinct or merging into a smear. If they merge, move the lights further back. If the eyes are soft, use a slightly narrower aperture such as f/2.8.
Why the Camera Gets Christmas Lights Wrong
Christmas lights fool the light meter because they are the worst possible combination of small, extremely bright, and set against near-black surroundings. The meter reads a frame that is mostly darkness with a few searing points, concludes the scene is dark, and opens up. The result is a grey, washed background with clipped bulbs that have lost all colour.
Automatic modes also tend to choose a slow shutter, because they read the scene as dim. A one-quarter second handheld hand shake turns every point light into a short dash instead of a clean disc. This is the single most common reason a phone or point-and-shoot Christmas lights photo looks disappointing.
Two fixes handle most of it. First, use exposure compensation: negative values when bulbs are blown to white, positive values when the whole frame is murky. Second, switch to a night mode or a timer, which forces a longer, steadier exposure and hands the exposure decision to you rather than to the meter.
One more behaviour is worth knowing. If you focus directly on a cluster of lights with autofocus, the camera will hunt, and it may pull focus into the middle of the frame. Focus on your subject or on a plain dark area instead, and the bokeh will resolve cleanly.
Camera Settings Cheat Sheet
Start from the row that matches what you are holding. These are starting points, not rules, and every one of them assumes the room lights are off and the bulbs are the only illumination.
| Camera type | Aperture | Shutter | ISO | Focus | Tripod |
|---|---|---|---|---|---|
| DSLR with fast prime | f/1.8 | 1/125s | 1600 | Single point AF on the subject | Recommended |
| Mirrorless body | f/1.8 to f/2.8 | 1/160s | 800 to 1600 | Manual focus with peaking | Recommended |
| Kit zoom at f/4 to f/5.6 | Widest available | 1/125s | 3200 | Manual focus | Required |
| Smartphone | Fixed, not adjustable | Night mode or 3s timer | <td AutoTap the subject, not the lights | Steady surface |
If you only remember one row, remember the first. A wide aperture, a shutter fast enough to hand-hold at that ISO, and focus on the subject is the whole recipe.
How to Get Rounder, Bigger Bokeh Balls
Small, sharp-edged, overlapping dots are the most common complaint on every photography forum this time of year, and they are a geometry problem rather than a gear problem. Three levers control the size of each disc, and you can pull all three at once.
- Widen the aperture. Every stop you open doubles the size of the out-of-focus area. Moving from f/5.6 to f/2.8 is a four-times increase in blur area.
- Move further from the lights. Bokeh disc size grows with the distance between the plane of focus and the light source. This is why the same lens and aperture produce mushy results when the subject is standing right next to the tree.
- Use a longer focal length. A 100mm lens produces discs roughly twice the size of a 50mm from the same position. Zoom in and step back to keep the framing.
There is one more factor people miss. Light balls at the edge of the frame are squeezed into a cat’s-eye or lemon shape because the aperture is seen at an angle. If you want evenly round orbs across the whole image, shoot with the subject centred and accept some empty space at the edges, or crop to a square.
Keeping the light source away from the frame edge also stops it from going dim, which happens when a fast lens vignettes. Dark corners make the balls look dimmer than they are, so the frame edge is where weak bokeh hides.
| Focal length | Aperture to aim for | Subject-to-light distance that works indoors |
|---|---|---|
| 35mm | f/2.0 or wider | 4 metres or more |
| 50mm | f/1.8 | 3 metres or more |
| 85mm | f/1.8 | 2.5 metres or more |
| 100mm macro | f/2.8 | 1.5 metres or more |
Those distances are what makes the effect readable, not a minimum for any camera. The rule of thumb is that a big blurry mess with no clear discs is almost always a distance problem, not an aperture problem.
Photographing a Subject in Front of the Lights
A wall of soft glowing orbs with nothing in front of them is decoration, not a photograph. The effect gets its emotional weight from the contrast between something sharp and something soft, and a person, a pet, or a foreground object is what makes the viewer look twice.
Place the subject in the lower third, off centre, with the lights behind and slightly above. Have them look into the light rather than away from it, so the frame has a direction. A sprig of holly, a bauble, or a mug held close to the lens at the edge of the frame works as a foreground anchor and gives the shot a sense of place.
The most useful trick is to bring the subject closer to the camera than you think is reasonable. Sharp subject, distant lights, and a wide aperture produce the separation that makes the image look professional. If the light strand is the brightest thing and the face is dull, raise the light level on the face with a bounce card or a single low lamp placed off to the side.
People rarely hold still for repeated shots, so work in short bursts. Ten frames at one setting, then adjust, rather than fifty frames with a changing aperture. The forum consensus on r/photocritique is consistent on this: the shots people respond to are the ones where the exposure was right the first time and the subject was not trying to be still for a minute.
How to Shoot Christmas Light Bokeh on a Phone
Phones have a fixed aperture, so distance does all the work. You cannot open the iris, but you can put the subject close and the lights far, and that alone produces convincing bokeh balls. Tap to focus on the subject, not on the lights.
- Kill the room lights. Same rule as a camera. Screen brightness down, room lights off, curtains closed.
- Use Night mode or the timer. Night mode stacks several exposures and gives a cleaner result, but it can flatten contrast if the lights are very bright. The three-second timer with flash off is the more predictable option for a static scene.
- Tap to focus on the subject. Lock focus and exposure on a face, then hold the phone still. If you focus on the lights, the whole background sharpens and the effect disappears.
- Move closer to the subject and further from the lights. This is your aperture. Doubling the subject-to-light distance more than compensates for a small sensor.
- Do not trust Portrait mode. It struggles with small point lights, often smearing them into grey smudges or clipping them. Shoot in the standard mode instead.
- Consider a manual camera app. Apps that expose ISO and shutter speed separately let you hold a fast shutter in low light, which is how you keep the bulbs round instead of streaked.
- Clean the lens. A smudged lens turns every point light into a small comet. It is the least glamorous step and the one that most improves a night phone shot.
One honest limitation: most phone lenses are wide, so the discs stay smaller than a prime lens produces. Zooming in, if your model has an optical telephoto, doubles the apparent ball size. Digital zoom does not, and it softens the image.
Blue Hour vs Full Dark: When to Shoot
Full dark gives the cleanest, most saturated balls because there is no ambient light to wash them. Blue hour, the twenty minutes after sunset when the sky still holds colour, gives you something a night shot cannot: a recognisable background with depth, and enough light to fill a shadow side on a face.
If your goal is abstract glowing orbs, wait for full dark. If your goal is a portrait or a holiday card photo with a person in it, blue hour or early dusk is easier because you are not fighting a five-minute exposure for every bit of shadow detail.
The trick to shooting Christmas lights without starburst spikes is also timing. Spikes come from diffraction, which happens when you stop the aperture down. Keep the aperture wide and the spikes disappear, and blue hour lets you keep it wide without pushing the ISO as far.
Creative Bokeh Ideas at Home
Once the basic shot works, these variations are worth an evening each.
- Abstract light spheres. Remove the subject entirely, focus on a dark corner, and let the whole frame be glowing discs. Slow the shutter to 1/15s or 1/8s and rotate the camera slightly during the exposure for a swirl.
- Macro of a single bulb. A 100mm macro or a phone macro mode on one lit bulb gives overlapping discs that fill the frame and show the shape of your lens aperture clearly.
- Light trails. A two-second exposure at ISO 100 with the lights twinkling produces short curved streaks. Put a slow shutter on a tripod and move the camera a few centimetres during the shot.
- Foreground bokeh. Hang lights between the camera and the subject. The nearest bulbs become large soft shapes that frame the person, an approach enthusiasts use regularly on high-resolution bodies with fast primes.
- Reflections. Shoot through a dark window or a glass ornament. The doubled reflection creates two overlapping sets of discs, and the glass edge adds a sharp geometric line to break up the softness.
- Shaped light. Cut a heart, star, or snowflake out of black card, tape it over the front element, and focus past it. The card stays sharp and the lights behind render as that shape. Reviewers on photography forums note this is fiddly to align and works best when the card sits within a few centimetres of the glass.
A word of caution on the last one. Holding a fast lens wide open by hand risks dropping it, and taping card over the front element while a string light is plugged in nearby is unnecessary risk. Set the camera on a surface first.
Why Your Bokeh Balls Look Like Hexagons, Hearts, or Cat’s Eyes
The shape of your bokeh is the shape of your aperture. A lens with nine rounded blades gives near-circles at wide apertures, a lens with straight blades gives nonagons, and older or heavily stopped-down lenses produce obvious polygons. You cannot change it, so plan around it by shooting wide open where the iris is most circular.
Cat’s-eye bokeh appears at the corners of the frame because you are viewing the iris at an angle. Centre the composition and crop if the shape bothers you. Hearts and other symbols are almost never the lens, they are a filter or a card over the front element.
One forum-documented trick is to smear a lens with petroleum jelly to turn small points of light into stars and irregular shapes. It works and it looks intentional in small doses. It also permanently reduces contrast and complicates every later edit, so treat it as a single experiment rather than a technique.
Bokeh Balls vs Starbursts
Some people want the exact opposite of this guide. Starbursts, the spikes radiating from each light, are a diffraction artifact that appears when the aperture is stopped down to f/8 or beyond. They show up on a Christmas tree shot at f/11 and vanish at f/1.8.
So the advice is the same advice read backwards. Wide aperture for soft balls, narrow aperture for spikes. If your tree already looks great and the bokeh version looks like mush, you are not doing something wrong, you are simply using a tool for the opposite effect.
What to Do If Your Lens Is Too Slow
Most people start with a kit zoom that stops at f/4 or f/5.6, and that aperture produces small, weak discs. Rather than buying anything, change the geometry.
- Move the subject closer to the camera and the lights much further back. Distance compensates for aperture; there is no substitute for it.
- Shoot a portrait rather than pure abstract bokeh. A sharp face with a textured background reads as intentional at f/5.6, where an all-bokeh frame reads as out of focus.
- Choose lights with large, widely spaced bulbs. Bigger sources produce bigger discs regardless of the aperture.
- Use a 100mm macro or 50mm prime if one is already in a drawer. A slow prime still beats a kit zoom at the same f-number because of the focal length difference.
- Shoot at blue hour. Ambient light lets you keep the frame readable while the lights are still bright enough to show colour.
The honest framing is that a kit zoom will never produce the same disc size as a fast prime. It can produce a good image, and it can produce big discs at long subject-to-light distances, which is what matters if you are shooting in a small room.
Editing Christmas Light Bokeh
Raw files give you far more room than JPEGs, because recovering a clipped bulb from a JPEG is close to impossible. Shoot raw if your camera offers it, and edit in this order.
- Set the exposure first. Lower the exposure slider until the brightest bulbs stop being pure white flat discs. Recovering the coloured halo of a bulb is the whole point of the shot.
- Pull the highlights down. Keep some highlight detail so each ball has a bright core and a coloured edge rather than a solid white patch.
- Drop the shadows gently. Deepen the blacks a little to make the orbs separate from the background. This is the single most effective slider for making bokeh look crisp.
- Add a small amount of dehaze or texture. Two or three units is plenty. More and the bokeh discs gain hard outlines that look digital.
- Check the colour. Warm bulbs in a cool room produce a magenta cast on the background. Nudging the white balance a few hundred kelvin fixes the frame faster than any mask.
- Noise reduction last. High-ISO night shots get grainy, and aggressive noise reduction smears the very gradients that make bokeh look soft.
On a phone, the equivalent moves are the highlights and shadows sliders in the native editor, plus a light vibrance bump. Avoid heavy sharpening, which creates hard rings around every light ball.
Troubleshooting: Symptom, Cause, Fix
These four or five failures account for almost every disappointing Christmas light photo. Find your symptom and work across the row.
| Symptom | Cause | Fix |
|---|---|---|
| Lights are solid white blobs with no colour | Overexposed, the meter opened up for the dark room | Drop exposure by a third to two-thirds of a stop, or apply negative exposure compensation in Aperture Priority |
| Whole frame is grey and muddy | Stray room light, streetlight through a window, or screen brightness | Kill every light but the string, close curtains, and lower the ISO so the frame reads darker |
| Focus hunts and never settles | Autofocus pointed at a cluster of point lights | Focus on the subject, switch to single-point AF or manual focus, and use focus peaking if your camera has it |
| No bokeh at all, the lights look sharp | Aperture too narrow, or focus landed on the lights themselves | Open the aperture to the widest setting and refocus on something in front of them |
| Bokeh balls are small and mushy | Subject too close to the lights, or focal length too short | Add subject-to-light distance first, then change focal length |
| Lights render as short streaks | Shutter too slow for handheld shooting | Raise shutter speed, raise ISO, or use a tripod and shoot at 1/30s or slower deliberately |
If you are seeing doubled or smeared shapes, check for a dirty front element or a filter left on the lens. A single fingerprint turns a clean disc into a soft comet, and it is the fastest fix on this list.
Common Mistakes to Avoid
- Leaving the ceiling light on. This is the mistake behind more unusable shots than any setting error.
- Trying to make a full frame of bokeh tell a story. A big blurry mess with no subject is a texture, not a photograph. Give the viewer something sharp to look at.
- Standing the subject next to the tree. Distance is the lever you control for free. Use it.
- Stopping down to avoid blown highlights. That solves the exposure and destroys the effect. Correct the exposure instead, or fix it in the edit.
- Changing five settings at once. Lock the aperture, then the shutter, then the ISO, and change one thing per attempt.
- Trusting the histogram alone. A histogram that looks correct still hides a face that is a quarter stop under. Check the face at 100 percent on the camera screen.
Safety and Setup Notes for Indoor String Lights
A few practical notes before you start stringing lights across a room for a photo session. Use lights rated for indoor use, and never mix an outdoor set into an indoor arrangement, because outdoor cables are often heavier and warmer.
Keep runs off the floor and away from walking routes, and never dangle a strand over a tree or a piece of furniture that someone might brush against. If you use battery-operated fairy lights you can move freely, that removes most of the cable routing problem entirely.
Do not leave plugged-in lights unattended for a long session, and turn them off when you stop shooting. Coiled warm bulbs are the main heat risk in a small room, so untangle any strand before you hang it.
Frequently Asked Questions
What f stop is best for bokeh?
As wide as your lens goes. f/1.8 is the most common practical answer, with f/1.2 to f/2.8 ideal for large, round bokeh balls. Below f/2 the plane of focus becomes so thin that most subjects are impossible to hold sharp, so f/2.8 is a good compromise when a person is in frame.
What are the best iPhone camera settings for taking pictures of Christmas lights?
Turn the room lights off, use Night mode or the three-second timer with flash disabled, then tap to focus on your subject rather than on the lights. Because a phone aperture is fixed, move physically closer to the subject and further from the lights. Avoid Portrait mode, which smears small point lights. Clean the lens first; a smudge turns every bulb into a comet.
How do I get very large bokeh while keeping a nearby subject in focus?
Put the subject close to the camera and the lights as far behind as the room allows. Short subject-to-light distance is what makes the discs grow, and a wide aperture keeps only the near plane sharp. Shoot at f/1.8, focus on the near eye or shoulder, and check that the balls are not merging into a smear.
How to take better bokeh photos?
Three levers control the size of each ball: aperture, focal length, and subject-to-light distance. Open the aperture as wide as the lens allows, use the longest focal length you can stand behind, and push the lights as far from your subject as possible. Keep the light source away from the frame edge, where discs turn into cat’s-eye shapes.
How do I avoid bokeh effect?
Stop the aperture down to f/8 or narrower and focus on the lights themselves, or on the background behind the subject. The same move that softens lights also deepens depth of field and brings them sharp. Note that very narrow apertures introduce diffraction spikes, so f/5.6 to f/8 is the usual ceiling for clean detail.
Is bokeh overrated?
Bokeh is a support tool, not a subject. On its own a full frame of soft circles is a texture with nothing to look at. It earns its place when there is something sharp to contrast it against, which is why the strongest Christmas light photos put a person, a pet, or a foreground object in front of the lights.
How do I photograph a Christmas tree without starburst spikes around the lights?
Keep the aperture wide. Starbursts are a diffraction artifact that appears when you stop down to f/8 or narrower, so shooting at f/1.8 to f/2.8 removes them entirely. If you also need the frame bright, raise ISO rather than closing the aperture, or shoot at blue hour when there is still ambient light to work with.
How do you do the viral Christmas photos?
Most of them are one of three things: an abstract frame of nothing but glowing discs, foreground bokeh with lights strung between the camera and the subject, or a long exposure that turns twinkling lights into short trails. All three need a tripod, a dark room, and a subject-to-light distance of at least two metres.
Conclusion
To shoot Christmas light bokeh photos at home, remember six things. Darken the room completely. Shoot at the widest aperture your lens allows. Put your subject close to the camera and the lights as far behind as you can manage. Focus on the subject rather than the lights. Expose in manual so the meter cannot over-brighten the frame. Then review, and if the balls are small, add distance before you change anything else.
That is the entire method. Once it is repeatable, the same six steps produce the abstract version, the portrait version, and the long-exposure version, all in the same room with the same lights.