
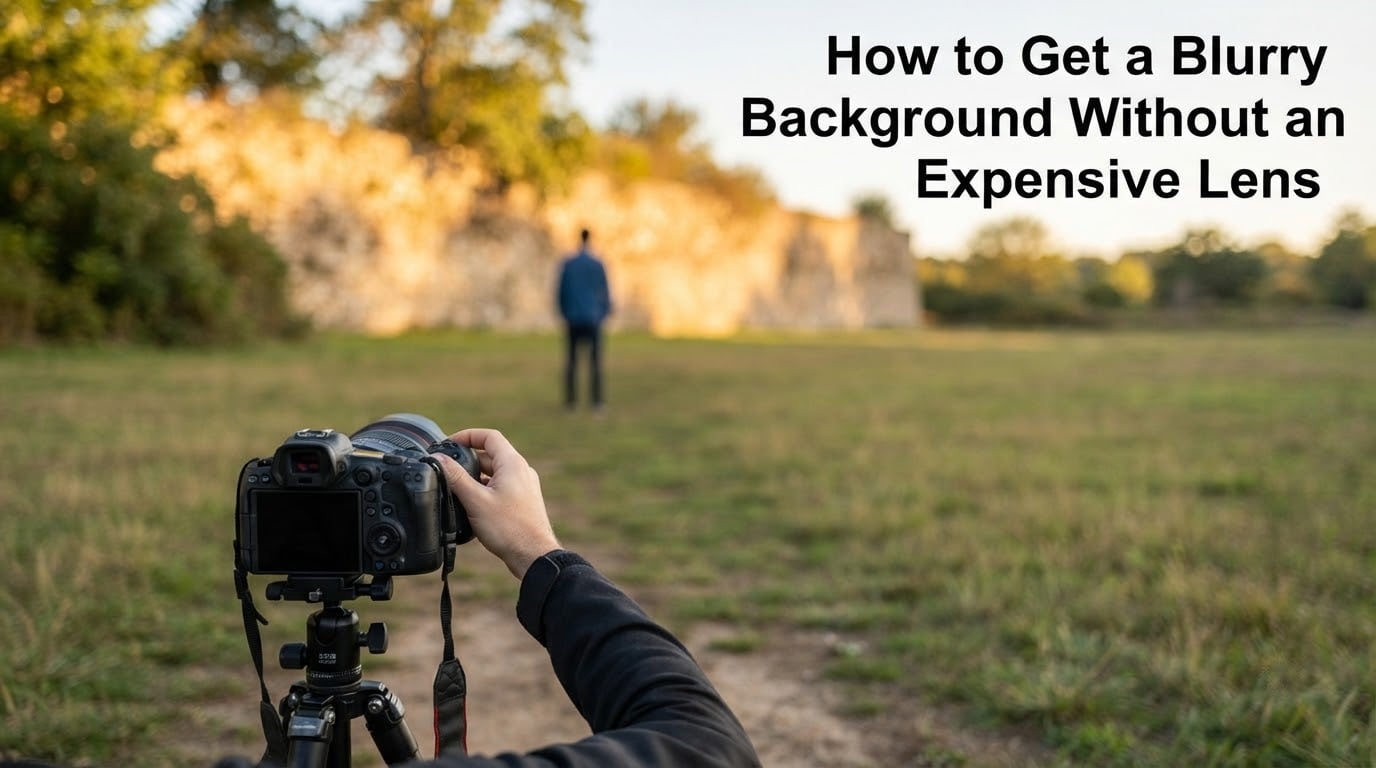
The best background blur you will ever photograph is not the product of an expensive lens. It comes from four things you can change on any camera made in the last thirty years: how wide the aperture opens, how far your subject stands from what is behind them, how close you stand to your subject, and how long your lens is. If you own a kit zoom that only opens to f/5.6, or a phone, or a hand-meald point-and-shoot, every one of those four levers is still available to you.
I have shot blurry background photography on gear that could not compete with a fast prime, and I have shot it badly on gear that could. That tells you something important: the gear is the smallest variable in the equation. The gaps in the results come from geometry, not from glass.
So this is how to get a blurry background without an expensive lens, laid out in the order I actually use on a shoot. We will start with what background blur physically is, work through each lever with real numbers, and finish with the situations where no amount of technique will save the shot and a cheap prime is simply the smarter purchase.
If you want the one-line version: the four levers, in order of impact, are aperture, subject-to-background distance, camera-to-subject distance, and focal length. With a slow kit lens, distance beats aperture almost every time.
Table of Contents
- What Background Blur Actually Is (Bokeh and Shallow Depth of Field)
- How to Get a Blurry Background Without an Expensive Lens: Seven Levers
- Lever 1: Open the Aperture as Wide as the Lens Allows
- Lever 2: Move Your Subject Away From the Background
- Lever 3: Get Close to Your Subject
- Lever 4: Use the Longest Focal Length You Have
- Sensor Size and Crop Factor: The Myth That Will Not Die
- Camera Setup Recipes by Light Level
- Blur or Motion Blur? How to Tell Them Apart
- Small Rooms and Backgrounds That Will Not Move
- How to Get a Blurry Background on a Phone
- Lighting That Turns Blur Into Bokeh Balls
- Editing the Blur: Field Blur, Lens Blur and AI Tools
- When a Cheap 50mm Prime Is the Smarter Buy
- The Video Version of Blurred Backgrounds
- Common Mistakes and Fast Fixes
- The Six-Step Background Blur Checklist
- Frequently Asked Questions
- How to make a very blurry background?
- Which aperture is better for blurry backgrounds, higher or lower?
- What camera settings will you use to get a blurred background?
- What lens gives a blurry background?
- Which lens is best for blurring the background?
- How can I blur the background of an image?
- How to achieve blurred background in photography?
- How do I slightly blur the background of a photo?
- How to photograph shallow depth of field?
- How do I blur the background in a small room?
- Final Thoughts
What Background Blur Actually Is (Bokeh and Shallow Depth of Field)
Background blur, also called bokeh, is the out-of-focus quality of the areas behind your subject. It is created by a shallow depth of field, where only a narrow slice of the scene around your focal plane is sharp and everything in front of and behind that slice falls progressively out of focus.
That is the whole concept. Two things in that sentence carry all the weight, and beginners usually misread both of them.
Shallow depth of field does not mean “blurred background.” It means a thin slice of the entire scene is in focus. That slice has a front edge and a back edge, and both edges are where sharpness quietly falls away. Your job is not to blur the background. Your job is to place the background well outside the back edge of the slice, or to make the slice so thin that the background has nowhere to sit but outside it.
The focal plane is the imaginary flat surface running through your point of focus, parallel to the sensor. It is not a plane in the scene, it is a plane at one specific distance. Focus at six feet and your focal plane is a flat six feet in front of the camera, running sideways. The subject’s ear, which is three inches in front of the nose, is not on that plane.
Out-of-focus light arrives at the sensor as a small disc rather than a point. That disc is called the circle of confusion, and photographers borrow a technical tolerance for how big a disc can get before we call the image soft, typically 0.03 mm on a full frame sensor and 0.02 mm on APS-C. What matters for this guide is simpler: discs get bigger as the background moves further behind the subject, and discs get bigger as the aperture opens wider. Bigger discs look more obviously soft. That is the entire physics of the effect in one sentence.
Nowhere in the phrase “shallow depth of field” does a price appear. Depth of field is a function of four numbers and one distance. We are about to look at all five.
How to Get a Blurry Background Without an Expensive Lens: Seven Levers
Here is the full list, ordered from the levers that work on every camera to the ones that only work sometimes.
- Open the aperture to the lowest f-number your lens allows. The lower the f-number, the wider the hole, the thinner the in-focus slice.
- Put as much distance as possible between your subject and the background. This is the single most effective lever on a slow kit lens, and it is free.
- Move the camera closer to your subject. Standing closer makes the in-focus slice physically thinner.
- Zoom to the longest focal length you have, then step back to reframe. The zoom-and-step-back trick turns a 55mm kit zoom into a background-blurring machine.
- Use the largest sensor you can get your hands on. A full frame body blurs more at identical settings than an APS-C body does.
- Light the background to create contrast and specular highlights. Blur is invisible on a flat grey wall and dramatic on a wall with bright points of light.
- Blur the background in editing as a deliberate last resort. Real optical blur is better, but a subtle software pass is a legitimate tool for a shot you cannot fix in the field.
The first four are the physical levers. The last three amplify or rescue what those four produce. If you read nothing else, read the first two, because they account for the overwhelming majority of the improvement most people can get from where they are starting.
Lever 1: Open the Aperture as Wide as the Lens Allows
The f-number is a fraction, not a number. f/2.8 means the opening is f divided by 2.8 across the lens diameter, so a lower f-number means a physically wider opening. A wide opening produces a thin in-focus slice, which pushes the background further outside it and makes each out-of-focus disc larger.
Here is the reference I keep in my head for a kit zoom rated f/3.5-5.6 at 18mm, which is the common APS-C kit lens:
| Aperture | Background blur | Minimum safe shutter | Typical ISO needed indoors | What it feels like |
|---|---|---|---|---|
| f/5.6 | Light, background only just separated | 1/125s | ISO 3200 | Everything readable, subject and background both sharp |
| f/4.0 | Noticeable softening behind the subject | 1/160s | ISO 2500 | Background still readable but softer |
| f/3.5 | Clear separation at typical portrait distances | 1/200s | ISO 2000 | Subject pops, background shapes still legible |
| f/2.0 | Strong blur, background becomes colour | 1/320s | ISO 1250 | Background stops competing for attention |
| f/1.4 | Very strong blur, disc shapes and highlights visible | 1/500s | ISO 800 | Nothing behind the subject is identifiable |
Read the ISO column as the real cost of the aperture column. Every time you stop down one whole stop from f/1.4 to f/2.0, the lens passes half as much light, so you either need a shutter twice as fast or an ISO twice as high. Indoors, the light does not come, so the ISO comes. That is the trade a slow kit lens forces on you, and it is the reason a f/5.6 kit lens portrait so often has a grainy background and a clean subject.
The compensation is straightforward. Shoot in aperture priority mode, the setting marked A on most cameras and Av on Canon. Dial in the widest f-number your lens allows, and the camera handles shutter speed and ISO for you. The one number you must watch is the shutter speed, because it has a hard floor determined by your focal length.
For a 50mm lens, stay at 1/100s or faster. For a 200mm, stay at 1/400s or faster. Below that floor you are not gaining background blur, you are losing your subject to camera shake. Two of the most common questions in photography forums follow directly from people missing this: why is my subject blurry, and why is my background sharp while my subject is not.
Image stabilization helps here. Turn it on, and you gain a few stops of usable shutter speed before shake becomes visible. It does not freeze a moving subject, so for babies, pets and anyone who will not hold still, you still need real shutter speed and a higher ISO.
Lever 2: Move Your Subject Away From the Background
This is the lever that decides whether a slow kit lens works or fails, and almost nobody teaches it with numbers. Here is the number.
Distance ratio rule: the background needs to sit roughly five to ten times further behind your subject than your camera sits in front of your subject. Miss that ratio and no aperture setting will rescue the image.
The reasoning is that the most common arrangement is also the worst. Stand three feet from your subject with a wall three feet behind them and the wall is only six feet from the camera. That is a ratio of about one to one. Stand three feet from your subject with the wall fifteen feet behind them and the wall is eighteen feet from the camera. That is a ratio of six to one, and the background will be a wall of soft colour at almost any aperture.
Photographers have been burned by this so consistently that the oldest surviving advice on the topic, still ranking on major photography forums, puts it plainly: if you are three feet away and the background is six feet behind the child, you can get there. If you are ten feet away and the background is only another foot, forget it. Set your expectations. It is not you, it is physics.
Put numbers on it and the physics stops being mysterious. The blur disc at the background grows in direct proportion to how far the background sits behind the focal plane, and shrinks in proportion to the total distance from the camera to that background. Push the subject four extra feet away from the wall and the background distance roughly doubles, which doubles the disc size, which doubles how soft it looks.
Here is a worked example using the most common kit zoom in existence, an 18-55mm f/3.5-5.6 on an APS-C body. Distances are given in feet, the focus is on the subject, and the blur column is the size of the out-of-focus disc at the background measured against a 0.02 mm sharpness threshold. I ran these through a depth of field calculator rather than eyeballing them, and you should do the same before a paid shoot, because your actual sensor and your actual lens will not match my figures exactly.
| Focal length | Aperture | Camera to subject | Background behind subject | Total camera to background | Blur at background | Result |
|---|---|---|---|---|---|---|
| 18mm | f/5.6 | 6.6 ft | 19.7 ft | 26.3 ft | 0.022 mm | Borderline. The background is soft only in the shadows. |
| 35mm | f/5.6 | 6.6 ft | 19.7 ft | 26.3 ft | 0.084 mm | Clearly soft. Good enough for a headshot at arm’s length. |
| 55mm | f/5.6 | 6.6 ft | 19.7 ft | 26.3 ft | 0.208 mm | Strong. This is the shot a kit lens is capable of outdoors. |
| 55mm | f/5.6 | 3.3 ft | 9.8 ft | 13.1 ft | 0.429 mm | Very strong. Half the subject distance doubles the blur. |
| 55mm | f/3.5 | 3.3 ft | 9.8 ft | 13.1 ft | 0.686 mm | Creamy. This is the difference one stop makes. |
| 85mm f/1.8 | f/1.8 | 3.3 ft | 9.8 ft | 13.1 ft | 3.29 mm | Background is unrecognisable. Far beyond what a kit lens can do. |
Look at rows one, three and five together. Same camera, same subject distance, same ratio. The 18mm row produces a background that is only just out of focus. The 55mm row at the same f/5.6 produces a background ten times softer. Focal length is doing enormous work in that comparison, and it is available to you for free on the zoom ring you already own.
Now look at rows three and four. Same lens, same aperture, same ratio. The only change is that the camera moved from 6.6 feet to 3.3 feet. The background blur doubled. That is the get-close lever, and it is the next section.
Lever 3: Get Close to Your Subject
Moving the camera closer to your subject thins the in-focus slice in two ways at once, which is why it is so efficient. Nearer focusing means less depth of field in front of and behind the subject for the same aperture, and it also means the out-of-focus background is optically magnified by the lens, so its discs appear larger on the sensor.
Compare the two 55mm rows in the table above. Halving the camera-to-subject distance took the blur from 0.208 mm to 0.429 mm. A kit lens wide open at f/3.5 stood three feet away produces nearly three times the blur it produced standing six feet away.
The obvious catch is framing. Move closer and a 55mm no longer fits a head and shoulders. Your three options are a wider lens, a crop, or simply cropping tighter. All three work. A 2x crop in post is not the same as a 100mm lens optically, because it magnifies the blur along with the subject, but the relative softness advantage of the closer position is already baked into the file.
There is one more thing closeness does that people miss. It keeps the foreground honest. If you shoot at f/1.4 from far away, you can have a sharp subject and a background that is only slightly soft. If you shoot at f/1.4 from three feet away, anything within a foot or so in front of the subject, a hand, a shoulder, a foreground leaf, also goes soft. That can look wonderful or it can look like a mistake, and it is a decision rather than a defect.
Lever 4: Use the Longest Focal Length You Have
Longer focal lengths blur more at the same subject distance and the same subject-to-background distance. Row two versus row one in the table makes the magnitude clear, at identical aperture, identical distances and identical framing.
Why does this work? Three separate effects stack. A longer lens magnifies the background, and magnification scales disc size with it. A longer lens compresses apparent perspective, so the background appears closer to the subject, which increases its distance beyond the back edge of the in-focus slice. And a longer lens has a longer focal length in the blur formula itself, which increases the disc size at a fixed aperture.
That compression is worth understanding on its own, because it is the effect most often misused. Telephoto compression does not create blur. What it does is make the background look physically nearer to the subject, which shrinks the room you need. Shooting a 200mm at eight feet from a subject against a wall twelve feet behind them looks like the wall is right behind the subject’s head, and the wall needs to be nearer than it looks. This is the trick bridge camera users reach for.
Here is the technique, and it is the most valuable single trick in this guide for anyone with a slow kit zoom or a long-range bridge camera.
Zoom in to your longest focal length, then walk backwards until the subject fills the frame again.
The framing ends up identical to where you started, so there is no compositional compromise at all. But the background disc size has gone up roughly in proportion to how far you zoomed, and you have also added perspective compression. Someone who zooms from 35mm to 200mm and steps back gains close to six times the blur of the wide end at the same framing.
For a bridge camera with a 50x optical zoom, users on photography forums report the same result: at maximum zoom and a fully retracted focal length, the background softens dramatically despite an aperture that never goes below f/5.6. The trade is ambient light. At the far end of a long zoom you need a fast shutter or a high ISO, and in poor light you will raise both and pay with noise and softness from the stabilization system.
The two failure modes to watch for at long focal lengths are the ones everyone already knows but everyone still forgets in the moment. Shake, which you fix with image stabilization and a shutter speed at or above the reciprocal of your focal length. And compression, which makes wide faces and noses look flatter than you expect, so step back to a comfortable working distance and let the subject walk toward you rather than cramming the lens into their face.
Sensor Size and Crop Factor: The Myth That Will Not Die
Here is the claim we need to end, because it is wrong, and it is the most argued-about point on every photography forum that has ever had one: a 50mm lens does not become an 80mm lens on an APS-C body.
Focal length is a physical property of the lens. It is the distance in millimetres from the rear principal point of the lens to the sensor plane when the lens is focused at infinity. The sensor does not move, the glass does not change, so a 50mm lens is a 50mm lens on every body. What an APS-C sensor does is crop a smaller window out of the same circle of good light, so you see a narrower field of view. 50mm on APS-C frames like 75mm on full frame, which is why people call it 75mm.
That framing difference has a real and often ignored effect on background blur. A narrower field of view at the same position crops the background down, so the visible section of background sits further from the edges of frame and reads as more uniform. The same 50mm f/1.8 that gives you a clean blurred background across the full frame on a full frame body gives you a tighter crop on APS-C where the remaining background is entirely the part directly behind the subject. Many photographers describe this as more separation, and it is a real perceptual effect rather than a change in physics.
What sensor size genuinely does is give you blur at identical settings. A full frame body has roughly 1.5x the sensor area of an APS-C body in each dimension, so the same lens at the same f-number, the same distance and the same composition produces a blur disc 1.5x larger when printed at the same size. Because we judge sharpness relative to print size, that reads as a 1.5x increase in blur strength. Two thirds of a stop, which is meaningful and not transformative.
The practical takeaway for a kit lens owner is encouraging. The gap between APS-C and full frame blur is about two thirds of a stop. The gap between f/5.6 and f/1.8 is three full stops. Your lens choice matters roughly four times more than your body choice. Buy the body that fits your hands, and spend what you saved on moving closer and zooming longer.
Camera Setup Recipes by Light Level
Settings that work at noon fail completely at dusk. The recipes below assume an 18-55mm f/3.5-5.6 kit zoom on APS-C, focused on a stationary subject, with the background at least ten feet behind the subject.
Bright direct sunlight. Switch to aperture priority, set f/5.6, set ISO 100, and let the camera pick the shutter. In full sun at f/5.6 and ISO 100 you will be around 1/1000s, which is well above the shake floor. The harder problem is light, not settings: the sun will blast your subject’s face into squint or light the background harder than the subject. Turn your subject three-quarters away from the sun or move them into the shadow of a building and shoot toward the open.
Open shade. Aperture priority, f/4, ISO 400, minimum shutter 1/250s. Open shade is the sweet spot for kit lens portraits because the light is soft and even, and the shaded area behind the subject will already be three or four stops darker than open sun. The only risk is flatness. Add a reflector or a flash to put a stop of light back into the eyes.
Indoor window light. Turn off every overhead light, put the subject two or three feet from the window with their face angled toward it, and shoot with the window behind you. Aperture priority, f/3.5, ISO 1600, minimum shutter 1/160s. Watch the white balance: mix a warm room with a cool window and skin tones go strange. Set white balance manually rather than letting auto guess.
Low light and indoor events. Aperture priority, f/3.5, ISO 3200 to 6400, minimum shutter 1/125s. At this light level you will have grain, and on a high ISO the grain is more visible in the out-of-focus areas than in the sharp subject. Raise the ISO only as far as you must, and use image stabilization. If the subject will not hold still, do not stop the shutter down for a cleaner background; a sharp face matters more than a clean wall.
One warning about going manual entirely. Beginners often drop to full manual, set f/1.8, and then cannot understand why the background looks sharp. Manual mode lets you set any aperture the lens supports, but the exposure system will simply compensate with a slower shutter and a higher ISO, and you have quietly given up the two things that were actually producing the blur. Aperture priority keeps you honest, because you choose the blur and the camera pays for it in light.
Blur or Motion Blur? How to Tell Them Apart
These are two different things that share a word, and mixing them up sends beginners down a path that makes their photos worse. It comes up in the comments on almost every background blur thread, so it is worth ten minutes.
Out-of-focus blur is optical. The lens formed an image of the background, but the image landed at a different distance than the sensor, so it spread into a disc. The edges stay reasonably defined. You can trace a railing or a window frame through the blur. Zoom into the out-of-focus region and you see colour and shape.
Motion blur is a timing problem. The subject or the camera moved while the shutter was open, so a point of light smeared into a line. There is no colour inside the smear, only a gradient. Zoom in and the object is recognisable but stretched in one direction, with a leading edge and a trailing edge.
Camera shake is a third, distinct case. The whole frame smears in the same direction, the subject smears too, and because your eye knows a face, you read the entire image as broken even when the background happens to be far away.
The dangerous part is the popular idea that you can slow your shutter down to get more background blur. You cannot. Shutter speed changes whether the subject and background are frozen or smeared. It does not change how much of the scene is in focus. The confusion is understandable, because motion blur and out-of-focus blur look similar in a thumbnail, but the fix is completely different: shallow depth of field for out-of-focus blur, a faster shutter for motion blur.
There is one place the two combine usefully, and it is called panning. Follow a moving subject with the camera at a slow shutter and the subject stays sharp while the background smears. That is a genuine motion blur effect rather than an accident, and it is a good reason to remember that a slow shutter is a tool, not a mistake.
Small Rooms and Backgrounds That Will Not Move
The distance ratio rule is easy to obey outdoors and nearly impossible indoors, and indoor portraits are where kit lens owners get frustrated. Here is what actually works when the wall is four feet behind the subject and it is not going anywhere.
Change the angle before you change the settings. If the subject is four feet from a wall in a ten foot room, photograph from the side. Stand at the end of the room, shoot diagonally across the room, and put fifteen feet of room between the subject and the nearest wall. Diagonal framing turns a small room into a large one because you are now using the room’s length rather than its width.
Use depth down the hallway. A portrait taken along a corridor, with the subject near one end, has genuine distance behind them. Pointing down a hallway or a stairwell gives you more subject-to-background distance than pointing at a wall.
Reframe with foreground. Shooting through a doorway, a banister, a plant or a curtain places an out-of-focus object very close to the lens. This produces a soft veil across the frame edges, which hides a cluttered background entirely and takes only seconds to set up.
Zoom in and step back indoors. This is the lever that saves small rooms most often, because the constraint indoors is usually how much the subject is magnified, and zooming lets you trade that constraint away.
Change the focal plane, not the wall. If the background is unavoidably sharp, focus on a plane in front of the background instead. In a tight room, deliberately putting the focus a foot in front of your subject pushes the wall much further out of focus. The subject’s face softens slightly, which is a different photograph, and often a more interesting one.
Accept it and fix it in software. Some rooms genuinely cannot produce optical blur. A field blur pass is the honest answer in that case, and hiding that fact is what makes edited blur look fake.
Forum users running into exactly this wall, describing a low f-stop with the focus pulled to the subject where either the subject is sharp and the background is not blurry enough, or both are blurry, are describing a distance ratio problem. Widening the aperture cannot fix it. Changing where things are, or accepting a software blur, can.
How to Get a Blurry Background on a Phone
A phone is a small sensor with a short maximum focal length and a fixed aperture, so a portrait lens’s blur is not available to you optically. What the phone offers instead is computational, and that changes both the technique and the expectations.
Turn on Portrait Mode and tap to focus on the eyes. Portrait Mode is not a filter. It uses a depth map, often from a secondary sensor or from a machine learning model, to decide what is subject and what is background, then applies blur to the background. Tap the face before shooting, because the default focus point is usually the centre of the frame, and a portrait focused on the chest has a chest in sharp focus and a soft face.
Use the 2x or 3x telephoto setting. This is the phone equivalent of the zoom-and-step-back trick. A 2x telephoto crop has a longer effective focal length, which magnifies the background and compresses it toward the subject, so Portrait Mode’s blur looks more like a real lens and less like a cut-out. Phones without an optical telephoto and with only digital zoom get worse, not better, when you zoom, because you are adding processing artefacts to a simulation.
Get real distance. A phone’s aperture is fixed, so distance is the only real lever you have. On a phone this matters more than on a camera, because the blur is generated from a depth estimate and a depth estimate gets less reliable further from the sensor. Six feet of clear space behind the subject produces a far more convincing result than two feet.
Understand why phone blur looks fake. The failure mode people complain about most is a halo of softness around hair, glasses and lace. The cause is that the depth map cannot resolve where a fine strand of hair ends and the background begins, so the model guesses. Guess wrong on the foreground side and you get a chewed, semi-transparent edge. Guess wrong on the background side and you get a sharp rim of background trapped against the subject. Complex edges are exactly where depth maps fail.
There is a second failure: blur applied in a flat plane while the real background is at varying distances. Optical blur has a gradient, sharpest in the out-of-focus area closest to the focal plane and softer further away. Computed blur applied evenly across every background pixel has no gradient, and a flat blur reads as a filter pasted over the image rather than as depth.
The practical fix for both is to keep the background simple and far away. A plain wall eight feet behind the subject, with a little light falloff on it, gives the depth model almost nothing to get wrong. A garden full of overlapping branches at three feet will always produce artefacts.
Lighting That Turns Blur Into Bokeh Balls
Background blur is a container. Lighting decides what you put in it. The same f/5.6 shot can be flat and grey or genuinely striking, and the difference is entirely where the light and the dark pixels land.
Put bright points behind the subject. Each out-of-focus point of light becomes a disc, and a disc with a bright centre and a soft edge is what people mean when they say bokeh balls. Street lights, candles, reflections in windows, string lights and wet pavement reflections after rain all produce this. The most effective time of day is the hour after sunset, when the sky still has colour and the artificial lights are already switched on.
Backlight the subject. Shooting into a low sun with the subject between you and the light gives you a bright background and a rim of light around the subject’s head and shoulders. The background is naturally several stops brighter than the subject, so a dark background against a lit subject produces more visible blur than any amount of aperture work in flat light.
Get contrast into the background. Blur is only readable against something with edges and tone variation. A wall in flat shade at f/2.8 and a garden of backlit branches at f/2.8 are not the same picture. If the background is a flat plane, you can improve it by walking sideways until it contains a bright doorway, a dark window or a person walking through.
Watch for lens flare and veiling flare. Shooting into the sun directly means light bouncing inside the lens and washing a milky veil over the whole frame, which kills contrast and makes the blur look dirty. Shift slightly so the sun is just out of frame, or hide it behind your subject’s head. The shadow of your own head entering the frame at wide apertures is the same problem in miniature.
Editing the Blur: Field Blur, Lens Blur and AI Tools
Editing blur is a legitimate tool. It is a bad tool when you use it to fake something the geometry could not deliver, because the eye reads an inconsistent depth cue as an error rather than as a style.
Field Blur treats the whole selection uniformly. It is the right choice for a background that genuinely is at one distance, such as a studio backdrop or a plain wall. It is the wrong choice for a background with a person walking through it at three different distances, because everyone ends up equally soft and the depth collapses.
Lens Blur applies a blur that increases with distance from the focus point, which mimics the behaviour of a real lens. It looks considerably more natural than a flat field blur on any scene with depth in it, at the cost of being fiddly to set up. Use it when the background genuinely recedes.
Mask-based and AI depth tools are faster and handle hair and complex edges better than a hand-drawn mask, and they inherit exactly the same failure modes. The tell is always the same: a semi-transparent or doubled edge where the mask guessed wrong, and a background that is uniformly soft rather than progressively softer with distance.
Two rules keep edited blur believable. Blur should always be strongest at the edges of frame and weakest near the subject, because that is how optical blur behaves. And the amount of blur should be plausible for the framing. Heavily blurring the background of a wide shot where you can see a person full length and the room around them reads as fake, because no lens produces that at that framing.
Editing is at its best as a finishing pass. Take the shot properly first, then apply a light blur to reduce background competition. That way the depth cues are already correct and the software is reinforcing a photograph rather than inventing one.
When a Cheap 50mm Prime Is the Smarter Buy
Everything above assumes your current lens. At some point, no technique substitutes for optics, and it is worth being straight about when that point arrives.
A 50mm f/1.8 is the most widely recommended answer on photography forums for background blur on a budget, and the reasons are arithmetic rather than snobbery. Three full stops wider than a kit lens f/5.6. One stop wider than f/3.5. A focal length that is long enough to compress without being so long that you need to stand across the room. A small, light, cheap lens with none of the softness or aberration problems that expensive glass solves.
The honest caveat is the one that shows up in the same forum threads: f/1.8 is shallow, and indoors you will fight it. At f/1.8 on a 50mm you may have a two inch slice of sharpness, which means the near eye and the far eye of a face angled slightly away from the camera will not both be sharp. Solve it by shooting the subject straight on, by turning the face toward the camera, by stopping down to f/2.8 for headshots, or by focusing on the near eye and accepting a soft far cheek. Each is a working technique, but each is a compromise the kit lens never asks you to make.
My honest read is that a 50mm f/1.8 is worth it if you shoot people, indoors or out, more than a few times a month. It is not worth it if you mostly photograph landscapes, events where you need the wide end, or subjects who move too fast for a fixed 50mm. In those cases, zooming to the tele end of your existing kit lens and stepping back will get you most of the way for nothing.
That said, this guide’s promise stands on its own. Every technique in it works with the lens you already own. The prime is an upgrade path, not a prerequisite.
The Video Version of Blurred Backgrounds
Video depth of field obeys the same physics, but the window is far narrower and the errors are far more visible, because the human eye is superbly trained at detecting focus problems in motion.
Aperture still sets the slice. At f/2.8 and a distance of six feet on a 50mm lens, you might have two or three inches of acceptable sharpness, and the least movement of your subject breaks it. The fix is not a faster aperture, because none exist for a beginner. The fix is distance and light: step back to nine or ten feet, which thickens the slice several times over, and add light so you can run a low ISO at the same f-number.
Shutter speed and aperture are coupled in video through the 180 degree shutter rule. At 24 fps, 180 degrees is 1/50s. At 60 fps it is 1/120s. Once you have chosen your f-number and the light gives you a shutter speed, you can regain light with a neutral density filter rather than by stopping down, which keeps the thin depth of field you were chasing. This is the one place where a physical filter beats everything else, and it is the only accessory in this entire guide that meaningfully changes what a slow lens can do.
Focus in video is manual or assisted. Pull focus deliberately, from the near eye to the far eye, rather than letting autofocus hunt. Autofocus hunting in a shallow slice looks worse than being slightly out of focus on purpose.
One warning specific to video: rolling shutter and stabilisation can introduce distortion at very close focus distances on phones and small sensors. Check a few seconds of footage before committing to a shoot where everything is inside three feet.
Common Mistakes and Fast Fixes
- Stopping down because the background is too dark. The fix is more light, not a smaller aperture. Open the aperture back up and raise ISO until the noise is acceptable. A noisy soft background beats a sharp dark one.
- Slowing the shutter to get more blur. The fix is to recognise this as motion blur. Nothing about shutter speed changes depth of field, and you have simply made the subject soft as well.
- Leaving the background a foot behind the subject. The fix is the distance ratio rule. Background at five to ten times the camera-to-subject distance, or accept that this room will not give you blur.
- Focusing on the chest or the centre of the frame. The fix is a single autofocus point placed on the nearest eye, with the drive mode switched to continuous so it tracks blinking and movement.
- Shooting wide open at f/1.4 and losing the far eye. The fix is to stop down one stop to f/2 or f/2.8. You lose very little background blur and you gain a face that works.
- Buying the wrong upgrade first. The fix is to check the order. A flash or a reflector beats a fast lens in every indoor situation, and a second light beats both outdoors at golden hour. Distance is free, so use all of it before you spend anything.
The Six-Step Background Blur Checklist
Run through this before you lift the camera. It takes about fifteen seconds and it covers most of the reasons a shot does not work.
- Find the farthest possible background, and put the subject between you and it.
- Zoom to the longest focal length that will still let you keep the framing, then step back.
- Set aperture priority and the widest f-number your lens allows.
- Set the shutter floor for your focal length, and let ISO rise to meet the light.
- Put a single autofocus point on the near eye and shoot in continuous drive.
- Check that the background has something bright in it, and if not, change your angle.
If you only do one of those, do the second. Zooming to the tele end and stepping back is the change that converts a phone-grade blurred background into a photograph, and it costs nothing.
Frequently Asked Questions
How to make a very blurry background?
Get four things right in this order: open the aperture to the widest f-number your lens allows, put the subject at least five times further from the background than the camera is from the subject, move the camera as close to the subject as framing permits, and use your longest focal length. In bright light, add a bright point of light behind the subject so the blur becomes visible discs rather than flat grey.
Which aperture is better for blurry backgrounds, higher or lower?
Lower. A low f-number such as f/1.8 means a wider opening, a thinner in-focus slice, and larger out-of-focus discs, so the background softens more. A high f-number such as f/16 makes almost the whole scene sharp. The cost of a low f-number is that less light reaches the sensor, so you need a faster shutter or a higher ISO.
What camera settings will you use to get a blurred background?
Use aperture priority mode at the widest f-number the lens allows, keep the shutter speed at or above the reciprocal of your focal length to avoid shake, and raise ISO until the exposure is right. For a kit zoom: f/5.6 and ISO 100 in direct sun, f/4 and ISO 400 in open shade, f/3.5 and ISO 1600 by a window, and f/3.5 with ISO 3200 to 6400 indoors.
What lens gives a blurry background?
Any lens can blur a background, and the four variables that matter are aperture, background distance, subject distance and focal length rather than the brand. For the strongest optical blur on a budget, a 50mm f/1.8 is the usual answer, roughly three stops wider than a kit zoom at f/5.6. With a slow kit zoom, zooming to the tele end and stepping back delivers much of the same result for nothing.
Which lens is best for blurring the background?
A fast prime, most often a 50mm f/1.8, because the wide maximum aperture gives the thinnest slice of sharpness and the longest focal length magnifies the background. For outdoor work at distance, a 70-200mm zoom is even stronger. Both are optional: every technique in this guide works with a kit zoom if you use distance and focal length properly.
How can I blur the background of an image?
Optically, focus on your subject and set the widest aperture available, then increase the distance between subject and background and move the camera closer. In editing, use Lens Blur for any background with real depth in it and Field Blur for a flat backdrop such as a studio wall, keeping the blur strongest at the edges of frame and weakest near the subject.
How to achieve blurred background in photography?
Create subject separation. Put the subject far from the background, get the camera close, shoot at the widest aperture with a fast enough shutter to hold the subject sharp, and use a longer focal length. Then light the background brighter than the subject or hide it behind something out of focus, so the blur reads as depth rather than as a soft frame.
How do I slightly blur the background of a photo?
Stop down one or two stops from the lens maximum, or use a neutral density filter to take light out of the scene without changing the aperture. A light Field Blur pass on a background that is already somewhat soft will finish the effect without looking processed, because a real depth gradient is already in the file.
How to photograph shallow depth of field?
Focus on one plane, open the aperture to the widest f-number your lens allows, and move the camera close to the subject so the in-focus slice is physically thin. Check the far side of the subject’s face and stop down one stop if it is softening. Then keep the shutter speed above the shake floor for your focal length and let ISO rise to compensate.
How do I blur the background in a small room?
Shoot diagonally across the room so you use its length rather than its width, place the subject near the far end, and point down a hallway or corridor if one exists. Frame through a doorway, banister or plant to put something out of focus in the near foreground, or shoot through a foreground object to veil a cluttered wall. If none of that works, a Lens Blur pass is the honest answer.
Final Thoughts
Learning how to get a blurry background without an expensive lens comes down to accepting that blur is a geometric relationship, not a purchase. Aperture, background distance, subject distance and focal length are the only four inputs, and every one of them except the first is completely free.
Start with the zoom-and-step-back trick this week. Zoom to the far end of whatever lens you own, walk backwards until the framing looks the same as it did, and take the shot. Then do it again with your subject standing five metres from the nearest wall instead of a metre, and compare. The second frame is the one that changes how you think about this.
For 2026, gear recommendations move, but the physics does not. A background five times further from your subject than your camera is from your subject will still be soft in 2026, and in ten years after that.