
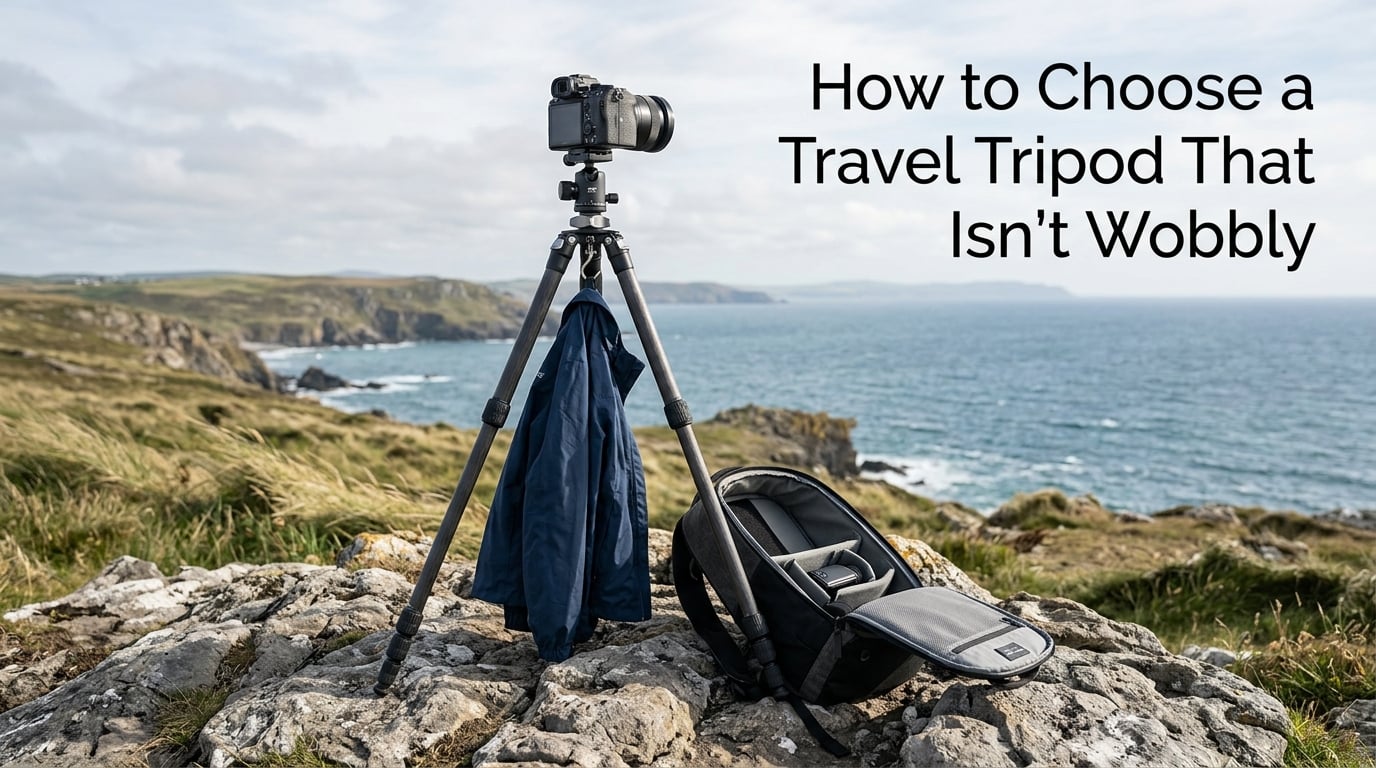
A wobbly travel tripod is not a quality problem you have to live with. Almost every case traces back to a handful of mechanical decisions made before you ever paid for the thing: how many leg sections it has, whether the center column is designed to carry load, how much stiffness the tubes have at full extension, and how tightly the locks clamp. If you know how to choose a travel tripod by those four decisions first, wobble stops being a gamble.
I have carried the same three tripods on roughly forty trips over the years, and the pattern was consistent enough to write down. The tripod that stayed rigid was never the heaviest one I owned. It was the one with the fewest joints between my hands and the ground, a load rating well above the kit hanging off it, and a head whose friction I could dial to exactly one setting and then stop thinking about.
This guide breaks wobble into its five mechanical root causes, then walks the selection criteria in the order they matter. It also includes a field audit you can run on the tripod you already own, because a lot of “wobbly” complaints are a serviceable tripod that just needs its locks re-torqued and a fresh inspection.
One note up front: everything below is about mechanics, not price. Entry-level tripods can be steady if the geometry is right, and flagship tripods can wobble badly if you are over their comfortable load and running the center column high. The variables that decide steadiness are measurable, so I have kept the discussion to those.
Table of Contents
- Why Travel Tripods Get Wobbly: Five Root Causes
- How to Choose a Travel Tripod: The Seven Criteria That Decide Steadiness
- Carbon Fiber vs Aluminum: Which Material Holds Up Steadier
- Twist Locks vs Flip Locks: Which One Stops the Creep
- Working Height: Match the Tripod to Your Body
- Load Capacity: Match the Rating to Your Camera Kit
- Tripod Heads: Why Camera Dips and How to Stop It
- How to Make a Travel Tripod More Stable in the Field
- The Four-Step Stability Audit for Your Current Tripod
- Maintenance: Preventing the Wobble You Have Not Hit Yet
- Frequently Asked Questions
- How to choose a travel tripod that is not wobbly?
- How many leg sections are best for stability?
- How to make a tripod stable?
- How to make a tripod more stable in the wind?
- Is carbon fiber worth it for a travel tripod?
- Why does my tripod wobble?
- What tripod height do I need for my height?
- What load capacity do I need for my camera?
- What are some tips for using a tripod effectively?
- Conclusion: A Steady Tripod Is a Geometry Question, Not a Spending Question
Why Travel Tripods Get Wobbly: Five Root Causes
Wobble is not one problem. It is five distinct problems that all look identical from behind the camera, and each has a different fix. Diagnose before you shop, because buying a replacement for the wrong cause is how people end up with two tripods and the same problem.
1. Too many leg sections
Every junction between leg tubes is a place where the leg can flex and, more importantly, a place where play develops as clamps wear. Four-section legs are noticeably softer under load than three-section legs of the same diameter, and five-section legs are worse again. Travel photographers accept this trade for packability, but you should accept it knowingly, and the compensation is to use fewer sections extended than you think you need.
2. Center column extension
This is the single most common source of the complaint “my new tripod is wobbly.” A center column is a thin tube bolted to the apex of an already-flexing structure, and it sits above the apex where leverage is worst. Raise it 30 centimeters and you have added a long, narrow, low-stiffness member directly under the camera. The tripod may be within its rated load and still buzz under a long exposure in a light breeze.
3. Play in worn leg locks
Travel gear takes abuse. Trips get checked, bags get dropped, locks get operated with cold or gloved hands, and grit works its way into threads. Over one to two years of regular travel use, both twist locks and flip locks develop measurable play. Photographers report this repeatedly: the tripod feels fine for a year and then a tripod or head that “gradually started to feel loose,” with the looseness concentrated at the leg locks rather than the head.
4. Ball head creep
A separate wobble, often mistaken for a leg problem, is a camera that slowly tilts after you have locked the head. Modern ball heads mostly fix this with a proper friction dial and a well-machined ball, but cheap ones do not, and a head that is overloaded will creep no matter how good its friction control is.
5. Load and center of gravity
Rated load capacity is not a target to approach. A tripod loaded near its rating is a tripod that deflects, and deflection at the apex shows up as camera movement. The same rig also matters when a long lens hangs forward of the support, which pushes the center of gravity outside the leg triangle and makes the whole assembly want to tip.
How to Choose a Travel Tripod: The Seven Criteria That Decide Steadiness
These seven criteria are ordered by how much they affect steadiness. If you only remember the first three, you will already be ahead of most buyers. Use this as the shortlist to compare any candidate you are considering.
- Leg section count. Three sections give the stiffest leg. Four is the usual travel compromise. Five or more sections are for backpackers who accept softness in exchange for a very short packed length, and they should only be used with a short center column or none at all.
- Material. Carbon fiber gives you stiffness per gram, which is the real currency of travel. Aluminum gives you stiffness per dollar, better repairability, and better behavior in extreme cold. Neither is universally steadier; they fail differently.
- Working height, not max height. Max height is the tallest the tripod can reach with the center column up. Working height is the height of the camera above the ground when you have the legs set at a shooting angle without extending the column. Only the second number tells you whether you will shoot level or hunched.
- Load rating with headroom. Add up your body, lens, head, plate, and any battery grip, then find a rating at least double that total. Overloaded tripods are the most common reason an expensive model gets described as wobbly.
- Lock type and lock quality. Twist locks are slow and precise. Flip locks are fast and easier to locate in the dark, but they depend on a spring and cam that can break or loosen. Budget for the maintenance either type needs.
- Head design and weight. A ball head with a real friction control and a standard Arca-Swiss-style plate clamp is the most flexible option. Pan-and-tilt heads are heavier but better for video panning and for long work where you want a second friction stage.
- Packed size versus girth. A tripod that fits the length of your bag but not around the girth of the bag is a tripod you will not bring. Check the collapsed diameter against the widest part of your pack before you buy.
Two terms worth defining before you go further, because manufacturers use them loosely. Working height is the height from the ground to the camera mount with the legs at their normal splay and the column down. Stability per ounce is a comparison metric, not a manufacturer spec: it divides the tripod’s resistance to side push at a given height by its weight, which is the honest way to compare a heavy three-section aluminum tripod against a light four-section carbon one.
Carbon Fiber vs Aluminum: Which Material Holds Up Steadier
Carbon fiber is lighter for the same stiffness, which means you can carry a stiffer tripod, or a tripod of equal stiffness that you will actually bring. Aluminum is heavier but tough, cheap to repair, and dimensionally very stable across temperature swings. Here is how the two compare on the factors that produce wobble.
| Factor | Carbon fiber | Aluminum |
|---|---|---|
| Stiffness per gram | Excellent | Fair |
| Stiffness per dollar | Low | Excellent |
| Apical damping of vibration | Good, varies with resin quality and layup | Good, consistent |
| Cold weather behavior | Stable, no hand cold penalty on tubes | Very stable, but cold hands make locks harder to operate |
| Salt and corrosion | Not affected at the tubes, hardware still is | Salt pits the anodizing and the hardware |
| Repairability | Specialist only, often total loss | Machine shop replaces joints, feet, clamps |
| Failure mode | Sudden, no warning, especially with poor resin | Gradual, and visible before it matters |
| Three-year resale retention | Roughly 60 to 70 percent | Roughly 40 to 50 percent |
The important caveat about carbon fiber is quality variance. Owners who have switched between builds report that a cheaper carbon tripod with poor resin layup vibrates noticeably more than a decent aluminum tripod of similar weight. A low-resin, high-modulus layup is stiff and lively in a good way; a poorly laid-up tube damps in a bad way. If a manufacturer does not explain the layup, treat that as a question to ask.
Aluminum’s advantage shows up in the third year. When a twist lock wears out, an aluminum leg can go to a machine shop and come back with a new joint. A cracked or delaminated carbon section is usually a write-off. That difference in lifetime cost matters more for a travel tripod than for a studio tripod, because travel gear takes hits.
Twist Locks vs Flip Locks: Which One Stops the Creep
Both lock types will develop play eventually, and they do it for different reasons. Twist locks loosen because the thread wears and the clamp force decays. Flip locks loosen because the cam pivots, the spring relaxes, and grit gets into the cam track. Neither is fixable with a wrench, but both are maintainable if you catch them early.
| Factor | Twist lock | Flip lock |
|---|---|---|
| Speed | Slow, roughly a quarter turn per section | Fast, one action per section |
| Repeatability of clamp force | Very consistent while the thread is new | Depends on cam and spring condition |
| Usable with gloves | Good, the knob is a large surface | Poor, the lever is small and stiff when cold |
| Typical wear | Thread wear, gradual loss of clamp | Cam wear, spring fatigue, grit intrusion |
| Failure visibility | You feel it before you see it | Often a sudden lean under load |
| Best for | Repeat precision work, video, studio-style setup | Fast travel field work, cold, limited light |
For travel specifically, flip locks win on speed and lose on cold hands. Photographers working above freezing report difficulty operating small levers, which is a real argument for a tripod with large twist knobs or a hybrid approach where the upper sections use one type and the lower use the other.
Whichever you choose, the maintenance rule is the same: re-torque your locks every few months of regular use, and always after a trip where the tripod was rained on or packed wet. Loosening the clamp, cleaning the threads, applying a small amount of marine-grade grease, and tightening to a firm feel takes a few minutes and restores most of the factory clamp force.
Working Height: Match the Tripod to Your Body
Working height is where most tripods get blamed unfairly. A tripod that is too short does not wobble by itself, but it pushes you to raise the center column, and then it wobbles. The fix is arithmetic, and it is worth doing before you buy.
- Under 5 feet 4 inches tall: Look for a working height of 45 to 52 centimeters at minimum. Compact travel tripods are often 40 centimeters with the column, which forces column use. A table-style tripod or a wider-angle leg splay is the alternative.
- 5 feet 4 inches to 6 feet tall: Most travel tripods fit without a column. Target a working height of 50 to 58 centimeters so the viewfinder sits at or just below eye level.
- Over 6 feet tall: You need a true working height above 60 centimeters, which usually means a four-section travel tripod or a three-section model with a large maximum height. This is the group that most often ends up shooting on a raised column.
Forum threads about “tall photographer tripod” problems repeat the same resolution: pick a tripod that reaches eye level with the column down. One owner described selling a flagship carbon kit at a loss after discovering that a mid-tier aluminum body paired with a used head gave the same steadiness, because the aluminum model already reached working height without the column.
The reverse problem exists too. Photographers shorter than the tripod’s minimum working height end up shooting with the legs splayed wide and the apex near their chest, which is stable but tiring. If you are under 5 feet tall, check the minimum working height, not just the maximum.
Load Capacity: Match the Rating to Your Camera Kit
Add everything: body with battery, lens, head, quick release plate, battery grip, and any filter or accessory you will leave attached. Then find a tripod rated at least twice that figure. The doubling is not marketing inflation; it is the margin that keeps the legs from deflecting under a firm down-angle pressure.
A DSLR with a kit lens and a compact ball head might total 6 pounds, which puts you in the 12-pound comfortable zone that most travel tripods cover. Add a 70-200mm lens, a grip, and a heavier head and you are past 10 pounds before you have reached the backpack. That combination wants a tripod rated 20 pounds or more, and it also wants a head with a load rating above the tripod’s own.
Two factors catch people off guard. First, a long telephoto lens shifts the center of gravity forward, so you need to check the load rating of the head clamp and, on a wide-footed tripod, consider whether the leg angle geometry keeps that weight over the base. Second, cold weather reduces battery performance, and a camera working harder for the same exposure is an unpleasant surprise that has nothing to do with your tripod.
Tripod Heads: Why Camera Dips and How to Stop It
The classic question on photography forums is why a new head dips or wobbles while you tighten it. There are three causes, and all three are fixable at purchase time.
- Ball roughness. A rough ball grips unevenly and lets the camera tilt as you tighten the clamp. Quality heads use a smooth, precisely fitted ball with a textured ring that contacts the plate evenly.
- Friction control that is too soft or missing. A head needs at least one friction stage, and two if you work overhead or on uneven rock. If you can position the camera by hand, the friction dial is not doing its job.
- Plate clamp mismatch. A proprietary plate system means your head and your tripod’s future upgrades are locked to one brand. A standard Arca-Swiss-style clamp accepts a very wide range of plates, which makes a future head swap a two-minute job.
Weight matters too. A heavy head raises the total mass and, more usefully for this topic, moves the load further from the apex. Video shooters who need smooth pans should accept the extra weight of a two-stage pan-and-tilt head, since it removes the creeping-during-pan problem entirely.
One modular strategy keeps showing up among owners with several tripods: buy legs first, buy the head later. A decent mid-range head on a solid body is a common upgrade path, and it also means a future head change fixes creep without replacing the whole kit.
How to Make a Travel Tripod More Stable in the Field
Even a well-chosen tripod benefits from field technique. Six habits account for most of the difference between a shaky image and a sharp one, and none of them require buying anything.
- Hang weight on the center hook. A hook under the apex accepts a small bag, a lens pouch, or your jacket. Adding mass low and central stabilizes a tall setup more effectively than anything else you can do in the field.
- Keep the center column down. If you must use the column, raise it as little as possible and lock the collar fully. Never leave a section of column between the collar and the leg apex unsecured.
- Keep the legs on solid ground. Bury spikes into soil, and on hard surfaces such as rock or boardwalk, let two legs sit fully weighted. A tripod is only as stable as its three contact points.
- Open the stance when the geometry allows it. A wider leg angle enlarges the support triangle and resists tipping. Most travel tripods let you splay the lower sections independently, which is the fastest stability upgrade in your bag.
- Brace yourself and the tripod. Wrap the non-viewing arm around a leg or your own body, and apply steady pressure through the viewfinder against the shutter. Long exposures should never rest on an outstretched arm.
- Work with the wind, not against it. A camera on a downwind side of the body is shielded. Shielding a tripod with your body on a ridge or beach is the simplest wind technique there is, and the hook with weight works here too.
For salt and sand environments, add a seventh habit: bring the tripod home and rinse it with fresh water. Salt crystallizes in the joints and accelerates the play that causes wobble, and sand in a cam track is the fastest route to a flip lock that will not hold.
The Four-Step Stability Audit for Your Current Tripod
Before you replace anything, run this audit. It takes about ten minutes with a hex key and a firm push, and it tells you whether your tripod has a real defect or just a service problem.
- Check lock clamp force at every section. Lock each section fully, then pull the leg straight down with a firm hand pull. Any perceptible give means the lock needs cleaning, regreasing, and re-torquing. That resolves the majority of reported travel tripod looseness.
- Push for lateral flex at working height. Set the tripod at your normal working height, column down, load it with your actual kit, and apply a firm side push to the head. Flex in the legs that you can feel through the camera means too many sections extended or a load over the comfortable rating.
- Test head creep deliberately. Point the camera down at a fixed target at an awkward angle, tighten everything, and wait. A slow tilt means head friction or ball quality, and it is a head problem rather than a leg problem.
- Inspect for cracks, dents, and grit. Look along each tube, around each collar, and at the feet. Run a clean cloth down the threads. If a carbon section shows a visible crack or an aluminum joint has play you cannot torque out, you have a hardware answer rather than a technique answer.
If steps one through three pass and the wobble remains, the problem is almost certainly the column. Take the column out of the equation by shooting at a lower height or a wider stance, and see whether the movement disappears.
Maintenance: Preventing the Wobble You Have Not Hit Yet
Travel tripods fail slowly, which means maintenance decides how long your current one stays steady. A ten-minute routine at the end of a season is worth more than any upgrade.
- Clean and re-grease every twist lock. Back the thread out, wipe it, apply a thin film of grease designed for metal threads, and re-tighten. Do this before a long trip, not after a failure.
- Rinse after salt exposure. Fresh water, then dry with the locks open. Salt in the joints is the main reason beach tripods develop play faster than inland ones.
- Keep grit out. Brush sand off the legs before collapsing them, and never collapse a tripod with legs wet or dirty. Grit in a cam track is the leading cause of flip locks that stop clamping.
- Inspect carbon sections for surface damage. Look for a matte, dull spot, a slight crease, or a fiber that lifts under a fingernail. A small nick is not a reason to retire a tripod, but it is a reason to stop loading it to the rating.
- Check the feet and spikes. Worn rubber feet and bent spikes change the contact geometry and put more load into the joints. Both are cheap, easy, replaceable parts.
- Keep the warranty paperwork and note the model number. Repairability and spare parts availability vary widely between manufacturers, and a manufacturer that sells replacement feet, clamps, and plates in 2026 is a manufacturer you can repair rather than replace.
A final point on lifetime cost. Carbon retains roughly 60 to 70 percent of its value over three years, aluminum roughly 40 to 50 percent, which matters if you resell. But resale is a rounding error next to repair: an aluminum tripod with a replaced joint or a new set of feet is back in service, while a delaminated carbon section is usually the end of the tripod.
Frequently Asked Questions
How to choose a travel tripod that is not wobbly?
Judge steadiness before weight. Check, in order: leg section count (three is stiffest), working height with the center column down, a load rating at least double your full kit weight, material stiffness, lock quality, and head friction. Then field-test at your real working height with your real kit before you keep it.
How many leg sections are best for stability?
Three sections are the stiffest because there are fewer joints between your hands and the ground. Four sections are the usual travel compromise and stay reasonably rigid if you extend them one section at a time as needed. Five or more sections accept softness for a very short packed length and work best with a short center column or none.
How to make a tripod stable?
Five things matter most: keep the center column down, hang weight from the center hook, widen the leg stance, keep all three feet on solid ground, and brace yourself and the tripod during the exposure. Keep the load at or below half the rated capacity and re-torque loose locks.
How to make a tripod more stable in the wind?
Add mass low and central with a bag or jacket on the center hook, shelter the camera with your own body on the upwind side, open the leg stance, and bury spikes into soil where the ground allows. A longer exposure at a lower ISO also means you can afford a wider stance instead of a rushed setup.
Is carbon fiber worth it for a travel tripod?
Carbon fiber is worth it if you will actually carry the tripod. It delivers more stiffness per gram, so the trade is usually a stiffer tripod at the same weight or the same stiffness at a lighter weight. Quality varies, so poor resin layup can damp worse than decent aluminum. Aluminum is cheaper, easier to repair, and better in resale terms only if you value repair over weight.
Why does my tripod wobble?
The usual causes are extended center column, too many leg sections extended, play in worn leg locks, a head that creeps under load, and a kit that exceeds half the rated capacity. Run the four-step audit: check lock clamp force, push for lateral flex at working height, test for head creep, then inspect tubes and feet for damage.
What tripod height do I need for my height?
Under 5 feet 4 inches, look for a minimum working height of 45 to 52 centimeters. Between 5 feet 4 inches and 6 feet, most travel tripods work with a 50 to 58 centimeter working height. Over 6 feet, target a true working height above 60 centimeters so you never need the center column raised.
What load capacity do I need for my camera?
Total your body with battery, lens, head, plate, grip, and accessories, then choose a rating at least double that figure. A mirrorless body with a kit lens and a light head stays inside the range most travel tripods cover. A telephoto lens, a battery grip, and a heavier head push you toward a 20-pound or higher rating.
What are some tips for using a tripod effectively?
Set the legs before you attach the camera, lock the center column collar fully, verify the bubble level after the plate is on, and use the two-step practice: place the camera, frame, then tighten. For long exposures, apply steady pressure through the viewfinder and brace with your body so the shutter is not the only thing resisting movement.
Conclusion: A Steady Tripod Is a Geometry Question, Not a Spending Question
To choose a travel tripod that is not wobbly, work in this order: fewest leg sections your packed size allows, working height that clears your eye line with the column down, a load rating at least double your kit, a material that suits your climate and repair budget, and locks you will maintain. Test it at full height with your actual gear before you commit, and run the four-step audit on anything you already own.
Most wobble complaints I have read about are not design flaws. They are a raised center column, an over-extended leg, or a lock that needed regreasing two seasons ago. Fix those first, and the tripod in your bag may be steadier than the one you are shopping for.