
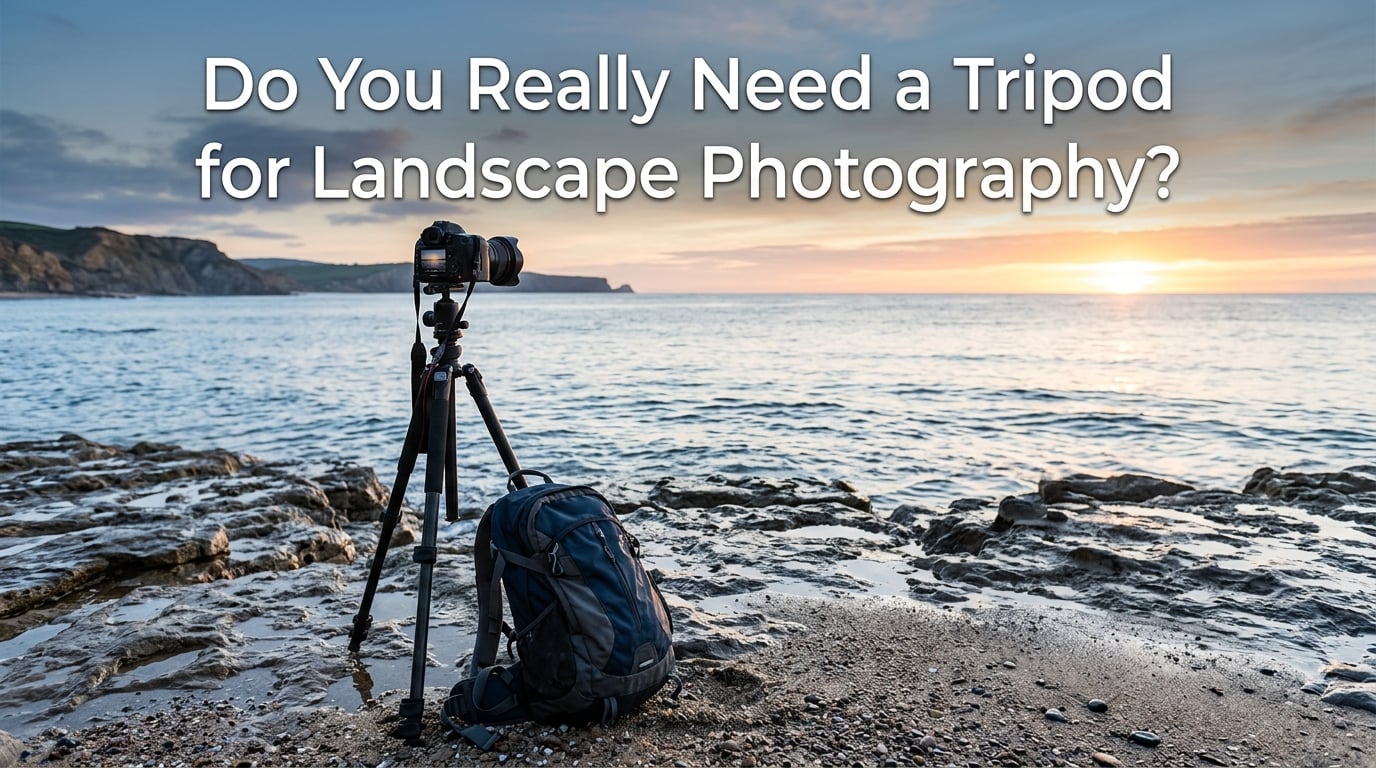
Short answer: you need a tripod for landscape photography whenever the light is thin or the exposure is long, and you can skip it most of the time. Bright daylight wide-angle scenes are sharper and better composed handheld. Blue hour, night sky, smooth water, focus stacking and bracketed panoramas are the other half of the craft, and a tripod is the tool that makes them possible.
That split is the whole decision, and it can be made with numbers rather than guesswork. I have spent years carrying a tripod on dawn trips I did not need and leaving it behind on evening trips I did. The difference was never skill or gear quality. It was whether the frame needed more time than my hands could hold still.
Last updated for 2026. Below is the reasoning, the thresholds, the scenarios, and what to do when you decide to leave the tripod at home.
Table of Contents
- Do You Really Need a Tripod for Landscape Photography?
- The Reciprocal Focal Length Rule: The Numbers That Make the Decision
- Seven Situations Where You Genuinely Need a Tripod
- Six Situations Where a Tripod Is Not Worth the Setup
- How to Hold a Camera Still Without a Tripod
- The 2-Second Self-Timer and Remote Release
- The Hybrid Workflow: Scout Handheld, Then Deploy the Tripod
- Focus Stacking and Exposure Bracketing Without a Tripod
- Sample Settings for the Tripod-Dependent Scenes
- The Real Cost of Carrying a Tripod
- When a Monopod, Beanbag or Bag Rest Beats a Tripod
- What to Buy if You Decide You Do Need One
- Five Tripod Mistakes That Ruin Frames
- Frequently Asked Questions
- When is a tripod necessary for landscape photography?
- Can I shoot landscape photography handheld?
- Can I do long exposure photography without a tripod?
- Should image stabilization be turned off on a tripod?
- How much weight should a tripod support?
- What is the best tripod brand for landscape photography?
- Do I need to pay more for a weather-resistant tripod?
- What type of tripod head should I use for landscape photography?
- Can you do focus stacking without a tripod?
- Are carbon fiber tripods worth it for landscape photography?
- Conclusion
Do You Really Need a Tripod for Landscape Photography?
You need a tripod when the shutter speed required for the look drops below what you can handhold, and you can shoot handheld when it stays above it. For daylight at 16mm to 35mm that is nearly every frame. For long exposures, night sky, focus stacking, bracketing and stitched panoramas, it is nearly every frame.
The dividing line is the reciprocal focal length rule: your minimum handheld shutter speed is roughly one over the focal length of the lens. At 16mm that is 1/16s, which daylight gives you easily. At 200mm it is 1/200s, which is not something you will get at dawn or under a canopy of forest.
Here is the decision in its shortest useful form.
| Use a tripod when | Shoot handheld when |
|---|---|
| You want water smoothed into a milky surface, 0.5s and longer | You want water frozen with visible texture and spray |
| The light is pre-dawn, blue hour, or after sunset | The light is bright midday or a sunlit golden hour |
| You are stacking focus from foreground to infinity | Depth of field covers the whole frame on its own |
| You are bracketing exposures to blend into HDR | Dynamic range fits inside a single frame |
| You are stitching a panorama with fixed, overlapping frames | The scene fits inside one wide-angle frame |
| You are shooting at 70mm or longer in low light | You are at 16mm to 35mm in bright conditions |
| You need the horizon exactly level, frame after frame | You are exploring and the frame is still changing |
If a scene lands in the left column, the tripod is not a nicety. It is the difference between a blurred frame and a sharp one. If it lands in the right column, a tripod usually costs you composition and patience for nothing.
The Reciprocal Focal Length Rule: The Numbers That Make the Decision
Handheld sharpness depends on one thing: keeping the sensor still for the entire exposure. Your own pulse, the press of the shutter button and the reflex of holding a weight out in front of you all move the sensor. Below a certain shutter speed, that movement spreads detail across the frame as blur.
The working rule is simple: keep the shutter speed at or above 1 divided by the focal length, measured in millimetres. A 50mm lens needs 1/50s or faster. A 35mm lens needs 1/35s or faster. Treat it as a floor you should beat, not a target you should hit, because most bodies will still show softness a third of a stop under it.
| Focal length | Minimum handheld shutter speed | Aim for in the field |
|---|---|---|
| 16mm | 1/16s | 1/125s or faster, easy in daylight |
| 24mm | 1/24s | 1/125s or faster, easy in daylight |
| 35mm | 1/35s | 1/125s or faster, easy in daylight |
| 50mm | 1/50s | 1/100s or faster, and brace |
| 70mm | 1/70s | 1/160s or faster, brace hard |
| 135mm | 1/135s | 1/250s or faster, brace hard |
| 200mm | 1/200s | 1/250s or faster and use stabilization |
Two things shift those numbers in your favour. In-lens or in-body stabilization buys you roughly two and a half to three shutter speeds of tolerance, which is the difference between a 200mm lens working at 1/60s and not working at all. Good technique adds more: bracing your elbows against your chest, resting the lens or the camera body on something solid, and releasing the shutter smoothly rather than jabbing it.
One practical comfort line helps more than the arithmetic. Below about 1/30s, handheld shooting becomes a fight regardless of lens. Between 1/30s and 1/125s, it is workable at wide angles with steady hands. Above 1/125s, you can concentrate on the frame instead of on your pulse.
In practice, this means the tripod question is mostly a question about time of day and focal length. Neither a 16mm lens nor a bright afternoon will ever demand a tripod. A 200mm lens at last light always will.
Seven Situations Where You Genuinely Need a Tripod
These are the cases where a tripod is the only honest answer, not the fashionable one.
1. Long exposures with water. Waterfalls usually sit between 0.5s and 5s. Ocean smoothing sits between 2s and 30s. Light trails run from 5s to 30s. No amount of bracing survives a 30-second exposure, and the smooth, weightless look people chase is simply the consequence of time passing during the frame.
2. Blue hour and pre-dawn. The light before sunrise and after sunset falls well below what the reciprocal rule allows, especially at moderate focal lengths. Handheld blue hour frames are usually soft, and photographers chasing that clean pre-sunrise look end up raising ISO to compensate, which trades sharpness for noise.
3. Night sky and the Milky Way. Astro frames commonly run 10s to 30s at wide apertures and elevated ISO. That combination is far past any handheld limit. A tripod is not optional here; it is the reason the image exists.
4. Aurora. Aurora work adds a hard time limit on top of the long exposure. You need every second to frame, focus and fire before the display moves. A tripod that sets up in seconds is what turns the light show from a memory into a photograph.
5. Focus stacking. When you need everything from a foreground rock to an infinity ridge sharp, you shoot several frames at different focus distances and blend them. Every frame must land on identical pixels, which means the camera must not move by a single millimetre.
6. Exposure bracketing and HDR blending. Bracketing requires three to nine exposures of the same static scene at different shutter speeds. Handheld, the frames shift with each press, and the blend produces ghosting instead of detail.
7. Stitched panoramas and telephoto compression. Panorama stitching demands a fixed camera so overlapping frames align. Telephoto landscape work, where layers of ridgelines compress into each other, needs a long shutter speed at 70mm or beyond, which is handheld territory you have already left behind.
Six Situations Where a Tripod Is Not Worth the Setup
Now the other side, which matters more often than most gear pages admit.
1. Bright daylight at wide angles. At 16mm in good light you are handholding at 1/125s or better, four stops past the rule. A tripod adds nothing but glass and dust between you and the scene.
2. Scouting and test frames. Working out where to stand, which foreground reads, and where the light will fall is faster handheld. A tripod anchors you to one composition, and compositions change when clouds move.
3. Golden hour at wide lenses. The hour around sunrise and sunset is dim, but a 16mm to 24mm lens still handholds comfortably with stabilization. Most golden hour frames do not need support.
4. Composition exploration. This is the argument that gets skipped. A tripod physically anchors you, and a photographer who is anchored stops moving. Walking left ten metres often finds a stronger frame than any settings change.
5. Freezing texture in water. If you want the wave to read as a wave, you want 1/500s or faster, which is firmly handheld territory. A tripod is the wrong tool for a sharp splash.
6. Phone and small-sensor work. A phone on a flexible-leg mini tripod is enough for most casual landscape frames. Beyond that, the support requirement drops rather than rising.
Photographers posting in r/AskPhotography regularly describe this split from the other direction, saying they travel ultralight with no tripod at all and accept occasional softness in exchange for reaching more locations. That is a reasonable position, not a wrong one.
How to Hold a Camera Still Without a Tripod
Bracing is a trainable sequence, not a talent. Work through it in order and the usable handheld window extends by several shutter speeds.
Step 1: Get both feet planted. Stand with your feet at shoulder width, one slightly forward, and your weight even. A tripod stance on loose ground is the beginning of every blurred frame.
Step 2: Tuck your elbows into your chest or your thighs. A tucked elbow is a supported elbow. Arms hanging free amplify pulse into the camera, and the shot stays soft no matter how fast the shutter is.
Step 3: Put something under the camera. Rest the lens barrel or the camera base on your raised knee, on a flat rock, on a fence post, on a pack lid, or on a trail marker. Any fixed surface removes a large share of the movement. On a long lens, put your hand under the far end of the lens hood and let it rest on whatever is beneath.
Step 4: Wedge your height. If the camera needs to be level with the ground, use your bag, a folded jacket, or a small stone under one side of the body. Wedge two identical small items, like two lens caps, rather than one unpredictable lump.
Step 5: Breathe out, then squeeze. Take a full breath and let it out slowly. The exhale is the quietest part of your cycle. Press the shutter smoothly for the whole exposure rather than jabbing it down, and keep pressure constant until the frame has finished.
Step 6: Stabilization on, or off for very long lenses. In-lens and in-body stabilization correct for your movement, so keep it on when handholding. Above roughly 300mm equivalent, hold the lens against your body and use stabilization to extend the window rather than to shoot faster than you can aim.
Step 7: Check the frame before you commit. Zoom to 100 percent on a bright edge after a test shot. If detail is smeared, no crop or sharpening will bring it back, and it is time to change the position, not the software.
Touchscreen focus and release is worth mentioning here. Several bodies let you tap to focus and tap again to fire, which removes the shake of pressing a physical button entirely. Combined with a 2-second timer, it is close to a rigid support for static scenes.
The 2-Second Self-Timer and Remote Release
The most common answer to a tripod on a budget is a timer or a remote, and it is more capable than its reputation. Every camera built in the last fifteen years has a self-timer, and most have a remote release over cable, infrared, or wireless.
The self-timer solves one specific problem well: the shake of the shutter press. Two seconds is enough to ride out the movement, and it is free. A remote release solves the same problem and adds a second one: you can step away from the tripod for a frame with no one walking into it.
What it does not solve is the need for the camera to sit motionless for a full second or thirty seconds. Wind on a long lens or a shoreline will still push it around. For exposures beyond about 1/2s, a rigid support is still the right answer.
The Hybrid Workflow: Scout Handheld, Then Deploy the Tripod
Nobody describes this clearly enough, and it is how the conflict between responsiveness and sharpness actually gets resolved. Shoot the whole session handheld first, then use the tripod once the light is right.
The sequence looks like this. Arrive before the light. Walk the scene with the camera in your hands and make test frames at whatever settings are convenient. Watch where the sun clears the ridge and where the water runs. Build the composition, then wait.
When the light does what you wanted, unpack the tripod, mount the camera, and fire the sequence. The tripod arrives at the moment it earns its weight, which means you are not carrying a heavy object for the first ninety minutes just to stand near it.
This also reframes the composition-versus-sharpness argument that gets framed as a trade-off. It is not really a trade-off. Sharpness is a requirement for a chosen composition, and composition is chosen by moving your feet. A tripod is a tool for the second half of a two-stage process, and handheld work is the first half.
Owners who carry a tripod often report that the frustration is not the weight, it is the anchoring. Once the legs are down, you stop walking. The hybrid workflow is the fix, because the tripod is a later decision rather than the first one.
Focus Stacking and Exposure Bracketing Without a Tripod
Handheld focus stacking is possible, and I would not recommend it for most landscape work. The technique works, but the alignment is a post-correction problem rather than a capture problem, and correction takes time on every single frame.
It is worth attempting when you have a phone or a mirrorless body with reliable in-body stabilization and you only need a few frames. Shoot your bracket manually while watching the magnification display, and keep the camera as fixed as possible by resting it on a support for the whole sequence. Then use a stacking tool that lets you correct alignment after capture.
It stops being worth it the moment you need ten frames for a foreground-to-infinity blend, or a bracketed HDR set at two second exposures. Any movement between frames creates ghosting, and ghosting takes longer to fix than a missing tripod.
The honest test: if you would describe the technique as the reason to get up before dawn, buy the support. If it is a nice-to-have you do once a season, it is a reasonable exercise in controlled shooting.
Sample Settings for the Tripod-Dependent Scenes
These are starting points, not rules. Every one of them needs a tripod.
| Scene | Shutter speed | Aperture | ISO | Stabilization |
|---|---|---|---|---|
| Waterfall, silky | 0.5s to 5s | f/8 to f/11 | 100 | Off |
| Ocean, smoothed | 2s to 30s | f/8 | 100 | Off |
| Ocean, frozen texture | 1/500s or faster | f/8 to f/11 | 100 | On, handheld |
| Blue hour | 2s to 15s | f/8 | 100 to 400 | Off |
| Milky Way | 10s to 30s | f/2.8 to f/4 | 1600 to 3200 | Off |
| Light trails | 5s to 30s | f/8 to f/11 | 100 | Off |
Two habits matter more than the numbers. Shoot RAW, so a bracketed set or a lifted shadow can be recovered later. And use a remote or the self-timer on every frame, because a tripod-mounted press is still a manual press.
The Real Cost of Carrying a Tripod
Bundle a decent travel tripod with head and it typically adds a kilogram or more to a pack, and it occupies more volume than a jacket. On a long approach with a loaded pack, that changes how far you are willing to walk, and walking further is usually where the better frames are.
The other cost is harder to measure. Deploying a tripod takes time: spread the legs, extend and lock each section, level the head, mount the camera, adjust the composition, and recheck. On a moving light you can lose the moment you unpacked for.
On r/backpacking, the recurring complaint about tripods is rarely the weight in kilograms. It is the volume, and the fact that a tripod turns a walk into a stop.
None of that means leave it behind permanently. It means make the decision per trip rather than per brand loyalty. If the trip is a day hike with midday light and a wide lens, leave it. If the trip is a dawn ridge with water and a long lens, carry it and accept the cost.
When a Monopod, Beanbag or Bag Rest Beats a Tripod
A monopod is the middle ground most guides dismiss without discussion. It is one leg instead of three, it is fast, and it cuts long lens vibration at telephoto focal lengths far better than nothing. What it will not do is hold a two second exposure motionless, so it does not replace a tripod for water or night work.
A beanbag or a filled camera bag is the underrated option for telephoto and low-angle frames. It takes a second to set up, it holds a heavy telephoto lens far steadier than a monopod, and it costs nothing if you already own the bag.
Your own backpack works the same way on a hillside. Sit down, rest the lens on the closed lid, and shoot. Many landscape photographers use exactly this when the light arrives before they planned to set up.
What to Buy if You Decide You Do Need One
Buying is a separate question from needing, and once you have decided the tripod is coming, the decision is not as expensive or as technical as it looks.
Get a ball head. A ball head lets you frame a level horizon by eye in seconds and lock in two axes. Pan-and-tilt and geared heads are designed for smooth video movement, and geared heads exist for a different reason entirely. Neither helps a landscape frame, and both add time and cost to every composition.
Prefer three or four leg sections. More sections pack smaller, and they also mean more locks and more places to flex. Five-section tripods are noticeably wobblier under a telephoto lens, and the savings in pack volume do not survive the first windy location.
Buy build quality, not material. A well-made aluminum tripod with solid locks is a better tool than a cheap carbon fiber one with loose hardware. The marketing emphasis on weight and material is loud; the lock quality and the leg casting are what decide whether a 30 second frame is sharp. A used tripod from a trusted brand built in the 1980s or 1990s is frequently a better buy than a new budget model, which is why forum recommendations keep pointing the same direction.
Check the load rating against double. Choose a rated capacity of at least twice the combined weight of your body and lenses. That margin covers the leverage of a telephoto lens hung out to one side, which is where tripods fail.
Do not put an expensive kit on a flimsy tripod. The classic beginner mistake is saving on support and paying later. A collapsing leg with a heavy lens on it is a gear risk, not a bargain.
Five Tripod Mistakes That Ruin Frames
1. Hands on the legs during the exposure. Touching the legs during a frame cancels damping. Step away, press the remote, and wait.
2. Center column raised for a long exposure. Raising the center column adds movement to the system. Compose down to the ground instead.
3. Twist locks left partly open. Every section should be fully seated and fully tightened. A half-open lock still carries the load and still flexes.
4. Stabilization left on when mounted. On most bodies, stabilization should be switched off when the camera sits on a tripod, because the system is chasing its own small corrections. A few newer models detect tripod use and handle it themselves.
5. Water and sand left in the legs after the shoot. Rinse the legs, loosen the collars, let them drain, and re-tighten before storage. Sand inside a leg is how a smooth tripod becomes a wobbly one.
In wind, hang your camera bag from the center hook on a ball head, or put the pack on the ground and rest a leg against it. Weight on the low centre does more for a long exposure than a heavier tripod would.
Frequently Asked Questions
When is a tripod necessary for landscape photography?
A tripod becomes necessary when the shutter speed you need for the look falls below what you can handhold. The floor is roughly one over the focal length, so 1/16s at 16mm but 1/200s at 200mm. In practice that means long exposures, blue hour, night sky, aurora, focus stacking, bracketing, panorama stitching, and any low-light frame at 70mm or longer. Daylight wide angles are the opposite case and rarely need support.
Can I shoot landscape photography handheld?
Yes, for most daylight work. At 16mm to 35mm in bright conditions you are handholding two to three shutter speeds past the rule, and in-lens or in-body stabilization adds roughly two and a half to three more. Bracing your elbows against your chest or thighs, resting the camera on a knee or a flat rock, and using the self-timer to remove the shake of the shutter press all extend the usable window further.
Can I do long exposure photography without a tripod?
Not for exposures that matter. Handheld shooting becomes unreliable below about 1/30s, and the long exposures that define water, light trails and night work run from half a second to thirty seconds. There is no grip, brace or body position that holds a camera still for thirty seconds. A timer or remote removes the shake of the press, but wind and vibration still move the frame, so a rigid support remains the answer.
Should image stabilization be turned off on a tripod?
On most cameras, yes. In-lens and in-body stabilization is designed to detect your movement and correct for it, so when the camera is already motionless on a tripod it can hunt and soften the frame. Switch stabilization off for tripod work, particularly for exposures beyond a second. Some newer bodies detect a tripod and manage this automatically, so check your camera’s notes rather than assuming.
How much weight should a tripod support?
Choose a rated load capacity of at least twice the combined weight of your body and lenses. A telephoto lens hung out to one side puts far more force on a leg than its own weight suggests, and the margin is what keeps the legs from flexing during a long frame. More than double is comfortable if you carry a heavy body with a fast telephoto, and it is the cheapest way to make an otherwise adequate tripod feel solid.
What is the best tripod brand for landscape photography?
Brand matters far less than build quality, and that is the point forum buyers keep making. A well-made tripod from any established brand with tight locks and stiff legs will outlast a poorly made one regardless of material. If you want a specific recommendation rather than a principle, tell me your camera, your heaviest lens, and how you travel, and I can narrow it down to a short list you can compare.
Do I need to pay more for a weather-resistant tripod?
Only if you shoot in conditions that would punish it. Sealed leg sections, sealed lock collars and a ball head rated for a long lens matter in surf, rain and freezing cold, and they are worth having if that is your normal shooting ground. For occasional drizzle on a hike, a well-maintained standard tripod is enough. The practical upgrade is maintenance, not weather sealing: rinse the legs, drain the collars and keep the locks clean.
What type of tripod head should I use for landscape photography?
A ball head. It lets you level the horizon by eye in a couple of seconds and lock two axes at once, which is exactly what static landscape work needs. Pan-and-tilt heads are built for smooth video pans and geared heads exist for a different style of work entirely, so both slow you down on a landscape frame. Add a long lens on a heavy body and you also need a head rated for the combined weight with margin.
Can you do focus stacking without a tripod?
Technically yes, practically rarely worth it. Handheld stacking relies on post-capture alignment correction, and the correction takes time on every frame. It works for a few frames with a stabilized body or a phone, resting the camera on a support for the whole sequence. For a foreground-to-infinity blend or a bracketed set at two seconds, any movement between frames creates ghosting that takes longer to fix than the tripod would have taken to unpack.
Are carbon fiber tripods worth it for landscape photography?
Carbon fiber is worth paying for when you carry weight on long approaches, because it is lighter than aluminum at the same stiffness. It is not worth paying for on its own. A well-made aluminum tripod with tight locks and stiff legs is a better tool than a cheap carbon fiber one with loose hardware, and a used tripod from a trusted brand built in the 1980s or 1990s often beats a new budget model. Judge the locks and the castings first.
Conclusion
Do you really need a tripod for landscape photography? Only when the frame needs more time than your hands can give it, and you can answer that in one second with the reciprocal focal length rule. Wide lens plus bright light means handheld, always. Long lens plus thin light, or any exposure past a second, means support, without debate.
On your next outing, check the two numbers before you decide: the focal length, and the light. If the shutter speed lands above one over the focal length, put the tripod back in the bag and spend the time walking instead. If it does not, unpack it, and you will have the sharp frame that the scene deserves.