
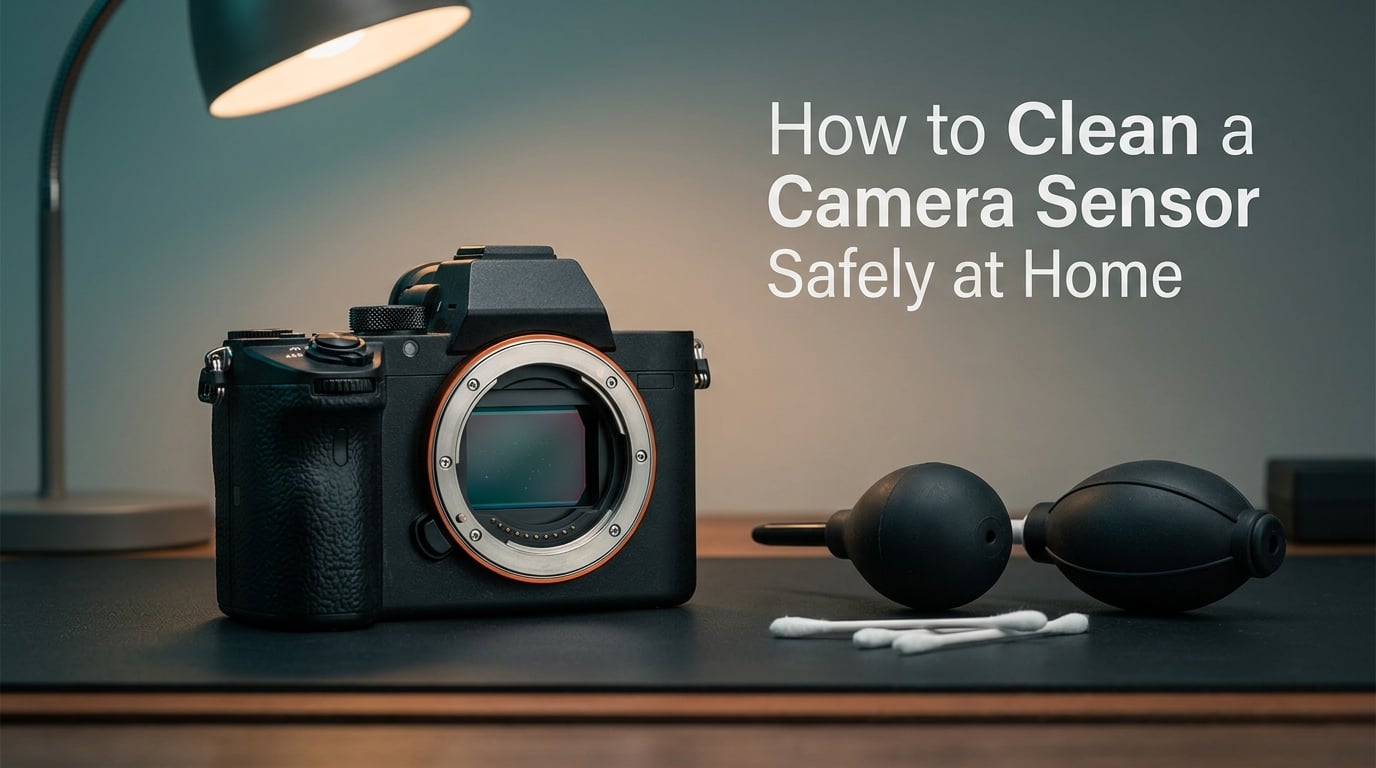
Yes, you can clean a camera sensor safely at home, and most dust problems never need a professional. The whole job comes down to one idea: you are wiping a piece of flat optical glass, not touching live electronics, and the safe method is to escalate slowly from the least invasive option to the most invasive, testing after every step.
That is the part almost every guide leaves out. People picture a chip, solder joints, and a hair-thin surface that will die at the first touch, so they live with dark spots in every frame and pay someone else to do a job that takes ten minutes. In practice the fragile part you worry about sits a millimetre or two below the surface you actually clean, protected by filter glass.
This guide walks the full procedure in the order that matters, from confirming you even have sensor dust, through the camera’s own cleaning cycle, a manual rocket blower, and only then wet cleaning with a size-matched swab. It also covers what never to use, how to clean without a dedicated kit, what to do if a previous cleaning made things worse, and when to stop and book a service instead.
We have worked through the method orderings, swab sizing, and brand menu paths for this guide, and this is the workflow we would hand to a friend with a dusty body and no technical background. Last reviewed and updated for September 2026.
Table of Contents
- What You Are Actually Touching: The Sensor Stack
- Should You Clean a Camera Sensor at Home?
- Diagnose First: The f/16 to f/22 Test
- What NOT to Use on a Camera Sensor
- Tools: What You Need and What Is Optional
- Pre-Cleaning Safety Checklist
- How to Clean a Camera Sensor Safely at Home: The Escalation Ladder
- DSLR vs Mirrorless: Mirror Lock-Up and the IBIS Warning
- How to Clean a Camera Sensor Without a Kit
- If You Already Made It Worse
- How Often Should You Clean Your Camera Sensor?
- DIY vs Professional Sensor Cleaning: What It Costs
- How to Verify Your Cleaning Worked
- How to Prevent Sensor Dust Before It Starts
- When to Stop and Book a Professional
- Frequently Asked Questions
- How do I know if my camera sensor is dirty?
- Can I clean my camera sensor with a blower?
- Can I use isopropyl alcohol to clean a camera sensor?
- Is it safe to clean a camera sensor yourself?
- How often should I clean my camera sensor?
- What happens if I touch the camera sensor?
- Can I use compressed air to clean a camera sensor?
- How do I activate sensor cleaning mode?
- What is a sensor loupe and do I need one?
- Why does my camera have dust spots in every photo?
- Conclusion
What You Are Actually Touching: The Sensor Stack
Understanding the physical stack dissolves most of the fear that stops people from cleaning their own gear. A digital camera sensor is a layered sandwich, and only the top layers are ever exposed to air.
At the very top sits the infrared cut filter, a thin sheet of glass that blocks infrared light from reaching the imaging layer. Directly beneath or bonded to it is the low-pass filter, sometimes called an anti-aliasing filter, which softens fine detail to reduce image artefacts. Both surfaces carry anti-reflective coatings to stop the filter stack from bouncing light back into the lens and producing flare.
Below all of that is the imaging silicon, the part everyone pictures when they imagine touching a sensor. It is bonded to a flexible substrate, sits on a small ceramic or metal package, and is bonded flat to a support frame with wires running off to the side. Nothing in normal cleaning comes near those wires or that frame.
So when you draw a swab across the filter glass, you are touching a smooth, flat, hard optical surface. It resists scratches far better than a lens element, and it is coated with a material that can be damaged by the wrong liquid, but it is not a fragile electronic component.
The stack, top to bottom:
- Anti-reflective and fluorine-based coatings
- Infrared cut filter (IR cut filter) glass
- Low-pass filter (optical low-pass and anti-aliasing filter)
- Imaging silicon bonded to substrate
- Ceramic or metal package with wire bonds
One caution belongs here. On some bodies the filter glass sits behind a shutter curtain or a mechanical protective window that only opens when the camera is fully powered and in a cleaning mode. That is why a half-open body door in a dim room can show you nothing at all, and why a body with a dead battery or a half-finished cycle may show you a surface you should not be working on.
Should You Clean a Camera Sensor at Home?
You should clean it at home when the problem is dust, the body is out of warranty, and the spots are visible in finished frames. You should not when the diagnosis points somewhere other than the sensor, or when a single mistake would be expensive to undo.
Most people who avoid cleaning their own sensors are not being cautious. They are solving the wrong problem, because they have not confirmed where the spots come from. Roughly speaking, a large share of the “dirty sensor” tickets we have seen were actually rear-element dust on a lens, a smudge on the viewfinder, or a stuck pixel that no amount of cleaning will ever touch. A five-minute diagnostic saves an unnecessary wet clean, and sometimes it saves a service bill.
There are legitimate cases where the answer is no, do not do this yourself. If the camera is still under warranty, an authorised service centre handles sensor cleaning as part of a routine service at no charge in some regions, and opening the body yourself can void that cover. If you already have visible streaks, smears, or a coating that looks hazed, a professional clean is far cheaper than a replacement filter assembly.
Older high-end bodies and rare or collectible cameras carry a second risk: parts become hard to source, and a technician may be the only person who can restore the camera you actually own. Fear of damaging an expensive body is the single most common reason people hesitate, and it is a reasonable feeling, but the technique below is designed specifically to keep the risk small.
One note on conflicting guidance. Forum discussions often repeat that at least one manufacturer advises against using a blower at all, which leaves people caught between conflicting advice. Manufacturer documentation for Canon, Nikon, Sony, and Fujifilm bodies generally describes using the built-in cleaning function and, where relevant, a manual air blower. When guidance conflicts, the manual shipped with your specific body wins over forum consensus, and the manufacturer knows the shutter and IBIS design you own.
Diagnose First: The f/16 to f/22 Test
Confirm the dust before you clean anything. Dust on the sensor only becomes obvious at small apertures, because a wide-open lens blurs the spot into invisibility, while a stopped-down lens makes it a hard, high-contrast dot.
- Point the camera at a plain, bright, evenly lit surface. A sheet of white paper or a clear, featureless sky both work. Avoid anything with texture, because texture competes with the spots.
- Set the camera to manual exposure. Use a fast shutter speed and a low ISO so the frame is not noisy, and set the aperture to f/16. On a kit lens that may be the sharpest stop available, and that is fine.
- Take a frame, then zoom to 100 percent in your editing software. In Lightroom, the Visualize Spots shortcut is the fastest way to find them; in other software, zoom in and pan around the frame.
- If spots are hard to see, repeat at f/22 or f/22 to f/32, the smallest aperture your lens offers. Each stop adds contrast on the spot.
- Watch the pattern, not just the spots. Sensor dust stays in exactly the same pixel position in every frame, and it does not move when you change the aperture or zoom. That fixed position is the tell.
- Take a second frame without moving the camera at all, and zoom to the same area. Identical spots in identical positions means the dirt is fixed to the sensor. Spots that change when you change lenses point at the lens instead.
That last step is the one most guides skip, and it takes ten seconds. Two frames taken from the same spot on a tripod, with the lens swapped between them, separate sensor dust from lens dust conclusively.
| What you see | Where it comes from | Does it move with aperture? | Correct fix |
|---|---|---|---|
| Dark, sharp, fixed-position spots | Sensor dust on the filter stack | No, and position is identical every frame | Cleaning mode, then blower, then swab |
| Hazy patch, soft spot, or flare that shifts | Rear element of the lens | Often yes | Clean the lens, not the sensor |
| Dirt only visible through the viewfinder or on the LCD overlay | Viewfinder eyepiece or screen protector | No, but not in the photo | Clean the eyepiece glass |
| One single dot in the same pixel, dimmer or brighter than its neighbours | Dead pixel or hot pixel | No, but the count never changes | Mapping and in-camera correction, not cleaning |
| Long streak or smear that appears after a cleaning attempt | Fluid or residue smeared across the filter | Usually faint, and it grows after wet cleaning | Stop, then a proper wet clean or a service |
If your spots are hot or dead pixels, stop reading. Those are stuck-pixel electronic faults, they are mapped and corrected in-camera or in software, and no amount of careful cleaning will remove them. A stuck pixel shows up in the same location in every single photo, usually as one dot, and it does not flicker between frames.
Some bodies ship with pixel mapping built in. Check the settings for a pixel mapping or pixel refresh entry and run it, because a mapped defect is invisible in the file and a lot of “my sensor is dirty” reports are just an unmapped pixel.
What NOT to Use on a Camera Sensor
Everything on this list is either sold near photography gear, found in a bathroom cabinet, or recommended by a well-meaning person. None of it belongs on a sensor.
- Canned or compressed air. The propellant drives condensation and micro-droplets onto the filter, and the force can drive dust deeper into the corners of the sensor chamber where a blower cannot reach it.
- Cotton swabs and Q-tips. Household swabs shed fibres, and loose fibres are worse than the dust you started with. A swab used once on a sensor is a single-use item, never a reusable one.
- Breath and saliva. A warm moist exhale lands as a fine film that attracts more dust and leaves a haze you will mistake for a bad sensor.
- Isopropyl alcohol at any concentration. It is a solvent, and it can strip the anti-reflective coatings and the fluorine coatings used on some filter stacks. It also attracts moisture in a humid room.
- Glass cleaner, Windex, and household sprays. The surfactants and dyes in window cleaner leave a residue that causes exactly the smears you were trying to remove.
- WD-40 and any lubricant. Oil-based products permanently haze the filter and migrate into the chamber where they pick up dust.
- Microfibre cloths, lens cloths, and hand blowers. A hand blower pushes saliva droplets straight onto the sensor, and a cloth is a lint magnet at exactly the wrong scale.
- Lens brushes and swabs loaded with household liquid. These are the tools behind most of the streak damage we see, and they are also the tools most often used on second-hand bodies by people who did not know.
The pattern to notice is that every item above either adds liquid that was not designed for optical coatings, or adds a particle source. The sensor chamber has no airflow and no cleaning mechanism, so anything you introduce tends to stay there.
Tools: What You Need and What Is Optional
You need three things to wet clean, and one of them is a bulb blower you will use constantly. Everything else is optional confidence-building equipment.
The manual rocket blower. A rubber bulb blower with a one-way valve and a long, narrow nozzle. The bulb type, sometimes sold as a rocket or Giottos-style blower, is safe because you control the force. Canister gas blowers are not, which is why they appear on the forbidden list above.
Size-matched sensor swabs. These are photographic-grade, low-lint swabs sold in a specific width for each sensor format. They are single use. A swab wider than your sensor can twist and scrape the chamber walls, so the size match is not a comfort detail, it is the point.
Sensor cleaning fluid. A purpose-made, methanol-based photographic cleaning solution. It evaporates cleanly, dissolves light oils, and leaves no residue. It is not the same as lens cleaner, and it is not alcohol.
Sensor loupe (optional). A small illuminated loupe that screws onto the lens mount so you can inspect the filter at working distance. It makes spotting a smear far easier. It also makes you more confident, which matters more than most guides admit.
A light source (optional). A bright LED lamp held at an angle to the glass will make dust and smears obvious under the loupe. A cheap USB light panel works.
Sensor cleaning brush (optional). A static-attracting brush for APS-C and larger sensors. It sits between the blower and the swab on the escalation ladder. It is genuinely useful for hairs and fibres that a blower cannot lift, and it is unnecessary if you already own a good kit.
| Sensor format | Approximate sensor size | Swab width to buy | Typical bodies |
|---|---|---|---|
| Full frame | 36mm by 24mm | 24mm | Canon EOS R, Nikon Z and D full frame, Sony Alpha full frame |
| APS-C | 24mm by 16mm | 16mm | Canon EOS R APS-C, Nikon Z DX, Sony APS-C, Fujifilm X |
| Micro Four Thirds | 17mm by 13mm | 14mm | Olympus OM, Panasonic Lumix, most Micro Four Thirds bodies |
| Medium format | Larger than full frame | Manufacturer-specific or 30mm plus | Only with guidance for your specific body |
Measure before you buy. Some cameras list their sensor format in the specification sheet, and the crop factor is the quick mental shortcut: a camera with a 1.5x or 1.6x crop is APS-C, a 2x crop is Micro Four Thirds, and a 1x crop is full frame.
Pre-Cleaning Safety Checklist
Run through this list before the body door opens. It takes two minutes and it covers nearly every avoidable accident we know about.
- Charge the battery fully, or fit a fresh one. On a DSLR with mirror lock-up, a low battery can let the shutter close while a swab is on the sensor. The curtain will scrape across the swab and leave a streak, and it may also drag grit.
- Turn off in-body image stabilization. On a mirrorless body, the IBIS unit physically moves to keep the frame steady. A cleaning mode that does not lock the unit can move it under the swab.
- Settle the room for ten minutes. Close windows, switch off fans and air conditioning, and let airborne dust drift down before you open anything. Working in a bathroom or a freshly dusted room defeats the whole exercise.
- Work over a clean, uncluttered surface with good light. You will be looking at a nearly invisible object. Bad light turns a two-minute job into a two-hour one.
- Clear a landing area and put the body caps on. Have a body cap ready for each cap you remove, so nothing is set down on a dusty table and reattached afterwards.
- Check the swab size and the fluid. Read the swab packaging against your sensor format table. Read the fluid label to confirm it is sensor cleaning solution, not lens cleaner.
- Wash and dry your hands, or use nitrile gloves. Skin oils are the most common cause of a smudge that appears after an otherwise good cleaning.
- Open the battery compartment last. On some bodies, a compartment door doubles as a lock or a power switch for cleaning mode. Fit the battery only when the manual says to.
Keep one rule in mind through all of it: if the room is dusty, the light is poor, or your hands are unsteady, stop. Trembling hands are a normal reason to postpone a sensor clean, and no image is worth a coating scratch.
How to Clean a Camera Sensor Safely at Home: The Escalation Ladder
This is the core procedure. Work through the four methods in order, and run the test after each one, because the overwhelming majority of dust problems are solved by the first two steps.
| Method | Invasiveness | Removes | Cannot remove | Use it when |
|---|---|---|---|---|
| 1. Built-in cleaning mode | None | Loose dust shaken off the filter | Anything stuck by surface tension or oil | Always, first, every time |
| 2. Manual rocket blower | Very low | Loose dust, fibres not stuck down | Grease, smears, anything adhered | Spots remain after step 1 |
| 3. Static sensor brush | Low | Hairs, fibres, fine grit | Oil and fingerprints | Blower leaves hairs in place |
| 4. Wet swab and sensor fluid | Moderate | Oils, smears, stubborn grime | Coating damage, nothing repairs that | Spots survive steps 1 to 3 |
Step 1: Run the Camera’s Built-In Cleaning Cycle
Almost every interchangeable-lens camera has a sensor cleaning function that vibrates the filter assembly to shake loose dust. On many bodies it uses a piezoelectric element, which is a thin crystal layer that flexes when a voltage is applied. The vibration is far too small to move the filter by any visible distance, but it is enough to break the contact between a loose speck and the glass.
Use it first, every time, for one reason: it costs nothing, it cannot scratch anything, and it removes a surprising share of the problem. It is also the safest way to test whether the remaining spots are even on the sensor, since it never changes a smear and only ever shifts loose dust.
Brand-by-Brand Sensor Cleaning Menu Paths
Menu wording changes with each model and firmware version, so treat the table below as a map rather than a script. If your body is not listed, search the manual for sensor cleaning, clean sensor, or clean now.
| Brand and series | Where to look | What to select | Critical warning |
|---|---|---|---|
| Canon EOS R series | Menu, then Clean sensor | Clean sensor, then Clean now for automatic or Clean manually to leave the sensor exposed | Clean manually leaves the shutter open. Cancel only with the sensor fully clear. |
| Nikon Z series | Setup menu, then Sensor cleaning | Automatic, Start, or Clean manually and open the mount to work | Confirm the frame counter has reached 0 before removing the lens. |
| Nikon D series DSLR | Setup menu, then Sensor cleaning | Automatic, Start, or Clean manually, then set the mirror lock-up lever to lock before removing the lens | Mirror lock-up on a low battery can let the shutter fire. Use a full battery. |
| Sony Alpha series | Setup, then Cleaning menu option | Cleaning, then Run or Continuous shooting, and Hold to run manually | Some bodies have a sensor shake or anti-dust option in SteadyShot settings. Do not confuse the two. |
| Fujifilm X series | Setup menu, then Sensor cleaning | Automatic, Start, or Clean manually | After Clean manually, confirm the sensor is exposed before you touch the mount. |
One brand-specific warning that cuts across the whole table. Some Sony Alpha and Fujifilm bodies use in-body image stabilization, and the stabilisation unit is a moving mechanical frame sitting close to the filter. If the body does not lock or disable it in cleaning mode, a swab moving under your hand can be caught by a unit that is still seeking. Check your specific model’s manual for a sensor lock or stabilisation disable step before you touch glass.
There is also a lesser-known conflict worth knowing. At least one manufacturer has reportedly advised against using a blower at all, while the documentation for Canon, Nikon, Sony, and Fujifilm bodies generally supports the built-in function and a manual air blower. If your manual tells you not to use a blower, follow it, and use the built-in cycle plus wet cleaning instead.
Step 2: Dry Cleaning With a Manual Rocket Blower
Hold the camera with the lens mount facing downward. This is the single most important part of the technique, because gravity does the work instead of your breath, and loose dust falls out of the chamber instead of being pushed deeper into it.
- Charge the battery and disable stabilisation, as in the checklist.
- Put the body into its manual cleaning or sensor-exposed mode, or lock the mirror on a DSLR.
- Remove the lens and fit the body cap for a moment so the open chamber is not exposed while you get the blower ready.
- Hold the camera at a downward angle over a clean surface, with the mount pointing at the floor.
- Take the rubber bulb in one hand and squeeze it firmly away from the camera to expel any stale air, then release it so it refills.
- Bring the nozzle to just outside the mount opening. Do not insert it. Do not let the tip touch the filter or the chamber walls.
- Squeeze the bulb once or twice. One firm puff moves most dust, and a light puff dislodges what the first one moved.
- Refit the lens and repeat the f/16 to f/22 test to see whether the spots changed.
Two mistakes make this step fail. Blowing from above, with the mount facing up, drives dust to the chamber’s far edge where it is hardest to reach. And puffing continuously for ten seconds only scatters dust around the chamber, because the air you push in has to go somewhere.
Stop and Test: Your Decision Point After Every Method
Run the f/16 to f/22 test again and read the result. This is the rule that keeps a routine clean routine.
| What the test shows after your last step | What it means | What to do next |
|---|---|---|
| Spots gone or barely visible at f/22 | The job is finished | Stop. Do not clean again for a spot nobody can see. |
| Fewer spots, same positions | Some dust moved, the rest is adhered | One more blower cycle, then move to the brush or the swab. |
| Spots moved to different positions | You moved loose dust successfully | Blow again while the mount faces down, then re-test. |
| New smear, streak, or haze appeared | You introduced something wet or fibrous | Stop dry methods. Go straight to a proper wet clean or a service. |
| Identical spots at f/22, and blur or haze spread across the frame | The dirt is probably not on the sensor | Stop, re-run the two-frame test with the lens swapped. |
The most common mistake in sensor cleaning is not using the wrong tool. It is doing a fifth clean when the fourth one already worked, and putting a clean sensor at risk for a speck that will never show in a print.
Step 3: Wet Cleaning With a Size-Matched Swab
Wet cleaning is the last rung, not the first. Use it when dry methods have run out and spots remain, or when you are removing an oil or fingerprint smear that no amount of air will touch.
Hold the camera with the mount facing down, the surface still exposed. You are trying to lay a swab down flat and lift it straight off, not to scrub.
- Moisten a single swab. Apply three to four drops of sensor cleaning fluid to the swab head, or follow the fluid’s own instructions. A saturated swab is a flooded sensor, so err on the side of less.
- Hold the swab almost vertical as you bring it to the sensor, with the swab tip approaching the glass at roughly a 45-degree angle. Touch the edge of the glass first, then lay the swab down so it flattens against the surface.
- Slide the swab gently across the sensor in one single pass, moving from the mount opening towards the far edge. No pressure. You are not polishing, you are sweeping.
- Lift the swab straight off the glass. Dragging it back across the same track redeposits what you just removed.
- Repeat with fresh swabs across overlapping passes until the visible dirt is gone. Expect two to four passes on a genuinely dirty sensor.
- Let the surface air dry fully with the body open, then refit the lens and run the f/16 to f/22 test.
The one-swab-one-pass rule is the technique that separates a good clean from a disaster. A back-and-forth motion grinds trapped grit across the coating, and that is how streaks are made. If the swab catches or feels like it is dragging, stop immediately rather than pressing harder.
For APS-C and larger formats, work from the edges toward the centre and overlap each pass slightly. On Micro Four Thirds, the smaller chamber and smaller filter make this step far easier and generally require fewer passes.
Choosing the Right Fluid
Use a purpose-made, methanol-based sensor cleaning solution, applied to the swab rather than sprayed toward the camera. Spraying liquid into an open chamber pushes fluid past the filter and onto the chamber walls and the shutter curtain, where it picks up dust on the way back.
Do not substitute isopropyl alcohol, even at ninety-nine percent purity. It is a strong solvent, it can attack anti-reflective and fluorine-based coatings, and it draws moisture from humid air onto a cold filter. It is a reasonable choice for cleaning a shutter curtain in a workshop with proper controls, which is not what a kitchen table is.
Some manufacturers have historically steered users toward a specific fluid for bodies whose filter stack uses a fluorine-based coating, because a strong solvent can haze it permanently. Check the manual or the manufacturer’s support page for your body before buying, and if your body lists a recommended solution, use that one.
DSLR vs Mirrorless: Mirror Lock-Up and the IBIS Warning
The mechanical difference between a DSLR and a mirrorless body changes the safety rules more than any other single factor in this guide.
On a DSLR, the reflex mirror sits between the lens mount and the sensor. It has to be raised and the shutter curtain has to be held open before anyone can reach the filter. That is what mirror lock-up, or lock mirror for cleaning, is for. Two risks follow from it.
- The shutter closing on your tool. If the battery is low while the mirror is locked, the camera may release the lock and fire a shutter. The curtain will drag across your swab and across the filter, which is one of the most reliable ways to put permanent streaks into a sensor. A full battery is not a formality.
- Locking up for cleaning versus locking up for shooting. A mirror lock-up shooting mode holds the mirror up to reduce vibration, but it does not necessarily expose the sensor in the same way. Use the option the manual labels for cleaning.
On a mirrorless body there is no mirror, so exposure is usually just a shutter that stays open. The new risk is stabilisation. On many bodies, in-body image stabilisation is a physical frame that shifts the sensor in response to detected movement. If a body is powered and stabilisation is active while a swab rests on the filter, the unit can move and catch the swab tip.
IBIS warning: on any mirrorless body with in-body image stabilisation, either use a cleaning mode that locks the sensor or turn stabilisation off in the menu before you place a swab on the glass. Some bodies require a specific sensor shake or sensor lock option rather than simply disabling SteadyShot. Check the manual for your body and do not assume one setting works across brands.
Electronic shutters on some models can be more restrictive still. A handful of cameras physically prohibit sensor access with an electronic shutter selected, so if a body refuses to expose the sensor, switch to mechanical before investigating anything else.
How to Clean a Camera Sensor Without a Kit
Several of the top results for this question promise you can clean a sensor with no equipment. Most of them quietly hand you a rocket blower in the second paragraph. Here is the honest version of what a household kit can and cannot do.
What genuinely works with nothing but a bulb blower: loose dust that landed recently, dust shaken loose by a lens change, and debris that is not adhering to the coating. Most first-time dust problems fall into this category, and a bulb blower from a hardware or craft shop is exactly the right tool for it. This is the standard advice we see repeated in photography communities: use a blower bulb, and run the camera’s own cleaning function first.
What a hardware store blower cannot do: lift grease, remove a fingerprint, dissolve a smear, or shift anything stuck to the filter by surface tension. It also cannot reach the far corners of a full-frame chamber, where grit collects and where a swab has to go. A bulb blower is a first and second method. It is not a complete answer.
What a cotton swab and a bottle of isopropyl alcohol can do: remove a small oil smear if the swab is genuinely photographic-grade, the fluid is a proper sensor solution, and the technique is single-pass. It is also the fastest route to a permanently streaked filter, because household swabs shed fibres and household alcohol attacks the coating. We have seen this pattern repeated in user accounts on photography forums, where people describe cleaning older DSLR bodies with Q-tips and a bottle of cleaner. It sometimes works, and it is how a body ends up with a hazy filter and a service bill.
So the real answer to cleaning a sensor without a dedicated kit is this. Spend nothing, use the built-in cleaning cycle, and use a bulb blower with the mount facing down. Stop there. If spots remain after that, the cheap part of the solution is over, and the genuine decision is between a proper kit and a professional clean.
A sensor loupe is the other thing people skip and later wish they had. It is optional, but it turns a blind procedure into a visible one, and it is the single upgrade that makes the whole process feel less like guesswork.
If You Already Made It Worse
If a previous cleaning left streaks, haze, or a smeared patch, you are not in trouble yet, but you are past the dry methods. Here is what to do.
Stop using dry methods immediately. Every blower cycle and every brush pass drags loose grit across a surface that is already carrying residue. A smeared filter attracts dust, and the smear is now feeding the dust it is holding.
Identify the residue before you wet clean again. If the problem is fibres from a cotton swab, a wet clean with a proper swab and sensor fluid lifts them. If the haze covers the whole frame evenly, a coating has been attacked and a swab will not restore it.
Run one careful wet clean with the right consumables. Fresh fluid, a size-matched photographic swab, three to four drops, single pass, mount facing down. One pass per direction, no scrubbing, and stop if the swab catches. Do not repeat passes hoping to polish a haze away.
Re-test at f/22 and compare against your earlier frames. If streaks improved, one more careful pass is reasonable. If the frame is unchanged or worse, stop.
Recognise the point of no return for a home clean. A permanently hazed filter, a filter with visible coating damage, or grit trapped between the filter and the shutter curtain cannot be fixed at a kitchen table. That is a service-centre job involving a body strip and a filter replacement, and it is where an early stop protects you.
There is one more scenario worth naming because photographers meet it often. A fungus or mould problem on the shutter curtain or the mirror, usually after a camera has been stored in a damp cupboard, presents as a hazy band that no blower touches. Isopropyl alcohol and cotton swabs are the tools people reach for, and on a non-critical body this sometimes resolves the issue. On a modern body with an electronic shutter it can do more harm than good. If the haze moves with the shutter position rather than staying fixed, treat it as a service case.
How Often Should You Clean Your Camera Sensor?
Clean when the test tells you to, not on a schedule. That said, environment and habit predict frequency better than any calendar.
- Frequent lens swapping in a clean room or studio. Every lens change is a dust event. Expect to check every few weeks and clean when the f/22 test shows spots.
- Travel, desert, beach, or dusty locations. This is where dust arrives fastest. Check after every major outing in these environments rather than waiting for a paid job.
- Outdoor weddings and events. The standard advice is to clean before an important paid shoot, then again after. A sensor that is clean on the way in is a problem you do not have on the day.
- Long lenses, wide apertures, and fast shutter speeds. Dust barely shows at f/1.4, so a body can collect a lot before you notice. Test at f/22 rather than judging from your finished work.
- Video and high-resolution work. Larger output sizes reveal dust that a web-sized image hides, and you cannot retouch a whole reel.
Checking takes a minute. Cleaning takes ten. A monthly f/22 test costs less time than a single round of spot removal in editing, and it is the habit that keeps the wet clean rare.
One routine worth adding: clean your camera after an event or a trip rather than before the next one. Dirt that sits for a week settles, and settled grit is harder to lift than fresh grit.
DIY vs Professional Sensor Cleaning: What It Costs
The honest comparison is not a single number. It is a break-even calculation that depends on how often you shoot and how comfortable you are with the procedure.
A basic DIY setup is a bulb blower, a pack of size-matched photographic swabs, and a bottle of sensor cleaning fluid, plus a loupe if you want to work by sight. That kit lasts a long time for a normal shooter, because the consumables are used a few swabs at a time and only on real problems. The cost is front-loaded and small.
A professional clean is cheaper per session than most people assume, and it buys you three things you cannot DIY: a strip-down access to the chamber corners, the ability to remove haze and coating damage, and zero risk to your body. If you clean the sensor professionally more than a couple of times a year, the service is no longer an expense so much as a rounding error on your gear budget.
| Route | What it fixes | What it cannot fix | Turnaround | Risk to your body |
|---|---|---|---|---|
| Built-in cycle and bulb blower | Loose dust, most first-time problems | Oils, smears, stuck grit, coating haze | Immediate | Effectively none |
| Full DIY wet clean | Dust, oils, light smears, surface grime | Chamber corners, coating damage, trapped grit | 30 minutes | Low, with correct swabs and technique |
| Local camera shop | Dust and smears, quick turnaround | Deep chamber work or coating replacement | Days, varies widely | None |
| Authorised service centre | Full strip, filter replacement, mould and fungus work | Physical damage to the filter glass itself | Weeks | None, and warranty-safe |
The break-even point is simple. If you are under warranty, if the body is valuable or hard to replace, if you have already caused visible damage, or if the spots survived a correct dry clean, the professional route wins on value alone. Everyone else can do the first three methods at home with almost no risk and should not think twice about it.
How to Verify Your Cleaning Worked
Keep a repeatable protocol, because a one-off look at a frame will convince you of anything.
- Before cleaning, take one reference frame: white background, f/16, ISO 100, fast shutter, in good light.
- Zoom to 100 percent and screenshot the file name plus a crop of the worst area, or note the count of spots you can see.
- After each method, retake the identical frame with the same settings, lens, and camera position.
- Compare in a side-by-side view. Spots that have moved or shrunk were on the sensor and are now in a different place. Spots that are pixel-identical were probably never on the filter at all.
- Stop when the result is invisible at your normal viewing size. If you cannot see it at 100 percent on a monitor, a client will not see it in a print.
In Lightroom, the Visualize Spots shortcut puts the sensor spots in view while you pan, which makes a before-and-after comparison fast. Take a few practice shots walking around the frame first, so you learn where the dust sits on your specific body.
One habit is worth building. After every clean, note the date and the method used. When spots reappear, you will know whether the interval is two weeks or two years, and that history tells you more about your own shooting than any general guidance.
How to Prevent Sensor Dust Before It Starts
Prevention is cheaper than cleaning and it takes less effort than most people expect.
Change lenses quickly, in a clean place, with the body facing down. The classic rule is to swap lenses over a flat surface, point the camera at a light source so you can see into the mount, and keep the change under a second or two. Dust is drawn into an open chamber by the settling air.
Use body caps and rear lens caps every time. A body with no cap is an open chamber sitting near a carpet. Caps cost almost nothing and are the single biggest reducer of dust events.
Keep the bag clean. A dedicated camera compartment, a blower kept in the bag to dust it out, and no food or fabric softener in the same compartment. Static from synthetic clothing pulls dust onto a camera body, so avoid wiping down a camera with a clothing freshener towel.
Do not change lenses in wind. Wind carries fine grit, and that is the moment most dust gets in. If you must, turn your back to the wind and work fast.
Do not work in a room you have just dusted or vacuumed. Let it settle for ten minutes. This is why the checklist starts with a settle period.
Do not leave the body uncapped on a table. Even for a minute, indoors, a downward-facing mount gathers what is floating.
Check before a paid job. One f/22 frame the night before costs a minute and removes an entire category of risk from the day.
When to Stop and Book a Professional
Stop immediately, close the body, and do not reopen it if any of these are true.
- The body is still under warranty and the manufacturer handles sensor cleaning as part of a service.
- The camera is a high-end, rare, or collectible body whose parts are hard to source.
- You see a haze that covers the whole frame evenly, which indicates coating damage rather than dirt.
- The swab catches, drags, or resists when you lay it on the glass.
- There is moisture, visible fluid, or debris near the shutter curtain.
- You see grit at the edge of the filter that a swab cannot reach without pushing it inward.
- The battery is low while a mirror is locked, or the body is not behaving exactly as the manual describes.
- Your hands are unsteady, or the light is poor. Postpone rather than push on.
There is also a value judgement worth making explicitly. Cleaning a sensor is a fifteen-minute job on a body you understand, and a bad decision on a body you cannot replace is not a calculation worth making. The technique in this guide is deliberately conservative for that reason: the escalation ladder means most people never need the risky step at all.
If you are buying a body second-hand, the sensor inspection is worth doing before you commit. Run the f/22 test, check the frame count, and look for haze and permanent streaks rather than loose dust, because loose dust is a five-minute fix and haze is a service. Sellers and forums frequently treat visible dust on a used body as a dealbreaker when it is not one.
Frequently Asked Questions
How do I know if my camera sensor is dirty?
Point the camera at a plain bright surface, set manual exposure at f/16 to f/22 with a fast shutter and low ISO, then zoom to 100 percent. Sensor dust appears as sharp, dark spots in exactly the same pixel position in every frame, and it gets more visible as you stop the aperture down. Run the same test twice with the lens swapped: spots that do not move are on the sensor, spots that shift are on the lens.
Can I clean my camera sensor with a blower?
Yes, a manual rubber bulb blower is the correct second step, after the camera’s built-in cleaning cycle. Charge the battery, disable in-body image stabilisation, put the body into its sensor-exposed or mirror-locked state, and hold the lens mount facing downward. Squeeze the bulb firmly to expel stale air, then puff once or twice with the nozzle just outside the mount without touching the filter. Never use canned air, which drives condensation onto the surface.
Can I use isopropyl alcohol to clean a camera sensor?
No, not on the filter stack of a modern body. Isopropyl alcohol is a solvent that can strip anti-reflective and fluorine-based coatings and attracts moisture from humid air onto a cold filter. Use a purpose-made methanol-based sensor cleaning solution applied to a size-matched photographic swab, three to four drops per swab, in single passes with the mount facing down.
Is it safe to clean a camera sensor yourself?
It is safe for most cameras if you work up the escalation ladder and test after every method. The built-in cleaning cycle carries effectively no risk, the bulb blower carries very little, and a wet clean is low risk when you use photographic swabs the right width for your sensor format and sensor-safe fluid. It is not wise when the body is under warranty, valuable or hard to replace, or already showing haze or streaks from a previous attempt.
How often should I clean my camera sensor?
Clean when the f/22 test shows spots, not on a calendar. Frequent lens swapping, travel, and dusty, windy, desert or beach environments all raise the rate considerably, so check after outings in those conditions. Clean before an important paid shoot and again after it. A monthly test frame takes a minute and prevents most wet cleans.
What happens if I touch the camera sensor?
Almost nothing, because the part you touch is glass. Above the imaging silicon sit the infrared cut filter and the low-pass filter, with their anti-reflective coatings, and that smooth hard surface is what a swab actually sweeps. The silicon, its bond wires, and the sensor package sit below and are never exposed. The real risks are dragging grit across the coating and using a liquid that strips it, not the contact itself.
Can I use compressed air to clean a camera sensor?
No. Canned and compressed air can push condensation and fine droplets onto the filter, and the force drives dust into the far corners of the chamber where a blower and a swab cannot reach it. Use a manual rubber bulb blower instead, with the camera mount facing downward so gravity carries loose dust out of the chamber.
How do I activate sensor cleaning mode?
On Canon EOS R bodies, look under Menu for Clean sensor and choose Clean now or Clean manually. On Nikon Z, use Setup menu then Sensor cleaning, and on Nikon D DSLRs use the same entry plus the mirror lock-up lever. On Sony Alpha, look in Setup for the Cleaning option and select Run or Continuous shooting. On Fujifilm X, use Setup menu then Sensor cleaning. Always use a full battery and disable stabilisation on mirrorless bodies.
What is a sensor loupe and do I need one?
A sensor loupe is a small illuminated loupe that screws onto the lens mount so you can inspect the filter at working distance. It is optional, and it makes spotting smears, smudges, and remaining dust far easier. For a first clean it turns a blind procedure into a visible one, and that confidence is often worth more than the accessory itself.
Why does my camera have dust spots in every photo?
Because the dirt is fixed to the sensor filter stack, so it appears in the same position in every frame, and small apertures make it far more visible than wide-open shooting. Check the same pixel across two frames to confirm. If the spot count never changes and it is a single dot, it may be a dead or hot pixel instead, which is a stuck-pixel fault that pixel mapping handles and no cleaning will fix.
Conclusion
Learning how to clean a camera sensor safely at home is mostly about restraint rather than technique. Confirm the dust with an f/16 to f/22 test, run the built-in cleaning cycle, puff the sensor with a bulb blower while the mount faces downward, and only reach for a size-matched swab and sensor fluid when dry methods have run out.
Most sensor problems are solved by the first two steps and the rest of the ladder exists for the small minority that are not. Keep a body cap on the camera, change lenses in a clean place, and take one test frame a month. That is the whole routine, and it costs less time than a single round of spot removal in editing.