
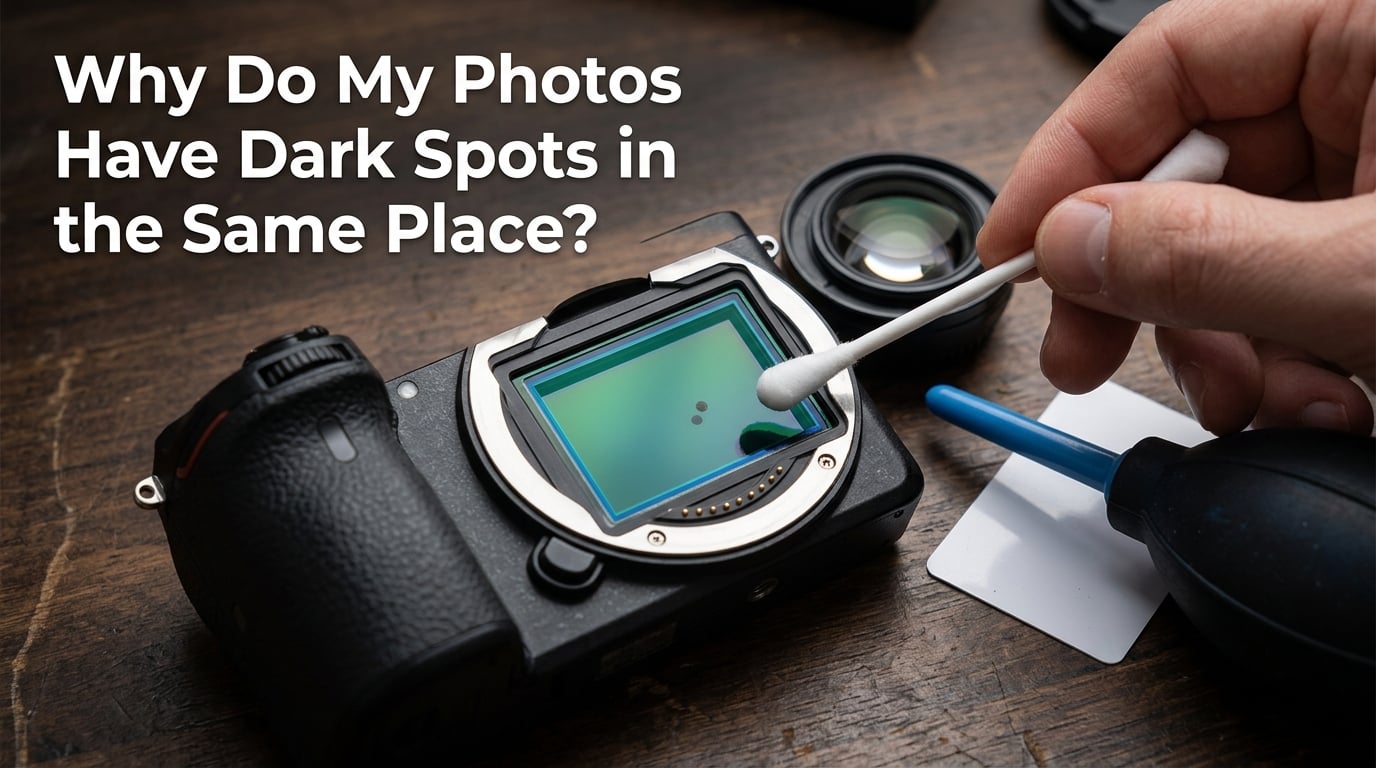
Dark spots that land in the exact same place in every photo are almost always dust or debris sitting on your camera’s image sensor. The sensor is a fixed surface, so a speck on it is photographed at the same spot in every single frame. Dust on the lens behaves differently: it shifts when you zoom or swap lenses, and it never stays anchored to one pixel region.
That fixed position is the whole diagnosis in a sentence, and it is the reason the question is worth answering properly. Almost nobody has ever asked a photographer about the spot in the sky, because the sky is where a blemish hurts most. Here is the way we break it down: a 60-second test that tells you sensor from lens, the optics that explain why the position never changes, a six-cause table, cleaning steps you can do at home, what to do when the camera cannot be opened, and how to erase the spot from shots you have already taken.
One note before we start. This is a diagnosis-first guide, not a shopping list. Nothing here needs a specific brand, and the only tools worth buying are described in their own section further down.
Table of Contents
- The 60-Second Test: Confirm What You Are Looking At
- Why Do My Photos Have Dark Spots in the Same Place?
- Diagnosis: Symptom vs Cause vs Fix
- How to Clean a Camera Sensor Yourself
- Fixes for Cameras You Cannot Open
- How to Get Rid of Dark Spots in Photos With Editing
- What Not to Use, and Why It Makes Things Worse
- Tools You Need and What Each One Is For
- How Often to Clean and How to Tell
- When to Stop Cleaning and Send It for Service
- Special Cases: Video, Panoramas, Scans and Prints
- Frequently Asked Questions
- How to get rid of dark spots in photos?
- Why are there black spots in my pictures?
- How to fix a dark spot on an iPhone camera?
- How do I know if dust is on the sensor or the back of the lens?
- Are dark spots on photos fixable in editing?
- Why do dark spots only show up at some apertures?
- Is sensor dust covered by warranty?
- What is blackpoint in photos?
- The One-Minute Recap
The 60-Second Test: Confirm What You Are Looking At
Before buying anything or opening anything, run this. It costs nothing and it settles the majority of cases in about a minute. Each step has one action and one expected result, so you can stop as soon as you get a clear signal.
- Point the camera at a plain white wall or an overcast sky. Expected result: the spot is obvious and sharply visible against a featureless background.
- Zoom in on the image at 100% on your computer screen. Expected result: you see whether the mark is a hard-edged dot or a soft translucent disc. Soft and round means out-of-focus dust rather than a faulty photosite.
- Tap the camera body gently with the palm of your hand, then take another photo. Expected result: a mark that shifts position or blurs differently is being imaged through the lens, not stuck to the sensor. This move-versus-stay test is the most repeated piece of advice across photography forums, and it is genuinely all it is cracked up to be.
- Change to a different focal length, or fit a different lens if your camera takes one. Expected result: lens dirt moves dramatically as magnification changes. Sensor dust barely moves at all, if it moves at all.
- Set the aperture to its narrowest setting, around f/22, and shoot the white wall again. Expected result: a sensor dust spot grows noticeably larger and darker as the aperture closes. A spot that stays exactly the same size is probably not ordinary dust.
Forum users report the same outcome repeatedly: the spot does not move, which confirms it is on the sensor rather than the lens. If step five made your spot pop into view when you had never noticed it before, that is a strong signal that you are dealing with dust that only shows at narrow apertures.
Why Do My Photos Have Dark Spots in the Same Place?
Because the dust is on a plane that never moves, and the camera maps that plane onto the sensor the same way in every frame. A speck sitting a fraction of a millimetre above the imaging surface sits directly in front of a fixed group of photosites, and no amount of recomposing, rotating the camera or changing lenses will move it off those photosites. It lands on the same pixels at the same coordinates, in the sky, on the wall, on a face, forever.
The speck itself is almost never in focus, because it sits well outside the depth of field in front of the sensor. Out-of-focus points of light do not render as points. They render as discs, which is why sensor dust has a soft round appearance and why photographers call it a bokeh ball. It is a small, semi-transparent dark circle with a slightly brighter core, and the softness is what tells you it is dust.
That disc changes size with aperture. Open the aperture wide and the cone of light reaching the sensor is narrow, so the dust disc is small and often invisible. Stop the aperture down and the cone widens, the disc grows, and the spot becomes obvious. This is exactly what shooters on photography forums describe when they notice spots appearing on long exposures taken at narrow apertures.
Two practical consequences follow from this. First, your white-wall test shot at f/22 is the honest checkpoint, because it shows every speck on the sensor at once. Second, dust is most damaging against bright, low-contrast areas, which is exactly why a small dot in an open sky reads as a defect while the same speck on a textured hillside disappears.
There is one more factor worth knowing. A speck does not have to be large to ruin a frame, but it does have to be reasonably close to the sensor surface to block much light. A speck resting against the protective filter blocks a lot and appears as a dense, dark dot. One floating further away blocks less and appears faint and translucent. That difference in density is why some spots look like a punch hole and others look like a smudge in the sky.
Diagnosis: Symptom vs Cause vs Fix
Sensor dust is the most common cause, not the only one. The table below separates the six causes this question actually covers, along with the tell-tale symptom and the correct route for each. Matching your symptom to a row takes less time than cleaning the wrong component.
| What you see | Most likely cause | How to confirm | Correct fix |
|---|---|---|---|
| Soft dark disc, identical position in every frame, grows as you stop the aperture down | Sensor dust on the imaging surface or filter stack | f/22 white-wall test; spot survives lens changes | Air blower first, then wet swab cleaning, or professional service |
| Mark shifts or changes size when you zoom or change lenses | Dirt on the lens front or rear element | Zoom test: mark moves with magnification | Clean the lens elements with a blower and lens cloth, no sensor work |
| Single hard-edged pixel, often in the same frame position on every file, sometimes slightly bright | Hot or dead photosite | Mark is one or two pixels wide and does not blur at any aperture | Pixel mapping in camera menus, mapping correction in editing software, or service |
| Clustered spots inside the image area, sometimes with a haze across the whole frame, worse at wide apertures | Fungal growth inside the lens element assembly | Pattern stays with the lens, follows it to another body | Lens service or replacement; no amount of sensor cleaning helps |
| Broad, soft, semi-transparent patch that spreads or smears when you try to clean it | Fluid, oil or coating residue on the sensor or filter | Persists after several correct wet swab passes | Stop swabbing. Send the body for professional cleaning |
| Mark is only on prints, scans or copies, and never appears on the screen or the original file | Scanner glass, printer feed path, ink or printhead failure | Open the original file and the mark is gone | Clean the scanner glass or run the printer head alignment and cleaning cycle |
Two rows deserve emphasis. Advice on photography forums is consistent on the first: if wet swabbing has been done correctly and the spot remains, the cause is probably not more dust, and more aggressive swabbing makes the outcome worse. There are also accounts of a photographer who cleaned sensors professionally and still could not lift a single large smudge after four swabs, which is the clearest known case of a mark that looks like dust and is not.
The print-stage row matters because search results for this question are crowded with printer and stitching threads. A dark spot that appears only on paper is a hardware failure in the scanner or printer, and no amount of camera work will touch it. Likewise, uneven shading toward the corners of a stitched 360 panorama is vignetting in the raw file, not a dirty sensor, as drone forums repeatedly point out.
How to Clean a Camera Sensor Yourself
Cleaning your own sensor is well within reach if you work slowly, in a clean room, with the right materials and never touch the filter with anything dry. Blowing out loose dust is the first and safest stage. Wet swabbing is the second stage, and only for what the blower will not shift.
Stage one: blower, then check again
- Work in a still, clean indoor space away from carpet, pets and open windows.
- Hold the camera body upside down over a clean surface so loose grit falls away from the sensor.
- Use a hand-operated rubber rocket blower. Squeeze it before the nozzle enters the body so you never blow grit inward.
- Fit the lens or body cap, power the camera on, and give it a moment. Many bodies run their ultrasonic sensor cleaning cycle at startup, which shifts light adhered dust on its own.
- Repeat the f/22 white-wall test. If the spot is gone, stop here.
Stage two: wet swabbing a mirrorless sensor
- Buy sensor swabs matched to your sensor format: full frame, APS-C or medium format, since swab width must match the surface.
- Lay a clean swab on a clean surface, add a small amount of sensor-cleaning fluid to one edge only. A saturated swab is what causes smears.
- Open the body with the lens removed, in a well-lit room, and look straight down at the sensor so you can see what you are touching.
- Place the damp edge of the swab against one side of the sensor and draw it slowly across to the other side in a single pass. No back-and-forth scrubbing.
- Discard the swab. Repeat with a fresh one only if you saw a mark removed, and stop after three passes.
Stage three: wet swabbing a DSLR
The procedure is the same, with one extra step and one difference. A DSLR has a reflex mirror in the way, so you must raise it and hold it up with the mirror lock-up setting in the menu, which most bodies place under cleaning or custom settings. Because the mirror mechanism is right beside the sensor, work extra slowly, and never force the swab against the frame edge.
Also, a DSLR sensor sits behind a low-pass or anti-aliasing filter and an IR-cut filter, both mounted in front of the imaging surface. That is why the swab has to be gentle and why the fluid must be the right one. These layers are glass, and glass does not recover from a careless pass.
Fixes for Cameras You Cannot Open
Most dark-spot questions in search results come from people holding a phone or an old fixed-zoom compact camera. There is no user-accessible sensor in either, so the sensor cleaning path simply does not apply. What works instead depends on when the problem started and who owns the device.
Smartphones
On a phone the whole optical stack is sealed and factory-calibrated, and the sensor sits behind fixed glass. There is no safe way for a user to reach it, and the correct first step is a support request rather than a repair attempt. Support can confirm whether the mark is in the capture pipeline, offer a service option, and in some cases supply a replacement unit. If the device arrived with the spot, return it under the store’s return window, which is the advice iPhone users in forum threads converge on.
In the meantime, the practical fixes are optical and computational. Wipe the lens area with a dry microfiber cloth, and use one of the editing routes below on the photos you have already taken.
Fixed-lens compacts, action cams and rented gear
A bridge camera or a compact with a built-in zoom cannot be opened, and the manufacturer service centre is the only route to a clean sensor. For action cameras the same applies, and the housing and its seals are the parts most people wrongly suspect first. If you are shooting a rented or borrowed body, do not clean it. Sensor cleaning is the owner’s responsibility and your attempt can create liability for damage you did not cause.
How to Get Rid of Dark Spots in Photos With Editing
If the camera is in a bag, the shots are already taken, or the mark sits in the sky of a frame you cannot retake, editing is the fastest route. The method depends on whether you shoot stills or video, and whether you shoot RAW.
RAW files: automatic dust detection in Lightroom
- In Adobe Lightroom Classic, open the RAW file and go to the Develop module.
- Find Capture Control in the right-hand panel, above the histogram area.
- Enable Visualize. The affected pixels are overlaid, and this is the fastest way to confirm the mark is in the file rather than on your screen.
- Click Detect Dust. The software builds a dust profile from the image data.
- Tick Apply to All. Every file in the selected folder shot with the same camera is corrected from one profile.
This is the closest thing in photography to a one-click fix, and it takes under a minute for a whole folder.
Any file: the spot healing tool
- Choose the Spot Removal tool and set the sample type to Content-Aware or Proximity Match.
- Set the size just larger than the mark and lower the tolerance so it does not blend surrounding sky or skin.
- Drag across the spot once. Check the edge at 100% before you commit.
- Repeat on the remaining marks, then correct any softness with a small brush on a low-opacity layer.
Video: compare frames
- Play a second or two of footage and look for a frame where the speck is absent, which happens whenever the sensor shakes slightly.
- Duplicate that frame and align it to the frame you need.
- Use a clean plate or the healing tool to patch the mark from the neighbouring frames.
A short burst of stills from one spot works the same way. Shoot ten frames, pick one where the speck moved, and heal the others from it. This is why frame stacking for astrophotography doubles as a dust-removal method.
What Not to Use, and Why It Makes Things Worse
Most damage to camera sensors happens while people are trying to remove dust, not because of the dust. These are the methods that cause it.
- Canned compressed air. Propellant and oily residue land on the filter, and the force can drive grit into the sensor stack. Forums warn about this repeatedly.
- Blowing with your mouth. You are introducing warm, moist breath onto cold glass, which condenses, and spit carries grit and salts onto the surface you are trying to protect.
- A dry swab. This is the most damaging common mistake. A dry swab drags grit across the filter and can turn one speck into a long smear.
- Microfiber cloth on a sensor. The cloth is for front and rear lens elements. Its fibres are loose relative to a filter surface and can scratch it.
- Drugstore rubbing alcohol. Additives and water content vary by product, and the wrong concentration can attack coatings.
- Ordinary cotton swabs. They shed fibres and are not sized for a sensor surface.
- A vacuum. Static attraction makes dust cling harder, and nothing about it improves the outcome.
Tools You Need and What Each One Is For
You need very little, and you need it in the right order. A blower handles most cases on its own; the rest is a small, one-time kit.
- Hand-operated rocket blower. The first tool to reach for, and the one that resolves the majority of dust cases. Never an electric blower.
- Sensor cleaning swabs, matched to your sensor format. Full frame, APS-C and medium format each need their own width, because an oversized swab can catch the sensor edge.
- Sensor cleaning fluid. A purpose-made, low-residue fluid. Use a minimal amount; a damp edge is enough.
- Sensor loupe or LED loupe. Lets you confirm a clean sensor under magnification before and after, which turns cleaning from guesswork into a check.
- Body and rear caps. A cap left off an empty mount is the most common route for dust to reach a sensor in the first place.
- Good light. Not a product, but you cannot clean what you cannot see, and ambient light is not enough.
How Often to Clean and How to Tell
The cadence depends on where you shoot, not on the calendar. A studio shooter working in controlled air can go months. A landscape shooter who changes lenses outdoors in wind can need a check after every trip, and beach or construction work calls for a blower pass after every session.
The single test that tells you when to act is the f/22 white-wall shot. Keep the habit of taking one after a lens change in a risky environment, and clean only when you see a mark. Avoid cleaning on a schedule, because unnecessary swabbing is how smears get created.
Prevention is simpler than cleaning. Change lenses over a flat surface with the mount facing down, cap both openings immediately, keep the body capped when no lens is fitted, and avoid swapping glass in wind, dust or near pet hair.
When to Stop Cleaning and Send It for Service
There is a clear line between cleaning and repair, and crossing it with a swab is how a small problem becomes an expensive one.
Stop and send the body in if the mark is a broad soft patch rather than a discrete speck, if it spreads after a swab pass, if you have already used three swabs without improvement, or if you can see fluid or a droplet sitting under the filter. Professionals on photography forums draw the same line: correct wet swabbing that removes nothing means the cause is not dust, and continuing only makes it worse.
Never attempt a swab if you cannot open the body confidently, if the camera is rented or borrowed, or if you suspect the filter is already scratched. A damaged sensor assembly or filter is a service-centre job, and it is the reason the careful method matters: a single careless pass costs far more than a professional clean.
If the camera is new and developed spots within days, stop cleaning entirely and use the return window. That is a defect claim, not a maintenance task, and a store exchange is a much better outcome than a service repair.
Special Cases: Video, Panoramas, Scans and Prints
Some spots that people describe as sensor dust are artifacts of something else entirely.
Panoramas and 360 stitches. Uneven darkening toward the corners of a stitched image is vignetting recorded in the raw file, not a dirty sensor. Processing the raw file with a lens profile correction fixes it in seconds.
Scanned film and photo scanners. Marks in the same place on every scan are almost always on the scanner glass or the platen, not on the negative. Open the raw scan and the mark is visible in the pixels, so the answer is the scanner bed, and a single wipe fixes a whole batch of files.
Prints and copies. If the original digital file is clean and the spot only appears on paper, the fault is in the printer’s feed path, ink, or printhead. Run the manufacturer’s head cleaning and alignment cycle, and check the ink levels. This is a very common source of confusion because both problems get described with the same phrase.
Video. A speck that appears in every frame of a video is the same sensor dust, and the frame-comparison method above removes it in post. A speck that appears only in fast pans is usually a dirty lens element moving through the frame.
Frequently Asked Questions
How to get rid of dark spots in photos?
If the mark is in the same place in every frame, it is dust on the image sensor. Blow it out with a hand-operated rocket blower held with the body facing down, then repeat the f/22 white-wall test. If it remains, clean the sensor with a swab matched to your sensor format and a small amount of sensor-cleaning fluid, using single slow passes. For shots you already took, use Capture Control dust detection in Lightroom Classic or the spot healing tool.
Why are there black spots in my pictures?
Black spots that appear in the identical position in every photo are dust or debris on the image sensor, a fixed surface, so the same pixels are blocked in every frame. Lens dirt is the other common cause, but it moves when you zoom or change lenses. Hot or dead photosites, fungal growth inside a lens, and oily residue on the filter are the remaining causes.
How to fix a dark spot on an iPhone camera?
Phones have a sealed lens and sensor assembly with no user-accessible cleaning path. Wipe the lens area with a dry microfiber cloth, then contact the device manufacturer, which can confirm whether the mark is in the capture pipeline and offer a service or replacement. If the spots appeared before you owned the device, return it inside the return window. Use the spot healing tool to heal the photos you have already taken.
How do I know if dust is on the sensor or the back of the lens?
Zoom the camera to a different focal length or fit a different lens and take another shot. If the mark shifts position or changes size with magnification, it is on the lens. If it stays anchored to the same spot no matter what you do, it is on the sensor. Shooting a plain white wall at around f/22 makes both easier to see, because the disc grows as the aperture narrows.
Are dark spots on photos fixable in editing?
Yes. For RAW files, Capture Control in Lightroom Classic can detect the dust pattern, build a profile from the image data and apply it to every file shot with that camera. For any format, the spot healing tool with content-aware settings removes individual marks. For video, find a frame where the speck is absent and patch it over the affected frames.
Why do dark spots only show up at some apertures?
A speck on the sensor is far outside the depth of field, so it is imaged as an out-of-focus disc rather than a point. Wide open, the disc is small and often invisible. Stopping the aperture down widens the cone of light reaching the sensor, the disc grows, and the spot becomes obvious. That is why an f/22 test shot on a white wall reveals everything a normal frame hides.
Is sensor dust covered by warranty?
Ordinary dust is not a defect and is not treated as one. A mark present on a new camera from the factory is different, and that is a return or warranty case rather than a maintenance task. Damage caused by cleaning with compressed air, mouth-blowing or a dry swab is not covered, which is the practical reason to follow the careful method.
What is blackpoint in photos?
Blackpoint is the tonal level below which an image file records pure black, used in RAW processing to set the darkest value the camera captured. It has nothing to do with discrete dark spots in the picture. Adjusting blackpoint changes overall shadow density, while a sensor dust spot is a localized mark that stays in one frame position no matter what tonal settings you apply.
The One-Minute Recap
Why do my photos have dark spots in the same place? Because a speck of dust is sitting on a surface that never moves, so it is photographed at the same spot in every frame. Tap the body and zoom to confirm it does not move, shoot a white wall at f/22 to see how bad it is, and start with a hand-operated blower before any swab touches the filter.
Edit the frames you have already taken with Capture Control or the healing tool while you decide, and stop cleaning the moment a soft smudge refuses to lift. That is the line between dust and service, and knowing where it sits saves both your photos and your camera.