
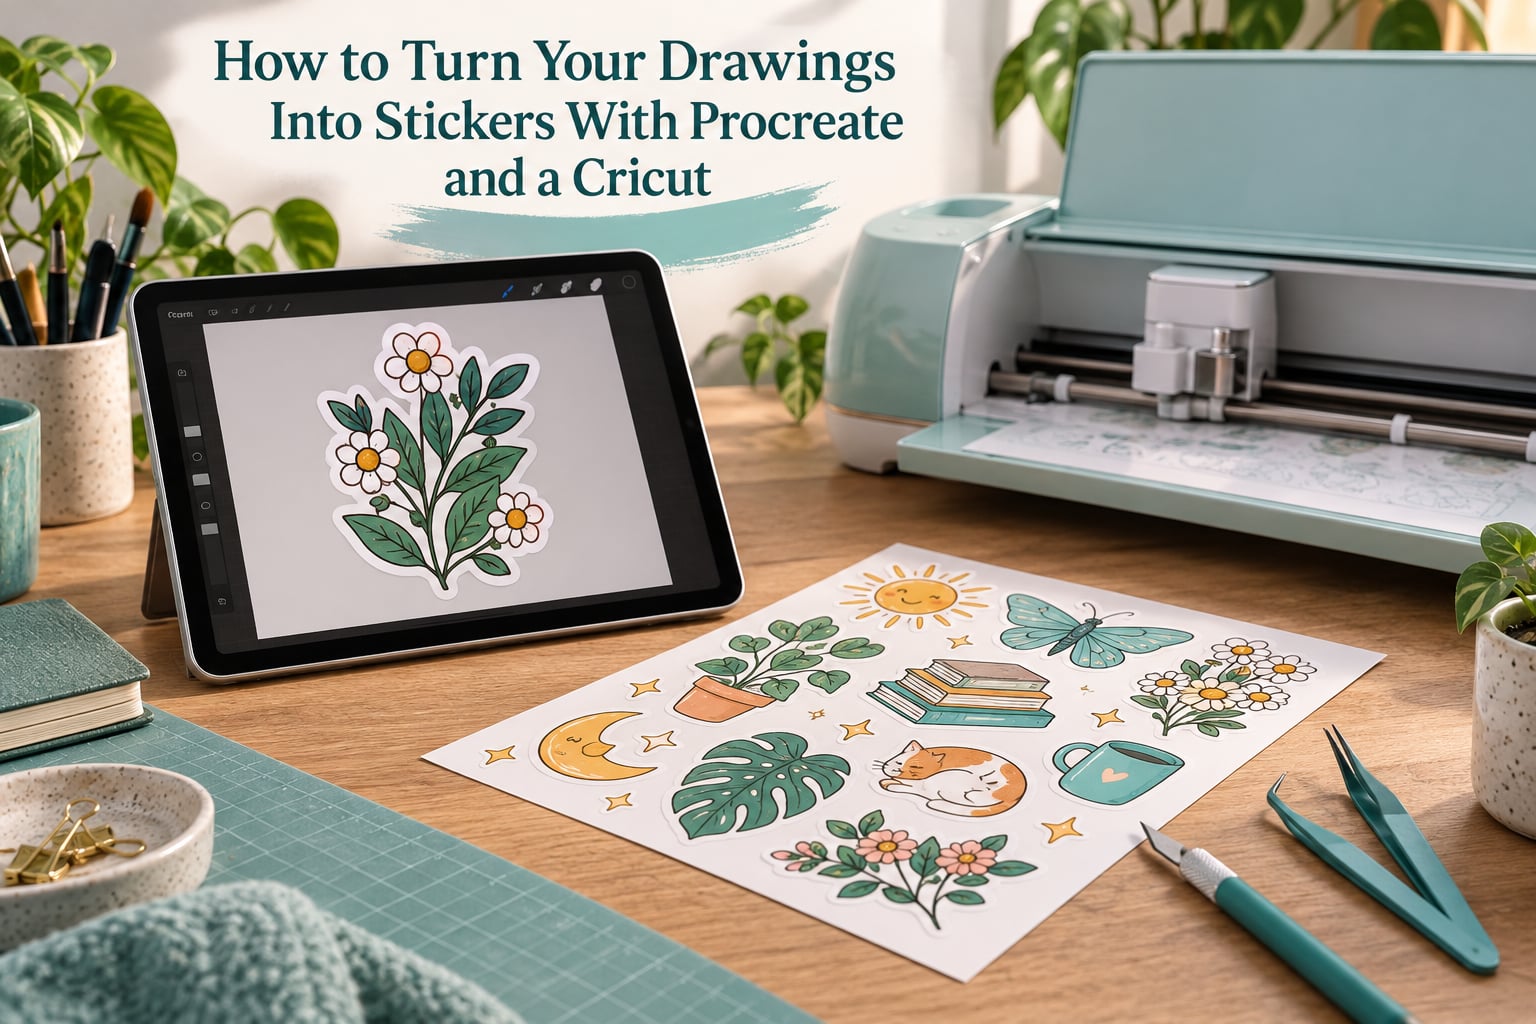
If you draw on an iPad and you own a Cricut, the gap between a finished illustration and a sticker you can peel off a laptop lid is smaller than most people expect. This guide walks through how to turn drawings into stickers with Procreate and a Cricut, end to end, with the exact numbers that decide whether the cut lands clean or slices through your art.
We have run this process on both sides of the machine: art in Procreate, calibration and cutting in Cricut Design Space, and we have re-run it enough times to know which settings actually matter. The short version, in eight steps:
- Draw your sticker art in Procreate at its final printed size.
- Add a white border so the blade never touches your line art.
- Export a transparent-background PNG at 300 ppi.
- Assemble the PNGs into one flat sticker sheet in a second Procreate document.
- Upload that single sheet to Cricut Design Space and choose Print Then Cut.
- Print onto sticker paper, load the mat, and cut.
- Weed the sheet and peel the stickers off by hand.
- Laminate or seal them if they need to survive water.
That is the whole method. Everything below is the detail that makes it repeatable instead of lucky.
Updated for 2026.
Table of Contents
- What You Need Before You Start
- How to Turn Drawings Into Stickers With Procreate and a Cricut
- Step 1: Draw your art in Procreate at its final size
- Step 2: Add a white border and bleed in Procreate
- Step 3: Export a transparent PNG at 300 ppi
- Working with color layers separately
- Step 4: Build the sticker sheet in a second Procreate document
- Step 5: Upload the sheet to Cricut Design Space and choose Print Then Cut
- Step 6: Print on sticker paper, then load the mat
- Step 7: Weed, peel and finish
- Details the blade cannot cut cleanly
- Step 8: Seal or laminate for water resistance
- Which Cricut Machines Support Print Then Cut
- Kiss Cut vs Die Cut: Which One Should You Make
- How to Choose Sticker Paper and Vinyl
- Sizing and Resolution Math for Print Then Cut
- Print Then Cut Calibration and the Grayscale Test Print
- Troubleshooting: Symptom and Fix
- How to Make Stickers Without a Cricut or a Printer
- Turning Procreate Drawings Into Stickers People Can Buy
- Frequently Asked Questions
- How to make stickers with Procreate and a Cricut?
- Can you use Procreate to make stickers?
- How to print stickers in Procreate?
- Is there a Cricut that prints and cuts stickers?
- How to cut stickers on a Cricut after printing?
- How to do Print Then Cut on Cricut stickers?
- Why are my Cricut registration marks not lining up?
- What is the best app for making stickers?
- Do I need a Cricut to make stickers?
- Is it easy to make stickers with a Cricut?
- Conclusion
What You Need Before You Start
Three things decide whether this workflow works: a Cricut that supports Print Then Cut, an inkjet printer, and a Procreate export that is already the right size. Get those right and the rest is muscle memory.
Hardware
- A Print Then Cut capable Cricut — the Explore Air 2, Explore 2 and 3, and Maker 3 all handle it. See the model table below for the full list.
- A StandardGrip cutting mat and a clean replacement cutting mat. A heavily used mat will not hold a printed sticker sheet flat.
- A fine-point blade for sticker paper and a deep-cut blade plus scraper tool if you are working with thicker vinyl or laminate.
- Tweezers and a spatula or scraper for lifting weeded stickers without creasing them.
- An inkjet printer. Laser prints do not take sticker paper well, and the pigment in inkjet ink reacts with the adhesive in a way that makes colors pop.
Community members on r/cricut consistently pair an Epson EcoTank or XP-series inkjet with matte or glossy sticker paper, and report the cleanest color results from that combination.
Consumables
- Printable sticker paper or printable adhesive vinyl in letter size, which matches the standard printable area.
- Matte finish for a low-glare surface, glossy for saturated color, clear if you want the background to show through, and holographic for a shimmer that suits decorative art.
- Self-adhesive lamination or a UV-resistant sealer spray if the stickers will meet water.
Software and accounts
- Procreate on iPad, with a canvas large enough for the sheet.
- Cricut Design Space, free, on a desktop browser or tablet. A Cricut account is required to send a job to the machine.
- Calibration is done from the machine’s own menu using Design Space over Bluetooth, so keep the machine near your tablet the first time you use it.
Why these two work together well: Procreate is a raster drawing app, which is ideal for illustration, lettering and painted art. Cricut is a contour cutter that only follows lines. Print Then Cut bridges the two: your printer lays down the art, and the machine’s sensor reads registration marks printed alongside it so the blade knows where to slice. The drawing side never has to think about cutting, and the cutting side never has to think about art.
How to Turn Drawings Into Stickers With Procreate and a Cricut
The process below runs in the order that avoids rework. Sizing comes first because every later step depends on it, and the sheet gets assembled before upload because that is the step most beginners skip and then fight in Design Space.
Step 1: Draw your art in Procreate at its final size
Create a new document sized in inches, not pixels, and pick a resolution of 300. Procreate’s new document dialog accepts inches, so a 3 inch wide sticker is a 3 by 3 inch canvas at 300 ppi.
Drawing at final size matters for three reasons. Stroke weight will look right, any type you place will be the size you intended, and you will never have to guess a scale factor later.
Keep one clear habit: leave transparent canvas around the art. Do not draw edge to edge. You need breathing room for the border in the next step, and for the slice margin that the blade requires between a sticker and the edge of the sheet.
Step 2: Add a white border and bleed in Procreate
Every sticker needs a white outline, and this is the step almost every guide glosses over. A cut line that touches ink will chew a pale halo into your artwork.
The technique takes about fifteen seconds. Duplicate the art layer, place the copy on top, select it, and use Select → Select All followed by Select → Grow to push the selection outward by roughly 0.05 to 0.08 inch. Fill that expanded selection with white, then move it behind the art layer. You now have a white border of consistent width around the whole sticker.
That border is your bleed. It also gives the finished sticker a clean white edge, which is what makes kiss-cut sheets look intentional rather than roughly trimmed.
Tip: a border of 0.06 inch is a good default for small stickers. Go wider for larger ones, since a cut wanders more on a longer curve.
Step 3: Export a transparent PNG at 300 ppi
In Procreate, tap Share, then Export, then PNG. Choose 2x only if the sticker will end up larger than about 4 inches and your canvas is small; for most sticker sizes 1x at a 300 ppi canvas is already sharp.
Confirm that the file has an alpha channel and a transparent background before you upload it anywhere. A white or checkerboard-looking background flattened into the PNG will print as an opaque block, and there is no fix for it downstream.
Rename the file after its final size, for example moon-phase-3in. When a sheet holds a dozen designs, searchable filenames save an enormous amount of time.
Working with color layers separately
Procreate’s layer stack gives you an option that flat designs do not. Keep your spot colors on their own layers, for example a separate layer for each ink-heavy color, and export each one as its own PNG. Printed in registration, those layers let a single design be reprinted later in a different color without redrawing the whole thing, which matters once you are producing the same sticker in several colorways.
The practical version is simpler: keep the base drawing flattened, and only isolate a color when you genuinely need a separate run of it. Splitting every design into separate exports multiplies your print jobs for little benefit on a sheet of twelve mixed designs.
Step 4: Build the sticker sheet in a second Procreate document
This is the step that most tutorials skip, and it is the exact place beginners get stuck. You do not need to upload twelve separate PNGs and align them one by one in Design Space. Assemble the sheet in Procreate instead, so Design Space receives a single flattened image.
Create a new document at 8.5 by 11 inches, 300 ppi. Add a background layer filled with white, because a transparent sheet can confuse the print preview. Then place each exported PNG on its own layer and position it.
To stop guessing, add guide layers. Draw a 3.5 cm (about 1.38 inch) circle and a 5 cm (about 2 inch) circle, in a contrasting color, and use them as layout guides. Planers and journal sellers build most sheets from 3.5 cm circles; 5 cm circles are the common gift-sticker size. Once your arrangement satisfies the guides, delete or hide them before exporting.
Leave about 0.15 inch of clear space between any two designs. The blade has to travel between stickers, and designs closer than that will end up with each other’s cuts running through them.
A second guide layer is worth adding on any sheet with mixed sizes: a rectangle matching the printable area itself. Draw one at 9.25 by 6.75 inches, keep it on its own layer below your art, and you get a visual boundary for the region the cutter can actually reach.
Finally, stay inside the printable area. The largest region Design Space can print and cut is 9.25 by 6.75 inches, so leave the outer margin of your 8.5 by 11 inch sheet empty. Anything printed there gets ignored by the cutter.
Export this composite document as a single flattened PNG. That file is what you upload.
Warning: flatten the document before export. A Procreate document saved as a layered .procreate file uploads to Design Space as a generic image with no transparency, which is not what you want.
Step 5: Upload the sheet to Cricut Design Space and choose Print Then Cut
Open Design Space, choose Insert Images, and upload the flattened sheet. Once the image lands on the canvas, use the operation dropdown in the top toolbar to change it from Cut to Print Then Cut.
Design Space now generates thin registration marks and a bounding cut line around the sheet. The marks are what the machine’s sensor locates. If the marks look faint, you can thicken them, but do not move or scale them by hand.
Leave the bounding cut line in place. It is the border that tells the machine where the sheet actually ends, which prevents the machine from cutting across the entire mat.
Check the Print Then Cut toggle under the print settings so the same job prints and cuts in one go. Then note the detected color count and make sure your inkjet has ink for every color the sheet uses.
Step 6: Print on sticker paper, then load the mat
Print the sheet at 100 percent scale, never fit-to-page. A scaled print shifts the artwork relative to the registration marks, and the cut will land off the design.
Print a plain-paper test first if this is your first run. Ordinary copy paper is cheap and it proves the size, the margins and the ink coverage before you commit to adhesive material.
Once the sticker paper comes out of the printer, let it sit for several minutes. Ink that is still wet will transfer onto the mat, and it will stick there permanently.
Peel the backing from the printed sheet, lay it print-side down onto a clean StandardGrip mat, and press it down with a scraper to push out air pockets. A bubble under the artwork is a bald patch on your finished sticker.
Load the mat, set the blade to the depth matching your material, and send the job. The machine scans the marks, solves for the offset between the printed image and the mat grid, and cuts the contour lines.
Step 7: Weed, peel and finish
Lift the sheet off the mat at a shallow angle rather than straight up. Pulling perpendicular to the mat is what tears sticker paper at the edges, and it is one of the most common complaints on r/cricut.
Weed away the empty vinyl with tweezers and a scraper, working from the outside in. A sharp peel at a shallow angle keeps the printed edge of the sticker intact.
For kiss-cut sheets you leave the outlines on the sticker and cut only the outer sheet border, so each sticker stays in place until the user lifts it. For die-cut stickers the outline comes off entirely and you are left with individual stickers you can peel one at a time.
For a tidy die-cut edge, trim the white border slightly with a craft knife. Leave a hairline rather than cutting flush, since a flush trim exposes the adhesive edge and invites peeling.
Details the blade cannot cut cleanly
The fine-point blade resolves about a 0.02 inch line. Anything thinner than that will either not cut at all, leaving a torn flap, or produce a rough nick where the blade wanders off the paper entirely.
Three adjustments fix most of it. Simplify small features in the original Procreate document, such as tiny text, eyelashes or fur detail, and re-export rather than trying to cut finer. Increase the blade depth by one increment so the cut is decisive instead of half-through. And widen the white border under any feature that sits close to the cut line, so a small wander still lands on white rather than on ink.
Planter stickers in very small formats are the hardest case. If a design depends on hairline detail, work larger and scale the print down, or accept that the design needs a bigger sticker to read properly.
Step 8: Seal or laminate for water resistance
Paper stickers absorb water and fade. If yours will live on a water bottle, a lunchbox or a laptop that travels, seal them.
Two options work. Cut a piece of self-adhesive laminate slightly larger than each sticker, apply it with a scraper, and trim the excess. Or use a UV-resistant sealer spray, which is faster for a full sheet and leaves a softer hand-feel.
Skip sealing if you made water-based inkjet stickers for paper use only, and test a sealed sticker on the exact surface you plan to use. A laminate that is too stiff will lift at the corners of a curved bottle.
Seal the whole sheet before you weed it if you can. Covering a flat sheet with spray sealer is faster and more even than sealing each sticker one at a time, and you avoid the fingerprint smears that come from handling a freshly sealed sticker. Let it cure fully before peeling anything off the mat.
Which Cricut Machines Support Print Then Cut
Print Then Cut is a machine feature, not a subscription. It works on a specific set of models, and older or entry-level machines cut vinyl only.
| Cricut model | Print Then Cut | What to know |
|---|---|---|
| Maker 3 | Yes | Full support, prints through Bluetooth |
| Explore Air 3 | Yes | Full support, current Air model |
| Explore Air 2 | Yes | The most common starter machine in sticker tutorials |
| Explore 3 | Yes | Full support |
| Explore 2 | Yes | Full support |
| Newer and imported models | Check Design Space | Support is confirmed by the software version, not the model name alone |
| Joy and Joy Xtra | No | Cut-only models |
| Explore and Explore Air (first generation) | No | Pre-date the feature |
| Maker 2 and earlier | No | Pre-date the feature |
Older hardware is not automatically unusable. You can still print a sheet yourself and send just the contour lines to a cut-capable machine using Cricut’s print-and-cut workflow from a computer, but a supported machine does both steps in one job and removes the alignment step entirely.
Kiss Cut vs Die Cut: Which One Should You Make
Die cut means the cut follows the outline of each sticker and the waste around it is weeded away. You end up holding loose individual stickers. This is what people picture when they say sticker, and it is the right choice for laptop skins, water bottles and gift labels.
Kiss cut means the blade only cuts the outer boundary of the sheet, leaving the stickers sitting in their cut-out cells. This is what you want for planner and journal sheets, and for any sticker you intend to sell in a bundle, because the buyer can lift one sticker without disturbing the rest.
Beginners often reach the wrong result because they never decide before printing. The choice lives in one place: after setting the image to Print Then Cut, open the layer’s options and turn kiss cut on. Turning it on adds inner cut lines around each design so the cells stay attached to the sheet.
Decide based on the use. Single stickers on objects want die cut. Sheets of many stickers want kiss cut.
How to Choose Sticker Paper and Vinyl
The material changes the finish, the durability and how the colors read. These are the four options that cover almost every home sticker project.
| Material | Best for | Water resistance | Watch out for |
|---|---|---|---|
| Matte paper sticker sheet | Labels, planner sheets, packaging | Low, needs sealing | Ink can look slightly muted under matte coating |
| Matte vinyl | Everyday use, laptop skins | Good once sealed | Scuffs less visibly than glossy |
| Glossy vinyl | Bright illustrations, photography | Good once sealed | Glare under direct light |
| Clear vinyl | Overlays and die-cut line art | Good | White prints slightly warm on transparent stock |
| Holographic vinyl | Decorative art, kids’ sheets | Good once sealed | Shine varies across the sheet, so test large areas |
Community advice consistently favors matte for anything that will be handled often and glossy or holographic for display pieces. Whichever you pick, print a single test sticker first, because inkjet ink and plastic coating do not always agree.
Color shifts between paper and vinyl are the surprise most beginners hit. Inkjet paper is bright white, while many vinyl sheets carry a slight gray or warm tone, so saturated colors can print duller on vinyl than the same file does on paper. If a color looks wrong, the fix is a test print on the actual material rather than an adjustment in Procreate.
Also check the printer profile. Almost every inkjet driver ships with a coated-media option that boosts saturation on glossy and photo paper, and using it makes a visible difference on a sticker. Switching the profile is a menu change, but skipping it is the reason a print looks washed out.
Sizing and Resolution Math for Print Then Cut
Two numbers settle most sizing arguments: 300 ppi and a printable area of 9.25 by 6.75 inches.
At 300 ppi, a 3 inch sticker needs roughly 900 pixels of width. A 2 inch sticker needs about 600. If you drew at a smaller canvas size in Procreate, resize the document up rather than upscaling the image, so the strokes stay crisp.
With the printable area at 9.25 by 6.75 inches, the practical count is lower than it looks once you leave the required 0.15 inch gaps:
- 2 inch circles: about 12 per sheet
- 3.5 cm circles: about 14 per sheet
- 3 inch circles: about 8 per sheet
- 4 inch circles: about 4 per sheet
These are estimates for round designs with even spacing. A tight grid without gaps may print fine and then fail at the cutting stage, so treat them as a ceiling rather than a target.
For sizing a 3.5 cm circle in Procreate, remember that 1 inch is 2.54 cm, so 3.5 cm is about 1.38 inch and 5 cm is about 1.97 inch. Draw the guide circle, place your art inside it, and the sheet stays consistent batch to batch.
The reverse calculation matters just as often. If you have already drawn a piece at a specific size and want to know what it will look like at the standard planner sizes, measure the widest point of the art in Procreate, and compare it against a 1.38 inch or 1.97 inch guide circle drawn at the same zoom level. Scaling down is usually better than scaling up, because a reduced design keeps clean edges where an enlarged one softens.
Print Then Cut Calibration and the Grayscale Test Print
Calibration teaches the machine where your printer’s ink lands relative to the blade. Run it the first time you use a machine, after you switch paper types, and any time the cut starts drifting.
The walkthrough is short. On the machine, open Settings and find the calibration option for Print Then Cut. Make sure the mat is loaded and the machine can see it, then start. The machine prints a calibration sheet, you load that printed sheet back onto the mat exactly as printed, and it cuts a grid of test lines. The machine reads which lines cut cleanly and stores the correction.
Run it in the same conditions you will print in. A calibration done in a warm room with a fresh mat behaves differently from one done on a cold morning, and the difference shows up as a cut that is off by a millimeter or two.
The grayscale test print
Before you spend a sheet of adhesive material, print your job in grayscale on plain paper at 100 percent scale. This is a free pre-flight check that catches most of what goes wrong.
Check three things on the test print. The registration marks should be solid, continuous lines rather than broken dashes. The cut bounding line should sit outside every design with a visible margin. And the colors that will print should show the areas you expect, with no unexpected white plate.
If the marks are faint or the design looks shifted, fix the problem on paper where a mistake is free. Once the sheet is on sticker paper, the same mistake costs you a sheet and half an hour of ink.
Troubleshooting: Symptom and Fix
Nearly every Print Then Cut problem falls into one of a handful of buckets. Find your symptom here before changing settings at random.
| Symptom | Cause | Fix |
|---|---|---|
| Cut line is off by a few millimeters | Calibration drift, or a print scaled away from 100 percent | Rerun calibration and reprint at 100 percent, never fit-to-page |
| Registration marks are faint or broken | Ink starvation or a low-quality sheet | Run a nozzle check, thicken the mark line in Design Space, switch paper |
| Blade stops partway through a line | Blade depth too shallow for the material | Increase blade depth by one increment, or use a deep-cut blade for laminate |
| Sticker will not peel off the mat | StandardGrip holds too well, or ink was still wet at load | Let the print dry longer and peel at a shallow angle |
| Print looks faded or streaky | Cheap coating, or wrong paper profile in the print dialog | Choose the coated-paper profile, run a nozzle clean, test a better sheet |
| Stickers print but the machine cuts the wrong area | Artwork sits outside the printable area, or the bounding line was moved | Rebuild the sheet inside 9.25 by 6.75 inches and leave the bounding line alone |
| Sticker has a pale chewed edge | No white border under the cut line | Add the white bleed in Procreate and re-export |
| Cuts run through neighboring designs | Gap between designs under 0.15 inch | Respace the sheet and flatten a new PNG |
Registration misalignment and incomplete cuts are the two failures beginners hit most often, and both have a deterministic fix once you know which one you are looking at.
Work through the causes in order of likelihood before touching the machine. Print scale comes first, then calibration, then paper and ink, and blade depth last. Most reported problems resolve in the first two, and changing the blade depth when the real cause is a scaled print only wastes a mat.
How to Make Stickers Without a Cricut or a Printer
If you do not own a Cricut, the artwork half of this workflow still works. Print the flattened sheet on an inkjet, let it dry, and cut around each design with a craft knife and a cutting mat. Slow, but the result is identical, and it is the cheapest way to test whether a design is worth committing to adhesive material.
A second option is to skip the printer and buy blank kiss-cut sticker sheets, then draw the art directly onto the liner with a waterproof pen or paint marker. Quality depends almost entirely on your line work, and it works well for hand-lettered text stickers.
If you do not own a printer, an office print shop will print a PDF you bring on a USB stick. Take the same flattened 8.5 by 11 inch sheet, ask for plain paper or their own sticker paper, and print at 100 percent. You then only need a machine to cut it.
Beginners on r/cricut ask the same first question repeatedly: whether the artwork has to be their own. It does not have to be. Drawing your own is the most fun route and gives you the cleanest rights, but tracing your own photo reference or commissioning an illustrator all work fine as long as you hold the rights to the finished art.
Turning Procreate Drawings Into Stickers People Can Buy
Once a sheet comes out clean, the same pipeline scales into a small product line. The bottleneck is almost never the cutting; it is how long each sheet takes from start to finish.
Batch your workflow. Draw a family of related designs first, export them all, then build one sheet holding as many as the spacing rules allow. One print and one cut job then produces an entire collection instead of a single sticker.
Bundle by theme rather than by count. A set of twelve seasonal planner stickers reads as a product; twelve unrelated single stickers read as clutter. Kiss-cut sheets are the format to sell in, since the buyer gets the whole arrangement at once.
List them where the buyers already are. Etsy and Big Cartel are the natural homes for handmade digital art, and both handle the physical shipping of a flat sheet simply.
Be honest about the limits of home production. A home inkjet sticker will not match a commercial die-cut product in edge smoothness, and that is a quality ceiling rather than a skill problem. The right move is to lean into the handmade story, use a strong material, and price against what the work actually takes.
Keep your Procreate sheet template and reuse it. A template with the circle guides, the printable-area rectangle and a saved layer order turns a new design into a five-minute job rather than a half-hour rebuild, and that saved time is the difference between making one sheet a month and making one a week.
Frequently Asked Questions
How to make stickers with Procreate and a Cricut?
Draw your art in Procreate at final size, add a white border, export a transparent PNG at 300 ppi, assemble the PNGs into one flat 8.5 by 11 inch sheet in a second Procreate document, upload that sheet to Cricut Design Space, switch the image to Print Then Cut, print at 100 percent on sticker paper, load the mat, and cut. Weed the sheet, peel the stickers off at a shallow angle, and seal them if they need water resistance.
Can you use Procreate to make stickers?
Yes. Procreate is a raster illustration app, which suits painted art, hand lettering and digital painting. Cricut cannot read Procreate files directly, so the required step is exporting your work as a transparent-background PNG and printing it yourself. Everything about sizing, the white border and the sticker sheet layout is done in Procreate before upload.
How to print stickers in Procreate?
Procreate does not print on its own. You export a flattened PNG, open it in Cricut Design Space, set the image to Print Then Cut, and print the job from Design Space. Print at 100 percent scale rather than fit-to-page, because a scaled print moves the artwork away from the registration marks and the cut lands off the design.
Is there a Cricut that prints and cuts stickers?
No Cricut prints and cuts in one job. The Cricut itself only cuts, while the image comes from a separate inkjet printer. Print Then Cut is the feature that links the two: Design Space prints the design along with registration marks, and the Cricut scans those marks to find the artwork. The Explore Air 2, Explore 2 and 3, Explore Air 3, and Maker 3 all support it.
How to cut stickers on a Cricut after printing?
Set the image to Print Then Cut in Design Space and send the combined job. Let the printed sticker paper dry for several minutes, peel off the backing, lay the sheet print-side down on a clean StandardGrip mat, press out air pockets with a scraper, and load the mat. Set the blade depth to match your material before starting the cut.
How to do Print Then Cut on Cricut stickers?
Upload your flattened sticker sheet to Design Space, then change the operation dropdown from Cut to Print Then Cut. Design Space adds registration marks and a bounding line around the sheet. Leave the bounding line untouched, choose kiss cut if you want the stickers to stay in their cells, then print and load as normal. The machine scans the marks before cutting.
Why are my Cricut registration marks not lining up?
Usually the print was scaled. Anything other than 100 percent scale, including fit-to-page, shifts the artwork relative to the marks, and the cut follows the marks rather than the art. Rerun the Print Then Cut calibration, print on plain paper as a test, and confirm the marks come out as solid continuous lines before using sticker material again.
What is the best app for making stickers?
Procreate is the strongest option for illustration and lettering. It handles pressure-sensitive brushes and a large pressure-sensitive canvas, and it exports transparent PNGs at any size you need. Canva works well for simple typographic and geometric designs, and Illustrator suits logo and vector work where crisp type edges matter. All three export a PNG that Cricut Design Space accepts.
Do I need a Cricut to make stickers?
No. You need paper or vinyl, an inkjet printer, and either a cutting machine or a craft knife. Hand-cutting around a printed design is slower and slightly less precise, but it produces the same sticker and is a good way to test a design before buying equipment.
Is it easy to make stickers with a Cricut?
It is easy once the setup is correct, and most frustration comes from two things: exporting artwork that is not at its final size, and skipping calibration. Fix those and the workflow is a repeatable five-minute loop once your sheet template is built. Keep a saved Procreate sheet template with your circle guides and the whole process becomes a fill-in-the-blank job.
Conclusion
Learning how to turn drawings into stickers with Procreate and a Cricut comes down to three habits: draw at final size, export a transparent PNG at 300 ppi with a white border, and build the whole sticker sheet in Procreate before it ever reaches Design Space. Everything else in the process is a setting you change once.
Start with three designs on a single sheet, print the grayscale test on plain paper, and calibrate before the first adhesive run. Once that first sheet comes out clean, the loop takes minutes and your drawings work as stickers anywhere you want them.