
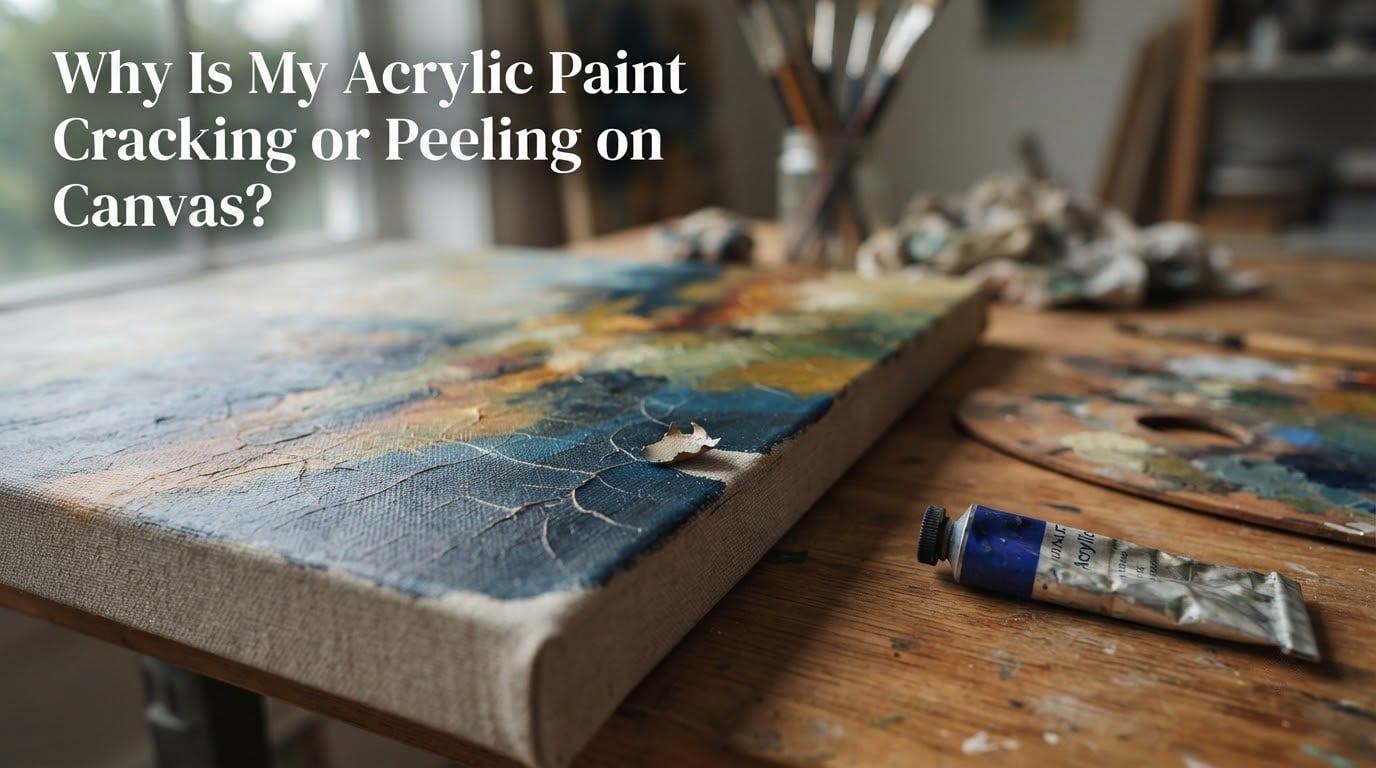
I have watched acrylic paintings I loved turn into cracked or peeling messes, and I know the gut-punch feeling when it happens. The good news is that acrylic paint cracking or peeling on canvas almost always comes down to one of two things: the paint film is under too much internal stress, or the paint is not sticking to the surface beneath it. Both are preventable, and most of the time, both are fixable.
In this guide, I will walk you through exactly what is happening inside the paint layer, how to tell cracking apart from peeling, how to repair each one, and how to make sure your next painting stays smooth for years. I have pulled together forum wisdom from painters who have wrestled with this on real canvases, plus the polymer science behind why acrylic behaves the way it does.
Table of Contents
- Quick Diagnosis: Is Your Paint Cracking or Peeling?
- What Causes Acrylic Paint to Crack on Canvas
- What Causes Acrylic Paint to Peel Off Canvas
- Surface Preparation Fundamentals to Prevent Both Problems
- Step-by-Step Repair Guide for Cracked Acrylic Paint
- Step-by-Step Repair Guide for Peeling Acrylic Paint
- When to Repair and When to Start Over
- Prevention Best Practices for Future Paintings
- Choosing the Right Mediums, Primers, and Varnishes
- Frequently Asked Questions
- Conclusion
Quick Diagnosis: Is Your Paint Cracking or Peeling?
Before we dig into causes and fixes, you need to know which problem you actually have. Cracking and peeling look similar at first glance but have completely different root causes and solutions.
- Cracking means the paint film itself is splitting open while still attached to the canvas. You will see fissures, hairlines, alligator-scale patterns, or “mud cracks” running through a layer that is otherwise glued down.
- Peeling means the paint is detaching from the canvas. You will see flakes lifting at the edges, paint curling away from gesso, or whole sheets coming off in strips.
Run through this quick checklist to identify your situation:
- Are the cracks still flat against the canvas, with no raised edges? You have cracking.
- Can you slide a fingernail under a cracked edge and lift a flake? You have peeling.
- Do the cracks look like dry riverbeds or alligator skin? That is crazing or alligatoring, a cracking subtype.
- Is the paint coming off in sheets or strips, often exposing white gesso underneath? That is adhesive failure, a peeling subtype.
- Did the problem show up during drying, or weeks later? In-drying cracks usually mean thickness; late cracks mean environment or incompatibility.
If your damage is widespread across more than 40% of the surface, or the canvas itself is sagging, you are probably looking at a restart. For smaller, localized damage, scroll to the repair guides below.
What Causes Acrylic Paint to Crack on Canvas
Acrylic paint cracks because the dried film shrinks or moves more than it can stretch. The polymer binder that holds pigment together loses flexibility as water leaves it, and any stress that builds up has to release somewhere. On canvas, that somewhere is usually a crack.
The Polymer Binder and Drying Mechanics
Acrylic paint is a suspension of tiny plastic polymer particles in water. As the water evaporates, those particles get closer and closer until they fuse together into a continuous plastic film. This film is what holds pigment to your canvas. The film is flexible at first and becomes more rigid as it fully cures over the following days and weeks.
Here is the catch: as the film forms, it also shrinks slightly. If the layer underneath is still soft or shrinks at a different rate, the top layer pulls against it and eventually tears itself apart. That is the moment you see cracks appear.
Surface Tension and Uneven Drying
The most common cracking scenario happens when the outside of a thick application dries faster than the inside. Painters on r/PourPainting describe this constantly: the surface looks dry, so they add another pour, only to find cracks everywhere a day later.
What is happening is that the outer skin tightens up first, then the wet core underneath continues to shrink. The skin cannot stretch to accommodate that shrinkage, so it fractures. Veteran artists call this “skin cracking,” and it is the single most common cracking pattern in pour painting.
Thick Applications, Mud Cracking, and Alligatoring
Heavy impasto, thick gel medium mixtures, and built-up texture pastes are cracking magnets. There are three named patterns worth recognizing:
- Crazing: Fine, hairline cracks that look like shattered glass. Common in thin layers over more flexible underlayers.
- Mud cracking: Deep, irregular cracks that look like dried mud in a desert. Almost always caused by paint applied too thick in one pass.
- Alligatoring: Patterned cracks resembling alligator scales. Usually a sign of incompatible layers, like a rigid topcoat over a soft, slow-curing underlayer.
Environmental Factors That Trigger Cracking
Heat, low humidity, and strong airflow all force water out of acrylic faster than the film can adjust. Painting in direct sunlight, near a heater, or with a fan blowing on the canvas invites surface-skin cracking. Cold temperatures below about 10°C (50°F) slow curing so much that layers may seem dry on top but stay soft underneath for weeks, which can produce delayed cracking once the room warms up.
Pour Painting Specific Triggers
Pour painters have their own cracking checklist. From threads on r/PourPainting and r/acrylicpainting, the most common triggers are:
- Using too much water or silicone oil in the mix, which weakens the polymer binder.
- Pouring too thick a layer, often more than 1/8 inch deep.
- Painting over an old pour that had not fully cured (acrylic can take weeks to fully harden).
- Adding dry pigments or heavy texture additives that do not bond with the binder.
What Causes Acrylic Paint to Peel Off Canvas
Peeling is an adhesion problem, not a film problem. The paint might be perfectly intact and flexible, but it has lost its grip on the canvas or on the layer beneath it. When you lift a peeling flake, you usually see clean canvas or gesso on the back of it, with no paint transfer.
Adhesion Failure Explained
Adhesion works through two main mechanisms: mechanical grip, where paint soaks into the tooth of a surface, and chemical grip, where the binder bonds with the surface chemistry. When either mechanism fails, the paint has nothing to hold onto. Peeling is what happens next.
Surface Preparation Mistakes
Skipping primer is the number one cause of peeling in beginner work. Bare canvas has a loose, woven texture that absorbs binder unevenly. Paint lays on top of those fibers rather than wrapping around them, so a gentle tug or temperature shift can pop the whole sheet off. Even pre-primed canvases benefit from at least one extra coat of quality gesso before serious work.
Other surface prep mistakes include painting over dusty or chalky gesso, painting on a slick gesso without scuffing it, and painting on top of an old oil painting without an isolation coat.
Incompatible Layers and Mediums
You cannot paint acrylic over wet oil, and you cannot put a rigid varnish over a still-curing acrylic layer. Users on r/painting regularly warn about mixing mediums and topcoats from different chemistries. If you apply an alkyd or oil-based product over acrylic, the solvents can soften the acrylic and break adhesion. If you apply a heavy gloss varnish before the acrylic has cured, the solvent in the varnish can do the same.
Moisture, Grease, and Contaminants
Any film between the paint and the canvas prevents bonding. Common culprits include fingerprints, skin oils, household dust, waxy cleaning products, water spots, and silicone spray. Once paint goes over a contaminated patch, peeling is almost guaranteed as the paint dries and tries to grip something it cannot.
Surface Preparation Fundamentals to Prevent Both Problems
Most cracking and peeling comes back to what happened before the brush ever touched the canvas. Spending 20 extra minutes on prep saves hours of repair later.
Choosing and Applying Gesso
Gesso is the foundation. It creates a uniform, slightly absorbent surface that acrylic can bond to. For most paintings, two to three thin coats of quality acrylic gesso are enough. Apply each coat in perpendicular directions (one horizontal, one vertical) and let each coat dry fully before adding the next. Sand lightly with 220-grit between coats if you want a very smooth surface.
Avoid stretching your gesso too thin on raw canvas. The goal is to fill the weave enough that light does not pass through it, without sealing the tooth so completely that paint cannot grip.
Canvas Stretching and Tension
A loose canvas wobbles and flexes, which translates mechanical stress into the paint film. That flex is enough to start cracks, especially around the corners and edges. Check your canvas tension by flicking it lightly. A tight canvas feels drum-like and gives a clean bounce. A loose canvas gives a dull thud or visibly ripples.
If your canvas has slackened after painting, a trick from thegrumble.com and other veteran forums is to spray a light mist of water on the back of the canvas. The fibers absorb water and shrink, which tightens the weave back to drum-tight. Let it dry fully before adding any paint to the front.
Cleaning Before You Paint
Wipe the gessoed surface with a slightly damp lint-free cloth to remove dust and chalk. Avoid tack cloths that leave residue. If the canvas has been sitting for a long time, a quick wipe with isopropyl alcohol on a rag removes oily contaminants. Let any cleaning agent evaporate completely before painting.
Priming Porous or Unusual Surfaces
If you are painting on raw wood, hardboard, paper, or unprimed linen, you need a dedicated primer for that substrate. Wood and hardboard especially can release tannins and acids that interfere with acrylic adhesion, so seal them with a sizing or a barrier coat before gessoing.
Step-by-Step Repair Guide for Cracked Acrylic Paint
If the paint film is cracked but still firmly attached, you can usually stabilize it and make the cracks nearly invisible. This is the path I take when I see crazing or early mud cracking in my own work.
Materials You Will Need
- Soft brush (size 6 or 8 round)
- Clean palette or plate
- Acrylic medium (gloss or matte, your choice)
- Acrylic varnish (either brush-on or spray)
- Palette knife
- Light source and magnifying glass (optional, for inspection)
Stabilizing Loose Flakes
For cracking without peeling, the paint is still attached, but fragile. Press any loose edges down with a clean fingertip. If a flake lifts easily, fold a tiny drop of gloss medium under it with a fine brush, then press it flat and weight it with a clean sheet of wax paper and a light book for 24 hours.
Sealing With an Isolation Coat and Varnish
Acrylic paintings benefit from a removable isolation coat before final varnish. Mix one part gloss medium with two parts water, brush a thin even layer across the entire painting, and let it dry for at least 24 hours. Then apply two thin coats of varnish, letting each coat dry fully. The varnish soaks into the cracks and, as forum users on r/PourPainting have noted, often visually seals fine crazing to the point where it disappears under normal lighting.
Touch-Up Techniques
If cracks remain visible after varnishing, you can spot-tint them. Thin your touch-up paint with medium (not water) until it flows like ink, then use a 10/0 brush to drag color into the crack line. Blend outward so the touch-up feathers into surrounding paint. Let it dry, then revarnish the touched-up area.
Step-by-Step Repair Guide for Peeling Acrylic Paint
Peeling needs more aggressive intervention because the paint has already lost its bond. The goal is to remove anything loose, restore the surface, and rebuild.
Removing Loose Paint Safely
Use your fingernail or a soft plastic scraper to lift flakes that are clearly detached. Do not pull on flakes that are still firmly attached, as this creates new damage. Stop scraping when you reach paint that feels solid. Vacuum or brush away all dust and flakes.
Re-Priming the Bare Area
The exposed canvas or gesso now needs fresh primer so the new paint has something to grip. Apply one or two thin coats of gesso only to the bare patch, feathering the edges so the repair blends into surrounding paint. Let each coat dry fully.
Reconstructing Lost Layers
Rebuild the painting in thin layers, letting each layer dry completely before adding the next. Match color, value, and texture carefully. Use the same paint brand and formula if possible, since different brands have different binders and finishes. When you reach the original paint level, stop and let the area cure for a week before varnishing the entire painting.
When to Repair and When to Start Over
Not every damaged painting is worth saving, and trying to repair the wrong one can waste hours and leave you more frustrated. I use this decision framework whenever a piece goes wrong.
Decision Matrix by Damage Severity
- Hairline crazing under 10% of the surface: Repair. Varnish and spot-tint.
- Localized mud cracking under 25%: Repair. Stabilize, retexture, and revarnish.
- Widespread mud cracking or alligatoring: Strongly consider starting over. The film is fundamentally compromised.
- Peeling under 15% with stable edges: Repair. Scrape, prime, rebuild.
- Peeling over 30%, or canvas itself warping: Start over. Restretch the canvas or use a new one.
Cost of Time vs Materials
Be honest with yourself about the time investment. A full repair of a 16 by 20 inch painting can take three to five days of drying time plus several hours of active work. If the canvas is inexpensive and the painting is early in your journey, the canvas is more valuable as a learning artifact than as a finished piece. Gesso over it and start fresh.
Commission and Gift Considerations
If the painting is a commissioned piece or a meaningful gift, a careful repair is almost always worth it. For commissions, repair early, document the process with photos, and let the recipient know what happened only if they ask. For gifts, frame the painting under glass if any repair is even slightly visible, since glass reduces the apparent depth of cracks.
Prevention Best Practices for Future Paintings
Every cracking or peeling problem is easier to prevent than to fix. These ten habits have kept my own work clean for years.
- Apply paint in thin layers, building up gradually rather than laying it on thick.
- Let each layer dry completely before adding the next, ideally overnight for thick layers.
- Always prime raw canvas with at least two coats of quality gesso.
- Avoid diluting acrylic with more than 25% water. Use medium for thinning instead.
- Never mix oil and acrylic in the same painting without a proper isolation coat.
- Keep your studio between 18 and 24°C (65 to 75°F) with moderate humidity.
- Paint in indirect light rather than direct sun or under heat lamps.
- Clean and lightly sand slick surfaces before painting for better grip.
- Apply a removable isolation coat before your final varnish.
- Varnish finished paintings to seal them against moisture and abrasion.
Choosing the Right Mediums, Primers, and Varnishes
The right materials make prevention almost automatic. Here is a quick guide to what each product does and when to reach for it.
Medium Comparison for Flexibility
Acrylic mediums change the working properties of your paint without changing the color. Gloss medium keeps the film flexible and clear, matte medium adds softness but a touch of haze, and gel medium builds texture without making the film brittle. For paintings that may flex or where cracking is a known risk, lean toward gloss medium in your mixes.
Primer Comparison for Adhesion
Standard acrylic gesso works on most canvases and boards. For slick surfaces or unusual substrates, look for an adhesion-promoting primer that contains a bonding agent. For highly absorbent surfaces, use a sizing first to seal the pores, then gesso over it.
Varnish Comparison for Protection
Polymer varnish is the modern standard for acrylic paintings. It is water-clear, removable with ammonia, and protects against dust, UV, and minor abrasion. Spray varnish is ideal for textured surfaces because it does not pool in the recesses. Brush-on varnish gives a smoother finish on flatter work. Whichever you choose, always apply it over a fully cured painting and a removable isolation coat.
Frequently Asked Questions
How to fix cracked acrylic paint on canvas?
Stabilize the paint film with a thin coat of gloss medium, let it dry, then apply a removable isolation coat and two thin coats of varnish. The varnish soaks into the cracks and visually seals fine crazing. For wider cracks, spot-tint with thinned paint and feather outward before revarnishing.
Why does acrylic paint crack on canvas?
Acrylic paint cracks when the dried film shrinks or moves more than it can stretch. Common causes include applying paint too thick, pouring too deep a layer, painting in heat or low humidity, or layering rigid paint over a still-curing soft layer. Uneven drying of thick layers is the most frequent trigger.
Why is my paint cracking and peeling?
Cracking is a film problem caused by internal stress during drying. Peeling is an adhesion problem caused by paint losing grip on the canvas or on the layer beneath it. If cracks are flat to the surface, you are seeing cracking. If flakes lift away from the canvas, you are seeing peeling. Each problem needs a different fix.
How do I stop my acrylic paint from cracking?
Apply paint in thin layers, let each layer dry fully, use medium instead of water to thin paint, prime your canvas with at least two coats of gesso, paint in moderate temperature and humidity, and finish with a removable isolation coat plus two coats of varnish. These habits prevent most cracking before it starts.
Conclusion
Acrylic paint cracking or peeling on canvas is frustrating, but it is also one of the most diagnosable problems in acrylic painting. Cracking comes from film stress, usually because paint was applied too thick or dried too fast. Peeling comes from adhesion failure, usually because the surface was not prepared properly. Once you can tell the two apart, the fix is straightforward: stabilize cracked paint with medium and varnish, or rebuild peeling paint over a fresh coat of gesso.
Your next painting will go better if you commit to thin layers, full drying between coats, and a proper primer and varnish routine. I have been painting for years and I still get the occasional crack when I rush. When it happens, I follow this guide, repair what I can, and learn from what I cannot. You will too.