
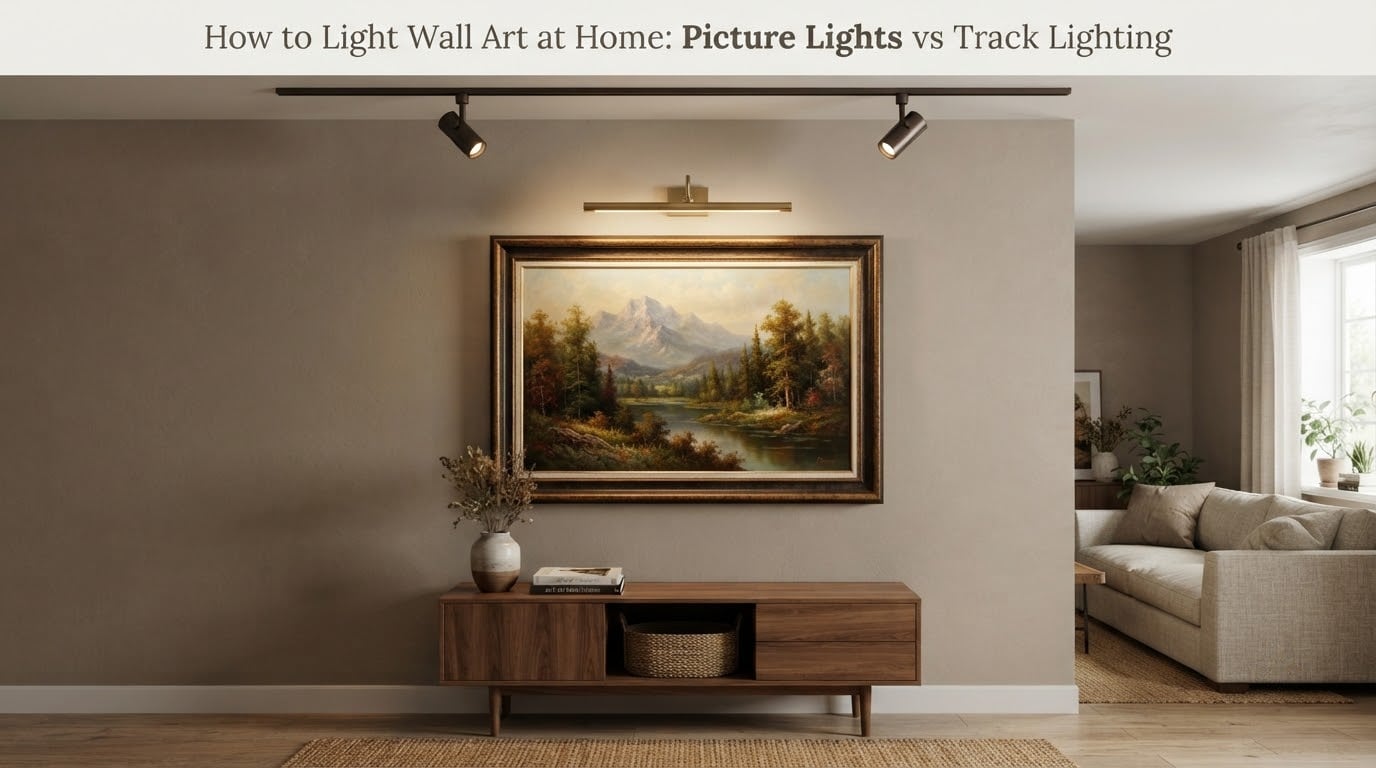
Most art on a home wall is lit badly, and it is almost never because the fixture is cheap. It is bad because the light sits at the wrong angle, the wrong distance, or the wrong color quality, so the artwork reads flat and casts its own shadow onto the wall behind it. The good news is that the fix is a measurement and a light bulb choice, not a renovation.
This guide covers how to light wall art at home, with a straight comparison of picture lights versus track lighting so you can decide which system fits your walls, your art, and how often you plan to change it. We have also worked through the placement math, the color temperature and CRI numbers that actually matter, room-by-room layouts, and what to do if you rent and cannot drill into a wall.
Short version, in case you want the answer first: for most homes, track lighting offers flexibility; picture lights suit permanent single-piece displays. Keep reading for the details behind that split.
Table of Contents
- Picture Lights vs Track Lighting: Quick Comparison
- How to Light Wall Art at Home: The Five-Step Method
- Understanding Your Artwork Type Before You Buy a Fixture
- Picture Lights Explained: Types, Sizing, and Installation
- Track Lighting Explained: Systems, Placement, and Beam Control
- The 30-Degree Rule: How to Calculate Fixture Distance From the Wall
- LED Essentials: CRI, Color Temperature, and UV Protection
- Lighting by Room: Gallery Wall, Above Sofa, Staircase, and Hallway
- Installation: DIY vs Hiring an Electrician, Plus Renter-Friendly Options
- Artwork Conservation and Long-Term Care
- Frequently Asked Questions
- Conclusion: Pick the Light That Matches How Your Art Changes
Picture Lights vs Track Lighting: Quick Comparison
Picture lights and track lighting both put controlled light on artwork, but they solve the problem in opposite ways. A picture light is a single fixture dedicated to one piece, mounted on the wall or the frame itself. Track lighting is a ceiling-mounted rail with heads you slide and aim wherever the collection needs them.
Here is how the two compare across the six criteria that decide the outcome:
Best for permanent single artwork: Picture lights win. The fixture is sized and aimed for one piece and never needs adjusting again.
Best for a rotating collection or gallery wall: Track lighting wins. Heads slide along the rail and pivot, so a new arrangement takes minutes.
Installation effort: Picture lights are simpler. Plug-in models need a nearby outlet, and hardwired models need a small hole in the wall. Track lighting needs a live circuit run to the ceiling, and that is real electrical work.
Visual footprint: A picture light adds a visible fixture on the art wall, which some homeowners love as a detail. Track lighting disappears into the ceiling and keeps the art wall completely clean.
Glare on glass or acrylic work: Picture lights are easier to control because the aiming is fixed and repeatable. Track heads are flexible but must be re-aimed every time the framing changes.
Maintenance: Picture lights have one fixture to service. Track lighting has multiple heads, each with its own aim, and they drift out of alignment as the rail settles and as the art changes.
The decision rule is simple. If the art on that wall will change more than once a year, choose track lighting. If it will not, choose a picture light and do not pay for flexibility you will never use.
How to Light Wall Art at Home: The Five-Step Method
Every good lighting setup, no matter the fixture, follows the same order of operations. Work through these five steps in sequence and you will get gallery-quality results on a home budget.
Step 1: Measure the wall, not the artwork
Measure the ceiling height of the room, the distance from the art wall to the opposite wall or nearest furniture, and the width and height of the frame or canvas itself. The ceiling height is the single most useful number because it drives the placement calculation in step 3. Write all three down before you shop.
Also note the ceiling construction. Popcorn and heavy texture make track rail mounting harder, while a smooth flat ceiling takes standard mounting plates with no fuss.
Step 2: Match the fixture to the fixture life
Choose picture lights for art that stays put, and track lighting for art that moves. If you have three framed prints on one wall, a single properly sized picture light bar is usually a better result than three small fixtures. If you have a twelve-frame gallery wall you rearrange each season, one rail with three or four heads is the only sane answer.
Skip the middle option. Many homeowners buy one narrow spot per small piece, then discover each one lands on the wall beside the frame instead of the frame itself.
Step 3: Position the light at 30 degrees from vertical
Aim the beam so it strikes the artwork at roughly a 30-degree angle from the wall, which is what avoids the shadow frame that ruins so much home lighting. Nearly every lighting designer we studied cited the same figure, and nearly every homeowner we read about struggled to measure it. There is a formula for that in its own section below.
Step 4: Set the color quality before the brightness
Choose a bulb with a Color Rendering Index of 90 or higher, and 95 or higher for valuable work, so the artwork shows its real colors rather than a dull approximation. Then pick color temperature by room mood, not by fixture habit. Getting these two right does more for how the art looks than doubling the brightness.
Step 5: Dim it, then fine-tune at night
Art lighting should never be the brightest thing in a room. Install a dimmer, or use a fixture with adjustable output, and set the level so the artwork is clearly readable but still feels like part of the room. Check the setup at night, because a lighting arrangement that looks correct at midday usually looks harsh after dark.
One habit worth adopting: photograph the finished wall in the evening, then look at that photo rather than your memory of it. The eye adapts to any lighting after a few minutes, and a photo does not.
Understanding Your Artwork Type Before You Buy a Fixture
The medium changes what good lighting looks like. A glossy oil painting wants a narrow beam and controlled glare, a matte watercolor wants a soft even wash, and a black-and-white photograph wants color accuracy above almost everything else. Getting this wrong is why some well-lit walls still look dull.
Here is a quick reference by medium:
Oil paintings: Traditional impasto and varnish surfaces reflect light sharply, so use a narrow beam, aim it away from the top edge, and keep the fixture adjustable. Traditional varnished oil is also more sensitive to heat and infrared than acrylic, so LED lighting is the safer choice. Recommended color temperature sits near 3000K, and CRI 90 or higher is the floor.
Acrylic paintings: Acrylic is the most forgiving medium. It is flexible, matte to glossy depending on the artist, and it is not UV-sensitive, so a standard LED picture light with CRI 90+ handles it easily. Color temperature is a matter of room mood rather than art protection.
Watercolors and works on paper: Paper is delicate and usually framed under glass or acrylic, which is where glare becomes the main problem. Use a wide, soft wash instead of a tight spot, angle the light so its reflection does not bounce into the room, and keep output low. Dimmability matters more here than in any other medium.
Photography prints and posters: These are almost entirely a color fidelity question. Black-and-white images need high CRI so the tonal range reads properly, and glossy prints need glare control for the same reason as glass. A 90+ CRI bulb at 3000K to 4000K handles almost any photographic print.
Sculpture and three-dimensional work: Direction matters more than evenness. A single raking light from one side at roughly 30 degrees creates the shadow that reveals form. Even wall washing flattens a sculpture, which defeats the point of having one.
Match the medium first, then the fixture. The reverse order is what leads people to buy a beautiful fixture that cannot actually do the job.
Picture Lights Explained: Types, Sizing, and Installation
A picture light is a shade on an arm that mounts to the wall above the frame or directly to the frame itself. It is the oldest and most traditional way to light art, and it remains the most forgiving for a single piece.
The fixture styles you will find
Wall-mounted with a picture light bar: A long shade, often with two lamps, mounted above the frame. This is the standard for traditional and classic interiors and handles medium-to-large pieces well.
Frame-mounted slim lights: A very thin fixture attached to the top edge of the frame itself. It travels with the art when you move it, which makes it the easiest DIY option and a favorite among renters and collectors who rotate work often.
Plug-in picture lights: Mount to the wall but cord to a nearby outlet. No wiring, no electrician, and they can be repositioned when the art changes.
Adjustable swing-arm lights: A wall plate with an arm that extends and pivots. Useful when the art wall has deep trim or the frame sits proud of the surface.
Picture light sizing: the 2/3 rule
The sizing guideline that appears most often in professional guidance is the 2/3 rule: the fixture should be roughly two-thirds the width of the frame or the wall segment it lights. This is the number to use, because a fixture that matches the frame width exactly tends to look undersized, while one that runs full wall width spreads its output thin.
For very large canvases, the convention inverts. When the art is wider than about six feet, a single narrow fixture looks lost, and either a long picture light bar sized near the full canvas width or a pair of track heads works better. Sculptural and textured pieces benefit from a slightly higher output because the surface catches light at many angles.
Installation realities
Plug-in models need an outlet within a few feet of the fixture and may need a cord cover painted to match the wall. Hardwired picture lights need a small hole, a cable run, and a switch location, which is electrician territory if you are not comfortable with basic wiring. Frame-mounted lights need no wall work at all, since the weight sits on the frame itself, though you should confirm the frame is sturdy enough.
One practical note from lighting forums: many homeowners buy a slim fixture expecting it to look invisible and end up with a visible chrome bar above a rustic canvas. Match the fixture finish to the room hardware, not to the art.
Track Lighting Explained: Systems, Placement, and Beam Control
Track lighting is a ceiling-mounted rail with heads that slide and pivot. It is the standard in galleries and museums for one reason: the same rail can light a single painting today and a twelve-piece wall next year without any new hardware.
Understanding the rail types
There are three legacy rail standards, and confusing them is the single most common track lighting mistake reported on home forums.
H-track: The most common residential standard.
J-track: The older commercial standard, still found in many existing homes.
L-track: A less common variant.
The head must match the rail. Heads are not interchangeable between H-track and J-track, and this is worth confirming before ordering anything.
Beam types and why they matter
Spot (narrow) beams concentrate light into a tight circle. Use one per single frame, and use them on oil paintings and sculpture where a shaped pool of light looks intentional.
Flood (wider) beams spread light across a broader area. Use them on gallery walls, wide canvases, and paper works where a tight spot would leave the edges dark.
Adjustable zoom heads let you narrow or widen the beam at the fixture rather than swapping hardware. For a home collection that changes, these remove most of the guesswork.
Homeowners frequently complain that track heads are too narrowly focused by default, which produces the small hard circle of light surrounded by dark wall. Wider floods or zoom heads solve it, and so does simply adding a second head rather than cranking up the brightness on one.
Glare control and lens choice
Glare on glass and acrylic glazing is the number one lighting complaint in home art discussions. It happens when the beam reflects off the glazing toward a seated viewer. The fix is optical rather than electrical: baffle or framing projector lenses block the light from side angles, and setting the head at 30 degrees with the viewer off-axis keeps the reflection out of the seating area.
Be aware of specular highlights. Glossy varnish, resin, and acrylic-coated prints produce a bright hotspot wherever the beam hits directly, so slightly dimming or widening the beam is often better than adding power.
How many heads to add
For a single artwork, one head aimed at the center of the piece is correct. For a gallery wall, plan one head per two to three frames grouped by size, spacing them so the pools of light merge rather than overlap. For a very wide canvas, two heads at roughly a third and two-thirds of the width, both angled inward, distribute the light far more evenly than one head at the center.
The 30-Degree Rule: How to Calculate Fixture Distance From the Wall
How far a light should sit from the wall comes down to one rule used across museum and residential lighting: aim the light at the artwork from about 30 degrees off vertical. At that angle, the beam rakes down across the surface, the frame casts a soft shadow instead of a hard one, and the eye reads the artwork as dimensional rather than flat.
The math is simpler than most guides make it sound. Multiply the distance from the ceiling to the center of your artwork by 0.7, and that gives you the distance the light should sit away from the wall.
Worked example one: standard ceiling. Ceiling at 8 feet, artwork center at 5 feet. Drop from ceiling to art center is 3 feet. Multiply by 0.7 and you get 2.1 feet. The track head or fixture sits about 2 feet out from the wall.
Worked example two: high ceiling. Ceiling at 12 feet, artwork center at 7 feet. Drop is 5 feet. Multiply by 0.7 and you get 3.5 feet. The light moves further out, which is exactly what the formula is telling you: taller rooms need fixtures further from the wall to preserve the same angle.
Worked example three: low ceiling over a sofa. Ceiling at 8 feet, artwork center at 6 feet. Drop is only 2 feet, giving 1.4 feet. On a low ceiling the track rail will sit close to the wall, and this is normal. If the resulting beam looks too shallow, that is a sign the art is hung too low for the room, not that the calculation is wrong.
To check your angle on site, stand to the side of the artwork at normal viewing distance and look at the head. If you can see the glowing face of the lamp, it is aimed too shallow and will produce glare. If the face is hidden by its own housing, the angle is right.
A second rule worth knowing is the 3x rule for intensity. Accent light on artwork is generally set at roughly three times the ambient light level of the surrounding wall, which is what creates the sense that the piece is lit. If your artwork does not look like the focal point, it is almost always under-lit rather than mis-aimed.
LED Essentials: CRI, Color Temperature, and UV Protection
LED is the only sensible light source for artwork today. It runs cool, produces negligible ultraviolet output, uses a fraction of the energy, and lasts far longer than the incandescent bulbs this advice used to center on.
CRI: the number that decides whether colors look right
Color Rendering Index, or CRI, measures how accurately a light source reproduces colors compared with a reference. For artwork, CRI 90 is the accepted minimum, and CRI 95 or higher is the standard for valuable work, according to collectors and lighting professionals alike. A low-CRI bulb will make a red painting look brown and a blue painting look grey, and no amount of extra brightness fixes that.
Check the CRI on the fixture, not just the bulb, because some fixtures are designed to hide low-CRI lamps.
Color temperature: Kelvin values by room
Color temperature is measured in Kelvin, and lower numbers read warm while higher numbers read cool.
2700K to 3000K: Warm and flattering, ideal for living rooms, bedrooms, and traditional interiors. This is the range most often recommended for homes.
3500K to 4000K: Neutral to daylight-balanced, often cited as the ideal band for artwork because it renders color accurately without a yellow or blue cast. Photography professionals frequently point to 3700K to 3800K as the sweet spot.
5000K and above: Daylight range. Crisp and modern, but it flattens warm palettes and makes some homes feel clinical. Use it only where the room already runs cool.
Consistency matters as much as the number. Mixing fixtures at different temperatures on one art wall is more distracting than any single temperature being slightly off.
UV, infrared, and heat
Ultraviolet radiation is the slow killer of artwork. It fades dyes, degrades paper, and weakens fabric, and the damage is irreversible. Good LED bulbs emit essentially no ultraviolet output, which removes the need for UV-filtering glazing on new work. The same is not true of incandescent or halogen lamps, which is why museums moved to LED decades ago.
Infrared radiation is the less discussed issue. It carries heat, and repeated exposure causes physical stress, cracking, and embrittlement, especially in older paintings and works on paper. LEDs produce negligible infrared, so they are the safe default for a collection.
Also aim for long rated life. A rated lifespan of 50,000 hours or more means you are unlikely to have to climb a ladder with a screwdriver in hand over the life of the art.
Output, beam angle, and dimming
For most home artwork, lumen figures matter far less than people expect. What matters is concentrated intensity on the artwork surface and even coverage across the frame. That is why one properly aimed 500-lumen head beats three bright heads pointed at the wall beside the painting.
Dimmability is worth paying attention to. It is how you set the 3x intensity ratio in the evening, how you keep glare off glossy work, and how the art fits a room with other lighting turned down. Most quality LED drivers support dimming, but confirm before installing.
Lighting by Room: Gallery Wall, Above Sofa, Staircase, and Hallway
Most lighting advice stops at the generic wall. Real rooms each have a geometry that changes the answer, and getting the specific case right matters more than any fixture specification.
Gallery walls
A gallery wall is many frames at mixed sizes, so even coverage beats precision. Use two or three flood or zoom heads on a single rail, space them across the wall, and aim each at the center of a frame group rather than at a gap. Adjustable zoom heads make this much easier because you can widen the pool to cover a large cluster and narrow it for a small one.
Keep the whole wall one temperature and one CRI. Mixed sources on a grid of frames make the arrangement look accidental.
Above a sofa
Artwork above a sofa is the most common residential placement and the most frequently botched. The classic problem is a low ceiling, which forces a shallow angle and produces glare. Hang the piece higher than you first think, leaving 6 to 8 inches above the sofa, and use a rail set further from the wall so the 30-degree angle still holds.
Avoid a picture light here unless it is slim and low-profile, because a traditional shade on a short wall projects a hard shadow down the wall. When the art is wide, two heads aimed inward at roughly a third and two-thirds of the width look far better than one.
Staircases
Staircases are the hardest residential case and the least discussed. The ceiling is sloped, the viewing angle changes as people move, and the art is often hung at an angle to follow the stair line. Use a sloped-ceiling track or wall-wash fixture mounted to the rake, and aim each head at the piece from the side people approach from rather than from above.
Light the treads separately with a different system. Stair lighting is a safety requirement, and art lighting should never be doing that job.
Hallways
Hallways reward small, well-directed light and punish anything that creates a hotspot on a wall. A narrow rail with one or two narrow spot heads, aimed at the center of each piece, reads better than a single wide wash. Keep output low, since a hallway is usually dim by design and the eye adjusts quickly.
Dining rooms and bedrooms
In a dining room the art is competing with a table pendant and people in motion, so aim for a controlled, slightly brighter pool and accept that it is not the only light in the room. In a bedroom, keep art lighting dimmable and low, since the wall is usually seen from a reclined position where a downward wash lands right in the eyeline.
Installation: DIY vs Hiring an Electrician, Plus Renter-Friendly Options
Cost is the most cited hesitation about track lighting, and the honest answer is that the fixtures are the smaller half of it. A picture light bar or plug-in fixture is a modest project, while a new ceiling track with a live circuit run is genuine electrical work in most homes.
When DIY makes sense
Handle it yourself if the fixture is plug-in, if the frame-mounted style is all you need, or if you are mounting a rail to an existing junction box that is already in the right place and your local rules allow homeowner work at that level. Check your local code and your lease before assuming.
When to hire an electrician
Bring in a professional for any new ceiling circuit, for extending power to a spot with no outlet, for a sloped or textured ceiling, for a room where the panel is full, and for anything in a historic or rental property you do not own outright. Professionals consistently note that a track system is only as good as the circuit feeding it, and an undersized run leads to flicker and dimming that people blame on the fixtures.
Professional installers also handle the aiming. A contractor can set the whole wall in one evening, which is worth it on a large gallery wall or a room with several pieces.
Renter-friendly, non-permanent options
If you cannot drill, the constraint is less limiting than it used to be.
Frame-mounted lights: The simplest solution by far. They attach to the top edge of the frame, carry no wall modifications at all, and move with the art.
Plug-in picture lights: Cord to a nearby outlet and use removable anchors or adhesive mounting plates for the wall plate.
Battery-powered and wireless lights: Cordless fixtures avoid wiring entirely and are popular with renters for exactly that reason. Battery life and light output are both lower than wired fixtures, so treat them as accent lighting rather than the room’s main source.
Adhesive-mounted track alternatives: Plug-in track systems with surface-mounted junction boxes let you run a rail without touching the wiring in the walls.
Light socket adapters: Fixtures that adapt to an existing ceiling socket, useful where there is a pre-existing fixture location near the art wall.
One honest caution: adhesive-mounted hardware on painted drywall can lift the paint when removed. Test on an inconspicuous spot, and prefer a removable hook-and-loop rated for the weight over a permanent adhesive strip.
Artwork Conservation and Long-Term Care
Lighting is a preservation decision, not just a design one. The goal is to display the art often and light it well while keeping cumulative exposure low, and modern LED makes that balance easy to strike.
Managing cumulative exposure
Conservators speak in terms of lux-hours, the product of light intensity and duration, because damage accumulates and does not reverse. Three principles cover most of it: use the lowest intensity that shows the art well, use the shortest exposure time that suits the room, and use LED sources that emit essentially no ultraviolet output.
UV, heat, and the sources you did not install
Fixtures are rarely the main threat in a home. Direct sunlight through a window fades dyes and paper far faster than any lamp, and it moves across the day and across the season. Keep works off sun-facing walls, and use window treatments that filter ultraviolet on the nearest glass.
Heat and humidity follow the same logic. Avoid positioning artwork above a radiator, near a fireplace, or on an exterior wall that runs warm. Stable conditions matter more than perfect ones, and rapid swings are worse than a moderately warm room.
Physical care for the fixtures
A simple schedule keeps things safe and looking right. Dust the shades and rail every few months, more often in a home with pets or cooking. Check that track heads have not drifted out of alignment, which happens as the rail settles. Confirm dimmer compatibility if you change bulbs, and replace lamps as a set rather than one at a time so the color stays consistent across the wall.
Frequently Asked Questions
What is the best lighting for wall art?
The best lighting for wall art is a dedicated accent source aimed at about 30 degrees from the wall, using high-CRI LED bulbs at 90 or above. A picture light suits a single permanent piece, while track lighting suits a wall where the art changes. A narrow spot for oil paintings and sculpture, a wider flood for gallery walls and paper works, and dimmable output for glare-prone glazed pieces.
Are track lights outdated?
No. Track lighting is the standard in galleries and museums precisely because it is adaptable. What changed is the fixture quality: older budget heads produced narrow, harsh spots, while modern LED track heads with adjustable beam angles, framing projector lenses, and high CRI render artwork far better. If track lights look dated in a room, the issue is usually the trim and lens rather than the system itself.
What is the 2/3 rule for wall art?
The 2/3 rule says the picture light should be roughly two-thirds the width of the frame or wall segment it lights. A fixture the same width as the frame reads as undersized, while one spanning the entire wall spreads its output too thin. For canvases wider than about six feet, the convention reverses and you want a long light bar or two track heads instead.
How far should a track light be from artwork?
Measure the drop from your ceiling to the center of the artwork and multiply it by 0.7. That gives the distance the light head should sit out from the wall, which preserves the standard 30-degree aiming angle. An 8-foot ceiling with the art center at 5 feet needs the head about 2.1 feet off the wall. Taller ceilings push the fixture further out.
What color temperature is best for artwork?
Most guidance points to 3000K for warm living spaces and roughly 3500K to 4000K for the most accurate color rendering, with 3700K to 3800K often cited as the ideal midpoint for art. The bigger mistake is mixing temperatures on one wall, so pick one Kelvin value and use it across every fixture lighting that art.
Can lighting damage artwork over time?
Yes, though modern LED makes the risk small. Ultraviolet radiation fades dyes and degrades paper, and infrared heat causes cracking and embrittlement in older work. Quality LED bulbs emit essentially no ultraviolet output and negligible heat, so they remove the main lamp-based risk. In most homes the larger threat is direct sunlight through a window, so keep works off sun-facing walls.
Do I need an electrician to install track lighting?
It depends on whether you are connecting to an existing circuit. Mounting a rail to an existing junction box in a convenient location can be a homeowner job where local code allows it. A new ceiling circuit, an extension to a wall with no outlet, a sloped or textured ceiling, or a full panel generally calls for a licensed electrician.
Conclusion: Pick the Light That Matches How Your Art Changes
Learning how to light wall art at home comes down to three things, and none of them involve buying more fixtures. Aim the light at 30 degrees from the wall, use the ceiling-to-art-center measurement times 0.7 to find how far out the fixture belongs, and specify a bulb with CRI 90 or higher at a single consistent color temperature.
Then choose the system that fits your actual habits. If the art on that wall stays where it is, a properly sized picture light is the cleaner answer. If you rotate pieces, move collections, or light a gallery wall, one rail with a few adjustable heads will serve you for years without new hardware. And if you cannot drill at all, frame-mounted and plug-in options now handle most single pieces.
Start by measuring the ceiling height and the drop to the center of your artwork. Those two numbers decide the rest, and they take about five minutes.