
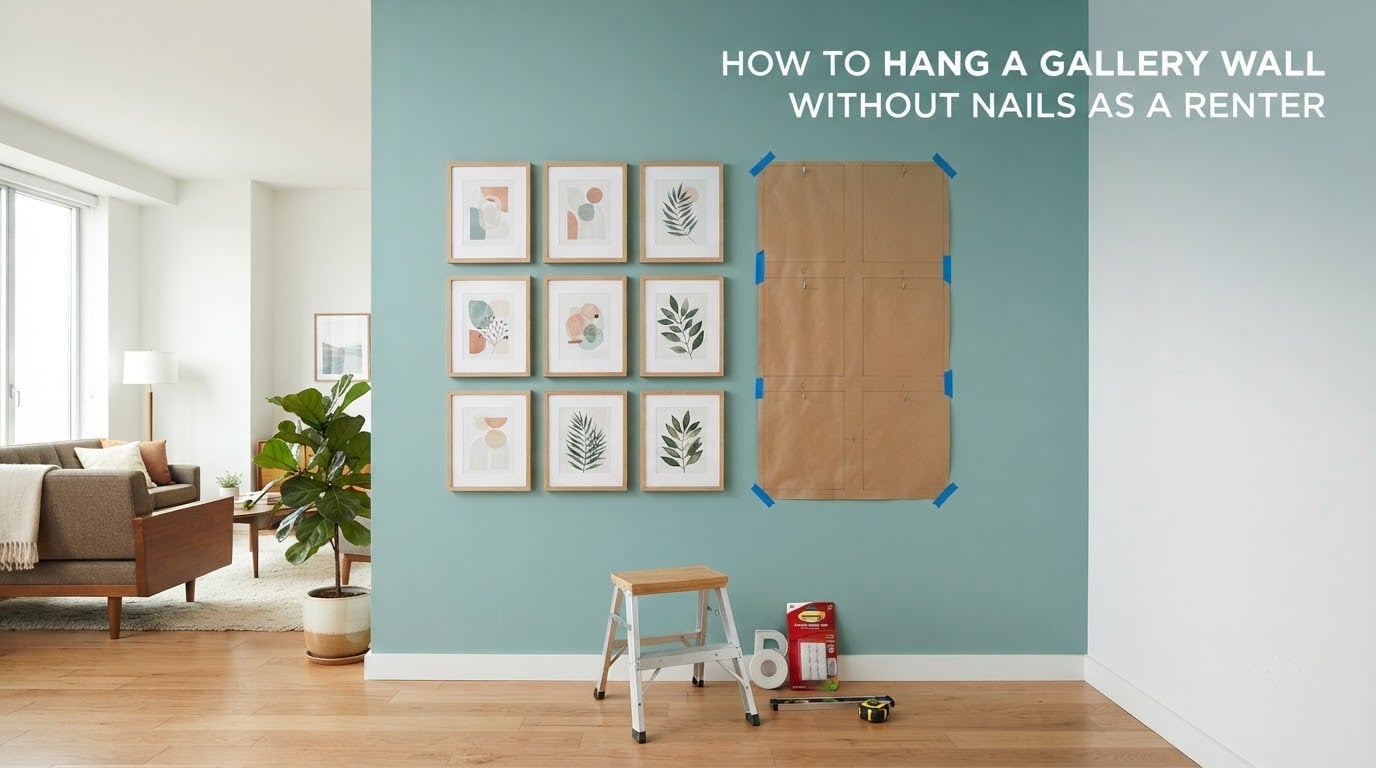
Yes, you can hang a full gallery wall without a single nail or screw, and the method that works is simpler than most guides make it sound. You group and size your frames on the floor, transfer that arrangement to the wall with a paper template, bond picture hanging strips or hook-and-loop tape to clean painted drywall, and press each one for 30 seconds. Then you wait before you add weight.
The whole approach rests on three things: knowing what your wall is made of, respecting the real weight limit rather than the number on the box, and pulling everything off at move-out slowly enough that the paint stays put. Get those three right and a renter friendly gallery wall is genuinely routine.
Below is the full process, in the order I would actually do it. I have run this sequence across dozens of apartment walls with everything from nine small prints to a dense grid above a sofa.
Table of Contents
- How to Hang a Gallery Wall Without Nails: The 6-Step Method
- 5 Nail-Free Ways to Hang a Gallery Wall in a Rental
- What Kind of Wall You Have Changes Everything
- How to Plan a Gallery Wall Layout on Paper
- What Is the 2/3 Rule for Hanging Pictures?
- How to Match Frame Hardware to the Right Strip
- How to Hang a Gallery Wall Step by Step
- How Much Weight Can Strips Really Hold?
- Will Command Strips Damage Drywall?
- When Adhesive Will Not Work
- How to Remove Everything Without Losing Your Deposit
- Frequently Asked Questions
- How can I hang a gallery wall without nails?
- What are some renter-friendly ways to hang paintings?
- How to hang art in a rental?
- What is the 2/3 rule for hanging pictures?
- How to hang something heavy renter friendly?
- How heavy is too heavy for Command strips?
- Are Command picture hanging strips renter friendly?
- Can Command strips really hold 20 lbs?
- Conclusion
How to Hang a Gallery Wall Without Nails: The 6-Step Method
- Identify your wall surface. Smooth painted drywall is the only surface where most adhesive mounting works well. Plaster, textured paint and wallpaper need a different plan.
- Group and measure every frame. Lay them all on the floor, measure each one, and decide the arrangement style: grid, salon, or salon-climbing.
- Build a paper template. Trace each frame at scale onto butcher paper, tape the pieces together, and mark the wall.
- Match hardware to method. Check the back of each frame for D-rings, a wire back, a sawtooth hanger or a keyhole, and pick strips or hooks that fit.
- Prep, press and cure. Wipe the wall with isopropyl alcohol, press each strip 30 seconds in place, and wait before hanging anything.
- Hang and verify. Add frames one at a time, gently test each, and photograph the finished wall for your move-out record.
5 Nail-Free Ways to Hang a Gallery Wall in a Rental
Adhesive strips are the standard, but they are not the only option. These are the five methods that hold up for renters, roughly in order of how many frames each can carry.
- Picture hanging strips. Wide strips that bond along the full top edge of a frame. Best for a dense wall of small-to-medium frames, and the least visible once hung.
- Command-style strips and hooks. Convenient and repositionable, but rated for a single smaller object. Several landlords say they charge for paint pulled by these, so use them for light pieces only.
- Hook-and-loop tape. Pairs that let you lift a frame off the wall without touching the strip. Best when you want to change the arrangement often.
- Larger adhesive clips or gel pads. A middle tier for medium frames, useful when a strip is too narrow for the frame width.
- No-wall displays. A leaning floor arrangement, a styled shelf, a tension rod wall, or a freestanding grid. Zero contact with the paint, and zero risk at inspection.
What Kind of Wall You Have Changes Everything
Every nail-free method on this page depends on a flat, clean, painted surface. Before you buy anything, run this test: press your thumb firmly into the wall. A slight dent and a soft, powdery surface means drywall. A hard, cool surface that sounds hollow means plaster or a plaster-lite wall. A bumpy surface you can feel is texture. Those three need three different approaches.
| Wall surface | Adhesive that works | What to avoid |
|---|---|---|
| Painted drywall, matte or eggshell | Picture hanging strips, hook-and-loop, VHB-style tape | Nothing, provided the wall is clean and the paint is cured |
| Painted drywall, semi-gloss or gloss | Extra surface cleaning, longer cure, one weight band down | Direct mounting without testing a small patch first |
| Fresh paint, under a few months old | Wait, or use a no-wall method | Anything adhesive. New paint is soft and peels as a sheet |
| Plaster, pre-1978 | Adhesive only on a tested spot, staying well under the rating | Drilling without knowing what is behind the plaster |
| Textured or popcorn ceiling wall | Nothing adhesive. Use leaning art or a shelf | Every strip and hook, without exception |
| Wallpaper | Removable hooks for light items only | Anything that can tear paper or leave adhesive in the seams |
Humidity matters more than most guides admit. In a bathroom, a kitchen above the sink, or a sunroom, adhesive bonds are working against moisture all day, and renter reports in the forums point to bathrooms as the single most common failure room. If the wall is damp, use a no-wall display instead.
How to Plan a Gallery Wall Layout on Paper
This is the step every other guide skips, and it is the reason most gallery walls look wrong. You cannot eyeball a layout on a wall. You build it flat, where nothing is at stake, and move it around until it looks right.
Build the template
- Lay every frame face-down in a row and measure the exact width and height of each, outside edge to outside edge, not including the frame’s outer lip.
- Scale the whole arrangement down to fit a sheet of butcher paper. A 12 by 18 inch frame becomes 3 by 4.5 inches at quarter scale.
- Trace each frame onto the paper and cut it out. Label the back of each paper shape with the frame’s weight and which strip it uses.
- Arrange the cutouts on the floor in your chosen style until the edges and gaps look intentional.
- Tape the cutouts into one sheet, then poke small holes through the centre of each one and at the corners.
- Hold the sheet against the wall, mark through the holes with a pencil, and step back before you remove anything.
The corner marks are what let you re-hang the exact same layout later, even after you move the pieces around. That single habit turns a gallery wall from a permanent commitment into something you can redo in twenty minutes.
| Layout style | How it works | Best in | Renter difficulty |
|---|---|---|---|
| Grid | Identical gaps between frames, aligned rows and columns | Living rooms and entryways with a sofa or console underneath | Easy. Even spacing hides small alignment errors |
| Salon | Loose organic cluster, frames nearly touching, edges not aligned | Narrow walls, awkward corners, behind a bed | Harder. Every frame is visible, so nothing hides |
| Salon-climbing | Salon cluster that steps upward toward one side | Staircases, sloping ceilings, rooms with one strong horizontal | Medium. Keep the outer edge straight to avoid a sagging look |
Spacing that reads as intentional
Two to three inches of consistent gap is the range most designers land on for a grid. Measure the gap twice, not once, because frames are rarely the exact size on the label. If you have a mirror in the mix, treat it as an anchor and hang it first, centred, with the smaller frames arranged around it.
What Is the 2/3 Rule for Hanging Pictures?
The 2/3 rule says the bottom of your lowest frame should sit roughly two thirds of the way up the wall from the floor, or about 6 to 8 inches above the top of a sofa, bed or console. A quick calculation: measure the room height, divide by 1.5, and mark that height on the wall. The middle of the arrangement belongs at that line.
Why it works is because art hung near eye level feels connected to the people in the room, while art hung high reads as leftover furniture rather than a decision.
How to Match Frame Hardware to the Right Strip
Flip each frame over before you plan anything. The back tells you what hardware you are dealing with, and that determines the method.
- D-rings on the back: a wire runs between two of them, leaving a loop. This is the easiest case. Attach one strip to the wall and hook the wire loop over it, or use two strips for width.
- Wire back: a single wire stretched across the full width. Works with a wide strip running along the top edge, but the strip must be at least as wide as the frame is heavy-friendly.
- Sawtooth hanger: a metal tooth that sits in a sawtooth slot. Hooks work well, but flat strips do not sit flat against this frame.
- Keyhole hanger: a keyhole-shaped slot near the top. Needs a hook, or a small pin that grips the slot. This is the hardest type to hang on adhesive.
- No hardware at all, or a backing board: a single wide strip along the top edge is the cleanest option.
Frames with glass are worth flagging. Rigid strips can stress the glass over time, so use a hook-and-loop pair or a clip for those, and never hang glass by its wire with a narrow strip.
How to Hang a Gallery Wall Step by Step
Once your layout is marked, the actual hanging takes about thirty minutes and most of that is waiting.
- Clear the wall. Wipe the marked area with isopropyl alcohol on a clean cloth, then let it dry fully. Dust, oils and fingerprint grease are the most common reason a bond fails early.
- Check the temperature. Adhesive bonds best around 65 to 75F. A cold wall in a drafty room will hold less than the same wall in a heated one.
- Apply the strips. Remove the backing and press each strip straight onto the marked spot, not at an angle. Rub firmly across the full length with your thumb for 30 seconds.
- Wait before loading it. Small items need roughly an hour, anything heavy needs up to 24 hours. Hanging the frames immediately is the most common mistake and the most common cause of a frame sliding down the wall in week two.
- Add the frames. Start with the anchor piece, the mirror or the largest frame, and work outward. Seat each frame gently rather than shoving it against the wall.
- Test and wait 24 hours. Give each frame a light, steady push to confirm it is seated, then leave the wall alone for a day before adding anything on top.
Pressing longer than 30 seconds helps. So does rubbing the strip with a flat tool along its whole length. Extra pressure at the bond line is the cheapest insurance available in this whole process.
How Much Weight Can Strips Really Hold?
Add up the weight of your frames before you buy a single strip, then divide that total across at least twice as many strip pairs as the packaging suggests. One weight band below the stated claim is the practice renters report as the safest, and it costs nothing except a larger pack.
| Method | Realistic per pair | Best frame backing | Grid wall of 8 frames? |
|---|---|---|---|
| Small Command-style hook | About 1.5 to 3 lb | Keyhole or sawtooth | Not recommended |
| Command-style strip | About 4 to 8 lb | D-rings or flat back | Workable if frames are very light |
| Picture hanging strip, small | About 4 lb | Wire back, narrow frame | Reasonable for prints under 8 by 10 |
| Picture hanging strip, large | About 12 to 16 lb | Wire back or flat back | The default choice for a dense wall |
| Hook-and-loop pairs | About 3 to 5 lb | Flat back, glass frames | Good, and the easiest to rearrange |
| Aluminum clip or gel pad | About 8 lb | Flat back, medium frame | Fills gaps between strip sizes |
| Monkey-style or toggle hook | About 20 to 50 lb | Sawtooth or keyhole | One oversized piece, not a full wall |
That 20 lb claim on a package is a laboratory figure on a smooth, clean, room-temperature surface. Renter reports suggest that in a humid room or on semi-gloss paint, real-world performance can be half of that. If your total load looks uncomfortable against these numbers, make the frames lighter instead of reaching for a stronger strip.
Two changes do most of the work. Swapping glass backing for foam-core or a thin paper mat can cut a frame weight by half. And staying under roughly 16 by 20 inches per frame keeps the load per strip pair in a range that adhesive actually holds all year.
Will Command Strips Damage Drywall?
Sometimes, and the honest answer is the most useful thing on this page. Renters report the removal outcome is close to a coin flip on painted drywall, with many describing roughly a 50/50 chance of a clean lift. Several landlords say they would charge for paint pulled by adhesive mounts, describing the damage as patchable but avoidable.
Where the damage comes from is not mysterious. It is the tape pulling faster than the paint can release. The paint is only as strong as its bond to the drywall, and on a matte finish, or on paint that is a few months old, that bond is weak. Adhesive that would hold a frame for a year can still take a piece of the top coat off in a single second-long yank.
What reduces the risk: mounting only on walls you know are smooth, matte and more than a few months past painting. Staying a weight band under the rating. Letting the bond cure fully. And when you remove, taking your time. The failure mode is almost always speed, not product.
One renter in a wall-hanging discussion described peeling strips straight down at a low angle, slowly, as the difference between a clean removal and torn paint. That is the single most repeated piece of good advice in the forums, and it costs nothing but patience.
When Adhesive Will Not Work
Some walls are simply not available to you as a renter, and forcing adhesive onto them is where deposits get lost.
- Leaning art. A row of frames resting on the floor against the wall, backed by a batten or a piece of trim for a cleaner line. This is the safest option on textured walls and it reads as intentional styling.
- Shelf styling. One long shelf with frames, small objects and a plant, letting the wall do the work indirectly.
- Tension rod. A rod wedged between two walls or inside a window recess, carrying a rail or a hanging rail of art. No holes in either wall.
- Freestanding grid. A wire grid in a wooden frame that stands on the floor, so you can change the whole arrangement whenever you like.
- Over-door and caddy systems. Hang art on the back of a door instead of the wall.
For a single genuinely heavy piece, a toggle-style hook rated well above the item is a real option. Just do not try to hang a dense multi-frame wall on them; they are built for one load, not twelve.
How to Remove Everything Without Losing Your Deposit
Plan the removal before you hang anything. Take two photos of the bare wall on the day you move in, and store them in the same folder as your lease.
- Take the frames off first, one at a time, lifting straight up and away. Do not twist a frame while it is still on the strip.
- Pull the strip tab down slowly, at a low angle, close to the wall surface, keeping steady pressure the entire way. A plastic card held against the wall helps support the tape as it releases.
- Never yank. If a strip resists, leave it and try again the next day; adhesive releases more easily once it has warmed and cooled a few times.
- Check for residue. Lift what is left with a plastic card and a little isopropyl alcohol. Dental floss held taut under the residue works well on stubborn spots. Skip metal tools, which scratch the surface.
- Wash the area gently with warm water and a mild cleaner, then dry it fully.
- Compare against your move-in photos before the walkthrough and fix any scuff or mark while the cleaning supplies are still out.
If you do end up with a small paint chip, a light touch-up with the leftover paint from moving in resolves it. A tiny nail hole is also usually patchable with spackle and one coat, which is why some renters decide a small fillable hole is the safer bet against a failed adhesive mount that takes a sheet of paint with it.
Frequently Asked Questions
How can I hang a gallery wall without nails?
Use removable adhesive picture hanging strips or hook-and-loop pairs on clean, smooth painted drywall. Plan the layout on paper first, mark the wall through a paper template, press each strip for 30 seconds, wait for the bond to cure, then add the frames one at a time. Pull the strips off slowly and parallel to the wall when you are done.
What are some renter-friendly ways to hang paintings?
The main options are picture hanging strips, Command-style strips and hooks, hook-and-loop tape for repositionable pieces, larger clips and gel pads for medium frames, and no-wall methods such as leaning art, styled shelves, a tension rod, or a freestanding grid. Weighted hardware like toggle-style hooks work for one heavy piece, but not for a dense multi-frame wall.
How to hang art in a rental?
Check your lease and ask your landlord if you plan anything beyond removable adhesive. Use strips only on smooth painted drywall that is more than a few months past painting, keep the total load at least one weight band under the packaging claim, and photograph the bare wall before you hang anything so you can show it is unchanged at move-out.
What is the 2/3 rule for hanging pictures?
The bottom of your lowest frame should sit about two thirds of the way up the wall from the floor, or roughly 6 to 8 inches above a sofa, bed or console. Divide the room height by 1.5, mark that height on the wall, and centre the middle of your gallery arrangement on that line.
How to hang something heavy renter friendly?
Use a toggle-style or Monkey-style hook rated well above the item for a single heavy piece, and choose a frame with a sawtooth or keyhole hanger that suits a hook. Keep the load well under the rating, mount it on smooth painted drywall away from humidity, and note that these hooks are not designed for a multi-frame gallery wall.
How heavy is too heavy for Command strips?
Treat small Command hooks as reliable only around 1.5 to 3 lb per pair, and larger Command strips around 4 to 8 lb per pair. Renters report that humid rooms and semi-gloss paint cut real-world performance, so add the weight of your frames and stay at least one weight band under the printed claim.
Are Command picture hanging strips renter friendly?
They are usually fine, but not guaranteed. Renters describe the removal outcome on painted drywall as close to a coin flip, and several landlords say they would charge for paint pulled by adhesive mounts. The risk drops sharply on smooth matte walls that are well past the paint drying stage, when you stay under the rating and when you pull the tab down slowly and flat against the wall.
Can Command strips really hold 20 lbs?
Sometimes, on a smooth clean surface at room temperature. That figure comes from controlled testing, and renters report noticeably weaker holds in humid rooms or on semi-gloss and fresh paint. For a gallery wall, divide the total frame weight across more strip pairs than the label suggests rather than testing one strip to its limit.
Conclusion
Learning how to hang a gallery wall without nails comes down to restraint rather than cleverness. Plan the arrangement flat, keep every frame lighter than you think you can get away with, spread the load across more strips than the packaging suggests, and let the bond cure before you touch it.
Start with the wall surface, take two photos of the bare wall, and begin with a small arrangement you can adjust after a week. Once you know how your paint responds, scaling up to a full wall is straightforward.
And if the surface is textured, the paint is fresh, or the frames are simply too heavy, switch to a leaning arrangement or a shelf. Nobody in your home will know you did not use a nail.