
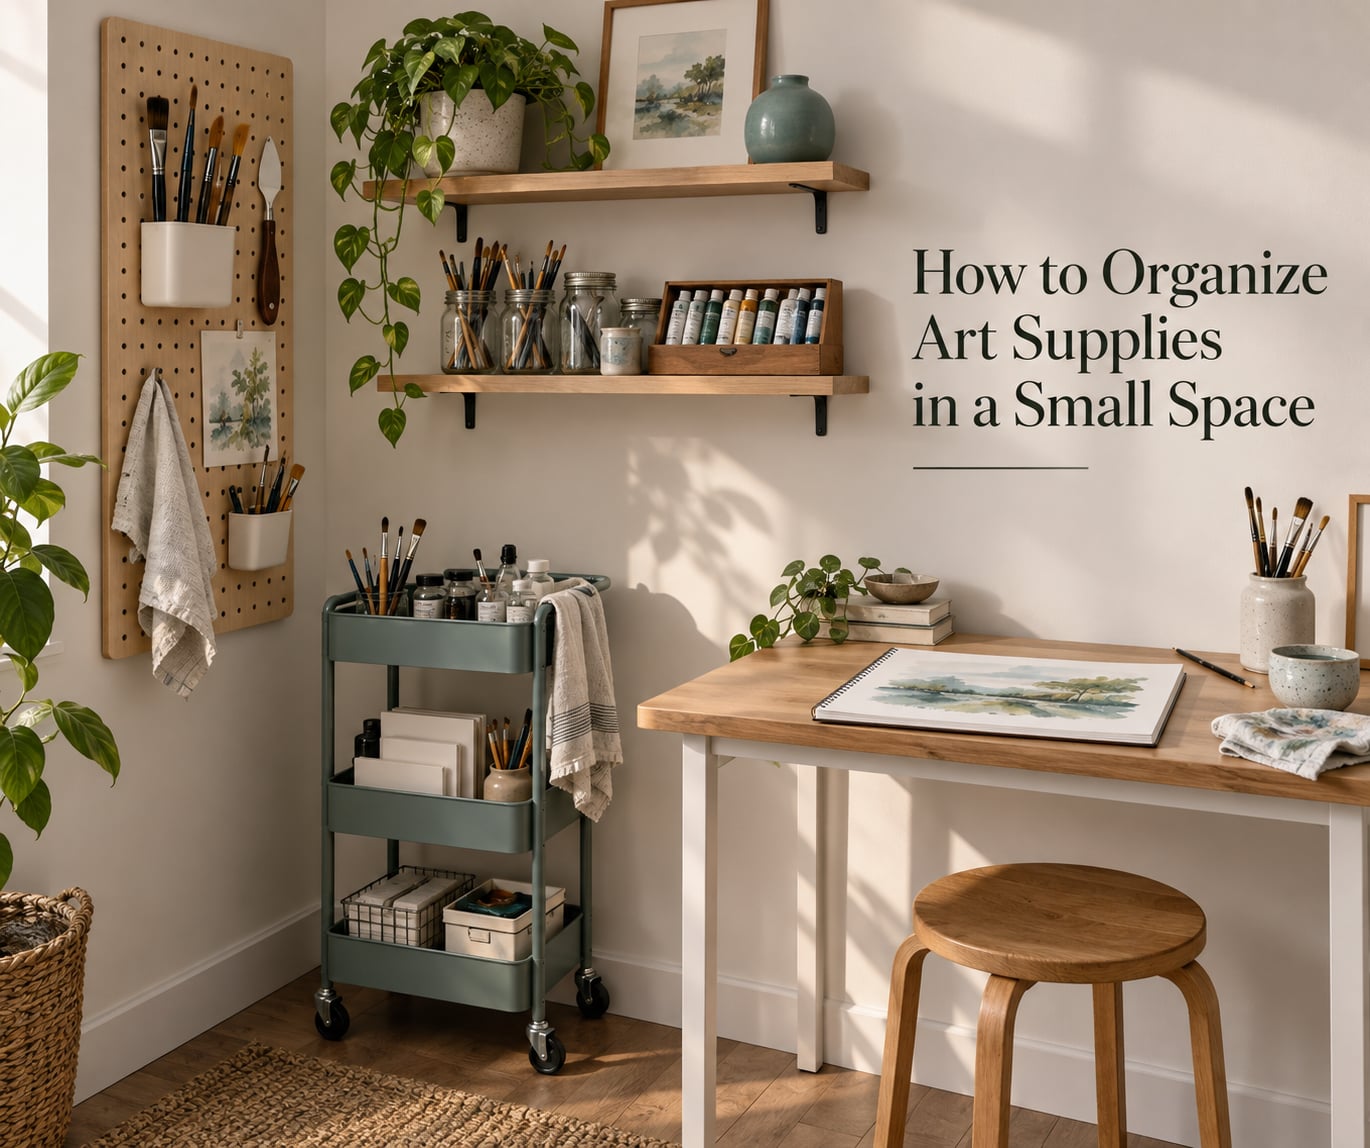
You can make a tight creative corner work by using three levers: vertical wall space, one rolling cart, and a fixed home for finished work. Everything else is detail. Learn how to organize art supplies in a small space by giving every item one address, keeping the items you use every session within arm’s reach, and packing away in five minutes when the table has to become something else by evening.
I have lived with this problem in a one-bedroom apartment where the dining table doubled as my studio four nights a week. The fix was never a bigger cabinet. It was a system I could repeat, because motivation does not survive a Tuesday.
This guide gives you that system in five zones, then shows you which storage type and which room layout fits your situation, and finally the care rules that keep brushes, paint and paper in usable condition. It takes one weekend to set up and about five minutes a session to keep working.
Table of Contents
- What Is Small-Space Art Supply Organization?
- The 5-Zone Small-Space Art Storage System
- Vertical and Wall-Mounted Storage Ideas
- Mobile and Modular Storage Solutions
- Which Layout Fits Your Room?
- How to Organize Art Supplies in a Small Space: Storage and Care
- Storing Works in Progress and Finished Artwork
- The 5-Minute Reset That Keeps It Working
- What Not to Buy When Space Is Tight
- Frequently Asked Questions
- What is the best way to organize craft supplies in a small space?
- How can I easily organize my art supplies?
- What are some DIY ways to organize art supplies?
- How do I organize a lot of stuff in a small space?
- What are some good ideas for storing art supplies in small spaces?
- How do artists store their supplies?
- Can I store art supplies in a closet or another room?
- Conclusion
What Is Small-Space Art Supply Organization?
It is the practice of giving every art material a fixed, visible home using vertical space, one portable active kit and a limited container footprint. The opposite is supplies spread across drawers, shopping bags and two different floors of the apartment.
It works as a flow rather than a single purchase. You sort into a few broad categories, move the items you touch every session into one tray or caddy, store everything else vertically in labeled bins, and return each item to its zone at the end of the session.
Why it matters is simple: if you cannot find a color mid-session, the session dies. Visible, reachable supplies also prevent dried-out paint, bent bristles and the duplicate-tube buying spiral that so many artists in small spaces describe.
The 5-Zone Small-Space Art Storage System
This is the whole method. Work through it in order, one zone per session block, and do not buy a single container until zone one is finished.
Zone 1: Purge and count before you buy anything
Spread every supply you own on the floor or the bed and sort it into three piles: use it, rehome it, and bin it. Artists on community boards repeatedly say the same thing about their own collections: they had no space problem, they had a volume problem, and containers were not the answer.
Rehome means donate, gift or swap, not the back of a closet. A pile that gets “rehomed” to another closet is a pile that will migrate back to the work surface within a month. For paper, a realistic count beats a guess: half a used pad is a fact, a stack you meant to use is a wish.
Zone 2: Split active supplies from reserve supplies
Everything you touch in a typical session goes into the active group. Everything else is reserve stock. This is the single highest-impact move in the whole system, and it is the one most people skip.
Ask the test question: did it get used in the last three sessions? If yes, it is active. If no, it is reserve, and reserve lives in a labeled bin you do not open mid-session. Two thirds of a typical collection is reserve, and reserve does not need to be pretty, only findable.
Zone 3: Build one portable active kit
Put the active supplies into a single container with a handle that you can move to wherever you are working. A handled tray, a shallow caddy or a single-lid box with fixed internal sections all work. A fixed-section box is the one people on forums single out most often for mixed kits, because paint tubes stand upright inside it and stay visible instead of lying in a jar with everything else.
Keep the kit to what fits on one tray. If it does not fit, it is reserve stock by definition. This one constraint is what stops the active pile from quietly growing back into the whole collection.
Zone 4: Store everything else vertically
Reserve supplies go up, not out. Wall-mounted shelving, pegboard, over-the-door organizers and shallow bins under a table or in a closet all count. Vertical storage is the answer for a specific reason: floor space is the scarce resource in a small apartment, and vertical storage uses the one dimension you have plenty of.
Label the front face of every bin, and label the top edge of deep drawers or boxes where the front label will be hidden once things are stacked. Masking tape with a marker works fine; a label maker is faster once the system is stable.
Zone 5: Write a put-away plan for the shared surface
If the table is a dining table, a desk or a kitchen table, the system is only half done until you define where the cart parks and where the kit goes at the end of the night. The put-away plan is about five items: kit to the cart hook, cart to its parking spot, wet work to the drying spot, paper flat, and the surface wiped.
Guests should never be able to tell an art system is hiding under a curtain or a fitted cover. That is the test of a shared-room setup.
Vertical and Wall-Mounted Storage Ideas
Use vertical storage when you have wall area and no floor area. These are the options that give the most capacity per square foot of floor.
- Six-inch deep floating shelves for jars, cans and small bottles. Shallow depth is the point: supplies disappear behind each other on deep shelving, and six inches is the measurement most people land on for a reason.
- A pegboard panel with hooks for brushes, palette knives, scissors and anything with a handle. Pegboard keeps the working face of a tool visible and off the surface.
- A magnetic tool strip for palette knives, small blades and metal implements. It costs one strip of wall and gives back an entire drawer.
- An over-the-door organizer for flat items, paper pads and shallow bins in a room where wall space is unusable.
- Hooks and rails under a shelf or table edge for the portable kit, a drying rack, or an apron and brush roll that would otherwise live in a drawer.
- Stackable baskets or risers to raise a bin so the one behind it stays visible.
Zero-cost vertical options
Before you buy a shelf, look at what is already in the house. A wine rack gives you angled per-item slots for brushes and pens. An old card catalog gives you many small labeled drawers for a collection that would otherwise need many small bins. Toilet paper rolls and cut-down cereal boxes make brush and pen holders. Mason jars hold brushes bristles-up, which is how they should be stored anyway.
The rule for upcycled containers is simple: they need to hold one category and stack or file without tipping. Beyond that, use what you have.
Mobile and Modular Storage Solutions
Use mobile storage when the room has no dedicated wall to give up, or when the art happens at a table that changes function daily.
- A rolling utility cart on casters as a permanent art station, not general storage. The specific instruction matters: a cart that becomes a junk drawer loses the fight in under a month, and a cart that holds only art supplies stays usable.
- A handled caddy or tray for the active kit, so you carry one thing instead of six.
- A tabletop drawer organizer for pens, pencils and small tools within reach of the working hand.
- A fixed-section single-lid box for tubes, small jars and tools that need to stay upright and visible.
- A two-cart surface trick when one cart is not enough working room: park two carts a few inches apart and lay a board across the top for a wider temporary surface.
- A drying rack that folds or hangs for people with no sink and no spare wall.
Add foot clearance under whatever surface you work at. In a small space people end up storing flat things under the table until their knees hit them mid-session, and then they stop working.
Which Layout Fits Your Room?
Pick the layout that matches the room you actually have, not the room you wish you had. Start with what the space must do when you are not painting.
| Situation | Best layout | Why it works |
|---|---|---|
| Studio apartment or spare-room corner | Wall shelving plus one rolling cart | Uses the two dimensions you have most of: wall height and floor length |
| Kitchen or dining table | Cart that parks under the table or against a wall, kit returned nightly | Makes the put-away routine a five-minute habit instead of a reset project |
| Shared family room | Over-the-door organizer, shallow shelves, curtain over a low unit | Keeps supplies out of sight when the room is in use as a living space |
| Home office doubling as a studio | Desktop drawer organizer plus under-table bins | Keeps work functions separated so the desk stays a desk |
| Dorm room | Single cart, under-bed bins, wall hooks on the bed frame or a door | Everything can be moved in a few minutes at move-out |
Compare storage types before you commit
Not every solution costs the same amount of floor space or effort as the next one. This table is the quick filter.
| Storage type | Best for | Space footprint | Difficulty |
|---|---|---|---|
| Pegboard and hooks | Hand tools and brushes kept visible | Wall only, no floor | Medium, needs a level surface and safe mounting |
| Six-inch floating shelf | Jars, cans, small bottles | Wall only | Low |
| Rolling cart | Active supplies and mobile work surface | Holds a cart footprint only | Low once loaded |
| Over-the-door organizer | Flat items and paper where wall space is unusable | Door swing space | Low |
| Handled caddy or tray | The active kit | Clears with the surface | Low |
| Fixed-section box | Tubes and small tools that must stay upright | One shelf slot | Low |
| Tabletop drawer organizer | Pens, pencils and small tools within reach | Surface area | Low |
| Under-table bins | Reserve stock and oversized paper | Under-surface volume | Low, but watch foot clearance |
How to Organize Art Supplies in a Small Space: Storage and Care
Storage is not only about finding things. In a small space, where supplies stay visible in open bins, care rules matter more than they would in a closed cabinet.
Brushes
Store brushes standing upright with the bristles up, in a jar, a caddy or a wall cup. Laying them in a drawer bends the bristles and the handle touches every pigment you own. Put a small amount of pigment residue aside and give the whole jar a rinse every few weeks.
Keep the jar on a stable, level surface. A rolling cart is fine; a slope, a stack of books near an edge, or a shelf above a radiator is not.
Paint and mediums
Close every lid tightly, and store tubes upright with the cap up in a sectioned box or a divided drawer so the caps do not collect dried paint. Keep paint off the floor, away from direct sunlight and away from heat, and give it a shelf that is shaded rather than the sunny wall you have free.
For anything water-based, ventilation matters more than tidiness. A small fan near the work surface costs nothing and handles the smell that otherwise makes a shared room unusable. If you work with oil, solvents or resin, store them sealed and upright in a cabinet rather than in an open bin, and keep them away from any heat source.
Paper, pads and canvas
Store watercolor paper and drawing pads flat, or vertical in magazine files, one pad per file so a bent corner does not spread. Cellophane sleeves on both sides of a fragile sheet stop it curling. Canvas and board should be stored vertically on edge rather than leaning against a wall, where they collect dust and block a walkway.
Roll a finished sheet rather than folding it. Folds leave permanent creases that no amount of flattening removes.
Storing Works in Progress and Finished Artwork
Artwork is usually the reason the corner has no room, so it needs its own rule rather than an overflow shelf.
Give works in progress one vertical slot with interleaving sheets between them, so wet paint never transfers to the back of the next piece. Label the top edge of each with a small sticky note naming the piece, which is faster than an index card and stays visible in a stacked slot. Where canvases will not fit flat or vertical, use a slotted divider rack or a rigid box with a card cross-section inside so the panels stand up on edge instead of sliding.
Give finished work a route, not a pile. Display a small rotating selection, archive the rest flat or in a portfolio box, photograph and share the ones you will not keep, and recycle the studies. Most small-space artists report the finished pile is the single biggest space recovery available.
If you genuinely have no room left for active art, that is a signal to look at a shared studio or a rented space for the heavy work rather than compressing supplies further.
The 5-Minute Reset That Keeps It Working
A system fails on the fourth session, not the first. Five minutes at the end is cheaper than a weekend rebuild.
- Wash and stand. Rinse brushes and water, stand them bristles up, cap every paint container.
- Return the active kit. Everything that came out goes back into the one kit, not into nearest drawers.
- Clear the surface. Any paper, masking or reference images off the table or into a finished-work slot.
- Return the cart. Kit to the kit slot, cart to its parking spot, wet work to the drying spot.
- Wipe and log. Clear the surface, and write a short note of anything you ran out of, so the next session starts with a list instead of a search.
Pair it with a monthly sweep of one bin and a restock check. The step most people skip is counting: you cannot avoid duplicate tubes if you have no idea you already own the color.
What Not to Buy When Space Is Tight
The most common mistake is buying storage to solve a volume problem, and then buying more storage to solve the storage problem. Skip these when space is genuinely tight.
- Deep shelving. Anything deeper than roughly six inches hides supplies behind other supplies and forces you to unload a shelf to find one jar.
- Multi-piece organizer sets before the purge. A five-drawer unit bought at the start of this process is a very expensive pile later.
- A second cart before the first is full and labeled. Two carts are a surface trick, not a storage plan.
- Specialized single-purpose boxes until you know which category actually keeps overflowing.
- More supplies. A full-to-the-top shelf is the trigger to stop buying, not the reason to buy a bigger shelf.
Think in tiers instead: start with upcycled and free containers, add one wall solution only after the free tier is full, and treat a larger system as a last step rather than a first one.
Frequently Asked Questions
What is the best way to organize craft supplies in a small space?
Use a five-zone system: purge and count first, split active supplies from reserve stock, put the active items in one portable kit, store the rest vertically in labeled bins, and define a put-away plan for a shared surface. The active-versus-reserve split is the step that makes the biggest difference in a small room.
How can I easily organize my art supplies?
Start with one portable kit for everything you used in your last three sessions. Store the remainder vertically in labeled bins or wall shelving, and end each session with a five-minute reset that returns the kit, caps the paint, stands the brushes and clears the surface.
What are some DIY ways to organize art supplies?
Use a wine rack as angled slots for brushes and pens, an old card catalog as many small labeled drawers, toilet paper rolls or cut-down cereal boxes as pen and brush holders, and mason jars for brushes stored bristles up. A curtain over a low unit hides supplies in a shared room at no cost.
How do I organize a lot of stuff in a small space?
Stop adding containers and start cutting volume. Sort everything into use, rehome and bin, then store the remainder vertically so floor space stays free. If the collection is still larger than the room after that, move the heavy work to a shared or rented studio rather than compressing supplies further.
What are some good ideas for storing art supplies in small spaces?
Six-inch deep floating shelves, a pegboard with hooks, a magnetic tool strip for palette knives, an over-the-door organizer for flat items, and a rolling cart that stays a dedicated art station. Each uses wall height or a small footprint instead of floor space.
How do artists store their supplies?
Brushes stand upright with bristles up, paint tubes sit cap-up in a divided box with lids closed, mediums are kept sealed, shaded and ventilated, paper stays flat or vertical in magazine files, and canvases are stored on edge with interleaving sheets between works in progress.
Can I store art supplies in a closet or another room?
Yes, as long as the supplies have one address and the route is short. A closet activity box for reserve stock and a rolling cart for active supplies keeps supplies on one floor rather than spread across several. Label the box so you can find a color without opening every bin.
Conclusion
To organize art supplies in a small space, do the purge first, split active from reserve, keep one portable kit and store everything else vertically, then run a five-minute reset after each session. Pick the layout that matches what your room has to be when you are not painting, and follow the care rules so brushes, paint and paper stay usable.
Start with the free tier this weekend, and only add a wall solution once your containers are full and labeled.