
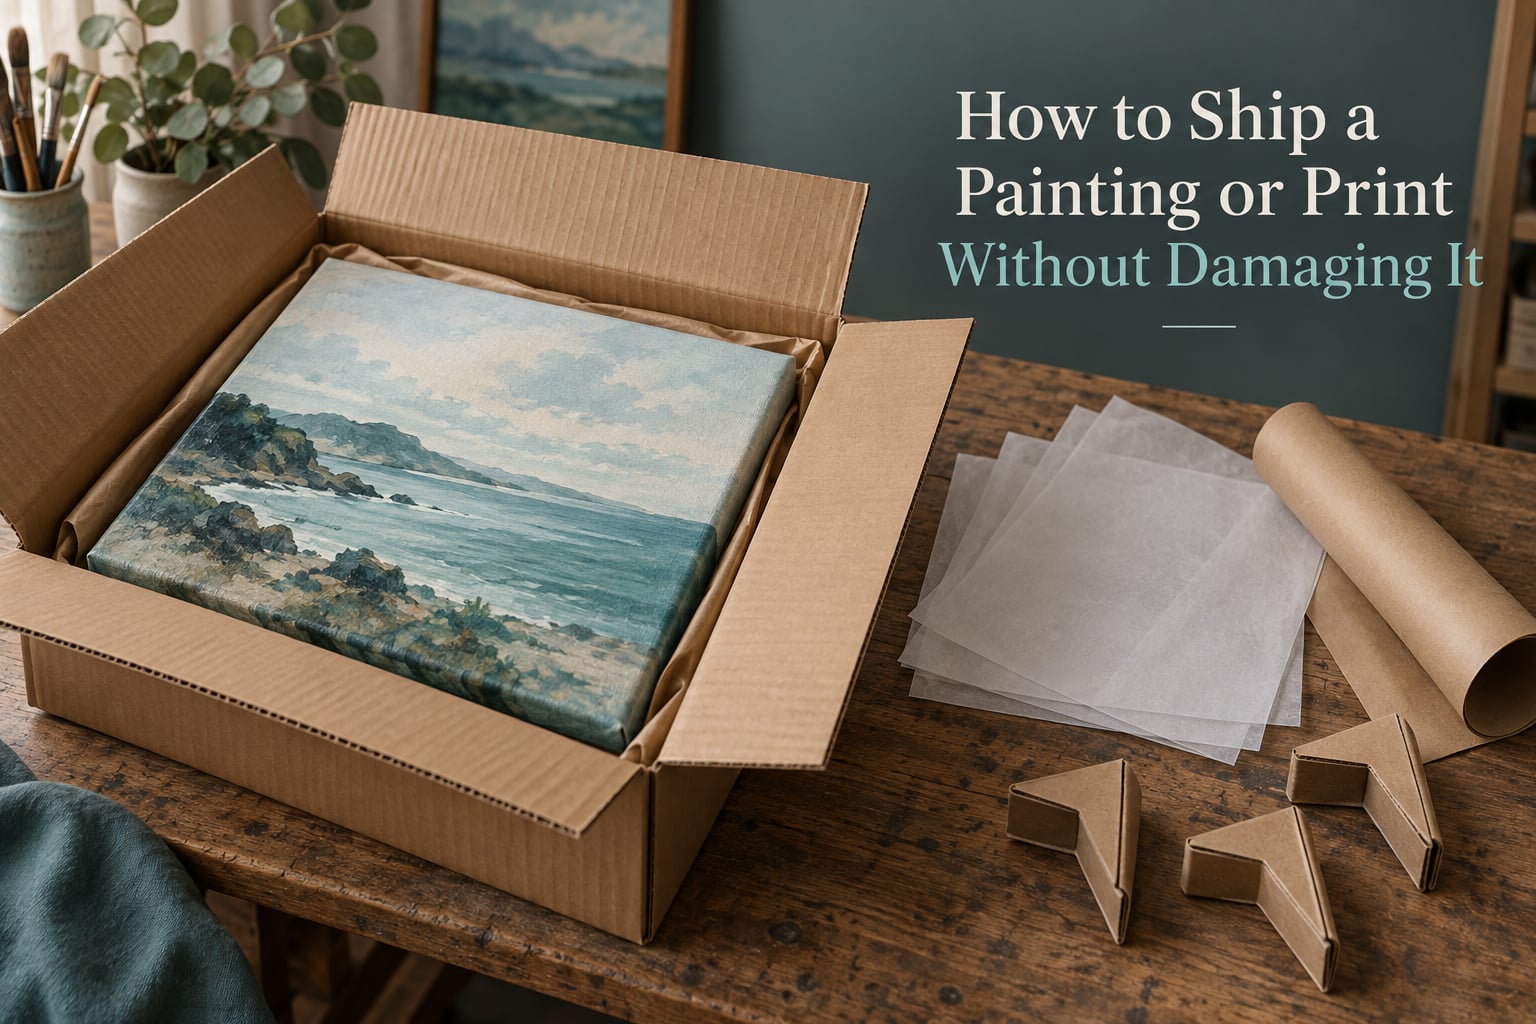
If you have ever watched a carrier hand a parcel to a stranger and wondered whether the canvas inside is going to survive the journey, the answer is almost always decided before the box is sealed. The safest way to handle how to ship a painting is the same for every medium: protect the painted surface from rubbing, cushion the piece against impact on all four sides, and lock it inside a sturdy box with two to three inches of clearance beyond the artwork in every direction.
That is the whole method. Almost everything that goes wrong in transit comes from skipping one of those three things, usually because the box was an improvised one that was a little too snug, or because plastic went straight onto paint that was not fully dry.
We have packed, sent, and received a lot of artwork over the years, and the difference between a piece that arrives perfect and one that arrives with a cracked stretcher bar is boringly consistent. It is the boring checklist that works, not the clever shortcut. Below is that checklist in full, split by medium, plus the paperwork and carrier decisions that come after the box is sealed.
Table of Contents
- How to Ship a Painting Without Damaging It: The Short Answer
- What You Need Before You Pack
- Step 1: Prepare and Protect the Painted Surface
- Step 2: Choose the Right Box
- Step 3: Wrap and Cushion the Artwork
- Step 4: Label, Insure, and Ship
- How to Ship a Print or Unframed Paper Safely
- Shipping Large and Oversized Paintings
- International Shipping and Customs
- What to Do If the Painting Arrives Damaged
- Materials and Carrier Guide
- Frequently Asked Questions
- What is the safest way to ship a painting?
- How should I package my canvas painting for shipping?
- How should I pack framed art for shipping?
- What is the cheapest way to ship a painting?
- Is UPS or FedEx better for shipping artwork?
- Can I ship a painting in a regular cardboard box?
- Do you need to crate a painting to ship it?
- What should I do if my painting arrives damaged?
- Conclusion: A Packing Routine You Can Repeat
How to Ship a Painting Without Damaging It: The Short Answer
Here is the compressed version, for anyone who wants the sequence before the reasoning.
- Make sure the paint is fully dry and the varnish has cured before anything touches the surface.
- Lay a sheet of acid-free glassine or acid-free tissue over the painted face. Never tape anything onto the artwork itself.
- Measure the piece, then get a double-wall corrugated box that is two to three inches larger than the artwork on every side.
- Wrap in bubble wrap with the flat side facing the artwork, so the bubbles point outward and absorb a knock instead of pressing a dimple into the paint.
- Add cushioning on all four sides and behind, so nothing shifts when you close the lid. A rattle means the packing failed.
- Put the wrapped art into the box, fill every void, then add a moisture barrier sleeve for long or cross-country journeys.
- Double-box it for anything valuable: an inner box sealed and placed inside a larger outer box with a second layer of cushioning between them.
- Declare a value that matches reality, require a signature, keep your photos of the packed piece, and skip the Fragile sticker.
Which method you use depends entirely on what you are sending. Here is the same problem solved four different ways.
| What you are sending | Method | Packaging | Main cost driver |
|---|---|---|---|
| Stretched canvas, unframed | Flat, wrapped, boxed | Glassine, bubble wrap, double-wall box | Billed weight from box dimensions |
| Framed art under glass | Replace glass with acrylic, corner-protect, box | Corner protectors, bubble wrap, double box | Handling surcharge plus box size |
| Unframed paper print or poster | Flat in a rigid mailer, or rolled into a tube | Glassine, two backing boards, rigid mailer | Mailer weight, usually light |
| Oversized or fragile work above carrier limits | Freight, art handler, or custom crate | Foam-lined crate or double crate | Freight class and liftgate service |
What You Need Before You Pack
Gather everything before the artwork comes off the wall or out of the portfolio. Packing a painting in a state of mild panic is how corners get crushed.
- Acid-free glassine or acid-free tissue. This is the single most important material on the list. Glassine is semi-transparent, non-abrasive, and prevents the painted surface from rubbing against itself or sticking to plastic. Plain wax paper is the usual substitute when glassine is not available.
- Bubble wrap, plus kraft paper or foam sheeting for the sides. Bubble wrap is for the face and for the outer layer; kraft or foam fills the deeper voids inside a large box.
- Cardboard corner protectors. Small L-shaped or foam blocks that clamp over the corners of a frame or canvas. The corners take the biggest hits in a drop, and they are the least forgiving part of the piece.
- A double-wall corrugated box, or two boxes in two sizes. Retail moving and television boxes are frequently printed with wording that says they are not intended for shipping. They tear along the printed score lines and crush under a stack.
- Packing tape and a moisture barrier sleeve. A heavy poly bag or plastic sleeve over the wrapped art blocks rain, humidity, and condensation during a long transit.
- A soft, clean cloth or a soft brush for dust, plus a pencil and a camera for the record photos.
Two cautions before you start. First, do not wrap oil paint, thick impasto, mica, or any flaking media in plastic until the surface is cured and varnished. Trapping moisture against paint that is still off-gassing can cloud the varnish and lift the impasto texture. Second, the wrapping order matters: glassine goes directly on the paint, plastic goes on the outside of the bubble wrap, never on the paint.
Step 1: Prepare and Protect the Painted Surface
The painted face is the part you can never replace, so it gets the first and thinnest layer of protection.
- Let the work sit flat and undisturbed until the surface is dry to a light touch and the varnish has cured. Oil and acrylic varnish have different cure windows, and packing early is the most common self-inflicted mistake.
- Dust the face with a soft brush or microfibre cloth while the work is still flat. Grit trapped under glassine becomes a micro-scratch during transit.
- Lay a single sheet of acid-free glassine over the face, or slip the whole painting into a glassine sheet folded like an envelope. Cardboard corner protectors clamp over the stretcher bar corners at this stage.
- Do not use tape on the artwork, and do not rely on the glassine to hold a label. Write the routing information on the outer box instead.
- For a framed piece under real glass, replace the glass with acrylic glazing before it leaves your studio. Acrylic is lighter, does not shatter into shards, and a crack in an acrylic pane is far less likely to take the image with it.
For how to pack a canvas painting for shipping specifically, that glassine layer is doing more work than anything else you will do. It costs almost nothing and it eliminates the two most visible forms of transit damage: surface scuffing and paint-to-plastic contact.
Step 2: Choose the Right Box
Box choice decides whether the cushioning can actually do its job. A snug box with no room around the artwork has nowhere to put the padding, so the padding becomes a thin layer that compresses on the first impact and never springs back.
The two to three inch clearance rule
Measure the artwork, then size the box so that two to three inches of empty space sit on each of the six sides. That gap is where the bubble wrap and foam go. If you have a piece that is nearly as wide as the box, the box is too small.
Single box, double box, or crate
- Single double-wall box suits a small or mid-size canvas, an unframed work, and any piece where the replacement value is modest. Fill the void with kraft paper or foam so the artwork cannot shift.
- Double box is the default for anything valuable. Seal the wrapped artwork in an inner box, cushion all six sides of that inner box, then set it in the centre of a larger outer box with a full second layer of cushioning. The outer box absorbs the impact and the artwork never touches the parcel walls.
- Custom crate is for work above carrier size limits, for very heavy pieces, and for anything travelling on a gallery loan. A foam-lined or built-up wood crate is the professional standard.
On the question that circulates most: a hardware store box reinforced with cardboard panels and foam is better than nothing, but the reinforcement does not upgrade the box. The panels add rigidity, they do not stop the corrugated walls from crushing, and the printed warning on a television box is there for a reason.
How to pack framed art for shipping
Framed work needs its own sequence because the frame is the weak point.
- Swap real glass for acrylic glazing, and tape an X across the acrylic in painter’s tape as a secondary barrier.
- Put corner protectors on all four frame corners. Long edges of a moulding will sometimes get pipe insulation run along them, then wrapped tight so the whole frame acts as one unit rather than four separate rails.
- Cover the back of the frame with acid-free tissue or a foam-board backing so the back cannot scratch the glazing as the parcel shifts.
- Wrap the entire framed piece in bubble wrap, flat side toward the glazing, then double box it if the frame is wide or the glazing is original.
- Photograph the frame and glazing before it goes in the box. If a claim is filed later, that photo is the only proof the piece left your hands intact.
Step 3: Wrap and Cushion the Artwork
This is the step people rush, and it is the step that decides the outcome. The rule that matters most: bubble wrap with the flat side facing the artwork, bubbles pointing out.
- Wrap the glassine-covered piece in two or three layers of bubble wrap, flat side in. Bumps pressed into wet or soft paint leave a permanent dimple pattern that will still be there after the parcel is opened.
- Add a cardboard sandwich on top of the bubble wrap for canvases with heavy texture. A stiff sheet of corrugated or foam board spreads the load and keeps the stretcher bars from being driven inward.
- Fill the four sides of the box with foam or crumpled kraft paper, packing it so it is dense enough to stay put and the wrapped piece cannot shift. Press the closed lid gently; if anything moves or rattles, add more fill.
- Slide the wrapped piece into a moisture barrier sleeve before it goes into the outer box if the trip is long, cross-country, or heading into winter.
- Seal every seam of the box with packing tape in a cross pattern. Do not rely on the box flaps folding under their own tension.
- For the second layer in a double box, treat the sealed inner box exactly as you treated the artwork: cushion all six sides, then fill the outer box so the inner box sits in the middle with no room to move.
As a rule of thumb for how to pack a canvas painting for shipping, the test is simple. Lift the sealed box and set it down hard from about waist height. If you hear a thud of moving mass inside, the packing is not finished.
Step 4: Label, Insure, and Ship
Once the box is sealed, the decisions that determine whether you get compensated for a loss.
- Declare a value that matches reality. Declared value is the number you tell the carrier the artwork is worth, and it is the ceiling on any claim. Under-declaring to dodge a fee is the single most common reason claims are denied.
- Require a signature. A signature-required service moves the risk of a parcel being left on a porch in the rain or stolen from a step, which are two of the most common causes of damage for a package this valuable.
- Use tracking and keep the receipt until the piece is in the buyer’s hands and they have confirmed its condition.
- Skip the Fragile sticker. It is not honoured by handling staff, and on some lanes it flags a parcel for extra handling rather than extra care.
- Mark the box as a work of art on the outside if the contents are a one-of-a-kind original. This does not change insurance terms, but it does change how a well-meaning handler approaches the parcel.
- Photograph the packed artwork and the sealed box before handing it over, including the declared value on the paperwork.
Why a large flat box costs more than you expect
Carriers charge on dimensional weight, not just actual weight. A big, light, flat package can be billed as though it weighed several times what it does on the scale, because the charge is calculated from the box dimensions divided by a standard factor.
Worked example: a 40 by 40 by 8 inch box. That is 12,800 cubic inches. Divided by the standard dimensional factor, the billable weight comes out well above the actual weight of a canvas plus padding. This is why an oversized surcharge exists and why shrinking the box by four inches on each side can change the bill more than the packing material costs.
How to Ship a Print or Unframed Paper Safely
Paper is a different problem from canvas. A giclée print or poster has no stretcher bars and no depth, so it is far cheaper to send, but it fails in one specific way: a crease. A single sharp fold is unrecoverable.
Two methods work, and the choice comes down to size.
Flat in a rigid mailer
- Sandwich the print between two sheets of acid-free glassine, printed side facing the glassine.
- Back it with two rigid sheets of board. Cardboard is enough for a short trip; use foam board or two layers of corrugated for heavier or longer journeys.
- Add corner protectors or a mat-board frame around the print so a knock does not crease an edge.
- Place the whole sandwich in a rigid mailer or a small corrugated box with cushioning on both faces.
- Do not use an ordinary envelope, and do not use an envelope with a rigid object inside it. A letter-thickness parcel is routinely handled by machinery and a sorting belt.
Rolled into a tube
- Roll the print image side out around a tube of at least three inches in diameter, with a larger diameter for very long works.
- Interleave glassine at every turn so the face of the print never rests directly on its own back.
- Wrap the roll in bubble wrap, then in kraft paper, then cap both ends with foam discs so the roll cannot telescope inside the tube.
- Never use a paper tube for a rolled print. It crushes in a stack.
Rolling is cheaper in postage terms and fine for a poster. It is not appropriate for a work with a heavy deckled edge, for something mounted on board that will crack when bent, or for a print a buyer plans to frame under glass immediately, since a rolled sheet never lies perfectly flat again.
If you would rather not use plastic at all, a rigid mailer with board sandwiching and paper tape handles most print shipments on its own, and the material can be reused on the next piece.
Shipping Large and Oversized Paintings
There is a size above which parcel carriers stop being a sensible option. Once a package crosses a carrier’s maximum length or girth, it moves into oversized handling, and often the surcharges exceed the artwork’s shipping value.
A recent thread in r/ArtistLounge showed how sharp that wall is. A seller moving their first out-of-state piece, a 36 by 36 by 1.5 inch canvas, quoted a figure from a professional packing service that landed well above what they had budgeted, and a purpose-built art shipping box from a carrier’s own line cost a substantial share of that again before any postage was added. The same buyer had also turned up at a hardware store and bought a television box that was printed, on the front, as not intended for shipping. Their reaction, in their own words, was a lesson learned.
That story is the useful part. Three decisions sit underneath it.
- Measure against the carrier’s oversized thresholds first. Know your box’s longest side and its girth before you buy packing materials, because the girth calculation often decides the approach.
- Compare parcel against freight. For work well past the limits, LTL freight on a pallet, or a specialist art handler, is frequently cheaper than parcel shipping a piece that gets oversized surcharges and extra handling.
- Decide whether a double box is genuinely enough. A double box handles a lot. A crate is for large work, very heavy work, gallery loans, and anything that must survive a warehouse transfer and a tailgate moment.
Rolling a canvas as a budget option
You can remove the stretcher bars and roll the canvas around a tube, and artists do it regularly. The caveat is paint movement. Oil paint that is thick, unpainted, or painted in loose strokes can crack along the roller line, and a rolled oil canvas will never lie flat again the way a stretched one does. Rolling is safest for a thin, fully cured acrylic piece and riskiest for a heavily textured oil surface. Stretched canvas shipped flat in a double box is the safer default.
International Shipping and Customs
Cross-border artwork adds a paper problem on top of a packing problem.
- Complete the customs declaration accurately, and expect duties to be assessed on the value you declare. Under-declaring to dodge duty creates an insurance problem later.
- Keep the invoice, the certificate of authenticity, and a condition record together. Collectors and insurers both expect a documented provenance for an original work.
- Check restrictions on materials. Some treatments and frames are restricted in certain destinations, and a work using certain animal-derived or plant-derived materials can be held for inspection.
- Use an art shipper for anything valuable or any large piece. They handle the export documentation and the delivery-agent appointment, which removes the customs counter from your day.
- For a gallery or collector delivery, ask about white glove service. It places the piece in the room and positions it, rather than leaving a parcel in a loading bay.
My rule for international shipments is simple: if the artwork is a one-of-a-kind original and you would be genuinely upset to lose it, the paperwork is worth paying someone to handle.
What to Do If the Painting Arrives Damaged
Damage is common enough that you should have a plan before you need one. The first hour matters more than the first week.
- Photograph everything before you unpack. The sealed box where it was found, the outer packaging, and the artwork in place. Do not remove wrapping until this is done.
- Save all packaging, tape, and labels. Carriers routinely ask the sender to produce the box. Throwing it out ends the conversation.
- Write down the condition in detail while the buyer is present: which corner is crushed, where the stretcher bar has bowed, whether the glazing is cracked or shattered.
- File the claim immediately. Most carriers have short windows for reporting damage, and a claim filed after the packaging is discarded is very hard to support.
- Do not repair before the carrier inspects it. Rebuilding a frame or re-stretching a canvas can be treated as altering the item and can reduce or void a claim.
Understand the value structure before you need it. Declared value is the maximum a carrier will pay, and it is also the number you agreed to. If the declared value is lower than the work is worth, the difference is your loss. That is why accurate declaring in Step 4 is really a claim-protection decision made a week before the problem happens.
Materials and Carrier Guide
This section is the reference part. Materials first, then carriers, then the billable weight arithmetic that explains the invoice.
What each material is for
| Material | What it does | Matters most for |
|---|---|---|
| Acid-free glassine or tissue | Stops the painted face rubbing and sticking | Every medium, non-negotiable |
| Bubble wrap | Spreads impact across a wide area | Every medium |
| Kraft paper or foam sheeting | Fills the void inside a large box | Canvas, oversized work |
| Corrugated or foam board | Backing and load spreading | Canvas, prints |
| Corner protectors | Takes the hit at the four weakest points | Framed art, canvas corners |
| Acrylic glazing | Replaces shatterable glass in a frame | Framed art |
| Moisture barrier sleeve | Blocks rain, humidity, condensation | Long and cross-country trips |
| Rigid mailer and tube | Rigidity for flat work, protection for rolled work | Unframed prints |
UPS vs FedEx vs USPS vs art handler vs freight
| Option | Best for | Main limitation |
|---|---|---|
| Parcel carrier with a store location | Small to mid-size work, someone else packs it | Professional packing adds a service charge on top of postage |
| Parcel carrier, self-packed | Full control, lowest material cost | Size limits, dimensional weight, you carry the packing risk |
| USPS | Light, flat print shipments | Thin, rigid mailers get machinery handling; not suited to canvas |
| Specialist art handler or fine art shipper | Framed work, international, gallery delivery, oversized | Highest service cost, and it is worth it above a certain artwork value |
| LTL freight on a pallet | Work above parcel size limits, several pieces at once | Needs a liftgate and someone to receive it |
Is UPS or FedEx better for shipping art? Neither wins outright, and the honest answer is that the choice matters less than the packing. Both have packaging services that will build a proper art box for you, both cap claims at declared value, and both are limited by size. If the piece is small and you are packing it yourself, pick whichever is cheaper after dimensional weight and whichever has a store location or drop point near you. If the piece is oversized or framed under original glazing, the carrier comparison is the wrong question and a specialist shipper is the right one.
What is the cheapest way to ship a painting? For a small unframed canvas or a print, self-packing with a correctly sized double-wall box is almost always the cheapest route, because you control the box dimensions and the dimensional weight. Cost jumps at three points: upgrading to a professional packing service, crossing into oversized handling, and using a specialist art shipper. Everything you can do to keep the box small and the weight honest pays back more than any material choice.
Billable weight reference
Two numbers decide the bill for any parcel: the actual weight on the scale, and the dimensional weight from the box dimensions. The carrier charges whichever is higher.
| Artwork | Typical packed box | What drives the bill |
|---|---|---|
| 8×10 print, unframed | Rigid mailer | Actual weight, usually light |
| 11×14 print, unframed | Small corrugated box or tube | Actual weight or tube length |
| 16×20 canvas, unframed | Approx. 20x24x6 | Dimensional weight kicks in |
| 24×36 canvas, unframed | Approx. 28x40x6 | Dimensional weight plus length |
| 36×36 canvas, unframed | Approx. 40x40x8 or larger | Oversized handling, possible surcharges |
| Framed work, any size | Double box | Box size, handling surcharge, insurance level |
Read that last table as the cost answer to the two most common questions. A 16×20 and a 24×36 are both billed substantially on dimensions rather than on what they weigh, which is why trimming the box depth by removing unneeded foam can matter as much as the material itself. A 36×36 is where self-shipping stops being obvious, and where comparing against freight or a specialist handler becomes the sensible next step.
Frequently Asked Questions
What is the safest way to ship a painting?
Protect the painted surface with acid-free glassine, cushion the piece with two to three inches of bubble wrap with the flat side facing the artwork, fill all four sides so nothing shifts, and use a double-wall box with two to three inches of clearance per side. Double-box anything valuable and declare a value that matches reality.
How should I package my canvas painting for shipping?
Confirm the paint and varnish are fully cured, dust the face, cover it with acid-free glassine, add corner protectors, wrap in bubble wrap with the flat side toward the art, add a cardboard sandwich for heavy texture, then box with two to three inches of cushioning on every side. The lid should close with no movement or rattle inside.
How should I pack framed art for shipping?
Replace real glass with acrylic glazing and tape an X across it, fit corner protectors on all four frame corners, cover the back with acid-free tissue or foam board, wrap the framed piece in bubble wrap flat side to the glazing, and double box it. Photograph the frame and glazing before packing so you have proof of its condition.
What is the cheapest way to ship a painting?
Self-packing a small unframed canvas or print in a correctly sized double-wall box is the cheapest route, because you control box dimensions and therefore the dimensional weight. Costs jump when you add professional packing, cross into oversized handling, or use a specialist art shipper.
Is UPS or FedEx better for shipping artwork?
Neither is meaningfully better for art, because both cap claims at declared value and both are limited by size. Choose whichever is cheaper after dimensional weight and whichever has a location near you. For framed work under original glazing or anything oversized, a specialist art shipper is a better fit than either carrier.
Can I ship a painting in a regular cardboard box?
You can, but reinforcement does not upgrade a box. Retail moving and television boxes are often printed as not intended for shipping, and they tear along their score lines and crush under a stack. Use a double-wall corrugated box, or a double box for anything valuable.
Do you need to crate a painting to ship it?
Usually not for small or mid-size work. A double box with two to three inches of cushioning per side handles most parcels. A custom crate is for oversized or heavy pieces, gallery loans, and anything passing through a freight warehouse or tailgate delivery.
What should I do if my painting arrives damaged?
Photograph the parcel where it was found, the packaging, and the artwork before unpacking, then save every box, label, and piece of tape. Note the damage in detail, file the claim immediately because reporting windows are short, and do not repair or re-stretch anything before the carrier inspects it.
Conclusion: A Packing Routine You Can Repeat
How to ship a painting comes down to four repeatable moves. Protect the surface with acid-free glassine once the varnish has cured. Cushion with bubble wrap flat side in, plus board for heavy texture. Box it with two to three inches of clearance per side, double-boxed if the work matters. Then declare a value that matches reality, require a signature, and photograph everything before the parcel leaves your hands.
Start by measuring the artwork and comparing the result against your carrier’s size limits. If the numbers land you in oversized territory, do the freight and art-handler comparison before you buy any materials, because that is the point where the cost story changes shape. 2026