
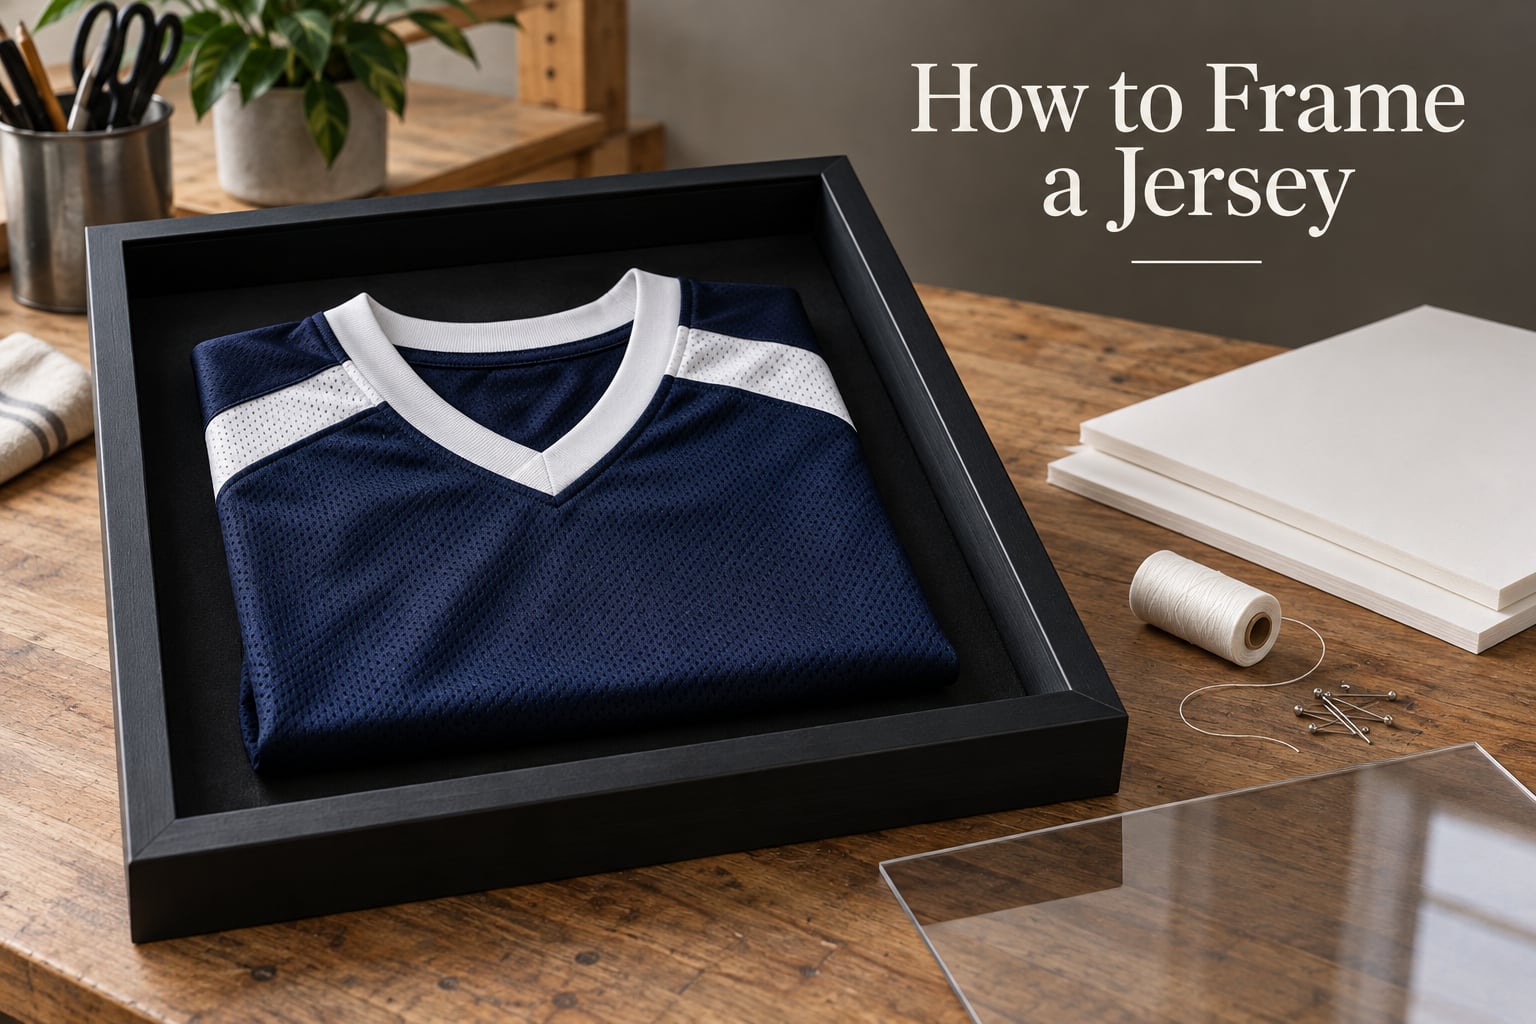
A framed jersey is the single most requested piece of sports memorabilia in American homes, and most first attempts fail in the same three places: the frame is too shallow, the fabric touches the glazing, and the wrong board yellows the jersey in a few years. Learning how to frame a jersey properly takes about an hour of work once you know the decisions that matter.
This guide walks through the whole process, from measuring your jersey to hanging the finished frame. You will get a size chart, a materials list, comparison tables for frames, boards, glazing and mounting methods, an eight-step process, and a fix-it list for the mistakes that show up in almost every beginner attempt.
If you are framing a signed, game-worn or vintage jersey, skip ahead to the section on what changes, because the rules are stricter for anything with permanent value.
Table of Contents
- What You Need to Frame a Jersey
- What Size Frame Do You Need to Frame a Jersey?
- Shadow Box vs Standard Frame: Which One to Choose
- Choosing a Backing Board for Your Jersey
- Choosing Glazing: Glass vs Acrylic vs UV-Protective Acrylic
- How to Frame a Jersey: Step by Step
- Mounting Methods: Pins, Stitching, and T-Tags
- Framing a Signed or Game-Worn Jersey: What Changes
- Common Jersey Framing Mistakes and How to Fix Them
- DIY vs Professional Framing: How to Decide
- Display Ideas: Combining a Jersey With Photos and Memorabilia
- Framing Multiple Jerseys and Matching Sets
- How to Hang a Framed Jersey and Care for It Long Term
- Frequently Asked Questions
- How do I frame my jersey?
- What is the best way to frame a sports jersey?
- How do I put a jersey in a shadow box with pins?
- What type of frame is best for displaying a jersey?
- What size frame do I need to frame a jersey?
- What is the best size for framing a football jersey?
- What size frame do I need for a jersey display case?
- What backing board is best for framing a jersey?
- Should you frame a jersey with glass or acrylic?
- Do you steam a jersey before framing it?
- How do you keep a jersey from wrinkling in a frame?
- How much does it cost to frame a jersey?
- Can Hobby Lobby frame a jersey?
- How do you frame multiple jerseys?
- Is a shadow box better than a standard frame for a jersey?
- Conclusion
What You Need to Frame a Jersey
Frame a jersey by mounting the folded garment on an acid-free backing board inside a deep frame, then sealing it behind UV-protective glazing. Before that sounds simple, the materials list below is the whole job. Nothing else is required.
- A deep shadow box or shadow box frame. Aim for 1 to 2 inches of interior depth. A folded jersey plus a board plus spacers needs more clearance than a standard flat frame allows.
- Acid-free foam board or acid-free mount board. This is the surface the jersey is sewn or pinned to. Never use standard cardboard, whose lignin content turns yellow over time.
- UV-protective glazing. Framer’s grade acrylic is the usual choice because it is light and blocks most ultraviolet light.
- Stainless steel framing pins for the pin method, or a needle and archival thread for stitching.
- T-tags if the jersey is signed, vintage or match-worn and you want to avoid puncturing the face fabric.
- Fabric blocks or foam spacers to hold the jersey off the glazing and create an air gap.
- A garment steamer or iron on low heat plus a pressing cloth for wrinkle removal.
- Microfiber cloth, a soft brush and gloves for handling.
- Paper towels or a sheet to lay the jersey on while you work.
Two items in that list matter more than the rest. The acid-free board protects the fabric chemically, and the air gap protects it physically. Get those right and the rest is technique.
What Size Frame Do You Need to Frame a Jersey?
Measure the jersey, not the box. Lay it flat, smooth out the sleeves so the shoulders span the full width, and measure shoulder-to-shoulder across the chest, then add 3 to 4 inches of margin on each side. The width plus margins is your frame width. Most adult jerseys land in the 30×40 or 32×40 range.
Here is the sizing reference we use. Youth jerseys need noticeably smaller frames than adult ones, and 3XL plus jerseys need a custom or oversized case.
| Jersey size | Approx. width across chest | Recommended frame size | Notes |
|---|---|---|---|
| Youth S / M | 16-18 inch | 20×24 or 22×28 | Add name, number or a small photo if you have room |
| Youth L / XL | 18-20 inch | 24×30 | Check the shoulder span before ordering |
| Adult S / M | 20-22 inch | 28×32 | Works for most baseball and soccer kits |
| Adult L / XL | 22-24 inch | 30×36 | The most common size for football jerseys |
| Adult 2XL | 24-26 inch | 32×40 | Add 2 inches of margin rather than crowding |
| Adult 3XL and up | 26 inch and wider | Custom or 36×48 | Consider folding sleeves or a two-panel layout |
A football jersey is usually the widest item, because the shoulder seams sit square and the sleeves are set wide. Basketball, baseball and hockey jerseys taper more, so a slightly smaller frame often works. Measure every time rather than assuming.
If your jersey measures wider than any standard frame allows, you have three options: fold the sleeves inward along the seam, split the display into two frames, or have a custom case built. Folding sleeves inward is the least noticeable option and keeps the name and number in one view.
Shadow Box vs Standard Frame: Which One to Choose
A shadow box is the right choice for nearly every jersey because it provides depth. A standard flat frame is acceptable only for a small youth jersey with no other memorabilia and no foam insert.
| Factor | Shadow box | Standard frame |
|---|---|---|
| Interior depth | 1-2 inch typical, 3 inch for memorabilia | Under 1 inch |
| Jersey clearance | Clears a folded jersey, board and spacers | Fabric presses against the glazing |
| Room for extras | Fits photos, tickets, a ball or a cap | Garment only |
| Setup difficulty | Moderate, needs even pressure on the back | Simple |
| Best for | Adult jerseys, signed pieces, combination displays | Small youth jerseys, temporary display |
Check the rebate, which is the interior distance between the glazing and the backing board. Anything under one inch will squeeze a folded jersey. If you plan to add a ticket, a photo corner set or a pair of gloves, move up to 2 inches or deeper.
Choosing a Backing Board for Your Jersey
Use acid-free foam board for a fuller, dimensional look. It gives the jersey body and helps a folded garment read as three-dimensional rather than flat. Acid-free mount board is thinner and works well under a pinned jersey where you want a smooth, tight presentation.
| Board type | Thickness | Look | Best for |
|---|---|---|---|
| Acid-free foam board | About 3 mm | Fuller, dimensional | Most jerseys, combination displays |
| Acid-free mount board | 2-3 mm | Flat and smooth | Pinned displays, very thin garments |
| Standard cardboard | Variable | Flat | Nothing worth preserving |
Standard cardboard is the one material to rule out. Its acidic sizing migrates into fabric over years, and the result is a yellow-brown stain that does not come out. If you already mounted a jersey on cardboard, replace the board before the discoloration sets in.
Cut the board two to three inches larger than the jersey on every side. That margin becomes the field your mat or border sits on, and it is what makes the finished piece look deliberate rather than crowded.
Choosing Glazing: Glass vs Acrylic vs UV-Protective Acrylic
Framer’s grade acrylic is the best glazing for a jersey. It is roughly half the weight of glass, will not shatter, and quality acrylic blocks about 98 percent of ultraviolet light. Fading in printed jerseys and inks in autographs is driven by light exposure, so the UV filter is the single most protective feature in the whole frame.
| Glazing | Weight | Shatter resistance | UV blocking | Scratch risk |
|---|---|---|---|---|
| Framer’s grade acrylic | Light | High | About 98 percent | Moderate, buff with microfiber |
| UV-filtering glass | Heavy | Low | Varies by coating | Low |
| Standard glass | Heavy | Low | Minimal | Low |
Acrylic does scratch, so handle it with a microfiber cloth and never use ammonia-based glass cleaner. Paper towels leave lint. If you pick glass, choose a UV-filtering pane and get help carrying it, because a large sheet over a 30×40 frame is heavy and awkward on a wall.
Acrylic arrives with a protective film on both faces. Leave it on while you assemble, then peel it off at the very end, immediately before the frame goes on the wall. Fingerprints and dust under the surface are permanent once the film is gone.
How to Frame a Jersey: Step by Step
Wash the jersey according to the care label, let it air dry, then steam or iron it on low with a pressing cloth to remove creases. Fold it so the name and number face forward, center it on an acid-free board, secure it with stitching, pins or T-tags, add spacers, close the frame and hang it away from direct sunlight. The eight steps below take that process from a folded jersey to a finished wall piece.
Step 1: Measure the Jersey Flat
Lay the jersey on a clean flat surface with the front facing up. Smooth the sleeves outward so the shoulder seams lie straight, then measure across the chest at the widest point and down from collar to hem. Add 3 to 4 inches of margin on all sides and you have your frame size.
Step 2: Wash and Steam
Wash the jersey following the care label and let it dry fully. Hang it on a hanger and steam from the inside out, or iron it on low heat with a clean pressing cloth between the iron and the fabric. Work from the collar down so you push wrinkles toward the hem rather than spreading them.
Sleeve patches and stitched numbers can pucker under direct heat. Steam from the back of the garment whenever the fabric allows, and never leave a hot iron sitting on a printed area.
Step 3: Cut the Acid-Free Board
Cut your acid-free foam or mount board 2 to 3 inches larger than the jersey on every side. Use a craft knife and a straightedge, and score the board rather than sawing it, so the edge stays clean and square.
Step 4: Fold and Center the Jersey
Fold each sleeve inward along the shoulder seam so the front panel reads as a clean rectangle. Place the jersey on the board, front facing out, and center it by measuring from the board edges to the jersey edges. Adjust in small increments rather than dragging it, which stretches the fabric.
A shallow foam insert behind the chest panel makes a folded jersey look fuller and more like a hanging garment. Cut the insert to sit behind the torso without pushing into the collar.
Step 5: Secure the Mounting
Work from the center outward so tension stays even. Use the method that matches the jersey’s value: machine stitching through the back at the collar, sleeve seams and bottom hem for a standard jersey, T-tags at the seams for anything signed or vintage, and pins for a simple, removable mount.
Step 6: Add Spacers and Check the Air Gap
Place fabric blocks or foam spacers around the perimeter so the jersey sits at least half an inch off the glazing. Look from the side in a raking light. If you can see shadow under the fabric, the gap is fine. If the jersey sits flat against the glazing, add another spacer layer.
Step 7: Seal the Frame
Set the backing board in, square the frame, and secure the back with the clips or turn buttons supplied with the case. If your frame has a hinged back, a small locking clasp is worth adding for a piece with resale value. Check the fit by looking at the frame from all four sides.
Step 8: Remove the Film and Hang
Peel the protective film from the acrylic, working corner to corner in one continuous motion. Hang the frame on hardware rated for its weight, keeping the center of the frame about 8 inches below eye level and away from direct sun, heating vents and exterior walls.
Mounting Methods: Pins, Stitching, and T-Tags
How you put a jersey in a shadow box with pins depends on what the jersey is worth. Each method below trades permanence against the risk of marking fabric, and the right one changes with the piece.
| Method | How it works | Marks fabric? | Reversible? | Best for |
|---|---|---|---|---|
| Machine stitching | Stitch through the back at collar, sleeve seams and hem | Small holes in seam allowances | No | Standard adult jerseys |
| Fold and pin | Fold to the front, pin through both layers into the board | Yes, visible holes | Yes | Youth jerseys, reversible mounts |
| Stainless steel pins | Pin the sleeve seams and hem, leaving the face free | Minimal, at seams only | Partly | New jerseys with no resale intent |
| T-tags | Fabric tags grip the garment from the seam, no punctures | No | Yes | Signed, match-worn, vintage jerseys |
| Corner mounts | Small brackets hold the garment at the corners | No | Yes | Lightweight or oversized jerseys |
Use stainless steel framing pins rather than standard steel pins. They do not rust, and rust stains on fabric are permanent. Drive pins into the board between weave lines so the point does not split a thread, and space them 4 to 6 inches apart along the hem and sleeve seams.
For stitching, work through the back of the garment at the collar, the start of each sleeve and the bottom hem. A simple running stitch in archival thread is enough. Knot the thread on the back, not the front, so nothing shows through the number.
T-tags work by clamping a fabric flap around a wire core. You slide the tag into the seam from the inside, so the face fabric is never pierced. It takes a few minutes per tag and is the only method I would use on a piece with real value.
Framing a Signed or Game-Worn Jersey: What Changes
Signed and game-worn jerseys need a non-invasive mount and UV protection, nothing more. Everything else stays the same. The signature is ink on a printed fabric, and light plus pressure is what destroys it.
- Use T-tags or corner mounts. No pins in the face fabric, and no stitching across a signed area.
- Choose UV-protective acrylic. Ink fades fastest of anything you will frame.
- Keep the air gap generous. Any sustained contact with glazing leaves a permanent flat spot that never fully recovers.
- Include the certificate of authentication. Mount the COA card flat on the backing board beneath the jersey or beside it in the same case.
- Handle with clean gloves. Skin oils on a game-worn jersey accelerate fiber weakening.
- Photograph the piece before framing. Record the condition of the fabric, the placement of the signature and any wear, in case the piece is ever authenticated or sold.
Game-worn jerseys often arrive with repairs, holes or a broken seam. Frame the piece as it is rather than restoring it, because restoration reduces value for collectors.
Common Jersey Framing Mistakes and How to Fix Them
Most ruined jersey frames fail on six specific errors. Each one has a straightforward fix, and most are caught by the pre-seal check.
The Jersey Touches the Glazing
The fabric lies flat against the acrylic, which over time creates a dull, permanent mark. Fix it by adding foam or fabric spacers around the perimeter until you can see a shadow under the garment from the side.
Visible Wrinkles and Sagging
The jersey was mounted before it dried fully, or it was folded along a crease that was never steamed out. Fix it by removing the mounting, steaming the garment again, and remounting on a flat surface with even tension from the center outward.
Uneven Tension or Crooked Centering
The jersey was pulled into place at the corners. Fix it by pinning the center first, working outward in small steps, and measuring the margins to the board edge rather than eyeballing it.
Pins Visible on the Front
Pins were driven through the display face. Fix it by relocating them to seam lines and hidden areas, or by switching to T-tags for a piece that has already been punctured once.
Yellowed Board or Fabric Staining
Standard cardboard or an off-brand mount board was used. Fix it by removing the jersey carefully, supporting the fabric, and remounting on verified acid-free board. Check the back of the board for a neutral pH label.
Print Transfer or Ink Marks on the Board
The jersey was left rolled or folded in a damp bag before framing. Fix it by airing the garment for a day and checking the board surface for transfer before remounting.
Before you seal the frame, run a short check: is the jersey centered with even margins, is there an air gap all round, are all pins and threads on the back, does the frame sit square on the wall, and does the signature sit clear of the glazing? A five-minute check saves a rebuild.
DIY vs Professional Framing: How to Decide
Most craft stores will frame a jersey, and most will use their standard matting process rather than a fabric mount. A shop counter service is a reasonable route if you want a clean result quickly. Knowing the trade-offs helps you decide.
| Factor | DIY | Professional or shop service |
|---|---|---|
| Time investment | One to two hours including prep | A few days of turnaround |
| Skill needed | Steaming, folding, basic stitching or pinning | None |
| Materials choice | Full control over board, glazing and depth | Whatever the shop stocks |
| For valuable pieces | Risky without a T-tag mount | Preferred, and the work carries a guarantee |
| Reversibility | Depends on the method you choose | Often permanent adhesive mounting |
| Best for | New jerseys, combination layouts, learning the craft | Signed, match-worn, vintage, and resale pieces |
Chain craft stores can usually cut boards to size and may sell shadow boxes, foam board and mat board in the right dimensions. That makes sourcing easy even if you do the assembly yourself.
Choose a professional when the jersey is game-worn, carries a valuable autograph, will be authenticated or insured, or is a gift you cannot risk. Choose DIY when the jersey is a recent purchase, when you want to combine it with other memorabilia, or when you want full control over depth and board color.
Display Ideas: Combining a Jersey With Photos and Memorabilia
A single jersey in an empty frame looks spare. A 2-inch deep case gives you room to build a small story around it, and the layout is the part people enjoy most.
- Season ticket and ticket stubs mounted flat on the backing board below the jersey, sealed in a pocket or between two sheets of archival polyester.
- Four photo corners at the lower left holding two or three 4×6 photos: the player, the game, the day it was signed.
- Miniature team memorabilia such as a hat, a pair of mini gloves or a small pennant, which is where the extra depth pays off.
- The COA card in the corner for authenticated pieces, mounted so it reads without glare.
- An engraved nameplate on the frame face or the bottom rail with the player name, team and years.
Set the jersey in the upper two thirds of the case and let the items below carry the story. Keep everything flat and spaced so the shadow lines separate cleanly, and leave roughly half an inch between the jersey hem and anything below it.
Framing Multiple Jerseys and Matching Sets
Framing a set of jerseys works best when every case is identical, because mismatched mouldings and glass read as clutter. Buy or build all four frames in the same size, with the same depth and the same glazing, and hang them as a grid with 3 to 4 inches of even spacing between frames.
Center the first frame on the wall, mark the top edge, then level the rest against that line. A laser level makes the grid quick. For two jerseys, a side-by-side pair reads better than a stack, because the eye follows the width rather than the height.
Decide the layout before you cut a single board. If a third or fourth piece is likely, pick a frame size that works for all of them now, since changing size later means rebuilding every mount.
How to Hang a Framed Jersey and Care for It Long Term
Hang the finished frame on hardware rated for at least double its weight, and keep it out of direct sunlight, away from heating vents and away from exterior walls. Light, heat and humidity are the three things that damage a framed jersey, and a west-facing wall gives you all three in one afternoon.
- Check the hardware. Use two points at the top, or a French cleat for a heavy case. Drywall anchors rated for the frame weight are not optional.
- Hang to eye level. Center of the frame about 60 to 66 inches from the floor works for most rooms.
- Keep the glass clean. Dust acrylic with a microfiber cloth and a dry or lightly dampened hand. Never use ammonia cleaner on acrylic.
- Inspect twice a year. Look for condensation, bowing of the backing board, loose turn buttons or yellowing at the board edges.
- Watch the environment. Basements and attics swing in humidity. Keep the case away from exterior walls and out of direct sun.
- Photograph the framed piece. A dated photo of the front and the back records the mounting method, which matters for a piece you may sell or pass down.
A well-mounted jersey in a UV-filtering case, hung away from sun, has a realistic shelf life measured in decades rather than seasons. The difference between that outcome and a faded print usually traces back to the board and the glazing, not the mounting technique.
Frequently Asked Questions
How do I frame my jersey?
Wash and steam the jersey, fold the sleeves in behind the body, then center it on an acid-free foam or mount board cut 2 to 3 inches larger than the garment. Secure it with stitching through the seams, T-tags, or stainless steel pins, add foam spacers so the fabric clears the glazing, and close the frame behind UV-protective acrylic. Hang the finished case away from direct sunlight.
What is the best way to frame a sports jersey?
A deep shadow box with an acid-free board and UV-protective acrylic is the best method for almost every jersey. The depth gives the folded garment clearance, the acid-free board prevents yellowing, and the UV filter slows fading of the print and any signature. Mounting the jersey with T-tags keeps the face fabric unpierced, which matters for signed and vintage pieces.
How do I put a jersey in a shadow box with pins?
Lay the folded jersey on the acid-free board and center it first. Pin the center hem, then work outward toward the shoulders in small steps, keeping even tension. Use stainless steel pins spaced 4 to 6 inches apart and drive them into the board between weave lines so they do not split threads. Add spacers around the perimeter so the fabric does not touch the glazing, then seal the back.
What type of frame is best for displaying a jersey?
A shadow box with 1 to 2 inches of interior depth is the best frame for a jersey because the folded garment, backing board and spacers need clearance that a flat frame cannot provide. Choose UV-protective framer’s grade acrylic for a light, shatter-safe face. Go deeper, 2 inches or more, if you plan to add photos, tickets or other memorabilia.
What size frame do I need to frame a jersey?
Measure the jersey flat across the chest at the widest point, then add 3 to 4 inches of margin on every side. Youth sizes usually fit 20×24 to 24×30 frames, adult small through large fits 28×32 to 30×36, and adult 2XL needs 32×40. Sizes 3XL and wider may need a custom case or a layout with the sleeves folded inward.
What is the best size for framing a football jersey?
A 30×36 frame fits most adult football jerseys, and 32×40 gives better margin for large fits. Football jerseys sit square across the shoulders, so measure shoulder to shoulder and add 3 to 4 inches on each side. Youth football jerseys usually fit 20×24 or 24×30. Measure before you buy, since shoulder span varies more than the size label suggests.
What size frame do I need for a jersey display case?
The frame must be at least 3 to 4 inches wider and 3 to 4 inches taller than the jersey measured flat, plus enough interior depth to clear the board and spacers. For most adult jerseys that lands between 28×32 and 32×40, with 1 to 2 inches of depth. Add depth rather than width if you plan to include tickets or photos.
What backing board is best for framing a jersey?
Acid-free foam board is the best all-round choice because its thickness gives the jersey a fuller, dimensional look. Acid-free mount board works when you want a flat, smooth surface under a pinned jersey. Avoid standard cardboard, whose acidic sizing migrates into fabric and leaves a yellow-brown stain that will not come out.
Should you frame a jersey with glass or acrylic?
Framer’s grade acrylic is the better choice for most jerseys. It is about half the weight of glass, will not shatter, and quality acrylic blocks around 98 percent of ultraviolet light, which slows fading of prints and autographs. Glass is more scratch resistant but heavy and shatter prone. Avoid ammonia cleaners on either surface and use a microfiber cloth.
Do you steam a jersey before framing it?
Yes. Wash it according to the care label, let it dry fully, then steam it or iron it on low heat with a clean pressing cloth between the fabric and the iron. Work from the collar down to push wrinkles toward the hem, and steam from the back of the garment where possible so printed areas and sleeve patches do not scorch or pucker.
How do you keep a jersey from wrinkling in a frame?
Mount the garment on a flat surface and work from the center outward so tension stays even. Never pull it into position by the corners, which stretches the fabric and sets diagonal creases. Add spacers so the jersey is held in a shallow pocket of air rather than pressed flat, and make sure the backing board is flat and square before you close the frame.
How much does it cost to frame a jersey?
The cost depends on whether you do it yourself. DIY framing means you pay only for a shadow box, acid-free board, glazing and mounting supplies, and the labor is a one to two hour project. Shop and professional services charge a custom framing fee on top of materials and add turnaround time, but they carry the risk on a valuable piece and offer a non-invasive T-tag mount.
Can Hobby Lobby frame a jersey?
Most chain craft stores can frame a garment using their standard matting and cutting services, though the service is designed for paper rather than fabric. For a jersey, the better approach is to buy the shadow box, board and acrylic there and do the mounting yourself, which gives you control over depth, tension and the UV filter.
How do you frame multiple jerseys?
Use the same frame size, depth and glazing for every case in the set so the wall reads as one grid rather than a collection. Measure all the jerseys first and pick a size that works for the largest one. Hang the first frame, mark its top edge, then level the rest against that line with 3 to 4 inches of even spacing.
Is a shadow box better than a standard frame for a jersey?
Yes, for almost every jersey. A shadow box provides 1 to 2 inches of interior depth so the folded garment, backing board and spacers clear the glazing instead of pressing against it. A standard flat frame gives under an inch of clearance, which is enough only for a small youth jersey with no foam insert and no other memorabilia.
Conclusion
How to frame a jersey comes down to four decisions: an acid-free board, a shadow box deep enough to clear the fabric, UV-protective acrylic, and a mounting method that suits the value of the piece. Steam the garment flat, center it on the board, work from the center outward so tension stays even, leave an air gap on all sides, and hang the case away from direct sun. Do those things and the frame protects the jersey for decades instead of seasons.