
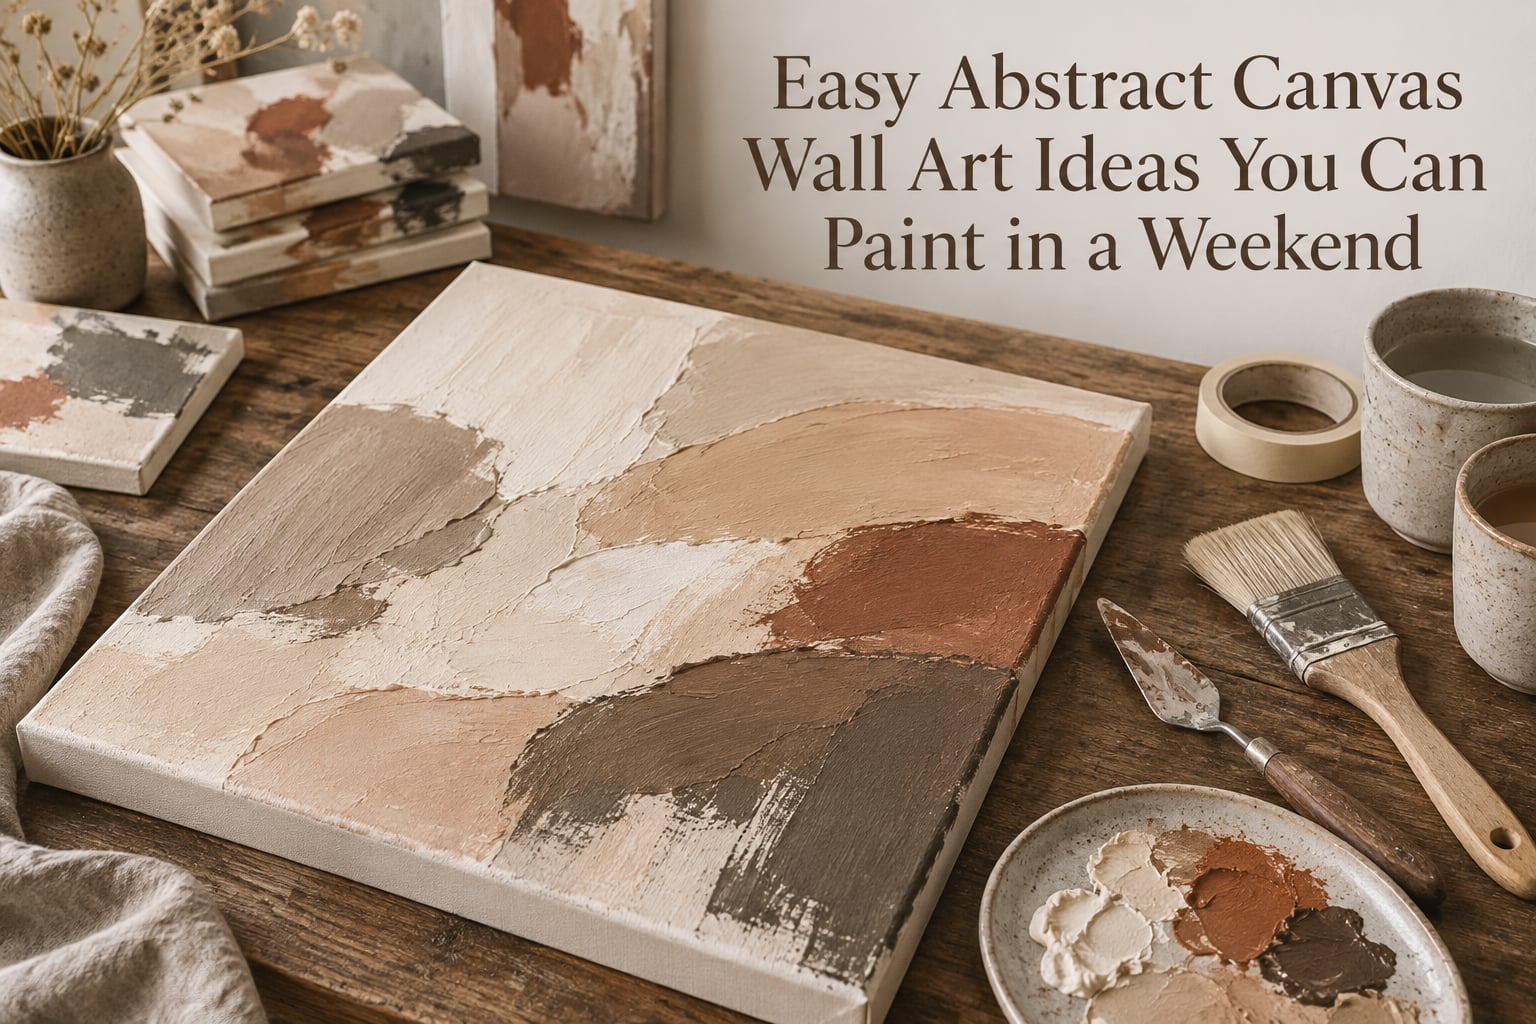
Every blank wall eventually wins. You walk past it with your coffee, decide it needs something, open a browser tab to search for art, and then close the tab because a print costs more than you want to spend on a piece you will not choose from a screen. Painting it yourself solves that, and abstract work is the version of painting that actually fits inside a weekend.
These easy abstract canvas wall art ideas need no drawing skill, no art school vocabulary, and no talent for seeing things the way a gallery does. You need a primed canvas, two or three acrylic colors, a brush or a knife, and about four hours of active work spread across two days. Dry time is the only real constraint, and that is a scheduling problem, not a talent problem.
Below you will find ten techniques ranked by drying time and difficulty, a session plan that fits Saturday and Sunday, a supply list, and the mistakes almost every beginner makes once. If you have never painted before, start with the alcohol lift or the dry brush. Both forgive nearly everything.
Table of Contents
- 10 Easy Abstract Canvas Wall Art Ideas You Can Paint in a Weekend
- Which Technique Should You Pick? Weekend Comparison Table
- How to Plan Your Weekend Around Drying Time
- What You Need to Paint Abstract Art
- How to Pick a Color Palette (and the 70/30 Rule)
- Common Beginner Mistakes and How to Fix Them
- How to Choose the Right Canvas Size for Your Wall
- Drying, Sealing, and Hanging Your Finished Piece
- Abstract Wall Art Trends Worth Trying in 2026
- Frequently Asked Questions
- What are some easy abstract art ideas for beginners?
- Do I need drawing skills to paint abstract art?
- What is the hidden golden rule in abstract art?
- What is the 70/30 rule in painting?
- What does adding rubbing alcohol to acrylic paint do?
- How long does acrylic paint take to dry between layers?
- What supplies do I need to paint abstract art?
- What size canvas should I use for a big blank wall?
- What are the current abstract art trends?
- Conclusion: Start With One Canvas This Weekend
10 Easy Abstract Canvas Wall Art Ideas You Can Paint in a Weekend
The fastest beginner abstract projects are the alcohol lift, the dry brush sweep, the palette knife field, the diluted wash, the drip pour, the sgraffito scrape, the color block, the soft gradient, the splatter, and the tape reveal. Every one of them finishes in a single sitting of active painting, and all of them cure overnight. Ranked roughly by how quickly a beginner gets a result they like, here they are.
1. The alcohol lift (also called the swipe effect)
A drop of rubbing alcohol pushed through wet acrylic paint drags the color into a soft, feathered bloom. It is the single most forgiving first project, because the effect is mostly done for you.
- Tape the back edges of the canvas and lay it flat on a covered table.
- Paint a base of 3 to 5 colors in large loose blocks, mixing each with equal parts water so it flows.
- Wait until the surface looks matte rather than wet, usually 5 to 10 minutes.
- Drop 5 to 10 drops of rubbing alcohol on the canvas, then drag a clean flat brush or a fingertip through each drop.
- Let it dry flat for at least 4 hours, then stand the canvas upright.
Dry time: 4 to 6 hours to touch, 24 hours to cure. Difficulty: beginner. Extra supplies: rubbing alcohol, a flat brush or a clean cotton swab.
2. Dry brush sweep
A nearly dry brush loaded with a thick paint and swept across the canvas leaves broken, streaky marks that read as texture. It is the fastest route to something that looks like it took more skill than it did.
- Prime or tape the canvas edges, then apply a thin base coat and let it dry completely.
- Load a wide flat brush with thick paint straight from the tube, no water.
- Wipe most of the paint off on a paper towel until the brush is nearly dry.
- Sweep in long, single strokes with light pressure, changing color at the end of each stroke.
- Repeat with a second color while the first layer is still slightly damp so edges stay soft.
Dry time: 2 to 3 hours between layers. Difficulty: beginner. Extra supplies: one wide flat brush and paper towels.
3. Palette knife field
A palette knife lays paint in thick ridges of impasto that catch light and give the piece physical depth. It is a two-hour project and the surface is genuinely three-dimensional when it dries.
- Squirt 4 to 6 colors onto a plate or piece of cardboard, keeping each color separate.
- Pull the knife through each color and drag it across the canvas in overlapping diagonal bands.
- Press the flat of the knife lightly to flatten some ridges and leave others raised.
- Add a contrasting color thinly across the top with the knife held at a shallow angle.
- Clean the knife immediately with a damp cloth before the paint sets.
Dry time: 6 to 8 hours for the impasto to firm up. Difficulty: beginner to intermediate. Extra supplies: a palette knife or a putty knife, a plate, cardboard.
4. Diluted acrylic wash with a soft gradient
A wash is paint thinned with water until it behaves like colored water, and stacking two or three washes gives the smooth, calm look popular in living rooms right now. It looks expensive and it is the least messy technique on this list.
- Mix 2 parts water to 1 part acrylic paint in a jar or cup.
- Brush the wash across the canvas in long overlapping strokes, working from one corner to the opposite one.
- Let it dry fully, 1 to 2 hours, then repeat with a second color placed only on one half of the canvas.
- Blend the meeting point with a clean damp brush before the second wash dries.
- Add a third wash the next morning for a smooth, layered look.
Dry time: 1 to 2 hours per wash. Difficulty: beginner. Extra supplies: cups, a wide flat brush, water.
5. Drip and pour
Thinned acrylic is allowed to run and pool on the canvas, creating organic shapes and lacing. The result looks ambitious and takes about ten minutes of actual painting.
- Protect your work surface completely, then tape all four canvas edges.
- Thin 4 to 6 colors to a cream-like consistency with equal parts water.
- Stand the canvas on a low riser or the rim of a box, tilted very slightly.
- Drizzle each color from a spoon or a squeeze bottle in a wandering line.
- Tap the side of the canvas gently to move the paint, then leave it flat and undisturbed for 8 hours.
Dry time: 8 to 12 hours, so this is a Saturday night job. Difficulty: intermediate. Extra supplies: a tilting surface, cups, a drop cloth, an old sheet underneath.
6. Sgraffito scrape
You lay down a wet top layer and then scratch through it with a stick to reveal the color underneath. The exposed lines add rhythm and a hand-drawn quality that smooth washes never have.
- Paint and dry a base layer of 3 colors in blocks.
- Apply a thick top layer of one contrasting color across half the canvas.
- While the top layer is still wet, drag a wooden stick or the handle of a brush through it in lines, arcs, or dots.
- Let the surface skin over slightly, about 20 minutes, so the scratches stay clean-edged.
- Repeat on the other half with a third color if you want a fuller composition.
Dry time: 4 to 6 hours. Difficulty: intermediate. Extra supplies: a wooden stick, a credit card, a craft knife with adult supervision away from children.
7. Bold color blocking
Hard-edged blocks of flat color separated by tape create a graphic, modern piece with no blending required. It is the best option if your room already has strong furniture colors to match.
- Sketch 3 to 5 blocks lightly in pencil, or plan them in your head and start with tape.
- Apply masking tape along the block edges and press the tape down firmly.
- Fill each block with thick acrylic, keeping the color consistent and un-thinned.
- Peel the tape while the paint is still slightly damp for a clean line, or wait until fully dry for a slightly ragged, softer edge.
- Add a thin second color inside one block for depth.
Dry time: 3 to 4 hours. Difficulty: beginner. Extra supplies: masking tape, a pencil, a small flat brush.
8. Watercolor and ink blooms on canvas
Wet-into-wet watercolor plus a few drops of ink creates soft clouds with dark edges that look far more controlled than they are. It rewards patience with the drying stage rather than with skill.
- Brush clean water across the canvas until it looks evenly damp, not dripping.
- Drop diluted watercolor or thinned acrylic into the damp areas and let it spread on its own.
- While it is still damp, add a drop or two of black ink and watch it bloom outward.
- Tilt the canvas a few degrees to let the wet paint travel toward one corner.
- Leave it flat overnight; touching it early ruins the edges.
Dry time: 6 hours minimum, overnight is better. Difficulty: beginner. Extra supplies: watercolors or ink, a cup of clean water, a tilt board.
9. Splatter and flick painting
Load a brush with thinned paint and flick it with your finger or flick a loaded toothbrush for fine spray. Splatter makes a fast energetic piece and pairs well with a solid color block underneath.
- Paint and dry a simple two-color background.
- Thin a third color until it runs off the brush in a drip.
- Flick the brush against a finger over the canvas, working from the far edge toward yourself.
- Use a toothbrush and thumb for a finer mist over one section only, so the piece has both scales.
- Stand back from across the room and check the balance before the paint dries.
Dry time: 2 to 3 hours. Difficulty: beginner. Extra supplies: an old toothbrush, an old sheet or newspaper underneath.
10. A series of three mini canvases
Rather than one large piece, paint three small canvases in a matched set over a weekend. This is the move to make when you are building a gallery wall, and it is the approach r/painting regulars and r/crafts posters describe most often for a first series.
- Choose three canvases in the same size, 8 by 10 inch works well.
- Pick one palette of 3 colors and use all three on every canvas so the set reads as related.
- Give each canvas a different technique: a wash, a dry brush sweep, and a color block.
- Repeat the same 5 to 7 day spacing between pieces so the set hangs with even visual weight.
- Space the finished pieces 2 to 3 inches apart on the wall.
Dry time: work one canvas per session. Difficulty: beginner. Extra supplies: three canvases instead of one, a consistent palette.
Which Technique Should You Pick? Weekend Comparison Table
Pick by dry time, not by how the finished piece looks in a photo. Drip and pour needs a full night of flat drying, while the dry brush sweep is workable in an afternoon. Here is the honest comparison of all ten techniques side by side.
| Technique | Active time | Dry time before moving | Difficulty | Extra supplies |
|---|---|---|---|---|
| Alcohol lift | 20 to 30 min | 4 to 6 hours | Beginner | Rubbing alcohol, flat brush |
| Dry brush sweep | 45 to 60 min | 2 to 3 hours | Beginner | Wide flat brush, paper towels |
| Palette knife field | 60 to 90 min | 6 to 8 hours | Beginner to intermediate | Palette knife, plate |
| Diluted wash gradient | 40 min per wash | 1 to 2 hours per layer | Beginner | Cups, wide brush |
| Drip and pour | 20 to 30 min | 8 to 12 hours flat | Intermediate | Drop cloth, tilting surface |
| Sgraffito scrape | 60 min | 4 to 6 hours | Intermediate | Wooden stick, tape |
| Color blocking | 60 to 75 min | 3 to 4 hours | Beginner | Masking tape |
| Watercolor blooms | 30 min | 6 hours, overnight better | Beginner | Watercolor or ink, water |
| Splatter and flick | 20 to 30 min | 2 to 3 hours | Beginner | Old toothbrush, sheet underneath |
| Mini canvas series | 60 min per canvas | 3 to 4 hours per canvas | Beginner | Three small canvases |
Two rules make the table easier to act on. Anything that needs 8 or more hours of flat drying has to start on Saturday morning, not Saturday night. And anything needing three separate dry cycles, like the wash gradient, belongs on a three-day project unless you use a fan to move the air.
How to Plan Your Weekend Around Drying Time
Acrylic paint is touch-dry long before it is cured, and almost every abandoned weekend project fails for the same reason: the painter decided a 40 minute dry meant the piece was finished. Touch-dry acrylic can still pick up a fingerprint or stick to a shelf, so plan the schedule around full overnight curing instead.
- Saturday morning, 2 hours: tape the canvas edges, apply any base coat, and start the first color blocks or wash. Nothing finishes in this session and that is fine.
- Saturday afternoon, 1 to 2 hours: while the base dries, mix your palette, set out tools, and practice two or three marks on scrap cardboard. Then add the main marks on the canvas once the base is dry to the touch.
- Saturday evening, 45 minutes: stand the canvas upright in a corner or on a drying rack, away from dust and pets. Do not lay it flat unless a drip or pour technique requires it.
- Sunday morning, 1.5 hours: add the final layer, texture, or details. This is the session where a piece that looked flat yesterday starts to make sense.
- Sunday afternoon, 30 minutes: seal the surface once the paint is fully dry to the touch, then hang it or set it in the intended spot.
- Sunday evening, 10 minutes: look at the piece from across the room and from the doorway. The view from the doorway is the one that tells you whether the composition works.
Two shortcuts shorten the schedule. A small fan or hair dryer on the cool setting, held at a distance and moved constantly, cuts dry time by roughly a third without causing cracks. A water spray bottle misted over a nearly dry wash brings it back to workable and smooths a chalky surface.
What You Need to Paint Abstract Art
A beginner abstract starter kit is smaller than most people expect. You can complete two or three of these projects with the same kit, and every item below has a clear job in the ten techniques above.
| Item | Why you need it | Which techniques use it |
|---|---|---|
| Primed stretched canvas | Sealed surface that takes paint without absorbing it | All ten |
| Acrylic paint, 4 to 6 colors | Water-based, quick drying, easy to thin | All ten |
| Wide flat brush, 1 to 2 inch | Washes, dry brush, color blocking | 1, 2, 4, 7, 8 |
| Round brush, small | Details and edge work | 6, 7, 9 |
| Palette knife | Impasto texture and ridges | 3 |
| Cups and a water jar | Mixing and thinning | 1, 4, 5, 8 |
| Masking tape | Clean edges and protected borders | 1, 6, 7 |
| Rubbing alcohol | Lifts wet paint into blooms | 1 |
| Palette or cardboard sheet | Mixing surface that can be thrown away | 3, 5, 9 |
| Drop cloth and an old sheet | Protects the table and floor | 5, 9 |
| Wooden stick | Scratching lines into wet paint | 6 |
Skip gesso and primer for a pre-stretched canvas sold as primed or pre-gessoed, which is nearly every budget canvas. If the label says raw or unpainted, seal it first with one thin coat of gesso and let it dry overnight.
On cost, the canvas is by far the largest line item in this project, and acrylic paint is the smallest. A small set of basics covers a whole wall over a year, so the second painting costs almost nothing in supplies.
How to Pick a Color Palette (and the 70/30 Rule)
The 70/30 rule says to let one dominant color occupy about 70 percent of the surface and a secondary or accent color take the remaining 30 percent. Beginners apply it by mixing 4 to 6 colors into a jar, then using that blend for most of the canvas and saving a single contrasting color for 30 percent of the marks.
The 70/30 split is a guideline rather than a law, and it works because it gives the eye one clear place to rest. Painting with five equal colors at once gives the eye nowhere to settle, which is the most common reason a beginner piece looks busy rather than finished.
- Neutral palette: white, warm gray, black, and one beige. These pieces disappear into a room and make it look bigger, which is why they are the safest first choice.
- Monochromatic: one hue in five values, from a pale tint to a near-black shade. The result feels calm and is very forgiving of uneven coverage.
- Bold two-color: one dominant, one accent. The highest contrast option and the best match for a room with strong furniture.
- Earth plus one: terracotta, ochre, cream, and a single deep green or blue. Warm, lived-in, and easy to keep consistent.
Pull colors from the room rather than from an abstract idea. Look at your sofa, your rug, and your curtains, find the color that repeats, and build the palette from that. r/malelivingspace posters consistently report that matching the room is what makes a self-painted piece look deliberate instead of homemade.
Common Beginner Mistakes and How to Fix Them
Every mistake below is recoverable, and most of them are recoverable while the paint is still wet. This is the section nobody else on the first page of results covers, and it is the one that saves the project.
Muddy color
Mud happens when you stir a color back into a previous mixture or over-thin the paint until the pigment separates. Fix it by letting the area dry completely, then painting over it with a thin, un-thinned coat of the intended color. Prevention is simpler: rinse the brush between colors, and never mix on the canvas.
Over-thinned paint
If the paint runs like water and you have to wait an hour for it to stop moving, it is too thin for anything except a wash. Fix it by letting it dry and adding a thicker layer on top, or by mixing fresh thick paint into the wet area to stiffen it.
Chalky, flat, unfinished surface
A surface with no contrast between marks reads as unfinished. Fix it by adding a final pass of one dark color applied with a dry brush, which introduces contrast without needing precision. Step back to the doorway and check again afterward.
Cracking or flaking
Cracks come from thick paint applied over a still-wet layer, or from a fan or heater pointed directly at the canvas. Fix a small crack by painting a thin layer of matching color over it once everything is fully dry. Keep airflow gentle and keep the layers thin.
Ragged or dirty canvas edges
Paint running over the sides of the canvas makes a finished piece look cheap. Fix it with masking tape applied before painting, or trim the edge after drying with a straight razor held against a ruler. Taped edges also keep the weave from wicking paint into a fuzzy line.
Working the paint too long
Kneading and reworking a spot to “get it right” is how beginners talk themselves out of good work. r/painting posters describe the same lesson repeatedly: the best abstract results come from deliberately loose marks that were not planned. Set a timer, commit to the mark, and move on.
Forgetting the paint ratio
If you never measure, you never repeat, and a three-canvas series ends up looking like three unrelated pieces. Fix it by mixing each color in the same jar with the same water ratio and using the same recipe on all three canvases.
How to Choose the Right Canvas Size for Your Wall
A painting hung too small on a large wall looks lost, and the most common size mistake beginners make is under-buying. Use wall width as your guide rather than your confidence. A canvas should generally cover between half and two thirds of the width of the furniture beneath it, or between half and two thirds of the width of the blank wall section if there is no furniture.
| Blank wall width | Single canvas that works well | Alternative |
|---|---|---|
| 3 to 4 feet | 16 x 20 inch or 18 x 24 inch | Three 11 x 14 inch pieces in a row |
| 5 to 6 feet | 24 x 36 inch | Two 24 x 30 inch pieces side by side |
| 7 to 9 feet | 30 x 40 inch or 36 x 48 inch | Two large pieces with a gap, or a four-piece grid |
| 10 feet or more | Two or more large canvases | A full gallery wall of mini canvases |
For vertical walls, go with a portrait orientation, and for wide walls above a sofa or console, go landscape. If you have a specific furniture piece, the canvas width should sit at roughly two thirds of that piece’s width, and the bottom of the canvas should land between 6 and 10 inches above it.
Hang the center of the artwork at 57 inches from the floor, which is standard gallery height. Renting a small level and measuring twice costs nothing and prevents the most common hanging mistake, which is a piece that is level on one side and off by an inch on the other.
Drying, Sealing, and Hanging Your Finished Piece
Wait at least 24 hours before sealing, and up to 72 hours if you used thick impasto or a drip pour. A matte sealer leaves the texture exactly as painted and suits almost every beginner piece, while a satin or gloss sealer deepens the colors slightly and reflects light across large impasto ridges. Apply it with a soft brush in long even strokes, away from any dust in the air.
Hanging an unframed canvas saves the most money and suits the look. Use two D-rings on the back corners and a D-ring or a picture-hook on the wall, then level the piece with a bubble level. For a renter, two heavy-duty removable strips rated well above the canvas weight hold a light stretched canvas flat against the wall, and taping the back edges means no hardware is visible at all.
Keep the canvas flat against the wall rather than hanging it with a gap behind it. A stretched canvas has a natural shadow line at the top and sides, and that shadow is the depth cue that makes the piece read as a real object instead of a poster.
Abstract Wall Art Trends Worth Trying in 2026
The strongest current looks all share a limited palette, a visible hand, and one clear focal area. Neutral, low-contrast washes in warm gray and cream remain the most requested direction because they suit rental and staging spaces. Texture-forward impasto in two or three colors is the second major direction, and the palette knife is the reason it looks intentional.
A third direction is soft, blurred organic shapes rather than hard geometric blocks, which is exactly what the alcohol lift and watercolor bloom techniques produce. Color blocking with hard tape edges is still widely used and works especially well in home offices and nurseries. The final direction is the mini canvas series, where a matched set of small pieces fills a gallery wall at a size and effort level most beginners can actually manage.
What has faded is the heavily layered, heavily glossy overpainting look that needed dozens of thin layers. You cannot build that in a weekend, and the current preference for visible negative space suits a painter who is still learning.
Frequently Asked Questions
What are some easy abstract art ideas for beginners?
The easiest beginner abstract projects are the alcohol lift, the dry brush sweep, the diluted acrylic wash, color blocking with masking tape, and the palette knife field. Each needs one sitting of active painting and cures overnight. All five use only acrylic paint, a canvas, and one or two extra tools.
Do I need drawing skills to paint abstract art?
No. Abstract painting is built from color, shape, line, and texture rather than a recognizable subject, so there is nothing to draw accurately. Every technique on this page works by moving, layering, thinning, or scratching paint, and none of them require a steady hand or an art background.
What is the hidden golden rule in abstract art?
There is no right or wrong answer, and the real rule is to commit to each mark instead of correcting it. Beginners lose more time trying to fix a stroke than painting it in the first place. Leave room for negative space and let one color dominate the composition.
What is the 70/30 rule in painting?
The 70/30 rule means letting one dominant color occupy about 70 percent of the surface and a secondary or accent color take the remaining 30 percent. It works because it gives the eye one clear place to rest. Paint five equal colors at once and the piece reads as busy rather than finished.
What does adding rubbing alcohol to acrylic paint do?
Rubbing alcohol pushes and thins wet acrylic, dragging the color outward into soft feathered blooms and lightened areas. Apply it to paint that has lost its wet shine but is not yet dry. Too much alcohol thins the paint into a pale stain, so drop small amounts and test on cardboard first.
How long does acrylic paint take to dry between layers?
Acrylic is touch-dry in 20 to 30 minutes and firm after 1 to 2 hours, but full curing takes 24 to 72 hours. Paint the next layer only when the surface no longer feels tacky or cool. A fan on a cool setting held at a distance can cut dry time by roughly a third.
What supplies do I need to paint abstract art?
You need a primed stretched canvas, four to six acrylic colors, a wide flat brush, a small round brush, cups and a water jar, and a palette or piece of cardboard for mixing. A palette knife, masking tape, and rubbing alcohol cover the texture and effect techniques. A drop cloth protects the table and floor.
What size canvas should I use for a big blank wall?
Aim for a canvas that covers about half to two thirds of the wall width, and match orientation to the wall shape. A 24 x 36 inch canvas suits a 5 to 6 foot wall, and two 24 x 30 inch pieces suit the same wall if you want a paired look. Three 11 x 14 inch canvases work well on narrower sections.
What are the current abstract art trends?
The most requested looks right now are limited neutral palettes in warm gray and cream, texture-forward impasto in two or three colors, soft blurred organic shapes, and hard-edged color blocking. Matched mini canvas series are popular for gallery walls. Heavyly layered glossy overpainting has faded in favor of visible negative space.
Conclusion: Start With One Canvas This Weekend
The best easy abstract canvas wall art idea for a first attempt is the alcohol lift, because it does most of the work for you and dries in under six hours. Choose your canvas size against the wall first, mix your palette second, and follow the Saturday and Sunday session plan rather than trying to finish in one go.
Pick one technique, tape the edges, and start Saturday morning. The wall will look different by Sunday afternoon, and you will have made something that no store could have picked for you.