
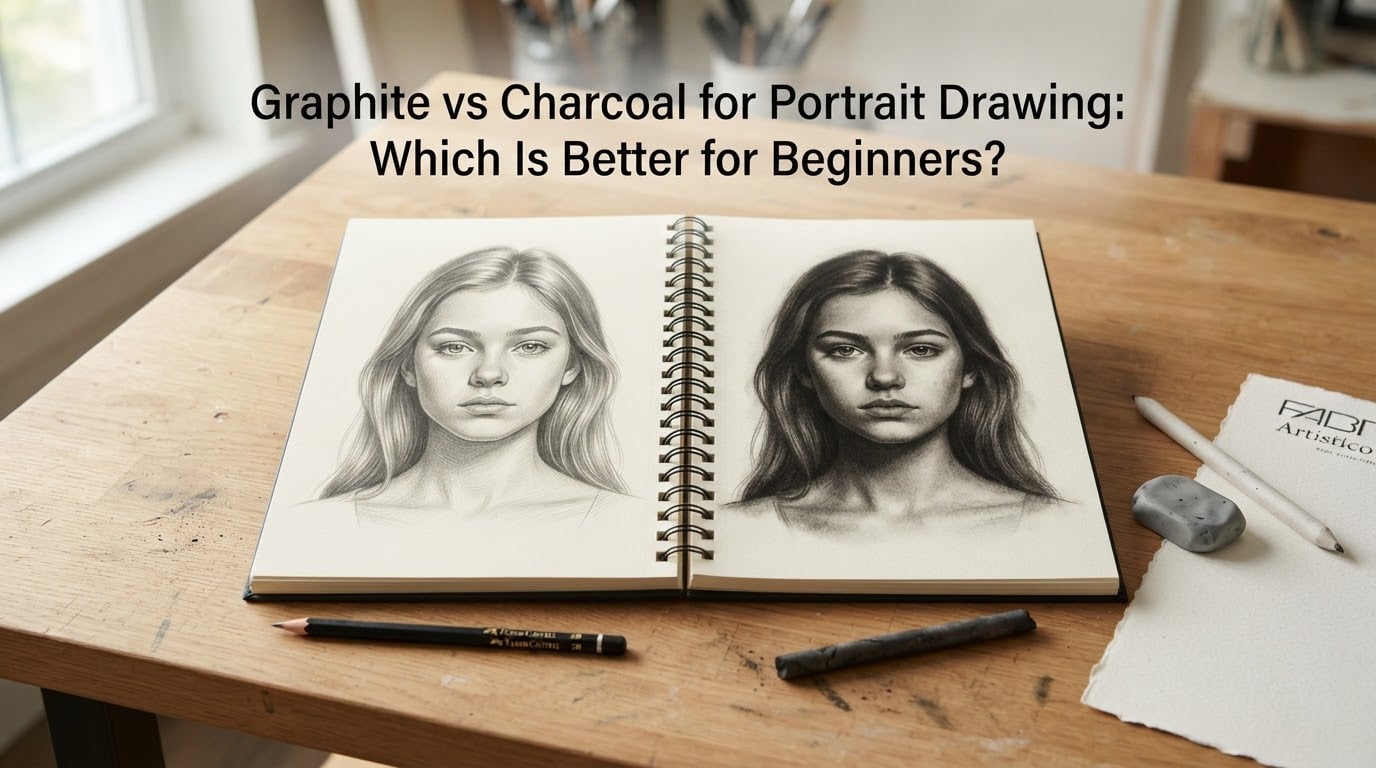
Choosing between graphite and charcoal for portrait drawing is one of the first real decisions a beginner makes, and it shapes how every sketchbook page feels for years. I have watched dozens of new students freeze in the art-supply aisle, holding a graphite pencil in one hand and a charcoal stick in the other, and I have been that beginner myself.
This guide breaks down the graphite vs charcoal for portrait drawing debate the way I wish someone had explained it to me on day one. You will learn how each medium actually works on paper, the trade-offs nobody mentions, which one I recommend you start with, and how to layer both safely once your confidence grows. By the end, the choice will feel less like a coin flip and more like picking the right tool for the job you want to do.
Table of Contents
- Quick Verdict: Which Should You Pick First?
- What Is Graphite and How Does It Work?
- What Is Charcoal and How Does It Work?
- Graphite vs Charcoal: Head-to-Head Comparison
- Types of Graphite Every Beginner Should Know
- Types of Charcoal Every Beginner Should Know
- Portrait-Specific Techniques: Eyes, Hair, and Skin Tones
- Tools and Paper You Need to Get Started
- Common Beginner Mistakes (and How to Avoid Them)
- Can You Use Graphite and Charcoal Together?
- Which Should Beginners Choose First?
- Frequently Asked Questions
- Conclusion
Quick Verdict: Which Should You Pick First?
For most beginners, graphite is the safer first medium for portrait drawing. It is cleaner, easier to control, easier to erase, and works on the cheap sketchbook paper you probably already own. Once you can place an eye or shape a jawline in graphite without fighting your tools, charcoal becomes a powerful upgrade rather than a frustration.
That said, charcoal wins if your goal is expressive, painterly portraits with the deepest blacks you can get from a dry medium. Artists who love bold contrast, dramatic lighting, and quick gestural marks reach for charcoal first. If that sounds like you, start with vine charcoal for sketching and add a single compressed charcoal pencil for the dark accents.
Here is the rule of thumb I share with new students: start graphite, learn structure, then add charcoal for mood. Following this path avoids the two big beginner traps: shiny graphite that ruins photographs and dusty charcoal that ends up on your phone screen.
What Is Graphite and How Does It Work?
Graphite is a naturally occurring form of carbon that miners first picked up in Borrowdale, England, around the 1500s. Before that discovery, artists used actual lead, which is why we still call them “lead pencils” even though no lead has touched a drawing pencil in centuries.
Modern graphite cores are a mixture of powdered graphite and clay. More clay makes a harder, lighter mark; more graphite makes a softer, darker mark. That mixture is what the HB scale measures, and it is the single most important concept to understand before you buy pencils.
Understanding the HB Scale
The HB grading system runs from 9H (extremely hard, pale grey) through HB (the middle, balanced grade) down to 9B (extremely soft, near-black). H grades are hard and leave light, precise, crisp lines ideal for technical drawing. B grades are soft and lay down rich, dark, blendable marks perfect for shading and portraits.
For portrait work, most of my sketches live in the 2B to 6B range. 2B gives a soft middle grey that builds the base skin tones, 4B deepens the shadows under the chin and around the eye sockets, and 6B pushes the darkest accents in pupils and hair. I keep one 2H handy only for the very brightest highlights and the initial construction lines I want to erase later.
Why Graphite Looks the Way It Does
Graphite leaves a slightly metallic sheen because the carbon-clay mixture sits on top of the paper fibers and reflects light. That sheen is the reason graphite portraits can look glossy under raking light or in photographs. It is also why graphite feels more “drawing” and less “painting” compared to charcoal.
What Is Charcoal and How Does It Work?
Charcoal is burned organic matter, usually willow, vine, or grape wood, that artists have used since the first cave paintings. When wood burns in a low-oxygen kiln, what remains is nearly pure carbon with a soft, powdery, almost velvety texture.
Unlike graphite, charcoal has no clay binder. The carbon particles sit loosely on the paper surface, which is why charcoal smudges so easily and why a single stroke can go from light grey to deep black with very little pressure.
The Three Forms of Charcoal
Vine charcoal (sometimes called willow charcoal) is the lightest and most sketch-like. It glides across paper, lifts off with a kneaded eraser, and is perfect for blocking in shapes at the start of a portrait.
Compressed charcoal is ground charcoal powder pressed into sticks or pencil form with a gum or wax binder. It is much darker and harder to erase, so it is best reserved for the deep darks at the end of a drawing.
Charcoal pencils wrap that same compressed charcoal in a wood casing, giving you the control of a pencil with the look of charcoal. They are the easiest entry point if you are used to graphite.
Why Charcoal Looks the Way It Does
Charcoal leaves a matte finish because the carbon absorbs light instead of reflecting it. That matte quality is exactly what gives charcoal portraits their moody, atmospheric look and what makes the darkest darks look truly black rather than dark grey.
Graphite vs Charcoal: Head-to-Head Comparison
This table compares both mediums across the criteria that matter most to a beginner working on a portrait. Each row reflects what I have observed across my own work and across classes I have taught.
| Criterion | Graphite | Charcoal |
|---|---|---|
| Control precision | Excellent for detail | Looser, more expressive |
| Value range (dark to light) | Light to dark grey | Light grey to true black |
| Erasability | Easy with vinyl or kneaded eraser | Hard, lifts but rarely disappears |
| Smudge resistance | Smudges, but controllable | Smudges very easily |
| Mess level | Low | High (dust, fingers, clothing) |
| Finish | Metallic sheen | Matte finish |
| Paper requirement | Works on most sketchbooks | Needs textured paper with tooth |
| Archival quality | Excellent, lightfast | Needs fixative to prevent smearing |
| Learning curve | Gentle | Steeper |
| Cost for a starter kit | Low (pencil set + eraser) | Moderate (sticks, pencils, paper, fixative) |
If I had to pick a single row that decides this debate for beginners, it is the mess row. Graphite stays where you put it; charcoal does not. Until your hand control is reliable, that single difference will save you hours of cleanup.
Types of Graphite Every Beginner Should Know
Walking into the pencil aisle, you will see dozens of brands and grades. The good news: you only need a handful to draw an entire portrait.
The Three Core Grades
HB is your everyday sketching pencil. Use it for construction lines, light gesture sketches, and any mark you plan to erase later.
2B is your workhorse for portrait shading. It is dark enough to build form but soft enough to blend smoothly with a tortillon or blending stump.
4B to 6B covers your deep darks, used sparingly for pupils, hair shadows, and the darkest accents under the chin and nose.
Other Forms Worth Knowing
Woodless graphite pencils are pure graphite wrapped in a thin lacquer. They let you cover large areas quickly with the side of the stick, which is great for big tonal washes.
Mechanical graphite holders use 2mm lead that you sharpen in a separate sharpener. They are excellent for very fine detail work like individual eyelashes.
Types of Charcoal Every Beginner Should Know
Charcoal comes in more forms than most beginners expect, and each behaves differently. Learning the lineup keeps you from grabbing the wrong stick at the wrong time.
Vine and Willow Charcoal
Vine charcoal and willow charcoal are almost identical in feel, light, crumbly, and forgiving. Both are sold as long thin sticks. They mark the page softly, lift easily with a kneaded eraser, and are perfect for the first 20 minutes of any portrait.
Compressed Charcoal Sticks
Compressed sticks are thicker, denser, and darker than vine. They are sold in soft, medium, and hard varieties, and they are the right tool for the final dark passes of a charcoal portrait. Once you commit a compressed charcoal mark, plan to leave it there.
Charcoal Pencils
Charcoal pencils give you the handling of a graphite pencil with the visual character of charcoal. For beginners, a single medium charcoal pencil is the easiest way to add charcoal to your kit without investing in separate sticks, sharpeners, and fixative.
Tinted and White Charcoal
Tinted charcoal comes in earthy colors like sanguine, sepia, and bistre, and is wonderful for warm underpainting. White charcoal is used for highlights on toned paper. Both are nice to add later, but neither is essential for your first portrait.
Portrait-Specific Techniques: Eyes, Hair, and Skin Tones
The medium you pick actually changes how you approach the face. Here is what I have learned about each.
Drawing Skin Tones
Graphite is a forgiving medium for skin because you can build tone gradually, lifting with a kneaded eraser when a value goes too dark. A 2B blended with a tortillon lays down the soft mid-grey that reads as skin.
Charcoal builds skin faster but with more commitment. Start with vine charcoal for the broad planes, then deepen with compressed charcoal only where the light tells you to.
Drawing Eyes
For the iris and pupil, a sharp 4B graphite pencil or a sharpened charcoal pencil gives you the small, controlled marks you need. Highlights in graphite are easier to recover because you can lift them with a kneaded eraser. In charcoal, you must reserve the white of the paper from the start by carefully erasing a tiny highlight shape.
Drawing Hair
Charcoal wins for hair. A side-loaded compressed charcoal stick covers large dark masses in seconds, and a charcoal pencil flicks in individual strands convincingly. Graphite hair tends to look stiff unless you build it in many thin layers.
Drawing Backgrounds
A dark charcoal background makes a graphite portrait pop. A soft graphite background makes a charcoal portrait feel grounded. Mixing the two is one of the easiest ways to combine them in a single piece.
Tools and Paper You Need to Get Started
The right accessories make the difference between fighting your materials and enjoying them. Here is the core toolkit I recommend for any beginner.
Erasers
A kneaded eraser is essential for both mediums. You shape it into a point for lifting tiny highlights and press it flat for broad softening. A vinyl eraser (also called a white plastic eraser) cuts crisp lines and removes larger mistakes cleanly.
Blending Tools
A blending stump (paper stick) and a tortillon (tighter paper stick) push graphite or charcoal into the paper tooth for smooth gradients. Fingers work in a pinch but always add skin oil that resists future layers.
Fixative
Fixative is a spray that locks charcoal in place. Workable fixative lets you draw over it again, while final fixative seals the drawing permanently. Skip fixative for graphite unless you want a slight sheen reduction.
Paper
Paper tooth is the texture that grabs graphite or charcoal. Smooth paper (like a typical sketchpad) suits graphite. Toothy, textured paper suits charcoal because the ridges hold more carbon. For portraits in charcoal, look for drawing paper in the 130-200 gsm range with a noticeable tooth. For graphite portraits, a medium-weight drawing paper around 100-130 gsm keeps lines crisp.
Common Beginner Mistakes (and How to Avoid Them)
Every beginner falls into the same handful of traps. Spotting them early saves you from restarting every portrait.
Mistake 1: Pressing Too Hard
Heavy pressure buries graphite into the paper fibers so deep that no eraser can recover it. Build tone in multiple light layers instead. Your 4B should glide across the paper, not grind into it.
Mistake 2: Using Fingers to Blend
Your fingers leave oils that repel later layers and create shiny patches. Use a blending stump or tortillon instead.
Mistake 3: Skipping Fixative on Charcoal
Charcoal drawings without fixative will smudge the moment you touch them, even months later. Spray light, even coats in a ventilated space.
Mistake 4: Choosing the Wrong Paper
Smooth paper makes charcoal look pale and slippery. Toothy paper makes graphite look gritty. Match the paper to the medium, or pick a medium-tooth drawing paper if you want to use both.
Mistake 5: Fighting the Sheen in Graphite
If you scan or photograph your graphite portrait and the darks look washed out, the metallic sheen is bouncing light back at the camera. Use raking light (light from the side) when photographing, and consider a light coat of workable fixative to reduce the sheen.
Mistake 6: Skipping Construction Lines
Both mediums tempt beginners to dive straight into shading. Light, erasable HB construction lines give you a roadmap and prevent the entire portrait from drifting out of proportion.
Can You Use Graphite and Charcoal Together?
Yes, and once you are comfortable with each medium alone, combining them produces some of the most striking beginner portraits you can make. The trick is the layering order.
The Safe Layering Order
Always apply graphite first, then charcoal on top. Graphite under charcoal stays put because the charcoal grabs the paper tooth above it. If you reverse the order, the graphite mixes into the charcoal and turns everything muddy.
Spray Workable Fixative Between Layers
If you want to draw charcoal over an already-shaded graphite area, a light coat of workable fixative keeps the graphite from lifting into the charcoal. Wait for it to dry completely before continuing.
Reserve Highlights From the Start
Because charcoal is hard to erase completely, leave the brightest highlights as bare paper from the beginning. In graphite, you can always lift highlights later with a kneaded eraser.
A Simple Mixed-Media Workflow
- Block in the head shape with light HB graphite.
- Establish the light and shadow pattern with vine charcoal.
- Deepen the shadows with compressed charcoal or a charcoal pencil.
- Add fine graphite details like eyelashes or skin texture last.
- Spray with final fixative when the portrait is fully dry.
Which Should Beginners Choose First?
If you have read this far, you already know my recommendation: start with graphite for the first two to three months. Use that time to learn proportion, value, and edge control without fighting mess or smudging. A simple graphite kit (one HB, one 2B, one 4B, one kneaded eraser, one vinyl eraser, and a sketchbook) gets you drawing within minutes.
Once portraits feel natural in graphite, add charcoal gradually. Buy one vine charcoal stick, one compressed charcoal pencil, and a single sheet of textured paper. Try a few small studies of eyes and hands before attempting a full charcoal portrait.
Within a year of consistent practice, you will likely use both. Most portrait artists I know reach for graphite on quiet, detailed days and charcoal on expressive, dramatic days. Learning both gives you a full range of voices instead of a single volume knob.
Frequently Asked Questions
Which is better for portraits, charcoal or graphite?
For most beginners, graphite is better for portraits because it gives cleaner control, easier erasing, and less mess. Charcoal becomes the better choice once you want the deepest blacks and the most expressive, painterly look. Many portrait artists eventually use both together.
Which is better for sketching, graphite or charcoal?
Graphite is better for clean, controlled sketching because it sharpens finely and erases easily. Charcoal is better for loose, gestural sketching because it glides across the paper and produces broader tonal marks. Beginners usually find graphite sketching more forgiving.
What type of pencil is best for portrait drawing?
For graphite portraits, a 2B is the best everyday workhorse, with a 4B for darks and an HB for construction lines. For charcoal portraits, a medium compressed charcoal pencil gives the most control. Many artists keep both a graphite and a charcoal pencil in their kit at once.
What is a disadvantage of using charcoal in art?
Charcoal smudges easily, dusts up your workspace, requires textured paper, and is very hard to erase once compressed. It also needs fixative to stay put over time. These disadvantages make it less beginner-friendly than graphite for portrait drawing.
Is charcoal drawing messy?
Yes, charcoal drawing is messier than graphite. It produces loose carbon dust that transfers to fingers, clothes, and surrounding surfaces. Working over a scrap sheet of paper and keeping a soft brush handy for dusting the page helps a lot.
How do I start drawing with charcoal as a beginner?
Start with vine charcoal, draw light loose shapes, lift with a kneaded eraser to correct mistakes, then add compressed charcoal only for the darkest accents. Always work on textured paper with tooth, and finish with a light coat of fixative.
Conclusion
The graphite vs charcoal for portrait drawing debate does not have a single winner, but it does have a clear beginner path: start graphite, build confidence, then add charcoal for mood and depth. Treat both as tools rather than rivals, and your portraits will grow with you.
Pick up a 2B pencil tonight, sketch a single eye from a reference photo, and notice how much easier the page feels when the medium works with you. That is the real lesson behind every comparison in this guide.