
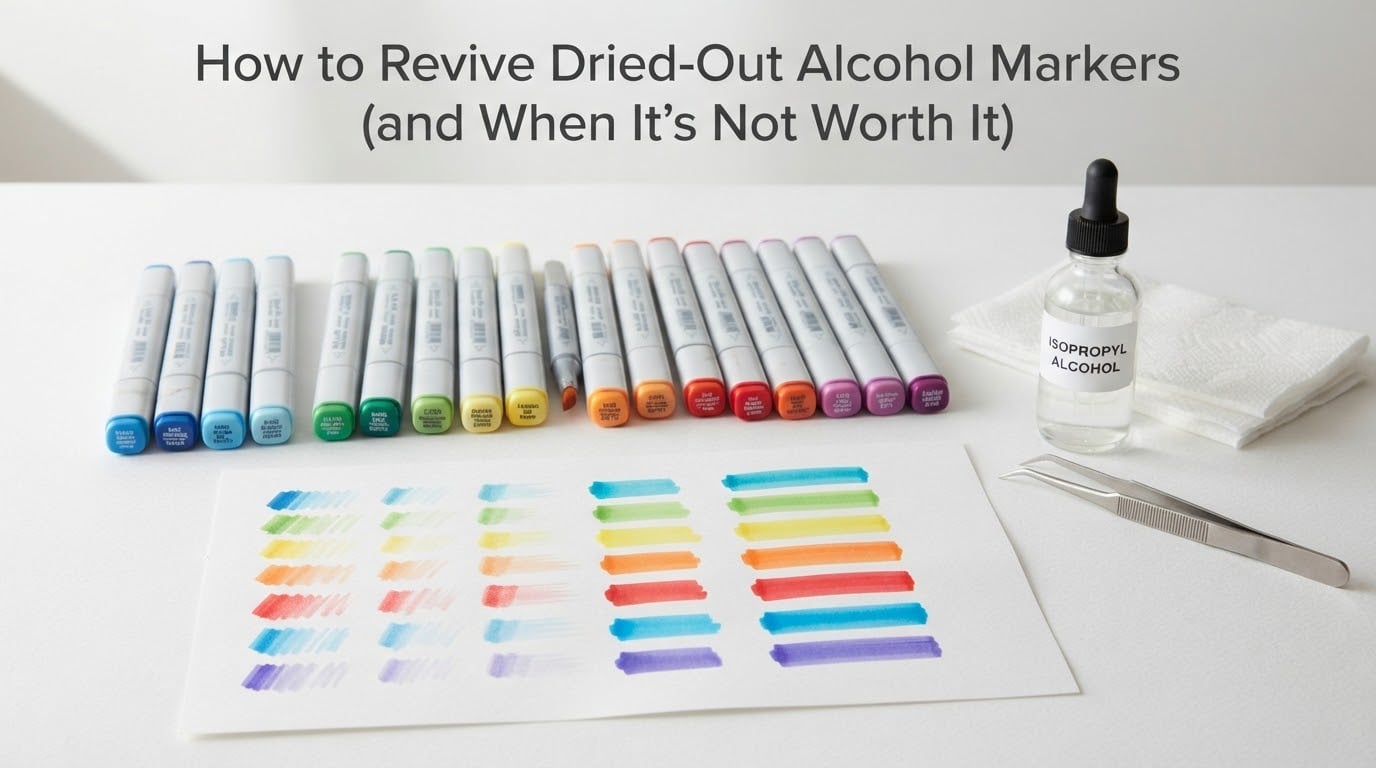
Yes, you can often revive dried-out alcohol markers using isopropyl alcohol to rehydrate the nib and inner ink reservoir. The process works best when the marker has simply lost its solvent to evaporation rather than suffering permanent nib damage or complete ink depletion. Most colorists can bring their markers back to life with simple supplies they already have at home.
Alcohol markers like Copics, Ohuhu, and Prismacolors dry out when the alcohol solvent evaporates from the spongy core inside the marker. This leaves dye residue behind and makes the marker feel scratchy or completely dried out. The good news is that alcohol solvent can dissolve that residue and restore flow in many cases.
In this guide, I’ll walk you through exactly how to revive dried-out alcohol markers using methods that actually work. I’ll also help you recognize when revival attempts are wasting your time so you can decide whether to replace your marker instead.
Table of Contents
Why Alcohol Markers Dry Out
Alcohol markers dry out because their solvent, typically ethanol or isopropanol, evaporates over time. This happens even when markers are capped properly, though poor cap seals dramatically speed up the process. Understanding why markers dry out helps you choose the right revival method and prevent future problems.
Cap Seal Failure
The most common cause of premature drying is cap seal failure. When you cap your marker, the inner cap should form an airtight seal around the nib. Over time, dye residue builds up inside the cap and creates what artists call “Copic jelly,” a sticky substance that prevents a proper seal.
That residue forms when ink dries on the inside walls of the cap. Every time you cap the marker, that dried residue touches the nib and can even pull more ink out of the marker. The cap becomes a trap that slowly drains your marker instead of protecting it.
Artists on the r/copic subreddit frequently report finding dried-out markers that still contain ink. The cap seal failed and allowed evaporation while the ink reservoir remained partially full. This is actually good news for revival because the core issue is evaporation, not depletion.
Alcohol Evaporation From the Core
Alcohol-based markers contain a spongy core saturated with dye and alcohol solvent. The alcohol is what keeps the dye liquid and allows smooth flow through the nib to your paper. When that alcohol evaporates, the dye stays behind as residue in the core and nib.
This residue is what makes dried markers feel scratchy and hard. The nib can become stiff and stained dark with concentrated dye. Even if you add more ink to a marker in this state, it may not flow properly because the core has lost its ability to hold and distribute liquid evenly.
Time and Storage Factors
Even well-sealed markers can dry out over months or years of storage. The alcohol solvent is volatile by nature and will eventually find microscopic escape routes. Markers stored in warm environments dry out faster because heat accelerates evaporation.
Markers left uncapped for even a few hours can develop nib damage that revival cannot fix. The exposed nib dries quickly and can develop a hardened outer layer that resists rehydration. This is why speed matters when you notice your marker drying out during use.
Materials You’ll Need
Reviving alcohol markers requires just a few supplies, most of which you probably already have. The key material is the right type of isopropyl alcohol, and the percentage matters more than you might expect.
Isopropyl Alcohol: 90% vs 70%
Use 90% isopropyl alcohol for marker revival whenever possible. The higher concentration works faster and introduces less water into your marker. Forum users consistently report better results with 90% alcohol compared to 70%.
Seventy percent isopropyl alcohol contains 30% water, which dilutes the marker ink and can affect color saturation. It will still work for revival, but you may notice your colors appear lighter or blend differently afterward. The water also takes longer to evaporate, extending your wait time before testing.
If you only have 70% alcohol available, it can still help revive a marker. Just expect slower results and plan to test the marker on scrap paper to check color consistency before returning to your artwork.
Other Supplies
Paper towels are essential for cleaning caps and wiping excess alcohol from nibs. You’ll need them to clean residue from the inside of marker caps as well as to dab the nib after applying revival solution. White paper towels work best so you can see the dye residue coming off.
Tweezers help you manipulate the alcohol-soaked paper towel inside tight marker caps. The inner cap area is small and hard to reach with fingers. Tweezers let you twist and press the towel against the cap walls to remove dried residue.
A small dropper or pipette gives you precise control over how much alcohol you apply to the marker. Too much alcohol can over-dilute your ink. A dropper lets you add just a few drops at a time and wait to see results before adding more.
Optional but helpful supplies include refill ink for your specific marker brand and replacement nibs if you discover yours is damaged beyond revival. These aren’t necessary for basic revival but can extend a marker’s life significantly.
How to Revive Dried-Out Alcohol Markers
Follow these steps to attempt marker revival. The process works best when the marker has simply lost solvent to evaporation. If your marker has visible nib damage or feels completely hard, revival may not succeed.
Step 1: Inspect the Marker
Before attempting revival, examine your marker carefully. Check the nib for visible damage, hardening, or dark staining that doesn’t soften when pressed gently. Look at the cap interior for jelly residue buildup. A damaged nib may need replacement rather than revival.
Squeeze the marker body if it’s designed to hold ink directly. If it feels completely empty and collapses easily, the marker may have run out of ink rather than just dried out. Revival works on solvent loss, not on empty markers.
Step 2: Clean the Cap
Cap cleaning is critical and often overlooked. Even if you successfully revive the marker, a dirty cap will immediately start drying it out again. Take a small piece of paper towel and soak it in isopropyl alcohol.
Use tweezers to press the alcohol-soaked towel into the marker cap. Twist and ream it around to clean the inner walls where dried residue accumulates. Remove the towel and inspect it. If you see dye residue on the towel, repeat with a fresh piece until the towel comes out clean.
Let the cap dry completely before recapping your marker. This usually takes just a few minutes since the alcohol evaporates quickly. A clean cap ensures your revived marker stays revived.
Step 3: Apply Alcohol to the Nib
For surface-level drying, apply a few drops of isopropyl alcohol directly to the marker nib. Use your dropper or pipette to control the amount. Three to five drops is usually enough to start.
Let the alcohol soak into the nib for about 30 seconds. The nib should start feeling softer as the alcohol dissolves the dried dye residue. Gently press the nib against paper to see if any ink flows.
If nothing flows, add a few more drops and wait longer. You can also try dipping just the tip of the nib into a small pool of alcohol for 10 to 15 seconds. This more aggressive approach can reach deeper into dried cores.
Step 4: Shake and Wait
After applying alcohol, shake the marker gently to help distribute the solution throughout the spongy core. Don’t shake aggressively. Just a few gentle flicks help the alcohol move through the internal reservoir.
Wait at least 15 to 30 minutes before testing the marker again. The alcohol needs time to dissolve dried residue and saturate the core. Some artists leave markers overnight before testing for best results.
If the marker still doesn’t work after this first attempt, you can try a second application. However, if you’ve added alcohol twice with no improvement, the marker may be beyond revival or need professional refill service.
Step 5: Test and Adjust
Test your revived marker on scrap paper first. The color may appear lighter or slightly different than before due to the alcohol dilution. Scribble in circles to help the ink flow evenly again.
If the color is significantly lighter than expected, you can add a drop of matching refill ink to restore saturation. This works best with markers that accept brand-specific refills. Generic refill inks may not match your marker’s exact color formulation.
If the marker flows but leaves streaks or skips, the nib may still have dried residue trapped in the fibers. You can try the alcohol application one more time. Persistent streaking usually indicates permanent nib damage that requires replacement.
When Revival Is Not Worth It
Not every dried-out marker can be saved. Knowing when to stop trying saves you frustration and helps you decide when replacement makes more sense. Here are the signs that your marker is beyond revival.
Signs of Permanent Nib Damage
The nib has permanent damage when it feels hard and plastic-like even after alcohol application. Press the nib gently with your fingernail. A healthy nib compresses and springs back. A damaged nib stays compressed or feels crunchy inside.
Dark staining that doesn’t soften is another warning sign. Some staining is normal, but when the entire nib is dark and feels stiff, the fibers have bonded with concentrated dye. Even if you get ink flowing again, the nib will likely perform poorly.
Physical damage like fraying, splitting, or flattening of the brush tip cannot be fixed with alcohol. Brush nibs are delicate, and once the shape is compromised, the marker won’t blend smoothly. Replacement nibs are the only solution for physical damage.
Core Saturation Failure
Wide markers and sketch markers with dried spongy cores often do not recover well, according to artists who have tried revival methods extensively. The internal core can become so saturated with dried dye that adding alcohol just creates a messy sludge instead of flowing ink.
You might notice alcohol pooling at the nib instead of absorbing into the core during revival attempts. This indicates the core can no longer hold liquid properly. The marker may leak or blotch even if you force some flow.
Cost Comparison: Revival vs Replacement
Consider the cost of your revival supplies and your time compared to simply replacing the marker. Isopropyl alcohol costs very little, but if you need to buy refill ink or replacement nibs, the total can approach the cost of a new marker.
Budget marker brands like Ohuhu and Caliart cost less per marker than professional brands like Copic. For budget markers, the time investment in revival may exceed the value of the marker itself. One artist noted that spending 30 minutes reviving a $4 marker doesn’t make economic sense.
For expensive markers like Copics, revival and refill are almost always worth attempting. A single Copic Sketch marker costs significantly more than a bottle of isopropyl alcohol. Even if revival takes multiple attempts, the savings make sense for premium markers.
Decision Checklist
Ask yourself these questions before spending time on revival:
Does the nib feel soft and pliable, or hard and plastic-like? Soft nibs can often be revived. Hard nibs usually cannot.
Is there still ink in the marker body? Empty markers need refills, not just revival.
How long has the marker been dried out? Markers dried for months may revive. Markers dried for years may have permanent core damage.
What is the marker’s value compared to your time? High-value markers justify more revival attempts.
Do you have the supplies on hand already? If you need to buy alcohol, paper towels, and refill ink, compare that total to a replacement marker.
Prevention Tips to Keep Your Markers Fresh
The best way to deal with dried-out markers is to prevent them from drying out in the first place. Simple habits and storage practices dramatically extend marker life. Here’s how to keep your alcohol markers working their best.
Proper Capping Technique
Cap your markers immediately after every use. This sounds obvious, but many artists leave markers uncapped while working on a piece. Even five minutes of exposure can start drying the nib. Get in the habit of capping each marker the moment you set it down.
Push caps on firmly until you feel or hear a slight click. That click indicates the inner seal is engaged. A loosely capped marker will dry out within days, not months. Test your caps periodically to make sure they’re seating properly.
Store markers horizontally whenever possible. Vertical storage can cause the ink to pool at one end of the marker, leaving the other end drier. Horizontal storage keeps ink distributed evenly throughout the core.
Regular Cap Cleaning
Clean your marker caps every few months to prevent jelly residue buildup. This simple maintenance step is the most effective way to prevent cap seal failure. Soak a paper towel in isopropyl alcohol and wipe inside each cap.
Artists who clean their caps regularly report significantly fewer dried-out markers. The few minutes spent on cap cleaning saves hours of revival attempts and the cost of replacement markers.
Climate Considerations
Store markers in a cool, dry place away from direct sunlight. Heat accelerates alcohol evaporation. Markers stored near heaters, in sunny windows, or in hot cars will dry out much faster than markers stored at room temperature.
Low humidity environments also contribute to faster drying. If you live in an arid climate, consider storing markers in an airtight container with a small humidity control packet. This creates a microclimate that protects your markers.
Refill Maintenance Schedule
Refill your markers before they run dry. Waiting until a marker stops laying down color means the core has already started drying out. Refilling while there’s still some ink in the marker keeps the core saturated and prevents residue buildup.
Professional illustrators often refill their markers when the color starts appearing slightly lighter than normal. This proactive approach maintains consistent color and prevents the dried-core problems that make revival necessary.
Keep track of which colors you use most frequently. Popular colors in your palette will need more frequent refilling. Markers you rarely use should still be tested monthly to catch drying early.
Frequently Asked Questions
Can you fix dried up alcohol markers?
Yes, you can often fix dried up alcohol markers by applying isopropyl alcohol to rehydrate the nib and inner core. The success rate depends on whether the nib is damaged or simply dried out. Markers with intact, soft nibs that have just lost solvent respond best to revival methods.
Can alcohol markers go bad?
Alcohol markers don’t technically expire, but they can dry out beyond revival if neglected for extended periods. The alcohol solvent eventually evaporates, leaving dye residue that hardens the nib and core. With proper storage and regular use, alcohol markers can last for years.
Can I rehydrate a dried out marker?
Yes, you can rehydrate a dried out alcohol marker using isopropyl alcohol. Apply a few drops to the nib, let it soak in, and wait 15 to 30 minutes before testing. Multiple applications may be necessary for severely dried markers. Success depends on the condition of the nib and core.
Can you revive alcohol markers with hand sanitizer?
Hand sanitizer can work as an emergency revival solution because it contains alcohol, but it’s not ideal. Most hand sanitizers include moisturizers, fragrances, and other additives that can affect marker performance. Pure isopropyl alcohol gives cleaner results with no residue left behind.
Final Thoughts
Reviving dried-out alcohol markers works more often than most artists expect, especially when the marker has simply lost solvent rather than suffered permanent damage. The key is using 90% isopropyl alcohol, cleaning your caps thoroughly, and being patient during the rehydration process.
I’ve found that prevention beats revival every time. Taking a few minutes each month to clean marker caps and check for drying saves hours of revival work and keeps my colors consistent. The artists who rarely deal with dried markers are the ones who maintain them regularly.
Not every marker can be saved. When you’ve tried alcohol applications with no success, when the nib feels permanently hard, or when the cost of revival supplies approaches the cost of a replacement, it’s okay to let go. Knowing when revival isn’t worth it is just as important as knowing how to revive.
Try the revival method on your dried markers before giving up on them. You might be surprised how many come back to life with just a few drops of alcohol and a clean cap.