
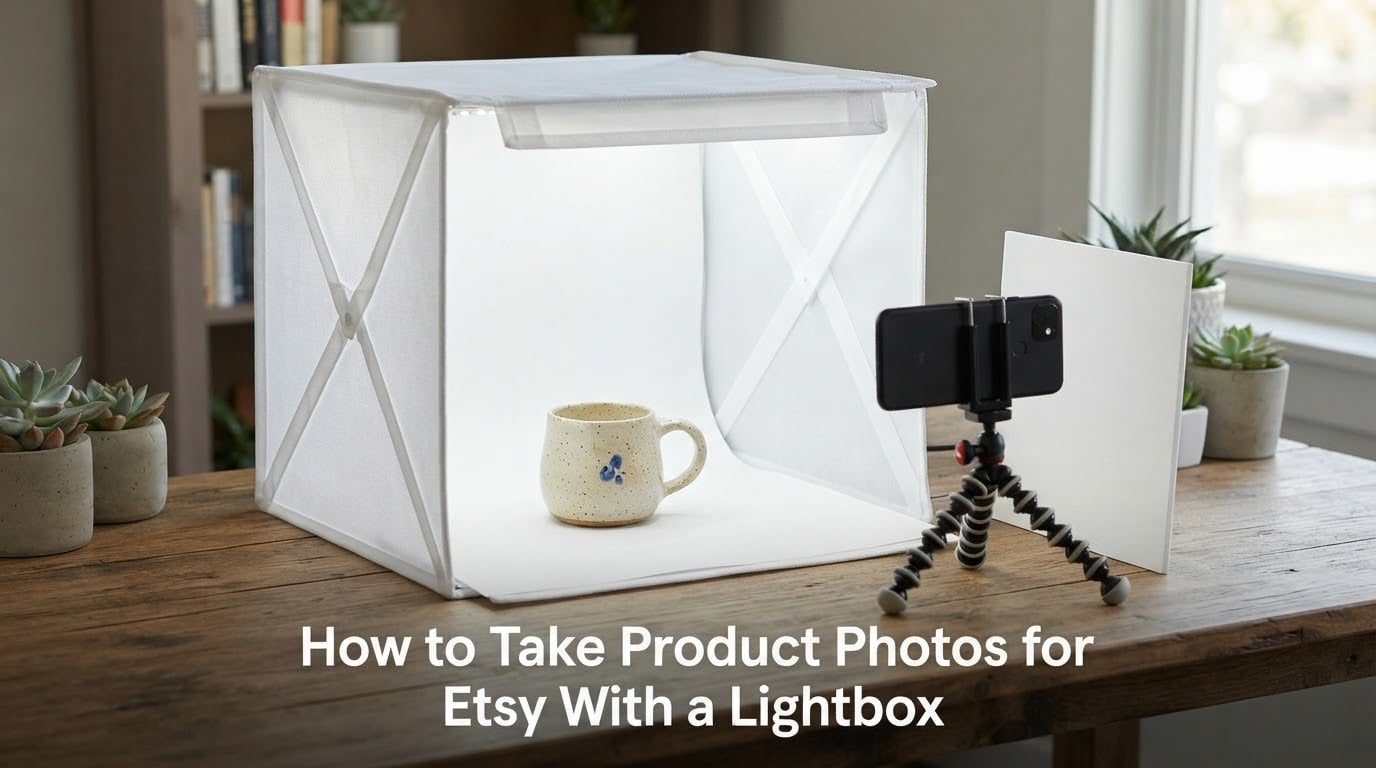
Quick answer: To take product photos for Etsy with a lightbox, set a white or grey backdrop inside the box, place your item in the center, turn on the built-in LEDs and dial them to roughly half brightness, then shoot on a tripod with a two-second timer at ISO 100 and an aperture between f/8 and f/11. The translucent walls wrap soft light around your product so the background comes out even and shadow-free.
I have shot small handmade goods for years, mostly jewelry, candles, and ceramics, and the setup below is the one I return to every time. It matters because Etsy buyers decide from photos alone. A listing with clean, evenly lit, color-accurate images builds trust before anyone reads your description, and a listing with hard shadows and a yellow cast does the opposite.
The good news is that a lightbox solves the hardest part of home product photography, which is consistency. Natural window light changes every hour and every season. A lightbox gives you the same clean result at 8pm in December and at noon in July.
Table of Contents
- What a lightbox is and why Etsy sellers use one
- What Etsy actually requires from your photos
- Gear checklist before you shoot
- How to take product photos for Etsy with a lightbox, step by step
- Camera and phone settings for lightbox shooting
- Lighting inside the box: killing shadows and controlling glare
- Choosing a background: white, neutral, and lifestyle
- The shot list: images every Etsy listing needs
- Per-category setups for jewelry, ceramics, candles, apparel, and art
- DIY lightbox or buy one
- When not to use a lightbox
- Editing and exporting your photos for Etsy
- Troubleshooting: symptom, cause, fix
- A repeatable 30-minute batch shoot
- Common mistakes that make listings look cheap
- Pre-publish checklist
- Frequently Asked Questions
- What are some tips for product photography on Etsy?
- Do Etsy product photos need a white background?
- What size should the first Etsy product photo be?
- Can I use AI-generated product photos on Etsy?
- Do I need a lightbox for Etsy product photos?
- How many photos can I add to an Etsy listing?
- What camera settings should I use for product photos?
- Is a lightbox better than a softbox for small products?
- How do I avoid shadows and reflections in lightbox product photos?
- What background color is best for Etsy listings?
- Conclusion
What a lightbox is and why Etsy sellers use one
A lightbox is a small enclosed shooting enclosure with translucent white panels and built-in lights. You may also see it called a light tent, a shooting tent, or a photo studio box. They are the same family of gear, and the names get used interchangeably.
The magic is in the walls. Light hits the translucent panels, scatters, and softens, so it arrives at your product from nearly every direction at once. Instead of one hard source throwing a dark shadow to the left, you get wraparound light with soft, shallow shadows. A white backdrop inside or behind the box bounces that same light back up underneath your product, so the base of the item does not go black either.
Here is what that buys you as a seller:
- Consistency. The same result for every item in a batch, which is what makes a shop catalog look like a catalog instead of a pile of unrelated listings.
- No weather dependency. No window, no clouds, no neighbor’s tree shadow at 4pm.
- Repeatable framing. Mark the spot where the camera sits and every photo lands identically.
- Accurate color. Daylight-balanced LEDs at roughly 5000K to 5500K show the real color of the item, which matters enormously when a buyer is deciding between two glazes.
- A genuinely clean background. The seamless white that most Etsy’s own categories assume you have.
Sellers consistently report that fixing the light delivers the biggest visible improvement in listing quality, and that holds up. A better camera behind bad light still looks bad. Good light behind an average camera looks like a professional catalog.
What Etsy actually requires from your photos
This is where most lighting guides stop and most seller questions begin. The technique only matters if the finished files clear Etsy’s rules. Here are the constraints that shape the whole shoot.
| What Etsy expects | The practical requirement | What this means for your lightbox session |
|---|---|---|
| Photo slots per listing | Up to 20 photos | You have room for a full story, so plan a shot list before you power on |
| Video slots | Up to 2 videos, roughly 5 to 15 seconds each | Shoot a slow rotation or a short flip of the piece in the same session |
| Longest edge of the main image | 2000 pixels or more on the longest side | Shoot the widest frame you can so you have pixels to crop into |
| Color profile | sRGB | Convert in export, not in the camera menu, to avoid washed-out results |
| Main image | A real photograph of the actual item on a clean background | No generated mockups or AI scenes as image one |
| Framing | Item fills the frame, centered, nothing cropped | Leave crop-safe space so the thumbnail crop never cuts your product |
| Consistency | Same light, background, and color across the shop | One fixed setup, reused for every listing |
Two of those rows deserve emphasis. The main image must be a real photograph of the real item, which rules out generated scenes in the first slot. And because Etsy crops images to a square thumbnail, a photo shot with the product crammed against the edges can lose its edges in search results.
Gear checklist before you shoot
You need fewer things than a photography blog implies. Here is the complete list:
- A lightbox or light tent sized so your largest product still has a few inches of clearance on every side.
- A backdrop. White foam board, a roll of white or grey paper, or the vinyl sweeps that come with most tents. Paper is cheaper and flat-lay friendly; vinyl wipes clean.
- A tripod or a rigid stand. A phone clamp on a small desk tripod is enough. Anything that holds still is enough.
- A camera or a phone. Modern phone cameras handle this setup well. A mirrorless body with a macro lens is a bonus, not a requirement.
- A two-second timer or a remote shutter. Never touch the camera during a shot with a hand on the frame.
- A white reflector card. A piece of foam board or a folded sheet of paper fills shadows in a single pass.
- A microfiber cloth. Dust on a backdrop is visible in a white-background shot, and fingerprints show on glossy finishes.
A clamp light and a sheet of white foam board can stand in for a reflector, and a bedsheet over a window replaces a tent if you are not ready to buy anything.
How to take product photos for Etsy with a lightbox, step by step
Step 1: Clear and level the space
Put the box on a flat table in a room with no direct sun. Sunlight leaking through a wall or a window will create a color shift and a hard edge that no amount of editing fully fixes.
Step 2: Fit the backdrop
Set the paper or vinyl so it curves from the surface up the back wall with no visible seam line. A hard crease between floor and wall reads as a horizon and pulls the eye away from the product. A gentle curve removes it.
Step 3: Clean and place the product
Wipe the item with the microfiber cloth, remove fingerprints, and center it. Leave room around it on all sides so the thumbnail crop has something to work with. Wiping the item down matters as much as wiping the backdrop, since handling it leaves marks on glossy glaze and polished metal.
Step 4: Power the lights and dial them down
Switch on the LEDs and set them to roughly half brightness before you bring the camera up. Full brightness on a small item is usually too hot, and dimming gives you far more control than cropping brightness in editing later.
Step 5: Set the camera, then stop touching it
Switch to manual or the closest equivalent, set ISO 100, pick an aperture between f/8 and f/11, and set white balance to the value you calibrated. Once it is set, leave the buttons alone for the rest of the batch. Every re-adjustment is a variable you will have to account for later.
Step 6: Focus on the product, not the backdrop
Phone cameras hunting for focus is one of the most common complaints from sellers working in tight boxes. Tap directly on the product in the viewfinder to lock focus, then use the timer so you are not reaching into the frame.
Step 7: Shoot the whole shot list
Work through the images in order: hero, three-quarter angle, detail macro, top-down, scale reference, packaging, in-use. Shooting in a fixed order means you never forget a slot, and every item in the batch gets the same treatment.
Step 8: Review before you break down
Zoom to 100 percent on the first image and check the edges of the product, the backdrop for dust, and the histogram for clipped highlights. Fixing a problem while the setup is still assembled takes a minute. Rebuilding it twenty minutes later takes twenty.
Camera and phone settings for lightbox shooting
| Setting | Phone | Mirrorless or DSLR |
|---|---|---|
| Mode | Pro or Manual mode, if your phone has it | Manual mode (M) |
| ISO | Lowest available, usually 50 to 100 | ISO 100 |
| Aperture | Fixed, controlled by the app | f/8 to f/11 |
| Shutter | Auto or 1/60 s | Whatever keeps exposure correct, typically 1/8 to 1/2 s on a tripod |
| White balance | Locked to daylight or a custom value | Locked, calibrated to your light |
| Focus | Tap-to-lock on the product | Single-point autofocus, then switch to manual once locked |
| Format | JPEG or HEIF at maximum resolution | RAW for the widest editing latitude |
| Stabilization | Off, on a tripod | Off, on a tripod |
Do not go past f/11 chasing extra depth of field. Small sensors and kit lenses start softening at very small apertures, a loss that is easy to see on fine jewelry detail. f/8 to f/11 is the sweet spot: enough depth for a whole product, sharp enough at the edges.
For very small jewelry, shoot a second pass with focus bracketing if your camera supports it, or stack two or three frames in editing. That gets the full piece sharp without the diffraction softness.
Lighting inside the box: killing shadows and controlling glare
Shadow control starts with the walls, but three habits finish the job.
Use one type of light. Mixing a warm ceiling bulb, a cool LED panel, and window light gives you three color temperatures in one frame, and no edit makes that look intentional. Shut the room lights off, close the curtains, and let the box be the only source.
Bounce instead of adding. When the light feels flat, the fix is usually a reflector card on the shadow side rather than a second lamp. Extra lamps add a second color temperature and a second set of reflections. A white card bouncing the same light back changes the ratio without changing the color.
Diffuse before you reduce. If a shadow is too dark, the answer is more light hitting it indirectly, not a brighter bulb aimed straight at it. Bright direct light deepens the shadow it creates even as it brightens the highlight.
Glare is a different problem and needs a different move. Metal and glass reflect whatever shape the walls and the lights make, which is why jewelry shot in a cheap box shows a big white smear across the chain. Angle the product slightly so the reflection falls on the backdrop instead of the surface, and place a strip of black card or black foam outside the frame to absorb the reflection you cannot move. Enclosed tents help here for a practical reason: they keep the lights, the ceiling, and your own reflection out of the shot entirely.
Choosing a background: white, neutral, and lifestyle
A clean, neutral background is the safe default. Pure white reads as a professional catalog, and light-colored backdrops keep attention on the item rather than on the surface behind it. Grey or neutral tones are gentler and often suit moodier handmade work, though they need slightly more exposure to stay bright.
Colored backdrops work for a shop with a deliberate palette, but keep the color out of the first image of each listing unless it genuinely helps sell the item. A saturated background behind a neutral product tends to shift how buyers perceive the color of what they are buying.
Lifestyle images belong in the supporting slots, not the first. Shoot them outside the lightbox on a table near a window, or anywhere with soft directional light, and let the environment tell the buyer how the item looks in a real room. A small number of in-use photos is the single strongest trust signal in a handmade shop, because it answers the question every buyer has and never asks out loud: what will this look like when it arrives?
The shot list: images every Etsy listing needs
Twenty slots is a lot of room, and most sellers fill three of them. Here is the order I shoot, with the job each image has to do.
| Slot | The image | What it must prove |
|---|---|---|
| 1 | Hero shot, straight on, clean background | Exactly what the buyer receives, whole and centered |
| 2 | Three-quarter angle | Depth, dimension, and how the piece sits |
| 3 | Detail macro | Craftsmanship, texture, glaze, stitching, or setting |
| 4 | Top-down flat lay | The full layout, especially for art prints and sets |
| 5 | Scale reference | Real-world size, held in a hand or beside a common object |
| 6 | Back or underside | Construction quality and any maker marks |
| 7 | In use or in a styled scene | How the item lives in a room, outfit, or routine |
| 8 | Packaging and gifting | What the unboxing looks like |
| 9 | Condition and flaws, for vintage or one-of-a-kind | Honesty, which protects both buyer and seller |
| 10 | Color variants or the full range | What else is available, which drives add-to-cart |
Shoot the set once per product and reuse the frames across listings of the same item. That is what makes batch shooting worth the setup time.
Per-category setups for jewelry, ceramics, candles, apparel, and art
Jewelry and metal
Tilt pieces onto a small riser rather than laying them flat, so the light catches the surface at an angle instead of reflecting straight back. Keep black card outside the frame to absorb edge reflections, and shoot one macro frame of the clasp or setting.
Ceramics and pottery
A 45-degree key light through one side opening gives glaze its depth and shows the throwing lines. Light straight on flattens a rounded form into a silhouette, which is the fastest way to make a hand-thrown mug look machine-made.
Candles and soap
Shoot a clean front shot, then a low three-quarter view that shows the wick and the label, then a lit frame. Watch the wax surface for fingerprints and wipe it before every shot.
Apparel and textiles
Light tents are the right tool here because they remove room reflections from a glossy screen print. Use the flat lay as the main image and add a shot on a hanger or a person to show drape and true fit.
Art prints and paper goods
Shoot straight down with the camera centered over the paper to avoid keystoning. Leave a small white margin around the print and include one photo showing the paper texture under raking light.
DIY lightbox or buy one
A cardboard or foam-board build costs almost nothing and works well for flat items, but it is a real box with real limitations. You will fight seams that leak light, walls that are not evenly translucent, and a size you cannot change. Sizing matters more than sellers expect: a box that fits the item exactly gives you no room to angle it or to slide the camera around for a three-quarter view.
Safety warning: do not mount hot lamps, halogen bulbs, or unsecured fixtures inside a cardboard or paper lightbox. Sellers report this as a common build, and it is a genuine fire risk. Use LED bulbs only, keep them outside the box or firmly separated from the panels, and never leave a build unattended while it is lit.
A purchased tent pays off when you shoot in volume, when glare is a recurring problem, or when your items are small enough that a generous interior genuinely matters. Portable folding tents with interchangeable backdrops and dimmable LEDs cover most of what a small shop needs, and they fold flat between sessions.
A softbox is the other option, and it beats a lightbox for larger, three-dimensional objects. It gives you directional control over shape and shadow, but it needs a separate background and more setup time per shot. For a candle, a ring, or a print, the lightbox is faster. For a chair, a bag, or a hat, the softbox wins.
When not to use a lightbox
A lightbox actively hurts some products. Consider shooting outside it when:
- The item is larger than the box. Cramming it in forces a wide-angle position and a distorted, keystoned frame.
- The surface is highly reflective or transparent. Mirrored acrylic, chrome, and clear resin turn a lightbox into a light source reflection, not a subject.
- Texture carries the value. A heavily woven throw, a raked ceramic surface, or a wood grain needs directional light to read. Flat wraparound light hides exactly the detail you are selling.
- The product is tall or irregular. A tent cannot give you a low angle without shooting through the base panel.
For any of these, use a softbox or a large diffused window light with a white reflector on the shadow side and a separate sweep for the background. The technique from this guide still applies, minus the enclosure.
Editing and exporting your photos for Etsy
Lightbox work needs very little retouching, and that is a sign the shoot went well. A short, repeatable edit is the goal.
- Crop with safety in mind. Keep the whole product inside the frame with breathing room on all sides, since Etsy crops to a square thumbnail in search.
- Set white balance, not saturation. If the item looks off-color, correct the white balance before touching anything else. Over-saturating hides the problem and pushes the product past its real color.
- Recover highlights and lift shadows gently. Bright LEDs on glossy surfaces clip easily, and a modest recovery keeps the detail.
- Check the background is truly clean. Remove stray dust and any light falloff at the corners.
- Export at 2000 pixels on the longest edge or larger, convert the color profile to sRGB, and use a high-quality JPEG.
Keep the unedited original. When you reshoot a listing a year later, having the RAW file means the new image matches the old one instead of drifting.
Troubleshooting: symptom, cause, fix
| Symptom | Cause | Fix |
|---|---|---|
| Hard dark shadow beside the product | Light entering from one side, or an unfiltered opening | Cover the open side with diffusion fabric and bounce a white card into the shadow |
| Uneven white background, bright center, gray corners | Light falloff from a small source close to the item | Move the lights farther back and dim them, or add a second diffused source |
| Visible seam or horizon line in the background | Backdrop creased where the floor meets the wall | Re-fit the paper with a smooth curve and no hard crease |
| White smear or bright hotspot on metal or glass | The light source or your own reflection is mirrored by the surface | Tilt the item, reposition the lights, and place black card outside the frame to absorb the reflection |
| Blurry photos | Camera movement or focus landing on the backdrop | Use a tripod and a two-second timer, then tap the product in the viewfinder to lock focus |
| Color looks wrong, blue or orange cast | Room lights or daylight leaking into the setup | Close the curtains, switch off room lights, lock white balance to the box light |
| Gray speckles across a white background | Dust on the backdrop or on the diffusion panels | Wipe the backdrop and the outside of the panels before each batch |
| Background not pure white after editing | Backdrop too dark or color profile not set to sRGB | Add light, then convert the profile on export rather than clipping in the editor |
| Not enough room to angle the product | Box is undersized for the item | Shoot flat lay, or move to a larger box or a softbox setup |
A repeatable 30-minute batch shoot
The single biggest time saver for a growing shop is refusing to rebuild the setup for every item. Sellers who batch shoot with a fixed camera position and a fixed light distance describe it as the change that made photography stop eating their evenings.
Here is the routine:
- Set up once. Box, backdrop, tripod, and camera at a fixed height and distance. Mark the camera position with tape on the table.
- Calibrate. Set exposure and white balance against a mid-gray or white card, then lock both.
- Queue 10 to 15 items. Lay them out in shooting order before you start. Every item gets the same ten-frame sequence.
- Shoot in batches of five. Change product, refocus, shoot. Review on the camera at 100 percent before moving on.
- Export and rename as you go. Handle each batch while the setup is still live, rather than the night before publishing.
That is roughly 30 minutes for ten listings, which is far less than most people spend photographing one item carefully.
Common mistakes that make listings look cheap
Using a collage as the main image. Etsy buyers scan single images, and a grid reads as an attempt to hide the product. One item, one frame, clean background.
Leaving the product too small in the frame. Empty space around a small item makes the thumbnail unreadable in search results. Fill the frame and leave only crop-safe margins.
Mixing light sources. Window light plus ceiling bulbs gives every photo a slightly different color, and the catalog stops looking coherent.
Hiding flaws. On vintage and one-of-a-kind handmade work, a visible flaw photographed honestly prevents the returns and messages that cost more than the sale. Shoot the flaw and put it in its own supporting image.
Over-correcting in editing. Heavy sharpening, crushed blacks, and boosted saturation are the fastest way to make a handmade item look processed rather than photographed.
Changing your shop look every month. Same background, same light, same framing. Buyers who shop three of your listings should feel like they landed in one studio.
Pre-publish checklist
Run through this before you hit publish:
- The main image is a real photograph of the actual item on a clean background
- The product is centered, fully inside the frame, and safe from thumbnail cropping
- Longest edge is 2000 pixels or more
- Exported and converted to sRGB
- Color matches the real item under daylight, not just on screen
- At least one image shows scale
- At least one image shows detail or craftsmanship
- At least one in-use or lifestyle image is included
- Condition flaws are shown for vintage and one-of-a-kind pieces
- Every photo shares the same background, light, and color temperature as the rest of the shop
Frequently Asked Questions
What are some tips for product photography on Etsy?
Shoot the real item on a clean, neutral background with soft even light, fill the frame without cropping the product, and include a scale reference and an in-use shot. Keep one fixed setup so every listing in your shop shares the same light and color. Accurate color and honest condition photos build more trust than expensive gear.
Do Etsy product photos need a white background?
A white or neutral background is the safe choice for the main image, but Etsy does not require pure white. What matters is a clean, uncluttered surface that does not compete with the product. Lifestyle and styled images work well in the supporting slots, where they answer how the item looks in a real room.
What size should the first Etsy product photo be?
Etsy’s main image should be at least 2000 pixels on its longest side. Shoot the widest frame your setup allows so you have pixels to crop from, then export at 2000 pixels or larger and convert the color profile to sRGB before uploading.
Can I use AI-generated product photos on Etsy?
The first image in a listing should be a real photograph of the actual item on a clean background. Generated scenes, stock images, and mockups are a poor substitute for the real thing and can lead to a listing being removed. Use staged or generated imagery only as clearly secondary supporting images, and make sure the product itself is always shown as photographed.
Do I need a lightbox for Etsy product photos?
A lightbox is not required, but it is one of the fastest ways to consistent results. A large window with a sheer curtain and a white reflector can produce beautiful natural light. A lightbox simply removes the variables, so the same setup works at any hour and in any weather.
How many photos can I add to an Etsy listing?
An Etsy listing can hold up to 20 photos plus up to 2 videos of roughly 5 to 15 seconds each. Most sellers fill only three or four slots. Planning a shot list and reusing frames across listings of the same item is the easiest way to use the space well.
What camera settings should I use for product photos?
Use manual mode, ISO 100, an aperture between f/8 and f/11, and a locked white balance. On a phone, use the pro or manual mode if you have one, lock focus by tapping the product, and always fire the shutter with a two-second timer on a tripod. Avoid apertures much smaller than f/11, where detail starts to soften.
Is a lightbox better than a softbox for small products?
For small items like jewelry, candles, and prints, a lightbox is faster because the enclosure diffuses the light and removes room reflections. A softbox gives you more directional control over shape and shadow, which matters for larger or textured products. Many sellers use the lightbox for the main images and a softbox for hero and lifestyle shots.
How do I avoid shadows and reflections in lightbox product photos?
Use one type of light only, and let the translucent walls do the softening. Fill shadows with a white reflector card rather than a second lamp, since extra lamps add a second color temperature. For glare on metal and glass, tilt the item so the reflection falls on the backdrop and place black card outside the frame to absorb what you cannot move.
What background color is best for Etsy listings?
White reads as a clean professional catalog and suits most products. Neutral grey or soft tones work well for moodier handmade goods and need slightly more exposure to stay bright. Keep colored backgrounds out of the main image unless the color genuinely helps sell the item, and stay consistent across the whole shop.
Conclusion
To take product photos for Etsy with a lightbox, the formula is short: one diffused light source, a curved seamless backdrop, a tripod with a timer, ISO 100, and an aperture between f/8 and f/11. Everything else on this page is a refinement of those five things.
Build the setup once, calibrate it against a white card, mark the camera position, and then run the same shot list for every product. That is how a small shop produces a catalog that looks like it was shot in a studio, on a table in your living room, updated for 2026.
Start with one listing today. Shoot the ten images, publish, and look at what buyers click. That feedback is worth more than any gear purchase.