
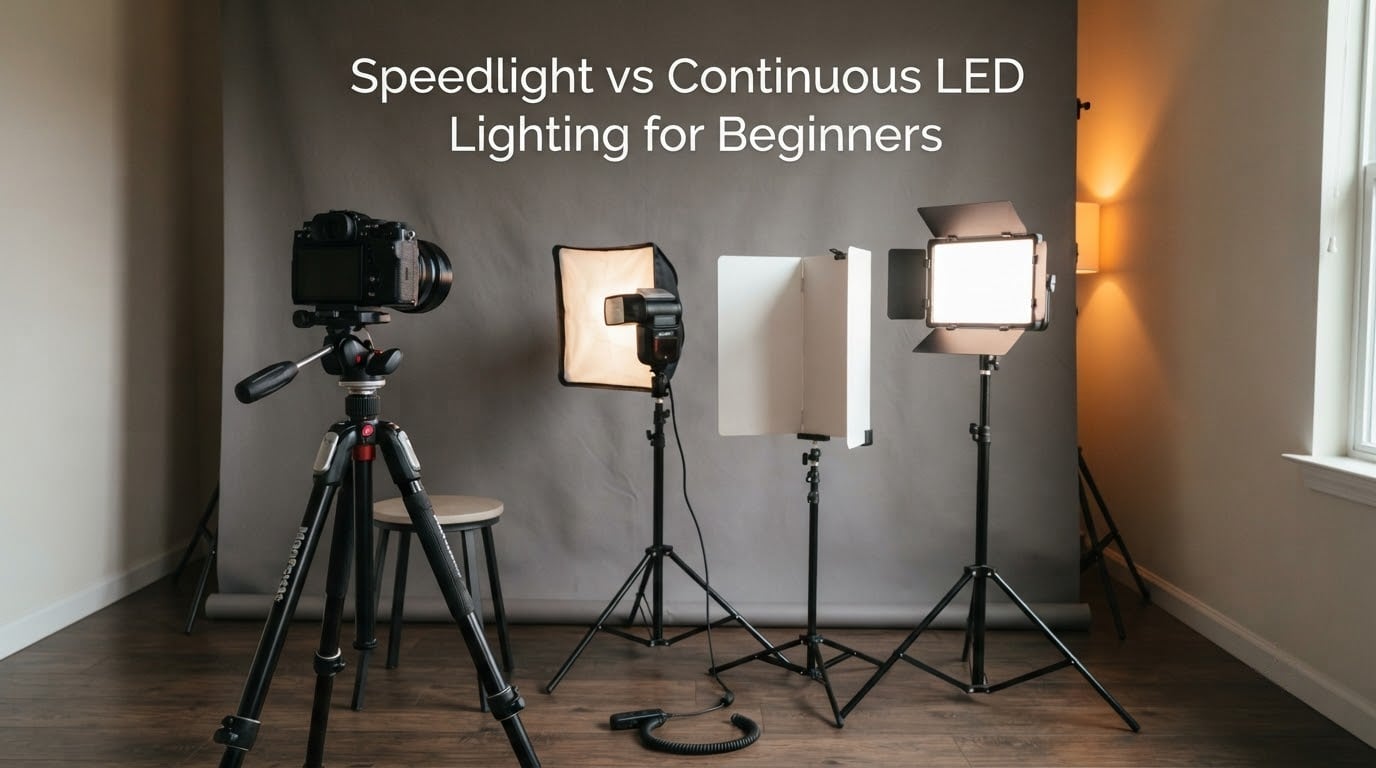
Short answer: a speedlight gives you more power, freezes motion, and grows into a full system, while a continuous LED lets you see the light before you shoot and works for video. If you shoot stills indoors, buy the flash. If you shoot video, or you want to learn lighting without any test frames, buy the LED.
I have shot portraits, events and hybrid photo-video work for years, and the question I get asked most often by people holding their first light is exactly this one. The honest answer is that both technologies are good, but they are good at completely different things, and picking the wrong one is the single most common first-gear mistake I see.
Photographers call a speedlight a flash, and they call a panel or COB fixture continuous light, or sometimes a video light. Those are the two camps in this guide to speedlight vs continuous LED lighting for beginners. I will define both in plain language, break down six differences that actually change your results, and give you a scenario-by-scenario recommendation so you can stop guessing.
One thing to clear up first: this is a general comparison, not a product roundup. Instead of naming winners that go out of date, I focus on the decision itself and the criteria that decide it.
Table of Contents
- Speedlight vs Continuous LED Lighting for Beginners: The Core Difference
- Understanding the Numbers: Watts, Watt-Seconds, Guide Number and Lux
- 6 Key Differences Between Speedlights and Continuous LED Lighting
- The Beginner Learning Curve: Modeling Lamp as Your Bridge
- Hidden System Costs Beginners Do Not Budget For
- Which Light Fits Your Shooting: Scenario Recommendations
- How to Choose Your First Light: A Buying Checklist
- Frequently Asked Questions
- Why don’t photographers use continuous lighting?
- Is flash better for photography than constant light?
- Is a speedlight the same as a flash?
- Should I start with a speedlight or continuous light for indoor portraits?
- What is the easiest lighting setup for a beginner?
- Is a speedlight enough for portraits, or do I need a studio strobe?
- How important is TTL for beginners?
- Can a modeling lamp or continuous preview help me learn flash faster?
- Is there ever a reason to choose continuous light first?
- What should I buy first if I want a system I can grow into?
- Conclusion: Make the Call and Then Commit
Speedlight vs Continuous LED Lighting for Beginners: The Core Difference
Here is the shortest accurate version. A speedlight delivers a very brief, very intense burst of light measured in watt-seconds. A continuous LED stays on constantly, and its output is measured in watts. One is a lightning bolt, the other is the sun, and every practical difference in this guide falls out of that single contrast.
What a speedlight actually is
A speedlight is a flash unit with a hot-shoe mount on top, the same mount your camera uses for the viewfinder. It fires for a few thousandths of a second, which is short enough to freeze a jumping dog or a spinning fan blade.
Because the light only exists for a fraction of a second, the flash duration itself acts as your shutter speed for that burst. A modern speedlight can fire at around 1/50,000 second, so motion has no chance to smear between one frame and the next.
Most speedlights also carry a modeling lamp, a small continuous bulb that switches on when you hold the depth-of-field or preview button. That lamp is dim and hot, and it is the single most useful feature for a beginner learning flash.
What continuous LED lighting actually is
Continuous LED lighting comes in three common shapes. Thin panels with an LED array spread light across a soft, wide face. COB fixtures pack a single bright chip behind a small reflector, which throws harder, punchier light with more visible falloff.
Then there are hybrid units with both a flash tube and a continuous mode, which straddle the line. Whichever shape you choose, the defining trait is the same: the light stays on, so what you see through the viewfinder is what you get.
The hybrid: flash with a modeling lamp
A hybrid fixture gives you a flash burst for stills and a switchable LED mode for video, in one housing. It is the compromise most beginners end up with, and it is worth knowing that the two halves are usually not equally strong. The flash side is the primary light, and the video side is a convenience.
Do not buy a hybrid expecting a video light to match a serious strobe. Read the ratings for each mode separately.
Understanding the Numbers: Watts, Watt-Seconds, Guide Number and Lux
Before anything else, here is the part that confuses nearly everyone. Comparing a 60W LED to a speedlight feels impossible, because you are comparing a number that describes a steady stream to a number that describes a single instantaneous burst. They are not the same quantity and no conversion table exists.
Why the numbers seem meaningless
- Watts (W) describe continuous power for LEDs. A 60W COB is a common entry-level panel rating.
- Watt-seconds (Ws) describe total energy per flash. Speedlights are quoted around 200Ws to 400Ws, and studio strobes go well past 500Ws.
- Guide number (GN) describes flash reach at a given ISO and aperture, which is the number you actually use to set exposure from a distance.
- Lux at 1m describes continuous light output at a fixed distance, and it is the only continuous number worth comparing between two panels.
The practical takeaway: compare flash to flash on watt-seconds and guide number, and compare LED to LED on lux at 1m. Never put the two scales side by side and try to derive a winner.
The inverse-square law in plain English
Light output falls off with the square of distance. Move a light twice as far away and you get roughly a quarter of the light at the subject. Double the distance again and you are down to about one sixteenth.
This is why a modest continuous panel that looks impressive at arm’s length can disappoint across a room, and why a small speedlight on a stand two metres away easily lights a portrait that looks bigger than your living space. Flash wins the power-per-kilogram contest because you are measuring the peak of a burst, not a steady stream.
6 Key Differences Between Speedlights and Continuous LED Lighting
1. Power output and how far you can push it
Flash wins decisively here. A speedlight’s rated watt-seconds concentrate a large burst into milliseconds, so it reaches across a room or into a bright room and still exposes cleanly. A continuous panel of comparable size has to push the same energy out in real time, which it can only do by generating significant heat.
The forum consensus we found lines up with this. Macro photographers, who need raw output at close range without a long exposure, recommend flash over continuous light almost without exception. That is the inverse-square law biting in practice.
2. Freezing motion
This is flash’s cleanest win. Because the burst lasts a fraction of a millisecond, a speedlight freezes movement regardless of your shutter speed. A continuous light depends entirely on your camera’s shutter speed to stop motion, and stopping a moving subject at 1/1000 second in a dim room means opening up the aperture and raising ISO.
Raising ISO is a trade. Your files get noisier, your dynamic range narrows, and recovering shadows in post gets harder. Flash sidesteps the whole problem, which is why wedding and event photographers reach for it even when a panel would light the room fine.
3. Workflow: test frames versus WYSIWYG
Continuous light is what you see is what you get. Compose, adjust, and the frame updates. Flash asks you to work in a loop: take a test frame, look at it, adjust, and shoot again.
For a beginner this matters more than any spec. A continuous light removes an entire layer of uncertainty while you are still learning where to place lights. A flash asks you to build a mental model of exposure that you do not have yet, and that is why so many people bounce off flash early.
Once the mental model exists, the loop stops feeling slow. That is the argument for suffering through it now rather than later.
4. Light modifiers and mounting
Speedlights use a dedicated bracket with a small round head, or an adapter plate that lets you fit larger softboxes. Continuous fixtures come in three mounting families: Bowens, Mini Bowens, and magnetic or proprietary mounts.
Each family has its own modifier library, and mixing them is where hidden costs hide. A Mini Bowens fixture will not accept full-size Bowens modifiers without an adapter, and some magnetic systems simply have no large modifiers at all. Plan the modifier ecosystem before you pick the light, not after.
5. Heat, noise and subject comfort
Continuous fixtures get hot. Sustained output means sustained heat, and a fan is usually needed to push the rated power, which adds noise you will hear in video recordings if the light sits near a microphone.
Flash barely warms anything. The subject never notices it is there, which matters for close portraits and for children who get uncomfortable under a hot panel. If your subject flinches from the light, that is an equipment decision, not a technique problem.
Both issues are avoidable with specific choices: a panel with a silent mode for video, or a flash for stills. Beginners buying a fan-cooled fixture for talking-head work learn this the hard way.
6. Video and hybrid shooting
Flash cannot light video at all. There is no exposure, no frame rate, and no shutter. If even part of your work is video, reels, tutorials, or streaming, continuous light is not optional.
The reverse is not true. A speedlight is fully capable of shooting stills and nothing else, and it does that better than any panel. So the practical rule is: if video is part of your plan, continuous light is on the list, and the real question becomes whether it is your main light or your accent light.
The Beginner Learning Curve: Modeling Lamp as Your Bridge
If flash is the better tool but continuous light is the better teacher, the fix is not to avoid flash. It is to use a bridge while you learn.
Every serious flash setup has the same bridge built in, and beginners rarely use it. The modeling lamp is a continuous bulb inside the flash head. Turn it on, and you see the light and the shadows before you press the shutter. It is dimmer and yellower than the flash burst, so it is not a WYSIWYG preview, but it tells you everything you need about shape, size, direction and falloff.
Here is how I would sequence the first few weeks. Start with the modeling lamp on and shoot in a dim room so the lamp reads clearly on the frame. Place your main light at about 45 degrees to one side of your subject and slightly above eye level. Add a reflector or white card on the shadow side, close in, to bounce light back and soften the contrast. Turn the modeling lamp off, shoot, review the histogram, and adjust.
That is the whole process. Repeat until placement makes sense to you before the flash burst ever enters the conversation. Then switch to TTL, which meters the burst for you and lets you keep the same placement while you focus on composition and expression.
TTL versus manual flash for beginners
TTL lets the camera measure the flash and choose the power. It removes the exposure calculation from your workflow entirely, which is why it exists and why most beginners should use it first.
Manual flash asks you to set the power yourself. It is less flexible, but it is consistent from frame to frame and it is how a photographer gains real control of lighting ratios. Treat TTL as the training wheels and manual as where you end up.
The 3 lighting rule
Common in beginner discussions, and worth knowing: a complete setup is one main light, one fill light, and one background light. The main shapes the subject, the fill softens shadows created by the main, and the background separates the subject from its surroundings.
You can absolutely start with one light. The rule describes the finished goal, not a starting requirement, and adding a second off-camera flash with a small reflector is the most useful second purchase most beginners can make.
Hidden System Costs Beginners Do Not Budget For
The light itself is the smallest part of either system. This is where first kits get expensive, and it is the part most comparison articles skip.
What a speedlight system really needs
- A trigger or radio receiver for off-camera use, since the built-in pop-up flash is your only other option
- A stand, or a way to put the light off the camera
- A modifier: a small reflector, a bounce card, or a softbox for one head
- Fresh batteries and a spare set
- A second flash later, ideally matching the first
The trigger is the piece people skip and then immediately regret. Working with the flash on the hot shoe means very flat, boring light, and you learn placement far better off-camera.
What a continuous LED system really needs
- A stand that can carry the fixture’s weight safely
- A softbox or diffusion dome matched to the mount family
- A dimmer, which many cheap panels lack and every good one has
- A battery solution, since most panels are AC-only
- Anything you need for video: a battery, a diffuser, and a way to control brightness by hand
The dimmer is worth dwelling on. Without one, matching a light to your room’s existing light means walking a dimmer knob on an outlet or moving the fixture. That single control changes how usable a panel is.
Modifier mounts explained in one paragraph each
Bowens is the original large studio mount. The broadest modifier selection exists for it, and it is the safest long-term bet if you plan to keep buying light. Mini Bowens is a smaller, cheaper version with a decent but more limited range of modifiers, popular with compact panels. Magnetic and proprietary mounts are the cheapest and most convenient, and they are the most limiting when you outgrow your first fixture.
The used market: what holds value and what does not
Used buying came up repeatedly as something nobody covers, so here is the practical version. Speedlights hold value well because they are electronics with a proven radio system, and a used flash from a major brand is a straightforward purchase. Continuous panels depreciate faster for a specific reason: non-replaceable integrated batteries end a fixture’s working life, and once that battery fails the unit is scrap even if the LEDs are fine.
So the rule that falls out of this is simple. When buying a panel used, confirm the battery is replaceable or confirm the fixture is mains powered. When buying a flash used, check the recycle time, because a tired capacitor shows up as a speedlight that takes two seconds to be ready for the next frame, and that will wreck your work at events. Prefer buying a quality trigger and stand new, since those wear out from being dropped, and buy the light itself used if you can test it.
Which Light Fits Your Shooting: Scenario Recommendations
This is the section to read twice. Find what you actually shoot, not what you might shoot in a year.
Indoor portraits and headshots
Start with a speedlight. Portrait work is the classic flash situation: a still subject, a subject who needs to feel comfortable, and a room that may have too much window light to overpower easily. Add a small off-camera flash and a white reflector and you can build headshot-quality light for the price of a dinner.
The exception is if you are photographing children or anyone who will not sit still, or if you want a soft, obviously-studio look without a large modifier. In those cases a panel with a medium softbox is faster and kinder to the subject.
Events, weddings and parties
Speedlight, without question. Motion is everywhere, the recycle time matters more than you think when you are firing four frames a second, and a flash bounces off ceilings and walls that a panel would just light one small area of. You will also need a second and third flash, and matching flashes are cheap in a way matching panels never are.
Video, reels and content creation
Continuous light. There is no alternative here. Look for a bi-color or full-spectrum tunable panel, a dimmer, and a battery, and consider noise if you will record near a microphone. For talking-head work, one panel at 45 degrees with a white reflector opposite is the entire setup you need on day one.
Product, food and macro work
Flash for macro and anything small and shiny. Product work means a small subject at a short distance, which is the worst possible place for the inverse-square law, and reflective surfaces eat continuous light in a way they do not eat a burst. Keep the modeling lamp in your workflow so you can frame and focus without strobing your subject constantly.
Food and still life are the exception. These subjects never move, exposure times are long, and a panel’s steady output means you can build a neat light and refine it slowly. Continuous light wins here on comfort and control.
Outdoor fill and travel shooting
A speedlight, for a specific reason. Outdoors you are adding light to daylight, which is far brighter than any room. Reaching that gap with a continuous panel means carrying mains power or a large battery, and you will still be fighting the sun. A compact flash off-camera acts as a reflector and lifts a shadowed face in seconds with nothing to plug in.
Travel shooters who also film should carry both, but the flash is the one that saves a shot.
Family and holiday shoots
Family sessions are moving, indoor, and often time-limited, which points to flash. Holiday and seasonal shoots at home have the opposite problem: mixed household lighting, a small room, and subjects who are also being cooked for. Continuous light is the more forgiving choice there, especially for the candid frames between posed ones.
If you can only carry one, consider how many people are moving. One adult sitting still, continuous. Three children, flash.
How to Choose Your First Light: A Buying Checklist
Speedlight buying checklist
- Guide number: higher means more reach, and this is the spec that sets how big a space you can light.
- Radio system compatibility: this matters more than any other single feature, because it decides which triggers and which other flashes you can use later.
- TTL support: essential for your first year, and a reason to stay inside one brand’s ecosystem rather than mixing systems.
- Modeling lamp: a continuous preview bulb, and the tool that makes learning flash practical.
- Recycle time and capacity: matters if you shoot bursts, and the number to check when buying used.
- Battery type: replaceable batteries are a real advantage over sealed units.
Continuous LED buying checklist
- Dimming: non-negotiable for matching ambient light.
- Colour rendering index: see the section on skin tones below.
- Battery versus mains: decide this before you buy, because it determines whether the light travels.
- Mount: Bowens gives you the most modifier options long term.
- Fan noise: a deal breaker in video, so check whether the fixture has a silent mode.
- Weight and yoke quality: a heavy fixture on a weak stand is a real risk.
Colour temperature and CRI for skin tones
Skin is the hardest thing to light accurately, and it is the main quality difference beginners notice between lights. A panel with a low colour rendering index renders some colours in the spectrum poorly, and the result is skin that looks flat or slightly off. A rating of 95 or above is a reasonable target for portraits, and TLCI is the broadcast-era equivalent worth asking about.
Colour temperature matters just as much. A panel set to a warm tone will fight a daylight-balanced room and make your white background look yellow. A bi-color panel lets you dial it in, which is why it is worth the step up.
Flash faces have their own colour temperature, usually around 5500K, and a modelling lamp is close to tungsten. None of that matters much because the flash is short enough that your camera’s white balance handles it consistently. It is one more small way continuous light asks you to think and flash asks you to press a button.
First purchase priority order
If you want a system you can grow into, buy in this order. Start with the light that matches your primary subject matter. Next, buy the way to get it off the camera, which means a trigger and radio receiver for flash or a stand for continuous. Then buy a modifier matched to the mount, and a reflector or white card, which cost almost nothing and do more for your images than any light upgrade.
Only after that consider a second light. People routinely upgrade a first light too early and then discover they cannot get it off the camera or cannot shape it.
Five beginner mistakes to avoid
- Buying a second light before a first modifier. One shaped light beats two bare ones, every time.
- Ignoring the mount family. A cheap fixture with no modifier options becomes an expensive paperweight.
- Confusing watts with brightness. Check lux at 1m or a published photometric chart, not the wattage label.
- Shooting flash in manual power mode first. Use TTL while you learn placement, then move to manual.
- Placing the light too close and too high. The most common framing error is a 45-degree side position and about 45 degrees above eye level, then stepping back until the light is not in the way.
Frequently Asked Questions
Why don’t photographers use continuous lighting?
Mostly because of power and heat. To match the output of a flash burst in real time, a continuous fixture has to push the same energy out continuously, which means it runs hot, needs a fan, and needs mains power or a big battery. Flash delivers a large burst of energy in milliseconds, gets hot without touching the subject, and travels on small rechargeable batteries.
Is flash better for photography than constant light?
For stills, generally yes. Flash gives you more power for the weight, freezes motion independently of shutter speed, bounces off walls and ceilings, and never heats your subject. Continuous light wins on what you see before you shoot and on video capability, so it is better when your subjects sit still, move slowly, or when you film.
Is a speedlight the same as a flash?
A speedlight is a flash. Speedlight is the marketing name for a portable flash unit with a hot-shoe mount, the same mount your camera’s viewfinder uses. It is a type of flash, alongside studio strobes and monolights that need separate power. When people say flash photography for beginners, they usually mean speedlights.
Should I start with a speedlight or continuous light for indoor portraits?
Start with a speedlight for still portraits. You get more power, a cooler subject, softer shadows, and a small off-camera flash with a white reflector is enough for headshot-quality light in an ordinary room. Choose continuous light instead if your subjects are young children, you want a large softbox look without a big modifier, or you also need to film.
What is the easiest lighting setup for a beginner?
Start with one light at about 45 degrees to one side of your subject and slightly above eye level. Put a reflector or white card on the shadow side, close in, to bounce light back. Shoot, look at the histogram, and adjust until the shadows are as dark as you want. Add a second light only when you want two distinct shadows.
Is a speedlight enough for portraits, or do I need a studio strobe?
A speedlight is enough for portraits in a room, and it is what I would start with. You will notice the limit when you need a large softbox, very fast recycle time for bursts, or enough power to light a big space or a bright room. That is when a studio strobe earns its place. A speedlight plus a second one gets you a long way first.
How important is TTL for beginners?
Very important, and it should be your starting mode. TTL lets the camera meter the flash burst and set the power, so you can concentrate on where to put the light rather than on exposure arithmetic. It is not perfectly consistent between frames, so switch to manual power later, once placement feels automatic.
Can a modeling lamp or continuous preview help me learn flash faster?
Yes, and it is the fastest way through the learning curve. Turn on the modeling lamp to see the shape, direction and falloff of your light before you shoot, then switch it off for the real frame. Some flashes also support a strobe-preview mode that fires at low power. You sacrifice a little of the real look, but you keep the entire learning loop.
Is there ever a reason to choose continuous light first?
Yes, in four common cases. If you shoot any video, continuous light is the only option. If your subjects cannot sit still, a constant beam avoids a stroboscopic effect and you can see motion as you shoot it. If heat near the subject is a concern, especially with children, flash is cooler. And if you learn best by seeing the result live, continuous light removes the test-frame loop entirely.
What should I buy first if I want a system I can grow into?
Buy the light that matches your primary subject matter, then the means to get it off the camera, then one modifier, then a reflector. For flash that means a speedlight from a brand with a broad radio system, a matching trigger, a stand, a small softbox or reflector, and a second matching flash later. Staying inside one brand’s ecosystem early is what makes the system expandable.
Conclusion: Make the Call and Then Commit
The choice in speedlight vs continuous LED lighting for beginners is less about which light is better and more about which failure you can accept. Flash fails by making you wait and guess. Continuous light fails by not being strong enough, not freezing anything, and not helping you shoot video at all.
Pick the failure you can live with. If your subjects move, your rooms are unpredictable, or you want to grow into a full studio system, start with a speedlight and use its modeling lamp to shorten the learning curve. If you film, if you need instant feedback, or if you are not ready for a test-frame loop, start with a dimmable continuous light with a replaceable battery and a Bowens mount.
Whichever you pick, buy the stand or trigger before the second light, buy one good modifier rather than five cheap ones, and give yourself a month of practice before you judge the result. The equipment is rarely the limiting factor in the first six months.
That comparison is current as of October 2026, and both ecosystems keep improving, so the criteria above will hold even as specific models change.