
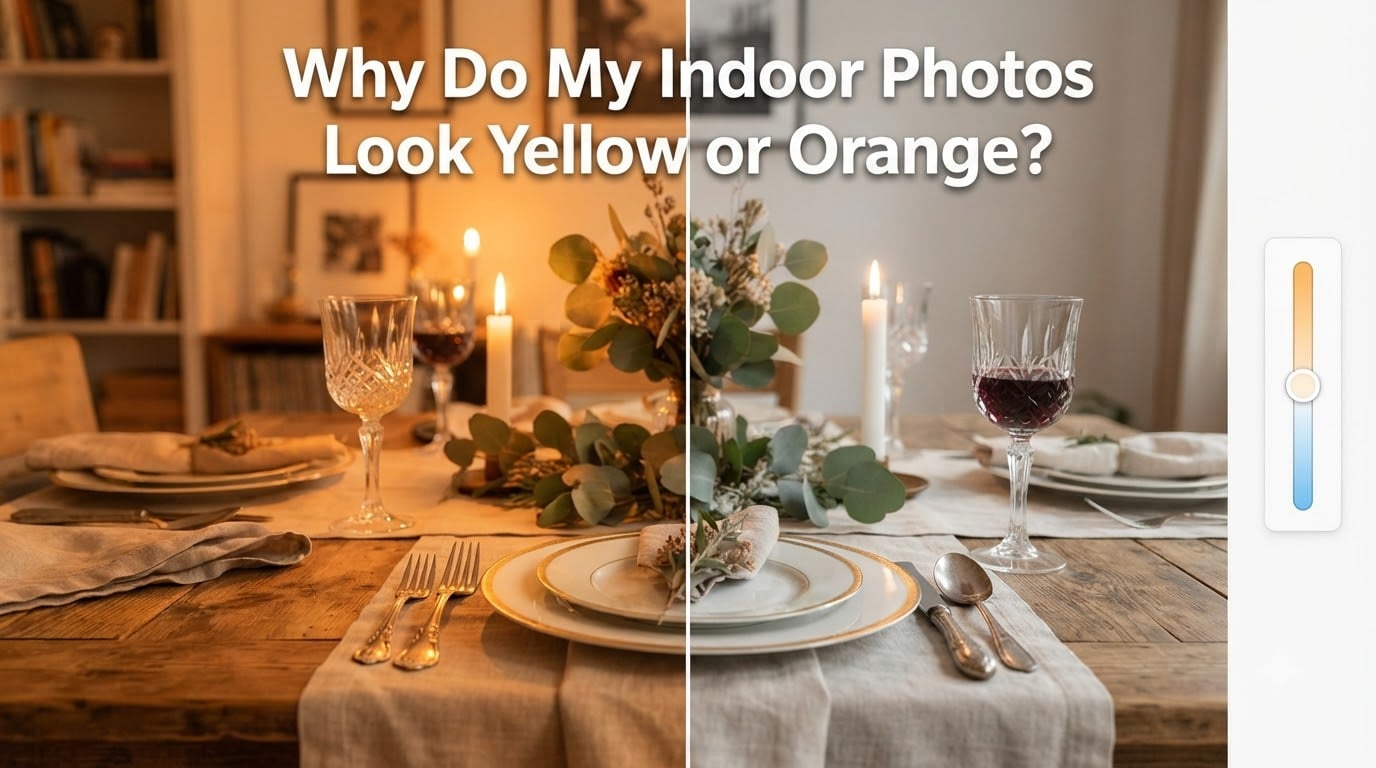
Indoor photos look yellow or orange because your camera records the actual color of the light, and most indoor bulbs are far warmer than daylight. Your eyes quietly re-balance for that warmth, so the room looks normal to you. The camera does not, unless you tell it what color of light it is shooting in.
That single sentence explains almost every warm, sickly, dinner-party photo you have ever taken. The fix is a white balance correction, and you can apply it three ways: set it before you shoot, correct it in an editor afterward, or move closer to a window and let daylight do the work for you.
I have shot enough indoor frames with a white balance left on auto to know where it goes wrong. Auto white balance tries to average a whole room into one number, and a room lit by a warm bulb, a window, and a television does not have one color. It guesses, and the guess lands somewhere between orange and green.
This guide covers the cause, the numbers behind it, the exact taps on a phone, the sliders in an editor, and how to tell a lighting problem apart from a device problem. If you only read one section, jump to the editing steps and neutralize the cast against a neutral grey or white surface.
Table of Contents
- Why Your Indoor Photos Look Yellow or Orange
- What Color Temperature in Kelvin Actually Means
- How to Fix the Cast in Editing
- Fixing It on Your Phone
- Setting White Balance Before You Shoot
- The Mixed Lighting Problem
- Is It the Light or Is Something Wrong With Your Camera?
- When to Keep the Warmth on Purpose
- Frequently Asked Questions
- Why are my photos looking yellow?
- What is the best white balance for indoor photography?
- How do I fix white balance in a photo?
- Why do my iPhone photos look so yellow?
- How do I remove yellow tint from photos on iPhone?
- How do I turn off yellow light on iPhone camera?
- Why do my photos look orange?
- How to get rid of orange tint in photos?
- What color cancels out yellow in photos?
- Why is my camera making me look yellow?
- Is there a free way to remove a yellow tint without Lightroom?
- Why are my indoor photos green instead of yellow?
- Bottom Line
Why Your Indoor Photos Look Yellow or Orange
A yellow or orange cast in indoor photos is a white balance problem, not a broken camera. White balance is the camera’s guess about which light source is illuminating the scene, and warm bulbs give that guess a very different answer than sunlight does.
Your Eyes Adapt to the Room and Your Camera Does Not
Hold a sheet of white paper under a warm bulb and it looks white to you. That is chromatic adaptation working in real time: your brain measures the light and subtracts it from everything you see, so neutral objects read as neutral again within seconds.
A camera has no brain. It measures the light, records it faithfully, and hands you a white wall that is technically orange. Nobody has to touch a setting for this to happen, which is why a brand new phone in a warm living room produces orange photos before you have changed anything.
The Bulb Types That Cause the Warmest Casts
Incandescent and halogen bulbs are the worst offenders. Their light is heavily weighted toward orange and yellow wavelengths, and they sit near 2700K to 3000K. Old dining rooms, many hotel and restaurant venues, and most household lamps fall into this group.
Warm white LEDs land in a similar range, usually 2700K to 3000K, so swapping a bulb for an LED does not automatically solve the warmth. Daylight-balanced LEDs around 4000K and cool white ones at 5000K or higher are much easier to photograph accurately.
Fluorescent tubes sit somewhere in the middle of the range but have a different problem entirely. Many older tubes have a strong green spike in their spectrum, and a camera that neutralizes the yellow component can hand you a green cast instead.
What Color Temperature in Kelvin Actually Means
Color temperature describes the color of light a source emits, measured on the Kelvin scale. Lower Kelvin values mean warmer, more orange light, and higher Kelvin values mean cooler, bluer light. The scale runs backwards from how most people expect, and that inversion trips up more beginners than any other setting.
White balance is the correction your camera or editor applies to counteract that color. Think of it as telling the camera which light it is standing in, so the software can subtract the warmth and record the wall as the grey it actually is.
Here is the reference I keep open while shooting. The Kelvin figures are approximate and depend on the specific bulb, but they are close enough to set a manual white balance from.
| Light source | Approximate Kelvin | Resulting cast if uncorrected |
|---|---|---|
| Candlelight and firelight | 1800K to 2000K | Deep orange, very warm |
| Incandescent and halogen bulbs | 2700K to 3000K | Strong orange or yellow |
| Warm white LED | 2700K to 3200K | Yellow to orange |
| Fluorescent tubes | 3500K to 4500K | Green or green-yellow |
| Overcast daylight | 6500K to 7500K | Cool blue |
| Direct midday sun | 5000K to 5500K | Slightly warm to neutral |
| Open shade and heavy cloud | 7000K to 8000K | Noticeably blue |
That is also why the question of what color cancels out yellow has a simple answer: blue. Blue is the opposite end of the temperature scale, so pulling a photo toward blue cancels a warm cast, and pulling it toward amber cancels a blue one. On the green-magenta axis, magenta is the answer for green.
A useful sanity check you can do on any photo. Find a surface that should be neutral grey, such as a white shirt in shade, a sheet of printer paper, or a concrete path outside. If it reads yellow, the temperature is too warm. If it reads blue, the temperature is too cool. If it reads green, the tint axis needs magenta.
How to Fix the Cast in Editing
Fixing a cast in an editor takes four steps and works in Lightroom, Snapseed, Google Photos, the built-in iOS editor, Capture One, and most free online tools. The names change, the physics does not.
The Four-Step Correction in Any Editor
- Open the raw or the JPEG and go to the white balance panel. On a phone this is usually called Adjust, White Balance, or Light. On a desktop editor it is the WB, Temperature, or Color panel.
- Move the temperature slider toward blue until the cast disappears. Small moves matter here, so work in increments and check a neutral surface rather than a face.
- Use the eyedropper on a neutral grey or white area in the photo. A single click sets temperature and tint at once, and it is the fastest way to a neutral result when you do not trust the slider scale.
- Fine-tune the tint slider. A yellow cast that turns green as you add blue needs a touch of magenta. A green fluorescent cast usually needs a fairly large tint move.
If the room has two different light sources, a global correction will always compromise. Mask the face or the food and correct it separately, then mask a second area lit by the window and correct that one toward cooler.
Watch for overcorrection. The failure mode almost everyone hits is pushing blue too far. Skin tones turn grey and lifeless, and highlights in the frame pick up a cyan edge. A slightly warm portrait usually looks better than a perfectly neutral grey one, so stop while it still looks alive.
How much room you have depends on the file. A RAW file keeps the full color data from the sensor, so the temperature slider can travel a long way before anything breaks. A JPEG is already clipped at capture, so a heavy correction pulls color out of the highlights first and starts hunting around the edges of bright areas.
Free Ways to Remove a Yellow Tint Without Paying for Software
Every option in the table below has a free path. The names of the controls are what people search for, because most of them are not labeled white balance anywhere in the interface.
| Editor and platform | Control name | Which slider to move |
|---|---|---|
| iOS Photos (built in) | Adjust, then Warmth and Tint | Warmth toward cooler for yellow, Tint toward purple for green |
| Snapseed (free mobile app) | Tune Image, then White Balance | Temperature toward cool, plus color selector eyedropper |
| Google Photos (free) | Edit, then Light | Warmth toward neutral, then Color temperature |
| Lightroom Mobile (free version) | Light panel | Temp toward blue, Tint toward magenta, or WB eyedropper |
| Lightroom Classic desktop | Develop, White Balance | Temp toward blue, Tint toward magenta, White Balance Selector eyedropper |
| Free online editors | Temperature or Warmth | Toward blue or neutral, then a Highlights recovery pass |
You do not need any of these to correct a JPEG. The free iOS editor and Google Photos both handle a moderate warm cast, and Snapseed has a white balance tool that behaves almost like a desktop panel.
Fixing It on Your Phone
Phones produce warm indoor photos for the same reason cameras do, and the automatic correction is often too timid to fully remove the cast. Every current phone has both a capture setting and an editing control worth using.
On iPhone
Lock the white balance before you shoot. Open the Camera app, switch to the Camera controls by tapping the arrow above the mode picker, and change Live Photo to Off, Portrait to Off, and Flash to Off. Those two effects each add their own processing that you cannot fully undo later.
To stop the yellow at the source on an iPhone, tap the chevron in the top settings row to open the expanded controls, then find Format, RAW, and Apple ProRAW options on models that support them. RAW keeps the color data that makes a strong correction possible.
To correct a photo you already took, open it in Photos, tap Edit in the top corner, then Adjust. Slide Warmth toward the cooler end until the cast goes, and use the Tint slider next to it to add a little purple if the whites have turned green. Tap the wand icon above the sliders to let the editor make a first automatic pass, then refine it by hand.
Users on Reddit have found the same thing independently: almost every photo editor on a phone has a warmth control somewhere, even when the app never uses the word. Once you know it is called Warmth, the setting is easy to find.
On Android
Most Android camera apps have a pro or manual mode with a white balance option, often a Kelvin entry field or a series of presets such as Incandescent, Fluorescent, and Daylight. Set it to Incandescent for a warm room and take a test shot against a white wall before you start.
For photos already in your gallery, the stock Google Photos editor is the fastest route. Open the photo, tap Edit, choose Light, and move Warmth toward neutral. If your camera maker ships its own gallery app, look for a similar Warmth or Temperature control, since the naming follows the same pattern.
Setting White Balance Before You Shoot
Correcting in the camera costs nothing and produces a cleaner file than correcting afterward. It is the only free fix, and it is the one most people skip.
Use a preset when you know the bulb. Incandescent, Tungsten, or Warm White sets roughly 2800K to 3200K. Fluorescent sits around 4000K. Daylight is 5200K and Shade is 6500K to 7500K. Presets are quick and consistent, which matters for a sequence.
Do not trust auto white balance indoors. AWB reads the whole frame and averages it. One r/AskPhotography thread captures the problem well: two photos from the same place, same settings, both at ISO 2500, 1/500 second at f/1.4, and roughly two thirds of them came out with a yellow or orange cast. Auto was not wrong so much as undecided.
Set Kelvin manually when you can estimate the light. Start at 3000K in a warm bulb room and move up toward 4000K if the photo comes out too blue. Manual takes seconds to set and stays fixed for the whole sequence.
Use a custom white balance from a grey card when accuracy matters, such as product work or paid portraits. Put a neutral grey card or Expodisc in the same light hitting your subject, frame it, and set the custom white balance from it.
Here is the mistake that catches people out. A grey card photographed under a different light than your subject produces a green or orange result, and you will spend an afternoon wondering why the card is the problem. Place the card in the light that is actually on the face or the dish, not in the shadow or under a different lamp.
Shoot RAW whenever you can. JPEG compresses color and clips bright channels, so a heavy correction later has less to work with. RAW files also carry the original white balance metadata, so an editor can reuse the setting you chose in camera.
Matching flash to a tungsten venue is the professional version of the same idea. Gel the flash with a CTO filter and set the camera to the incandescent white balance so flash and ambient light agree. Without the gel, the flash reads blue against an orange room.
Two workflow notes that save time on bigger shoots. In Lightroom, use the White Balance Selector eyedropper on the first frame, then copy that setting to the rest of the sequence so the whole set matches. For video, lock the white balance rather than leaving it on auto, because auto shifts frame to frame and the shift is far more noticeable in motion than in a still.
The Mixed Lighting Problem
A room lit by both window daylight and warm bulbs has no correct white balance. The window side wants 5500K, the bulb side wants 2800K, and one setting has to serve both. This is the most common indoor frustration and the one no slider fully solves.
There are four ways out, in order of how much they help.
- Reposition before you correct. Turn off the room lights, close the curtains on any window you are not using, and shoot near the window. One light source means one white balance, and this is the fix that costs nothing.
- Choose one light and let the other go dark. For a dinner, that often means the overhead off and the candlelight on. The frame becomes warmly lit on purpose rather than badly lit by accident.
- Set white balance for the subject, not the room. Base it on the light falling on the face or the food, then accept that the background will sit slightly off.
- Correct the two areas separately in post. A global temperature move gets you close, then a mask on the window side brings it cooler. This is a RAW-only fix, because a JPEG may not have the data to split cleanly.
On the dpreview forums, the technique people converge on is exactly that: correct the whole frame with one white balance move, then selectively pull the blue channel back in specific areas.
Is It the Light or Is Something Wrong With Your Camera?
Before editing anything, confirm the cast is really in the photo. A yellow screen and a yellow photo are different problems, and forum threads mix them up constantly.
If other apps look normal, it is a display setting. True Tone, Night Shift, Adaptive Tone, a blue light filter, or Night Mode warming the screen will tint the Photos app and your gallery at the same time. Check Settings, then Display and Brightness, or Accessibility, then Display and Text Size, and turn off True Tone, Night Shift, and Adaptive Tone. The photo itself never changed.
If only some apps look yellow, it is the photo. Send the file to another device or a web browser. If the cast is there too, it is baked into the image and white balance is the right fix.
If the yellow appears as a patch, usually in one corner, suspect heat or a failing sensor. White balance problems affect the whole frame evenly. A warm blotch that spreads from an edge is a thermal or hardware issue, and the phone or camera needs a restart, a cooling break, or service. This is one of the few cases where a restart genuinely solves it.
If the yellow arrived suddenly with no change in lighting, check for an update first, then reset the camera settings. A fall, a wet pocket, or a third-party app that changed your white balance preset can all do it.
When to Keep the Warmth on Purpose
Not every warm cast is a mistake. A consistent orange glow suits candlelit dinners, autumn interiors, food photography, and hospitality images where warmth reads as inviting.
The rule is consistency. If you keep the warmth, keep it deliberately and apply the same white balance to the whole set, so the frame reads as a choice rather than a mistake. Mixed correction across a sequence looks worse than a uniformly warm one.
Frequently Asked Questions
Why are my photos looking yellow?
Your camera is recording the real color of your indoor light, and warm bulbs emit light weighted heavily toward orange and yellow. Your brain adapts to that warmth so the room looks normal, but the camera does not adapt unless you set white balance. Shoot RAW, set the preset or Kelvin to match the bulb, and correct any remainder in editing.
What is the best white balance for indoor photography?
Match the Kelvin value to the light in the room rather than using auto. Incandescent and halogen bulbs sit near 2700K to 3000K, warm white LEDs near 2700K to 3200K, and fluorescent tubes near 4000K. A grey card in the light hitting your subject gives the most accurate custom value. In a room with mixed light, base the setting on the subject, not the background.
How do I fix white balance in a photo?
Open the editor’s white balance, temperature, or adjust panel. Move the temperature slider toward blue until a neutral surface in the frame looks grey again, use the eyedropper on that surface if one is available, then fine-tune the tint slider toward magenta if the whites have turned green. On mixed lighting, mask a second area and correct it separately.
Why do my iPhone photos look so yellow?
The iPhone records the warm light in the room the same way any camera does, and its automatic correction is often too subtle to remove the whole cast. Lock your camera settings, shoot in RAW or ProRAW when the model supports it, then open the photo in Photos, tap Edit, Adjust, and slide Warmth toward the cooler end. Use the Tint slider beside it if the whites turn green.
How do I remove yellow tint from photos on iPhone?
Open the photo in the Photos app, tap Edit in the top corner, then choose Adjust. Move the Warmth slider toward the cooler side until the yellow disappears, and add a small amount of Tint toward purple if the whites skew green. You can tap the wand icon above the sliders first for an automatic pass, then refine the result by hand.
How do I turn off yellow light on iPhone camera?
If the whole screen looks yellow rather than just the photo, it is a display setting. Go to Settings, then Display and Brightness, and turn off True Tone and Night Shift, and check Accessibility, Display and Text Size for Adaptive Tone. If only the captured photo is yellow, the setting to change is white balance, either on the camera or in the editor.
Why do my photos look orange?
Orange is the warmer end of the same problem that causes yellow. Old incandescent and halogen bulbs sit near 2700K to 3000K, and candlelight is warmer still, so anything neutral in the frame picks up an orange cast. Set white balance to the incandescent or tungsten preset, or raise the Kelvin value toward 4000K, and add blue in editing for whatever remains.
How to get rid of orange tint in photos?
Treat it as a warm white balance and correct it in three moves. Set a Kelvin value around 3000K to 4000K in camera if you can, shoot RAW, then in editing move the temperature or warmth slider toward blue until neutral surfaces read correctly. Check a white shirt or paper in the frame rather than a face, since skin tones skew warm naturally.
What color cancels out yellow in photos?
Blue. Yellow and blue sit at opposite ends of the color temperature scale, so adding blue to an image cancels a warm cast, and adding amber or orange cancels a blue one. On the separate green-magenta axis, magenta cancels green, which is what you need for fluorescent tubes and for whites that turn green after a temperature correction.
Why is my camera making me look yellow?
Skin reflects the color of whatever light hits it, so under a warm bulb your face is recorded with a yellow-orange cast that your eyes have already compensated for. Set white balance to the incandescent preset, or use a grey card in the light on your face to set a custom value. Add blue in editing, and stop before skin turns grey and lifeless.
Is there a free way to remove a yellow tint without Lightroom?
Yes. The Photos app on iPhone, Google Photos, and the free Snapseed app all have temperature or warmth controls. Open the editor panel, slide warmth toward cool until neutral surfaces look right, then adjust tint toward magenta if needed. Each is free to install and handles a moderate cast well on a JPEG straight from a phone.
Why are my indoor photos green instead of yellow?
Green usually means fluorescent tubes or cheap LEDs with a strong green spike in their spectrum, or a warm cast that was over-corrected toward blue. Correct with the tint slider toward magenta rather than the temperature slider, since temperature controls only the blue-amber axis. A white balance preset set to fluorescent is a better starting point than any manual value.
Bottom Line
Indoor photos look yellow or orange because the light in the room is warm and your camera records it as it is. Everything else follows from that one fact, including why the room looked normal to you and why auto white balance keeps guessing wrong.
Here is the order I would work in 2026. Set white balance in the camera to match the bulb, shoot RAW, and get the cast right in post with a temperature slider plus an eyedropper on a neutral surface. Correct any leftover green with the tint slider, and if the room mixes window light and bulbs, mask and correct the two areas separately. If the yellow is on the whole screen rather than in the photo, change your display settings instead.