
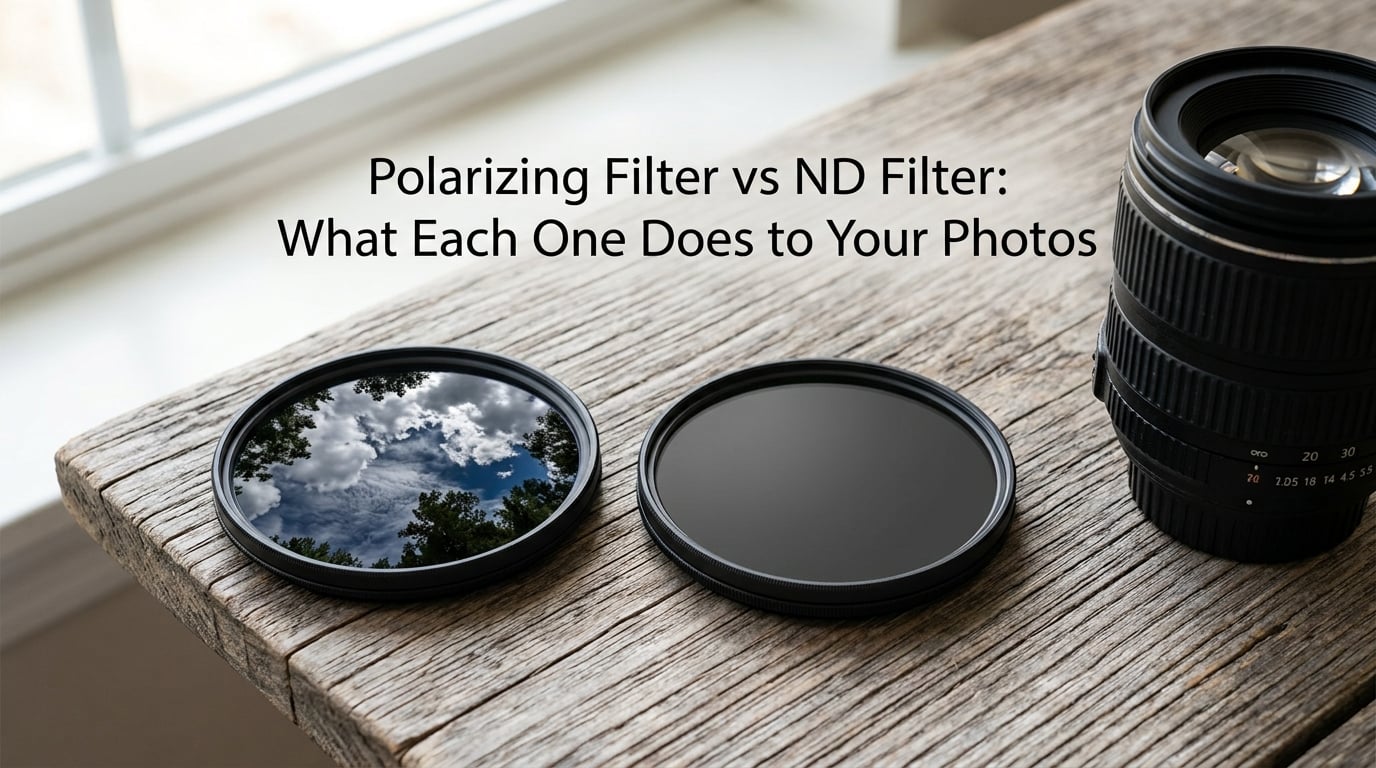
A polarizing filter vs ND filter comparison comes down to one question: what kind of light are you removing. A polarizing filter (CPL) blocks the polarized light that creates glare, haze, and reflections, so skies darken, foliage saturates, and you can see through water and glass. A neutral density (ND) filter cuts the total light evenly so you can slow the shutter or open the aperture without overexposing. One changes what the light looks like. The other only changes how much of it there is.
That distinction matters more than it sounds, because both filters darken the image and plenty of photographers assume they are interchangeable. They are not. Install an ND on a hazy lake and you get a darker, still-flat image. Install a polarizer on a waterfall in bright light and you get a cleaner, more colorful frame that is still overexposed.
We broke the two apart below, with the stop math, the failure cases, and a decision table. The guide is current for 2026 and covers stills shooters, landscape and travel work, outdoor portraits, and video.
Table of Contents
- What Is a Polarizing (CPL) Filter?
- What Is a Neutral Density (ND) Filter?
- Polarizing Filter vs ND Filter: What Each One Does Side by Side
- When to Use a Polarizing Filter
- When to Use an ND Filter
- How ND Filters Are Numbered: Optical Density vs ND Factor
- When Not to Use Each Filter
- Can You Use a Polarizing Filter and an ND Filter Together?
- Which Filter Do I Need? A Decision Table by Shooting Situation
- Choosing the Right Filter: Thread Sizes, Filter Systems, and Coatings
- Common Mistakes That Cost You Frames
- What Post-Processing Can and Cannot Replicate
- Frequently Asked Questions
- When not to use a polarizing filter?
- Why do photographers use ND filters?
- What filters do professional photographers use?
- Do ND filters reduce image quality?
- Should I use an ND filter or polarizer?
- What filters should every photographer have?
- Can you use a polarizing filter and ND filter together?
- What is the 20-60-20 rule in photography?
- Conclusion: Which Filter to Buy First
What Is a Polarizing (CPL) Filter?
A polarizing filter is a piece of optical glass or film that blocks polarized light while passing unpolarized light. Glare from surfaces like water, glass, leaves, and wet pavement is strongly polarized, which is why a polarizer removes it and a neutral grey filter cannot.
Physically, a screw-in polarizer is two plates. The rear plate carries a fixed polarizing film. The front plate carries a second film and screws into a threaded ring so you can rotate it. Turning the front element changes which plane of polarization is rejected, so the effect builds and fades smoothly rather than snapping on and off. That rotation is what separates a polarizer from every other filter, and it is why the same filter behaves completely differently in two frames taken seconds apart.
The light cost is real. A quality polarizer typically costs you 1 to 1.5 stops. The amount varies with the angle between the sun, the subject, and the camera, and it also depends on the sky brightness. On a hazy afternoon you may lose only a stop; at midday over a bright sky you can lose closer to 1.5.
Circular vs linear polarizers, and why it matters for autofocus
Most modern polarizers are circular (CPL), which means the polarizing film is laminated between glass layers and the outgoing light is still circularly polarized. A linear polarizer leaves the light linearly polarized, which fools some phase-detection autofocus systems and makes focusing with a strong ND impossible.
The practical advice is simple: buy circular, always. Modern mirrorless bodies focus fine through either, and the difference in optical performance between the two is small. A linear polarizer is only worth considering for a manual-focus or large-format setup, and even there the gain is marginal.
Polarizers in portrait photography
A polarizer reduces the specular glare off skin, which is what makes outdoor faces look shiny and washed out. Turn it just past the point where the glare disappears and you keep the benefit without flattening the face. Push it to full strength and you can remove the facial volume that lighting created, and the result reads as flat and slightly grey. A dpreview forum thread on daytime portraits put it bluntly: if the concern is a blown-out background in bright sun, a polarizer is the filter that addresses it.
Wide-angle limits and smartphone polarizers
On ultra-wide lenses, a polarizer can produce an uneven sky, darker at one end of the frame than the other, because the sun sits at a different angle to each edge. The fix is to zoom in, rotate, or accept a graduated ND instead. Smartphone clip-on polarizers do almost nothing useful, since phone lenses are wide and fixed, so the angle condition that makes a polarizer work is rarely met.
What Is a Neutral Density (ND) Filter?
A neutral density filter is grey glass or film of a fixed optical density. It transmits a known percentage of the light from the entire scene, from the center to the corners, with no preference for surface, angle, or subject. Color balance and contrast stay the same; only brightness changes.
That evenness is the point. An ND does not solve glare, haze, or reflections, and it cannot deepen a sky. What it does is buy you room inside the exposure triangle: a slower shutter speed for motion, or a wider aperture for shallow depth of field, or a flash speed you could not otherwise sync in daylight.
Fixed filters come in numbered densities, and a set of three or four covers almost everything a stills shooter needs. Variable ND filters use a rotating ring to slide between densities with one filter, which is convenient for video and awkward for stills, because a variable filter usually casts a color shift and a polarizer will not rotate correctly behind it.
Graduated ND: a third option for skies
A graduated ND darkens one part of the frame and leaves the rest untouched, with a transition between the two. A hard edge gives a crisp line and suits flat horizons such as seascapes. A soft edge blends the gradient and suits uneven horizons with hills or trees. The tradeoff is that any graduated filter shows its transition as a visible band, especially at high densities, so you have to place the transition carefully.
Polarizing Filter vs ND Filter: What Each One Does Side by Side
Most comparisons of these two filters describe them in general terms. The table below answers the practical questions directly.
| Question | Polarizing filter (CPL) | Neutral density (ND) filter |
|---|---|---|
| What it changes | Selectively blocks polarized light, so glare, haze, and reflections drop away | Reduces total light evenly across the whole frame |
| How it works | Thin polarizing film on a rotating front element, turned to reject one plane of polarized light | Neutral grey glass of a fixed optical density, with no rotation or angle dependence |
| Light cost | 1 to 1.5 stops, varying with the sun angle | Exactly the number of stops on the label, at every angle |
| Effect on color and contrast | Deepens blue sky, saturates foliage, raises perceived contrast, cuts atmospheric haze | No change to color, contrast, or dynamic range relative to a shorter exposure |
| Effect on exposure | Minor side effect from the light it removes | The entire purpose, and it is precise and repeatable |
| Must be rotated? | Yes, and the result depends on the angle to the sun | No, the result is the same at every angle |
| Best for | Blue sky, wet foliage, water surfaces, glass, damp rock, and reflections on any surface | Long exposures, silky water, wide apertures in daylight, and flash sync outdoors |
| Fails at | Sun behind the camera for skies, ultra-wide frames, metal, artificial light, and portraits if over-rotated | Haze, glare, reflections, and color. It will never clean up a flat, misty scene |
| Typical result | Darker, cleaner, more saturated frame with more apparent depth | Same frame, captured slower or wider, with control over blur and depth of field |
When to Use a Polarizing Filter
Use a polarizer whenever reflected, polarized light is polluting the frame. The classic cases are a blue sky, green foliage, water, glass, and damp surfaces.
On skies, the filter removes the brightest scattered light, deepening the blue and increasing the separation between white clouds and blue sky. On foliage, it cuts the waxy sheen off leaves so color comes through and you can see into the canopy instead of at it. On water, it suppresses the surface reflection so you can see into the lake, reef, or streambed. On architecture, it removes reflections from windows and glass fronts that double your subject.
It also handles generic haze. Distant landscapes lose contrast to scattered light, and a polarizer takes a chunk of that scattered light out of the frame, which reads as more depth.
The 90-degree rule, and why wide frames go uneven
A polarizer rejects polarized light coming from roughly 90 degrees to the sun. Point the sun behind the camera and the light reflecting off your subject arrives near that angle, so the filter works hard. Put the sun behind your subject and the reflection arrives at a shallow angle, so the filter does almost nothing to the sky.
This also explains uneven skies on wide lenses. A 14mm frame covers roughly 100 degrees horizontally, so a single rotation cannot keep the sun at 90 degrees for every part of the image. The center of the frame is correct while one edge drifts toward a worse or better angle, and you get a gradient you did not ask for. If that bothers you, zoom, or use a graduated ND and let the software handle the sky.
When to Use an ND Filter
There are three canonical reasons to use an ND filter, and everything else is a variation of them.
1. Shallow depth of field in daylight. If you want a portrait look at f/1.8 in full sun, the aperture alone will not do it. You need the shutter at 1/1000 to avoid motion blur, which needs a lot of light. An ND8 removes 3 stops, letting you open three stops wider. The result is a blurred background in bright sun, which is otherwise impossible.
2. Long exposures and controlled motion. Waterfalls, rivers, and seascapes turn silky at shutter speeds from 1/4 second to several seconds. A full ND100 removes about 6.6 stops. Car light trails and cloud movement need the same tool, and an ND is the only way to get there without a lens so slow that everything blurs.
3. Flash sync in daylight. Sync speed is capped by your camera’s shutter mechanism and the flash’s duration, often around 1/200 second. Use a strobe in bright sun and you need to burn through several stops. An ND8 or ND16 gets you to sync speed while the background stays bright. Without it, you close the aperture until the background goes dark.
Astro and night work sit in a related category. An ND stops bright stars and light pollution from blooming, though a dedicated night filter is a stronger tool.
How ND Filters Are Numbered: Optical Density vs ND Factor
ND filters carry two numbering systems and the industry uses both, which is the single most common source of confusion. Optical density is a decimal value. ND factor is a multiplier of the light level. Both describe the same glass, and every doubling of density is one stop.
To convert: stops = log2(ND factor), and ND factor = 10 raised to the power of optical density. ND 0.9 and ND8 are the same filter. So are ND 0.3 and ND2.
| Optical density | ND factor | Stops of light | Light transmitted |
|---|---|---|---|
| ND 0.3 | ND2 | 1 stop | 50% |
| ND 0.4 | ND3 | 1.6 stops | 40% |
| ND 0.6 | ND4 | 2 stops | 25% |
| ND 0.9 | ND8 | 3 stops | 12.5% |
| ND 1.0 | ND10 | 3.3 stops | 10% |
| ND 1.2 | ND16 | 4 stops | 6.25% |
| ND 1.5 | ND32 | 5 stops | 3.1% |
| ND 1.8 | ND64 | 6 stops | 1.6% |
| ND 2.0 | ND100 | 6.6 stops | 1% |
| ND 3.0 | ND1000 | 10 stops | 0.1% |
As a working rule, a fixed set of ND2, ND4, ND8, and ND16 covers daylight landscapes, outdoor portraits, and flash sync. Go to ND64 or ND100 only for long exposures after dark, and remember that stacking a thin filter in front of a thick one is a standard way to reach densities no single filter offers.
When Not to Use Each Filter
Filters cost light, cost money, and cost sharpness. Using the wrong one, or using the right one at the wrong moment, makes the image worse. Both filters have clear failure cases.
When not to use a polarizing filter:
- Sun behind the camera for a sky. At that angle there is little polarized light to remove, so the filter only costs you 1 to 1.5 stops and gives you a flat, pale sky.
- Ultra-wide lenses. A wide frame cannot hold the 90-degree angle across the whole image, so the sky goes uneven.
- Metals and man-made reflective objects. Metal reflections are not polarized, so a polarizer does little and costs sharpness.
- Artificial light. Indoor light is largely unpolarized, so the filter does almost nothing except reduce light.
- Portraits, at full rotation. Over-polarizing skin flattens the face and drains color.
- Low light, or any situation where you cannot afford 1 to 1.5 stops. Available light shots and fast-moving subjects suffer for no visual gain.
- Already over-contrasted scenes. Snow, bright overcast, and high-contrast midday light gain nothing and lose exposure.
When not to use an ND filter:
- When you need to freeze motion. An ND makes shutter speeds slower, so moving subjects blur more.
- Flash indoors or in a controlled studio. There is no light problem to solve, so the filter only darkens your setup.
- When the problem is glare, haze, or a flat sky. This is the classic forum mistake: an ND on a hazy day produces a darker image of the same flat scene.
- Daytime astro. An ND dims the sky along with the stars, so a light-pollution or narrowband filter is the better tool.
- Very dark scenes at very high density. Beyond roughly 6 stops you amplify noise, sensor hot pixels, and color casts, and image quality drops faster than the exposure benefit.
Can You Use a Polarizing Filter and an ND Filter Together?
Yes, and stacking is standard practice for wide-angle scenes where you need a clean sky and a long exposure in the same frame. The order and the filter type determine whether the combination actually works.
Stack them with the polarizer closest to the lens and the ND on the outside. Light from the scene crosses the ND first, then the polarizer rejects the polarized portion, then it enters the lens. Stacking order does not change the final amount of light, so the sequence matters less optically than you might expect. What matters is that the polarizer is the element you can reach and turn.
A fixed ND in the stack leaves your polarizer free to rotate normally, because the ND does not care what angle reaches it. A variable ND in the stack does not. Its optical axis is itself polarised, and it varies its angle of polarization as you turn the ring. When that polarization lands out of phase with your polarizer, the combined effect weakens unpredictably, and the sky darkens unevenly. This is the rotation conflict that shows up repeatedly in video forums, and it is why a fixed ND is the right choice for stills work in a stack.
Count the light loss before you mount anything. A polarizer at 1.5 stops plus an ND8 at 3 stops is 4.5 stops total. On a bright day that may still leave you at 1/15 second, which is a real exposure, but on a dim day you are at 1 second and losing the frame to camera shake.
Never stack two polarizers. The second one re-polarizes the light the first one just cleaned, so you lose roughly twice the light and gain nothing, and the result drifts in colour as you rotate the outer one.
Which Filter Do I Need? A Decision Table by Shooting Situation
The most common question on photography forums is which one to buy first. The table below answers it by situation rather than by category.
| Your situation | Filter you need | What you gain |
|---|---|---|
| Lake, river, or sea at midday with a hazy sky | Polarizer first, ND second | Clean reflections and deeper sky, plus a long shutter for silky water |
| Autumn foliage or a green canopy in bright sun | Polarizer | Saturated color and a visible depth into the leaves |
| Outdoor portrait in full sun, background too bright | Polarizer, or a variable ND for video | Controlled background and reduced skin glare |
| Wide aperture in daylight, want blur | ND8 or ND16 | f/1.8 or wider in bright sun at a fast shutter |
| Waterfall or seascape, want smooth water | ND8 to ND64 | Shutter speeds long enough to smooth the flow |
| Strobes or off-camera flash in daylight | ND8 to ND16 | Sync speed with a bright background |
| Architecture with glass everywhere | Polarizer | Window reflections removed, lines read cleanly |
| Night sky or light pollution | Neither, or a dedicated night filter | An ND dims the sky as well as the stars |
| Video where exposure must change frame to frame | Variable ND, plus a polarizer only if glare demands it | Rapid density control across changing light |
| Shooting only indoors with flash | Neither | There is no light problem to solve |
If your budget only covers one filter, choose based on what you actually photograph. Land, water, and travel shooters should start with a polarizer, because the scenes they shoot are full of glare. Videographers and outdoor portrait shooters who work in bright sun should start with a variable ND, because exposure control is their daily problem.
Choosing the Right Filter: Thread Sizes, Filter Systems, and Coatings
Thread size versus filter systems. Screw-in filters come in thread sizes such as 58mm or 77mm, matched to your lens barrel. The limitation is that one filter fits one size, so a kit with mixed sizes means buying multiple filters. Square filter systems use a common 100mm holder that you adapt to each lens with a step-up ring, and the holder has multiple slots so you can stack graduated NDs and a standard ND in the right order. If you shoot wide angles or travel with several lenses, a filter holder is the more flexible setup.
Coatings matter more than brand. Uncoated glass loses several percent of light to reflections at every surface, and the loss compounds when two uncoated filters face each other. Multi-coated and nano-coated glass pushes that loss down. Cheap filters with thin coatings are also where color cast and a slight overall softness come from.
Color cast is the real quality test. Good ND glass is spectrally neutral, so it darkens without shifting hue. Poor ND glass, and most variable NDs at certain densities, shift toward green, magenta, or blue. A raw file corrects most of this, but a strong cast also means uneven absorption across the frame, which shows up as a slight haze you cannot fix in software.
Build and feel. A quality polarizer has a smooth, damped rotation ring with no wobble. If the ring is stiff or the filter rattles, expect unevenness in the corners at wide angles. Thin rings also risk vignetting on narrow lenses.
The cheap filter warning. A very cheap filter can cost you more than shooting without one, because the optical softness, flare, and color shift outweigh any effect the filter provides. For an ND that removes many stops, an uncoated filter also throws enough internal reflections to add veiling flare, which lifts blacks and kills the clean, dark look a long exposure depends on. Buy the best glass you can for the job, and skip the filter entirely rather than settling for poor glass.
Common Mistakes That Cost You Frames
Stacking two polarizers. You lose about twice the light and gain nothing, and the result shifts color as you turn the front one.
Forgetting exposure compensation on a mirrorless body. Many mirrorless cameras meter to produce a bright image and do not expect you to dial in the filter factor. Shoot with a polarizer mounted and no compensation and you will overexpose by a stop or more. Turn on exposure compensation or metering manual; either fixes it. With a heavy ND on a tripod you will be in manual anyway.
Judging a polarizer at the wrong angle. Rotate it while pointing the sun at the lens, and it appears to do almost nothing. Rotate it with the sun behind your shoulder, and the effect builds from nothing to strong. Test before you judge.
Over-polarizing the sky in post. Push dehaze and contrast far enough and skies turn unnatural and edges halo. The real filter captured the usable range already.
Ignoring graduated ND banding. Higher-density graduated filters show steps in the gradient. A soft transition and careful placement help, but so does accepting a hard edge where the scene has one.
Using a variable ND in a stack with a polarizer. The rotation conflict described earlier costs you the effect you installed the polarizer for.
Leaving the filter on in dim light. A polarizer and a heavy ND both cost light you may not have. A quick habit of checking the light before mounting saves more images than any other single habit.
What Post-Processing Can and Cannot Replicate
Modern editing handles some filter jobs well and others not at all, which is worth knowing before you spend on glass.
What software does well: a graduated filter in Lightroom darkens a sky convincingly, and a graduated ND is largely unnecessary for flat horizons. Contrast curves, clarity, and dehaze recover much of the perceived punch a polarizer adds to a flat scene, and sharpening recovers some apparent detail loss. A modest ND’s effect is simply a slower shutter or wider aperture, so you can leave it off and process the exposure normally.
What software cannot do: recover detail from reflected light that is still in the frame. A polarizer physically removes glare from a water surface or a window before it reaches the sensor. Once that reflection is recorded, no slider removes it cleanly, because the information is not there. Cutting haze that already flattened a distant mountain is likewise a recovery task, not a creation task.
That distinction is the honest answer to the question of what filters professional photographers still use. Filters are used where the light is a problem at capture time, and software is used where it is a processing choice. The 1 to 1.5 stops a polarizer removes, and the motion an ND enables, happen before the shutter opens, and no amount of processing substitutes for them.
Frequently Asked Questions
When not to use a polarizing filter?
Skip the polarizer when the sun is behind the camera and you want a darker sky, since there is little polarized light to reject at that angle. Avoid it on ultra-wide lenses, where a single rotation cannot hold the 90-degree angle across the frame and the sky goes uneven. It also does little on metal reflections, artificial light, or already high-contrast scenes like snow, and it costs 1 to 1.5 stops in every case. For portraits, rotate only until skin glare disappears, since full rotation flattens facial volume.
Why do photographers use ND filters?
Photographers use ND filters for three main reasons: to open the aperture wider for shallow depth of field in daylight, to slow the shutter speed for long exposures that smooth water or trail lights, and to reach a flash sync speed fast enough to shoot strobes outdoors in bright sun. An ND reduces light evenly and predictably, so you can make that change without overexposing.
What filters do professional photographers use?
Working professionals typically use a circular polarizer for glare, reflections, sky, and foliage, and a set of fixed ND filters, often ND8, ND16, and ND64, for daylight wide apertures and long exposures. Landscape and travel shooters add a soft-edge graduated ND. Videographers rely on a variable ND. What they avoid is stacking too many low-quality pieces of glass, since flare and color cast cost more than the effect is worth.
Do ND filters reduce image quality?
A good ND filter has minimal optical impact beyond the exposure change. Cheap or uncoated filters do reduce quality: they soften detail, throw internal reflections that create veiling flare, and can cast a color shift. Quality multi-coated ND glass is spectrally neutral, so any residual shift is correctable from the raw file. Uncoated glass in bright sun is where quality loss becomes visible.
Should I use an ND filter or polarizer?
Use a polarizer when the problem is glare: hazy skies, wet foliage, water surfaces, glass, or reflections. Use an ND when the problem is exposure: you need a slower shutter, a wider aperture, or a faster flash sync in bright light. If your scene has both problems, such as a lake at midday, use both, with the polarizer closest to the lens and a fixed ND rather than a variable one.
What filters should every photographer have?
Most photographers get the most from a circular polarizer, since glare appears in outdoor scenes regardless of genre. A second useful addition is a variable ND for video, or a fixed ND8 and ND16 for daylight stills. A soft-edge graduated ND becomes valuable for wide-angle scenery work. Indoor flash shooters need none of these, and are better served by a spare battery and a second card.
Can you use a polarizing filter and ND filter together?
Yes, and it is standard practice for wide scenes. Put the polarizer closest to the lens and the ND on the outside, and use a fixed ND so the polarizer can still rotate freely. A variable ND in the stack varies its angle of polarization, which weakens the polarizer’s effect unpredictably. Add the light losses together before mounting, and never stack two polarizers, which costs about twice the light for no benefit.
What is the 20-60-20 rule in photography?
The 20-60-20 rule is a composition guideline: place the main subject within about 20 percent of the frame edge, keep secondary elements in the middle 60 percent of the frame, and let the outer 20 percent carry supporting elements or negative space. It is a framing habit rather than a filter technique, and it applies before any decision about polarizers or ND glass.
Conclusion: Which Filter to Buy First
If you photograph water, skies, or foliage outdoors, buy a circular polarizer first. It solves a problem no slider can fix, and it is the filter that makes the biggest visible difference on a mid-range body.
If you shoot video, or daylight portraits with a wide aperture or strobes, buy a variable ND first, then add a polarizer for glare when you need it. Keep a fixed ND in the kit if you ever stack.
Everything else follows from the same question. When the light is wrong in color, reach for the polarizer. When the light is wrong in quantity, reach for the ND filter. That is the whole of the polarizing filter vs ND filter difference, and once you internalize it, choosing stops being a guess.