
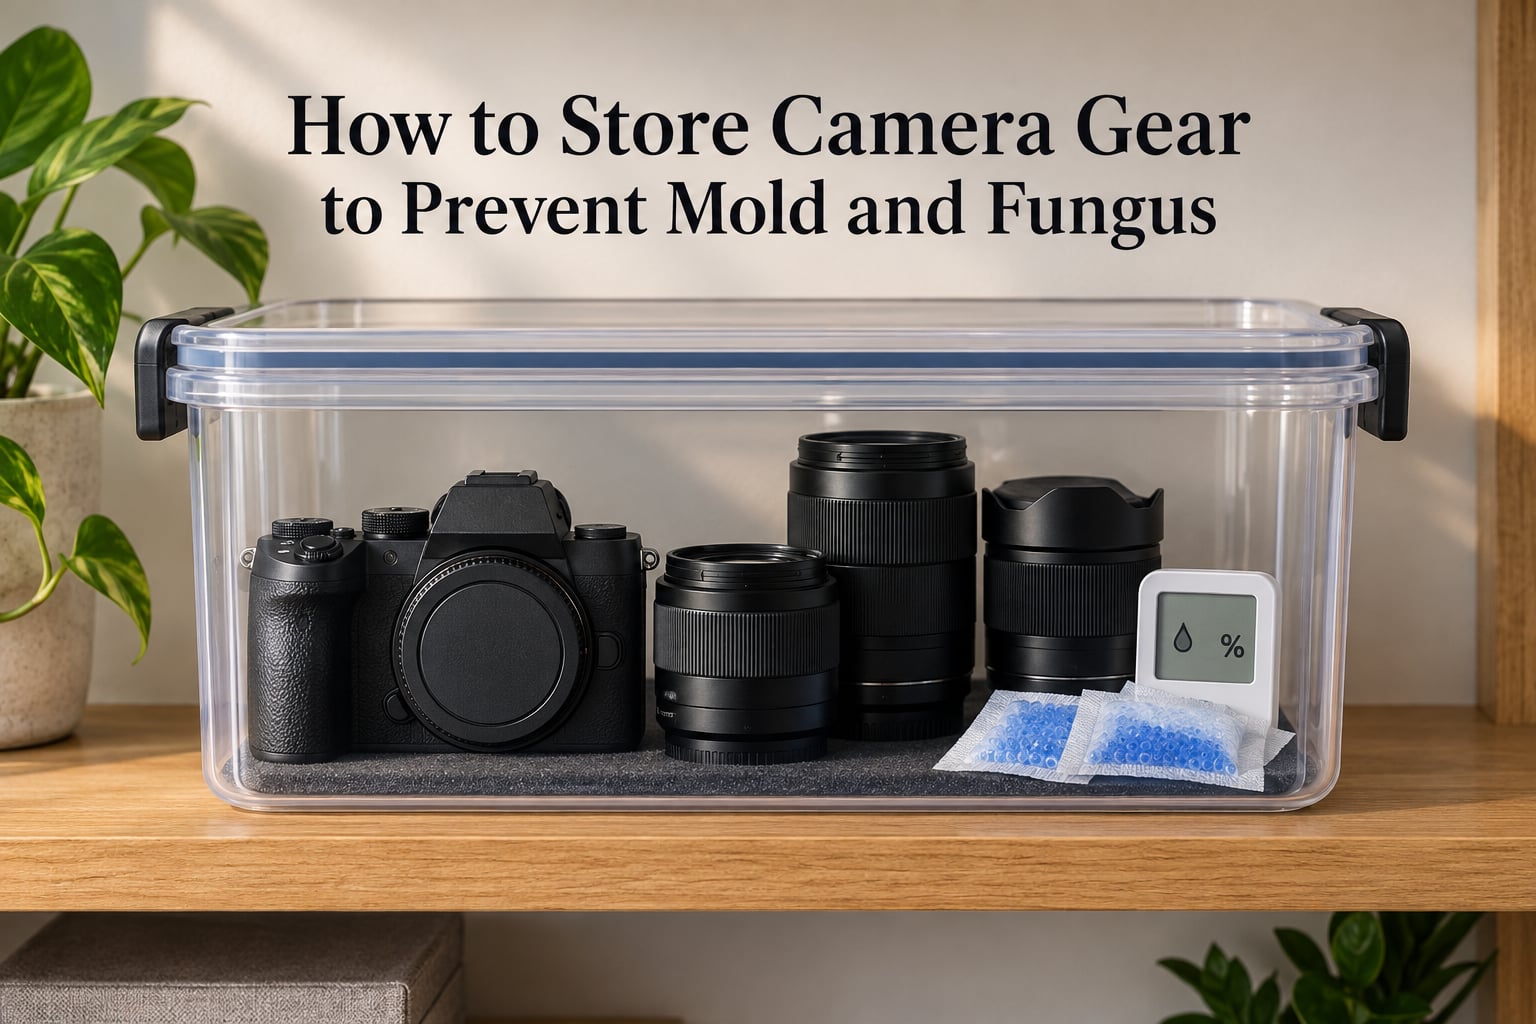
Store camera gear at 40-50% relative humidity, and treat 60% as the hard ceiling. Three rules do most of the work: never seal damp gear, keep it in an airtight container with a desiccant inside, and store it where air still moves. Above 60% relative humidity, fungal spores on the glass and in the barrel have the moisture, the organic residue and the time they need to grow.
I have watched a lens sit in a spare-room closet through a wet August and come out with a faint white crescent on the rear element. It was a body and three lenses I barely used, and the lens that suffered was the one with an old non-weather-sealed barrel. That single experience reframed how I store everything now, and it is the reason this guide starts with a number rather than a warning.
The rule of thumb among photographers has always been “keep it dry”, which is not much of a rule. Forum threads across DPReview, Reddit’s r/photography and the BCGF forums give advice ranging from “below 70% is fine” to “40-50% or you are gambling”, with no two sources agreeing. The physics settles it, and the rest of this guide walks through the mechanism, the numbers, and the setups I have actually used.
This guide was last updated in 2026. Every humidity figure comes from published storage guidance and from the long-term field reports photographers have posted publicly; where a claim comes from a named person or forum, I say so.
Table of Contents
- The Seven Rules That Prevent Most Camera Fungus
- What Actually Causes Lens Fungus and Mold
- The Humidity Number You Are Actually Targeting
- Dry Your Gear Completely Before You Store It
- Choose the Right Storage Setup
- Storing Camera Gear at Home
- Storing Gear While Traveling or in Hot and Humid Climates
- Clean Your Gear Before Storage
- How to Tell If Your Gear Already Has Fungus
- What to Do Once Fungus Has Grown
- What Not to Do
- Storing Gear You Are Selling, Lending or Not Using
- Frequently Asked Questions
- What humidity should I store camera gear at?
- What is the best way to store camera gear?
- How do I store my camera gear at home?
- Where should I store a camera when not in use?
- Is 60% humidity ok for cameras?
- Should you keep silica gel in a camera bag?
- How do I stop my camera fogging up in humidity?
- What causes lens fungus?
- Conclusion
The Seven Rules That Prevent Most Camera Fungus
- Keep relative humidity between 40% and 50% wherever the gear actually sits.
- Never put damp gear into a closed bag or case. Twenty-four hours open-air first, every time.
- Store gear in an airtight container with desiccant inside, not in an open shelf.
- Leave the room ventilated. A sealed closet with no airflow holds humidity longer than an open room does.
- Wipe sweat and dirt off the body and the barrel before long-term storage. Organic residue is the food.
- Carry a hygrometer. You cannot manage a number you never measure.
- Check the desiccant, because silica gel holds roughly 40% of its own weight in water and then stops working silently.
Every section below expands on one of those. If you only change one habit this year, make it number two.
What Actually Causes Lens Fungus and Mold
Fungus needs four things at once: moisture, spores, an organic substrate and time. Remove any one of them and the growth never starts.
Moisture is the obvious one. A lens barrel is a dark cavity, and above roughly 60% relative humidity the air inside it holds enough water vapour for spores to germinate.
Spores are always present. They are in the air of every room, and they arrive in the barrel the moment you put the cap on. The goal is not to keep spores out, which is impossible. The goal is to deny them moisture and time.
Organic residue is the part most people miss. The grease that lubricates a focus barrel, the film of sweat on a body plate, the skin cells and dust film on a rear element are all food. A clean barrel is meaningfully safer than a dirty one in the same closet.
Time is the variable that separates a scare from a real problem. A lens that spends an hour at 70% humidity while you move it into an air-conditioned room is fine. A lens that spends six weeks in a warm, dark, unventilated closet at 70% is not. One photographer on the DPReview fungus thread put it exactly right: duration of exposure is the real driver, not travel alone.
Darkness, warmth and lack of ventilation are what turn a marginal closet into a growth chamber. A photographer in the Philippines storing gear in multi-level glass-fronted dry cabinets, wiping each piece clean and dry before loading it, has reported zero fungus across several decades. An Australian owner of four dry boxes for his DSLR and Micro Four Thirds kit reports the same, and notes that a single professional viewfinder cleaning cost more than all four boxes combined.
Here is the fair counterpoint, because the fear gets silly fast. Modern weather-sealed bodies and lenses with sealed rear elements, and internally focusing designs that keep the rear group out of the air, are genuinely lower risk than older glass. A photographer who shoots constantly, keeps the kit moving, and lives in a dry climate will rarely see fungus. The people who should care most are the ones with the opposite profile.
You are in the high-risk group if you own more than one lens, live or travel somewhere humid, store gear in a basement or unheated room, keep an expensive kit idle for weeks, or buy used and vintage manual-focus glass. Vintage and manual-focus lenses rank highest because the barrels are less sealed, the grease is older, and the rear elements are more exposed.
The Humidity Number You Are Actually Targeting
The target is 40% to 50% relative humidity, with 60% as the ceiling you should not cross. Relative humidity simply means the percentage of water the air could hold at that temperature, so 50% RH is half-saturated. A hygrometer tells you the number in seconds and costs very little.
Dew point explains why the same reading feels different in different rooms. The dew point is the temperature at which the air would start condensing. Warm muggy air at 75% RH can have a high dew point and fog your front element the second it meets glass; dry cold air at 55% RH can have a low dew point and never fog anything. Fogging is a temperature-differential problem. Fungus is a time-and-humidity problem. They are separate failures with different fixes.
30-40% RH: Safe but wasteful. Very few homes in coastal or tropical regions reach this without a dehumidifier running.
40-50% RH: The target band. Long-term storage, sealed containers with desiccant, dry cabinets set to this range.
50-60% RH: Tolerable for short periods. A kit left for a month will probably be fine. A kit left for a season deserves a container and desiccant.
60-70% RH: Active risk. A photographer in Illinois reported basement readings in the mid-70s in summer with black mold on nearby walls, which is exactly the environment where a closet or cabinet starts producing visible fungus within weeks.
70% and above: Do not store optics here at all, and do not store leather or fabric camera bags here either. Move the gear to a sealed container with desiccant or a dry cabinet.
Put a hygrometer in the closet for a week before you trust it. People routinely overestimate how dry a room is and underestimate how much a building’s seasonal swing moves the number.
Dry Your Gear Completely Before You Store It
This is the single most important habit, and it is free. Damp gear placed in a closed bag does not dry. It sits in a warm, dark, humid microclimate with organic residue on the glass, which is the perfect set of growth conditions, and it can be ruined in a week.
The protocol is a 24-hour open-air dry-down, and it applies to anything that got damp, fogged, rained on or carried in from a humid room.
- Wipe the body and the barrel with a clean, dry cloth. Pay attention to the grip, the mount plate and the seams where dirt holds moisture.
- Remove both lens caps and leave the rear and front elements exposed to moving air. Caps on trap humidity against the glass.
- Open the camera bag, the padded dividers and any case, and leave everything open rather than just the lens.
- Spread gear out on a dry surface with space around each piece, not stacked, so air reaches every surface.
- Wait a full 24 hours. If the climate is genuinely humid, wait 48. If you are in a field hotel, use a fan on the room air rather than a hair dryer on the glass.
- Only then seal it up with desiccant, or return it to the dry cabinet.
For the end of a field day in a tropical climate, the routine is shorter and happens every night. A pro photographer working in Ecuador seals gear with desiccant every single night with the lens and body caps off, which is enough to get the kit through the next shooting day. A blower for dust, a dry cloth for sweat, caps off, desiccant in, bag open until morning. A photographer in Ecuador also notes that moisture can still creep between lens and sensor even on weather-sealed gear, and that night-to-day temperature swings alone cause fogging.
One photographer reported restoring a fogged Nikon D300 screen using silica gel sachets, though it took a long time. That is the best case for patience, and the dry-down rule is what you do in the meantime.
Choose the Right Storage Setup
Storage setups fall into three tiers, and the right one depends on how long the gear sits unused and how humid the room is.
The DIY tier is a gasket-sealed plastic bag or a screw-top clear container, color-indicating silica gel packets, and a small hygrometer inside with the container. This is the fastest setup and it works. On the DPReview thread, one photographer uses exactly this arrangement, and the Photo Life author suggests roughly a dozen 10g packets for a body plus two or three lenses for about a week.
The portable dry case tier is a hard airtight case with foam cut-outs and a desiccant compartment. Better protection against impact and dust, and it travels. This is the tier that makes sense for a large telephoto lens sitting between shoots, which is the exact concern a BCGF forum member raised about a 400mm f/2.8 on backorder.
The electronic dry cabinet tier is a powered cabinet with a built-in dehumidifier and hygrometer, running a dehumidification cycle to hold a set relative humidity. It never needs recharging, it holds many bodies and lenses at once, and it is the only tier that actively repairs a mildly damp kit left inside for a day or two. The claim from the Photo Life article is that a camera can come back to life after two days in a dry box.
Now the components, in detail.
Silica gel and other desiccants
Silica gel absorbs water vapour until it saturates, then stops. The key number most people do not know: a silica gel packet holds roughly 40% of its own weight in water. A 10g packet absorbs about 4g of water, which sounds like a lot until you work out that a humid closet can push that through in a few days.
Use color-indicating silica gel, the type that shifts colour as it absorbs moisture. It is the only way to know your packets are spent without a scale. Blue-to-clear is the common version; some types go orange-to-green. Replace or reactivate them before they saturate, not after.
Rechargeable or re-heatable silica gel can be dried out in a low oven and reused many times. This is the type to buy if you travel, because field capacity is the real constraint. A portable heater or a toaster oven on low, in a sealed container with the packets, restores them, and a battery-powered option exists for the road.
Avoid desiccating salts. Some varieties release water when they saturate rather than absorbing it, which is why the Photo Life article names this specifically. An item that sweats inside your sealed container is worse than no desiccant at all.
Sealed bags and dry boxes
To build a dry box yourself, choose a container with a rubber gasket or a screw seal that clicks. A gasket-sealed food storage tub works. Add a small digital hygrometer so you can read the humidity without opening the lid, then add enough color-indicating packets to cover roughly 40% of the container’s usable volume in packet weight. Put gear in clean and dry, caps off or caps on consistently, and do not overfill. Air needs to move inside the container, so leave a gap.
Seal the bag or lid and check the hygrometer again after 24 hours. If it climbs past 60%, add packets. Once the reading is stable in the target band, the box is doing its job and only needs a weekly glance.
Electronic dry cabinets
A dry cabinet holds a set relative humidity continuously rather than removing a fixed amount of water, so it is the only setup that protects a large kit or a big telephoto lens for months without intervention. Set it to 40-50%, space the gear so air circulutes between bodies and lenses, and load clean, dry equipment. Load it in the evening and let the cabinet run overnight before you close the door for good.
Cabinets generate heat. Never stack one directly above a battery, and keep it clear of the wall so the intake and outflow can work.
Hygrometers
A hygrometer is the cheapest and most useful tool in this entire guide. Without one, you are guessing at a variable that decides whether fungus starts. A small digital model that reads both temperature and relative humidity lets you see the dew point behaviour too, because the same relative humidity at two different temperatures behaves completely differently.
Keep one in the closet, one in the dry box or cabinet, and one in the travel case. Calibration drifts on cheap units, so test against a second one once a year.
Storing Camera Gear at Home
Where gear sits at home matters more than what it sits in. A closet in a climate-controlled room is the best common answer, a basement is the worst, and everything in between depends on your building.
Climate-controlled room, built-in closet. Usually the safest spot in the house. Still, put a hygrometer in there for a week, because interior closets run warmer than the room and can sit 5-10% higher in relative humidity.
Basement. The highest-risk location in most homes, particularly in humid summers. If the basement is where the gear has to live, put the gear in a sealed container with desiccant and a hygrometer rather than leaving it on shelving. Storage totps with gasket lids and plenty of packets are the cheapest fix available.
Unheated room, garage or attached shed. Wide temperature swings produce condensation cycles, and a sealed container protects against that even if the room itself is unreliable. Never store gear in a garage in a climate where summer temperatures spike; heat is a separate risk from moisture, and a camera left in a hot vehicle has suffered viewfinder screen damage.
Attic. Effectively a hot garage. Avoid it, especially for batteries, which is the same reason aviation rules restrict spare lithium batteries to carry-on.
On ventilation versus sealing: you want air movement in the room, not in a sealed box. A small unventilated closet holds humidity and warmth far longer than the rest of the space, and that combination is the one that grows things. A running dehumidifier in a humid summer, as the Australian photographer above does, addresses the entire room rather than a single container.
Seasonal swing is the part homeowners miss. Indoor relative humidity in winter is often fine and summer is often not, and a closet that reads well in March can read 70% in July. Check at the hottest, most humid point of the year rather than the driest, and set your standard from that reading.
Storing Gear While Traveling or in Hot and Humid Climates
Travel adds two problems that do not exist at home: temperature differentials that cause fogging, and no way to recharge desiccant.
Acclimatise before you switch environments. Seal the camera in a plastic bag before bringing it from outdoor air into air conditioning, or before bringing it from cold air into a warm room. Leave it sealed for 30-60 minutes. Condensation forms on the outside of the bag instead of on the front element. One photographer described moving from -28C in Finnish Lapland to +52C in Death Valley with no mould problems at all, using exactly this plastic-bag technique.
Use a rain cover and a poncho in the field. Prevention outdoors is cheaper than a dry-down later, and a lightweight poncho over the whole rig during a downpour beats a wet bag every time.
Run the night routine. Blower, dry cloth, caps off, desiccant in, bag open. The Ecuadorian pro who seals gear every night describes this as simply what the job requires.
Plan desiccant capacity around saturation. In genuinely humid air, packets hit their limit fast. A weight-scraping DIY dry box with a fan in the lid, borrowed from the design of an audiologist’s hearing-aid drying box, is a real build reported on the DPReview thread, and it works for travel where buying packets is impractical.
A portable heater is the other field option, and it beats desiccant in a cold, high-humidity situation because it lowers the relative humidity directly by raising the temperature. It is not a substitute for a dry cabinet, and you need a battery and a way to keep it away from fabric.
Where you never want to store optics is a parked car or a hot vehicle, for heat reasons as much as moisture.
Clean Your Gear Before Storage
Fungus eats organic matter, and cameras generate organic matter constantly. Sweat on the grip, skin oils on the barrel, dust film on the rear element and the grease that lubricates the focus ring are all substrate. Removing them before long-term storage costs you five minutes and removes one of the four conditions fungus needs.
The routine is simple. Blow loose dust off with a blower, never a brush compressed against the glass. Wipe the body and the focus and zoom rings with a lightly dampened microfibre cloth, then dry them immediately. Check the mount plate and the sensor chamber cover, where dust collects in a ring. On the rear element, breathe on the outer glass to create a slight fog, wipe with a clean cloth, and repeat once.
On the road, a cleaning kit is not an optional accessory. A blower, a microfibre cloth and a small brush should live permanently in the bag. A photographer in the Philippines wipes every piece clean and dry before it goes into the dry cabinet, and that step is part of the routine rather than a separate chore.
Clean leather and fabric camera bags too, or store them outside the dry box. Foam and padding hold sweat and mould spores even when the metal and glass is fine, and a moulded bag will re-contaminate clean gear.
How to Tell If Your Gear Already Has Fungus
Early lens fungus looks like a frost-like white mat creeping in from the edge of an element, usually the rear one. It is not a round spot in the middle of the glass, and it is not a speck. It is a spreading, branching pattern with a soft white edge, and it is usually attached to the barrel wall where organic residue collected.
The optical symptoms show up before you can see the growth. Look for haze that appears on one side of the frame rather than evenly, contrast that drops at the corners, veiling flare in high-contrast scenes, and a milky cast at full aperture. Fungus blocks light, so it behaves like a dirty front element that will not clean off from the outside.
Three things get confused with fungus. Dust appears as isolated specks with sharp edges and moves when you move the element, though internal dust is fixed and shifts across the frame as you rotate the barrel. Ordinary internal haze is even, symmetric and caused by coatings, not by growth. Real fungus is asymmetric, branching and located at a barrel edge.
The backlight test is simple and free. Remove the lens, point it at a bright light source, and look through the back at the front element. A faint, patchy, snowflake-like pattern concentrated near the rim is the giveaway. If you can see haze and flare in your images but nothing obvious through the barrel, put the lens on a wide-open lens and photograph a plain wall from across a room. Contrast and flare will expose it far more clearly than your eye will.
Check before you buy used glass, and check again the moment a lens comes out of a damp bag.
What to Do Once Fungus Has Grown
Work in this order, and stop as soon as a step makes things worse.
One, try the dry box first. Put the affected lens into a dry box or dry cabinet and leave it. Mild, recent growth sometimes does not recover, but a lens that was only damp rather than truly infested can come back after a couple of days. This is the cheapest attempt and it carries no risk.
Two, get it professionally cleaned. A technician will disassemble the barrel, remove the element and clean it properly. This is the option with a decent success rate, and it is the right call for a lens worth protecting. It is also the reason prevention matters: an Australian owner of four dry boxes points out that one professional viewfinder cleaning cost more than all four boxes put together.
Three, consider DIY UV and heat, with real caution. UV can kill surface fungus because the organism is fragile, and heat can dry out the growth. Both have drawbacks. A professional optics engineer on the DPReview thread warns that 254nm UV degrades the UV-cure adhesives used in lens assembly, and repeated exposure is how you get a lens that was merely hazy turned permanently clouded. The reports on this forum thread are contradictory precisely because the trade-off is real, not because the science is unclear.
Four, know when to stop. If the growth has spread across the element, if haze is visible in the middle of the frame rather than at the edge, or if it returns within weeks of a professional clean, the coating and glass are permanently etched. That is the point where replacing the lens is the cheaper decision, and it is a normal outcome rather than a failure.
What Not to Do
Rice does not dry a camera. The trick is endorsed and debunked in different places with no clear verdict, so here is the reason it fails: rice contains starch and fine powder that will lodge in a focus barrel and a shutter mechanism, and it does nothing about humidity inside a sealed lens. A Nikon Z9 video advises against it for this reason.
Do not use desiccating salts that sweat on saturation. They can release liquid into the container. Stick to silica gel, and use the color-indicating type so you know when it is spent.
Do not seal damp gear. Not in a bag, not in a case, not in a drawer. The 24-hour open-air rule exists precisely to stop this.
Do not apply extreme heat. Ovens, hair dryers, hot plates and hot cars can craze coatings, soften adhesives, warp barrels and melt printed markings. Heat near a hair dryer held at a distance, to move air, is a different thing entirely.
Do not run 254nm UV on a lens you care about. Same adhesive problem as above, and it is not reversible.
Do not rely on tanactin or similar on-lens treatments as a storage solution. Forum scepticism is warranted; they deal with a symptom rather than the humidity that produced it.
Do not leave caps on and the bag closed for months. A sealed cap on an uncleaned rear element is the exact microenvironment fungus wants.
Storing Gear You Are Selling, Lending or Not Using
Long-term idle storage and gear on its way out need a different routine. Sellers on photography social groups describe the common pattern: gear goes to consignment, sits on a shelf for months, and comes back with haze. That is avoidable.
For consignment or resale, store the item in a sealed bag with a desiccant packet and a small hygrometer, and check it every few weeks. Photograph the condition before it leaves your hands, front element and mount included, so any haze that appears later is clearly not yours. Do not ship gear that has spent a month in a humid closet.
For gear lent out long-term, hand it over clean and dry with a desiccant packet in the bag and tell the person to remove it as soon as they get home rather than later.
For a kit that simply sits idle, this is where a sealed container or a dry cabinet earns its keep. Load it clean and dry, with caps on consistently rather than sometimes on and sometimes off, spaced so air can move. Then leave it alone. The gear that gets fungus is the gear that gets half-taken-out, put in a drawer, stuffed back, and forgotten.
Frequently Asked Questions
What humidity should I store camera gear at?
Store camera gear at 40-50% relative humidity, and treat 60% as the hard ceiling. Below 40% is fine but hard to achieve without a dehumidifier. A digital hygrometer is the only way to know your actual number, since a warm closet can sit well above the room reading. Add color-indicating silica gel inside a sealed container and check it weekly.
What is the best way to store camera gear?
Three habits do most of the work. Dry gear completely for 24 hours open-air before storing it, then seal it in an airtight container with a desiccant packet inside, and keep that container in a ventilated room rather than a sealed closet. Add a small hygrometer to the container so you can confirm the reading without opening the lid.
How do I store my camera gear at home?
A closet inside a climate-controlled room is the safest common choice. Measure it for a week first, because interior closets run warmer and can read 5-10% higher than the room. Avoid basements, garages and attics where possible. If a basement is your only option, put the gear in a gasket-sealed container with plenty of desiccant instead of leaving it on open shelving.
Where should I store a camera when not in use?
Store it dry, in a sealed container with a desiccant packet, in a room with moving air. Short idle periods need nothing more than a padded shelf in a climate-controlled room. Weeks to months of idle time calls for a sealed bag or a dry cabinet, plus a hygrometer. The risk tracks with time, so duration is the variable to plan around rather than the calendar.
Is 60% humidity ok for cameras?
It is tolerable briefly and risky long-term. Above roughly 60% relative humidity, fungal spores on the glass and in the barrel have enough moisture to germinate, which is where the growth risk begins. Many forum threads cite below 70% as acceptable advice, but 60% is a better ceiling. A body and two or three lenses for a month at 55% will likely be fine.
Should you keep silica gel in a camera bag?
Yes, and it should be in the bag permanently rather than added after the fact. Use color-indicating packets so you can see when they saturate, since ordinary silica gel holds roughly 40% of its own weight in water and then stops working silently. In humid air, check the packets every few days. Rechargeable silica gel can be dried out in a low oven and reused.
How do I stop my camera fogging up in humidity?
Fogging is a temperature-differential problem, not a humidity one. Seal the camera in a plastic bag before moving it between outdoor air and air conditioning, or between cold and warm rooms, and leave it sealed for 30-60 minutes. Condensation forms on the outside of the bag instead of the front element. Carrying a rain cover prevents most fogging at source.
What causes lens fungus?
Fungus needs four conditions together: moisture, fungal spores, an organic substrate and time. Spores are always present in room air, so you cannot keep them out. What you control is humidity, the residue on the glass and in the barrel, and duration of exposure. Darkness, warmth and poor ventilation are what turn a marginal closet into a growth chamber.
Conclusion
To store camera gear to prevent mold and fungus, you need three things and none of them are complicated: keep relative humidity at 40-50% and never let a space go past 60%, refuse to seal anything that is even slightly damp, and put clean, dry gear into an airtight container with a desiccant inside a room where air still moves.
Everything else follows from those three. A hygrometer tells you whether you are meeting the number. Color-indicating silica gel tells you whether your desiccant still works, given that it holds only about 40% of its weight in water. A 24-hour open-air dry-down before storage prevents the one mistake that makes damage permanent.
Start by putting a hygrometer in the closet where your gear lives and reading it at the hottest, most humid point of the year. That single number decides whether you need a sealed container with packets or a dry cabinet, and it takes one inexpensive hygrometer and a week to find out.